Table of Contents
Advertisement
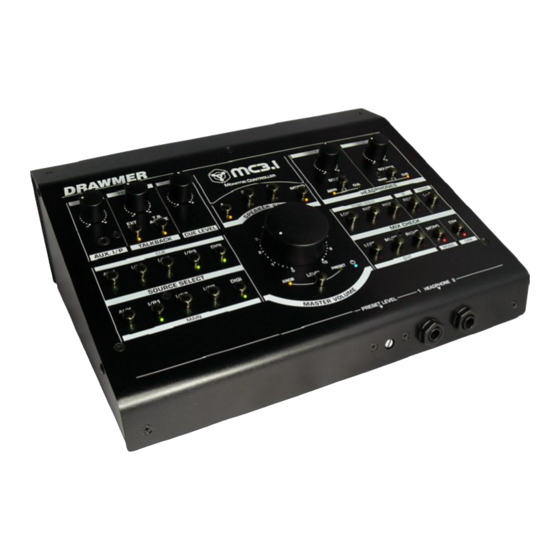
DRAWMER
. . . . . . . . . . . . . . . . . . . . . . . . . . . 3
. . . . . . . . . . . . . . . . . . . . . . . . . 6
. . . . . . . . . . . . . . . . . . . . . . . . . . . . 7
Chapter 3 - General Information
CONTENTS
. . . . . . . . . . . . . . . . . . 3
. . . . . . . . . . . . . . . . . . . . . . . . 4
. . . . . . . . . . . . . . . . . . . . . 7
. . . . . . . . . . . . . . . 7
. . . . . . . . . . . . . . . . . . . . . 8
. . . . . . . . . . . . . . . . 9
. . . . . . . . . . . . . . . . 10
. . . . . . . . . . . . . . . . . . . 18
. . . . . . . . . . . . . . . . . . . 22
. . . . . . . . . . . . . . . . . . . . 26
. . . . . . . . . . . . . . . . .26
. . . . . . . . . . . . . . . . . . . . . . . 26
. . . . . . . . . . . . . . . . . . . . . . 27
. . . . . . . . . . . 3
Advertisement
Table of Contents

Related Manuals for Drawmer MC 3.1


Summary of Contents for Drawmer MC 3.1
-
Page 1: Table Of Contents
....26 Contacting Drawmer ..... . . 26 Specification . - Page 2 DRAWMER...
-
Page 3: Warranty
COPYRIGHT This manual is copyrighted © 2016 by Drawmer Electronics Ltd. With all rights reserved. Under copyright laws, no part of this publication may be reproduced, transmitted, stored in a retrieval system or translated into any language in any form by any means, mechanical, optical, electronic, recording, or otherwise, without the written permission of Drawmer Electronics Ltd. -
Page 4: Chapter 1 - Introduction Introduction
CHAPTER 1 DRAWMER MC3.1 Monitor Controller Building on the success of the MC2.1, the MC3.1 Monitor Controller is just as accurate and transparent and of the same build quality. It can still faithfully reproduce what has been recorded without colouring the sound, but comes with a much expanded feature set, including more inputs, better control, extended channel routing and a desk top 'wedge' form factor. - Page 5 Can you trust the audio that your current monitor controller is providing? Is it colouring the sound? For all Drawmer monitor controllers it is imperative that what you record is exactly what you hear. The active circuit has been designed to faithfully produce the audio signal whilst removing many of the problems that a passive circuit will bring.
-
Page 6: Installation
DRAWMER Compare the MC2.1 and MC3.1 Features INSTALLATION The MC3.1 is a free standing, desktop unit, with controls and headphone jacks on the front panel and all other inputs and outputs on the rear. Screwing the MC3.1 to a desk. -
Page 7: Power Connection
In addition, should the power supply fail for any reason we strongly advise that you contact Drawmer for a replacement rather than repairing the unit yourselves. Failure to do either of these could permanently damage the MC3.1 and will also invalidate the warranty. -
Page 8: Audio Connection
DRAWMER AUDIO CONNECTIONS • Interference: If the unit is to be used where it maybe exposed to high levels of disturbance such as found close to a TV or radio transmitter, we advise that the unit is operated in a balanced configuration. -
Page 9: Typical Connection Guide
TYPICAL CONNECTION GUIDE MC3.1 - Monitor Controller... -
Page 10: Chapter 2 - Control Description
CHAPTER 2 DRAWMER CONTROL DESCRIPTION... - Page 11 Built in talkback microphone with level control, mono output jack and internal headphone routing. The MC3.1 Controls SOURCE SELECT Comprises of two sections: the MAIN (which is routed through the Main Volume control and to the Speaker Outputs ) and/or Headphones, and (which is routed through the Cue Level and to the Cue Output...
- Page 12 DRAWMER SPEAKERS Four switches select which of the four speaker outputs A, B, C are heard (see Each switch can be operated individually or simultaneously and in any combination and is perfect for performing A/B comparisons between various monitor setups. As the switches do not toggle between outputs when doing A/B comparisons both of those switches should be pressed at the same time i.e.
- Page 13 Both the volume knob and preset control circuit designs incorporate identical parallelled custom quad potentiometers, for excellent channel matching and a smooth feel, with a range from Off (-infinity) to +12dB of gain. Because the circuitry is active it allows for the signal level to be increased, rather than only attenuated, making subtle problems within the mix (such as noise at low levels, or unwanted harmonics, for example) more obvious and easier to iron out, especially during musical passages that would normally be quiet.
- Page 14 DRAWMER MIX CHECKING Mix Checking section allows the engineer to test various aspects of the mix without having to alter the signal earlier in the chain and potentially effect the recording, and is a very thorough and versatile checking tool. The...
- Page 15 Also, note that, when activating Left Right Cut whilst using headphones the signal is not 100% panned one way or the other - i.e. the signal centre moves to the side but is not completely removed from the opposite ear of the headphone - this is so that the Left/Right Cut sounds a little more natural, after all, if listening through...
- Page 16 DRAWMER INPUTS ANALOGUE The MC3.1 has four analogue inputs comprising I/P1 & I/P2 - both balanced Neutrik XLR/jack combi (combining a 3 pole XLR receptacle and ¼" phone jack in one XLR housing), I/P3 - stereo RCA’s, and also AUX.
- Page 17 EXTERNAL FOOTSWITCH: An external foot or hand switch can be connected to allow easier talkback operation. This works in parallel to the front panel switch ( so when either are active the talkback will operate. TALKBACK OUTPUT: A dedicated talkback output is provided so that, as well as being routed through the cue and the headphones, a talkback signal can be routed to other devices at the engineers discretion.
-
Page 18: Monitor Calibration
DRAWMER MONITOR CALIBRATION Whether you are installing one, two or three sets of speakers it is imperative that your system is calibrated, not only to centre the stereo image and to ensure that all speaker levels are the same, but also to ensure that you are mixing your music at industry standard listening levels. - Page 19 Holding the SPL - Set the meter to C weighted and on the slow scale. Start by sitting in your normal mixing position, hold the SPL meter at arm’s length and at chest level with the microphone of the meter facing toward the monitor to be calibrated. Maintain this position throughout the calibration process - this could be easier if it is fixed via a stand and bracket, and moved only to point at the relevant speaker.
- Page 20 DRAWMER The Procedure: 1. Begin by turning off the monitoring system and ensuring that all inputs and speakers are correctly connected. 2. Set all DAW/System controls to 0dB/unity gain - this should be left at this setting from now on. Remove all e.q. and dynamics from the signal path.
- Page 21 12. To calibrate each speaker repeat steps 7 to 11 - replacing the speaker on step 7 for each set - A,B or C. 13. To calibrate the sub - play the 40-80Hz signal, but this time have only the SUB switch active - Left and Right Cut need not be active as the frequency of the signal is limited to only the sub.
-
Page 22: Mix Checking Tips
DRAWMER Mix Checking Tips Due to the versatility of the MC3.1, and it’s thorough array of controls, some very useful techniques for checking your mix can easily be achieved, that can help improve the balance within a mix, pinpoint stereo width, phase and mono problems, and also aid when monogising. - Page 23 Cut It Out... Using the left and right cut switches will highlight the stereo balance of each channel. In stereo the mix sounds ok, however, it may be that you want an instrument to be panned so far left that it doesn’t occur at all in the right channel, by cutting the left and only hearing the right channel you will hear whether the instrument bleeds across, and panning adjustment can be made.
- Page 24 DRAWMER Listening in mono also highlights problems with the stereo width and balance of the mix and is more apparent when you use a lot of stereo-widening or width- enhancing techniques and tools. Switching mono in and out fairly quickly may make it apparent that the centre of the mix is shifting to the left or right, something that may go unnoticed if only working in stereo.
- Page 25 Designing a clean monitor control system is far from simple, however, using only the very best components and clever circuit design, with the Drawmer MC3.1 we have overcome all of these problems and managed to combine the best of both - whilst retaining the transparency and responsiveness that a passive circuit would bring with the advantages of an active one.
-
Page 26: If A Fault Develops
Authorised returns should be prepaid and must be insured. PHASE RESPONSE 20Hz-20kHz +/- 2degrees max All Drawmer produc ts are pac kaged in specially designed containers for protection. POWER REQUIREMENTS If the unit is to be returned, the original External Power Supply container must be used. -
Page 27: Block Diagram
BLOCK DIAGRAM Ref:1v00 A 18-08-16 MC3.1 - Monitor Controller... - Page 28 DRAWMER Drawmer Electronics Ltd, Coleman St, Parkgate, Rotherham, South Yorkshire, U.K.
Need help?
Do you have a question about the MC 3.1 and is the answer not in the manual?
Questions and answers