Advertisement
Table of Contents
- 1 Table of Contents
- 2 Important Safety Instructions
- 3 Touch Screen Functions
- 4 Back Panel Diagram
- 5 Remote Control Functions
- 6 Remote Control Set up &Notes
- 7 Installing Speaker Feet
- 8 AM/FM/CD-DVD/TV Connections
- 9 Wireless Transmitter Connection
- 10 Ipod,Tuner,And Aux Modes
- 11 Setting the Time
- 12 Specifications
- Download this manual
Advertisement
Table of Contents

Summary of Contents for Frontgate 42138
- Page 1 2.1 Speaker for iPod/iPhone Instruction Manual ITEM # 42138 USER MANUAL---------------------------------------------------------------1~17...
- Page 2 Included Accessories Wireless transmitter-------------------------------------------------------1PC Remote Control -----------------------------------------------------------1PC RCA Cable -----------------------------------------------------------------1PC Video Cable----------------------------------------------------------------1PC User`s manual -------------------------------------------------------------1PC Battery----------------------------------------------------------------------1PC Feet------------------------------------------------------------------------2PCS FM antenna --------------------------------------------------------------- 1PC AM antenna --------------------------------------------------------------- 1PC AM antenna bracket-------------------------------------------------------1PC...
-
Page 3: Table Of Contents
CONTENTS 1. Important safety instructions ----------------------------------------------------------- Page 3-4 2. Touch Screen Functions-------------------------------------------------------------------- Page 5 3. Back Panel Diagram-------------------------------------------------------------------------Page 6 4. Remote Control Functions----------------------------------------------------------------- Page 7 5. Remote Control Set Up & Notes----------------------------------------------------------Page 8 6. Installing Speaker Feet----------------------------------------------------------------------Page 9 7. AM/FM / CD-DVD/ TV Connections-------------------------------------------------- Page 10 8. -
Page 4: Important Safety Instructions
1. IMPORTANT SAFETY INSTRUCTIONS The lightning flash with arrowhead symbol CAUTION inside an equilateral triangle is intended to alert RISK OF ELECTRIC SHOCK User that the presence of uninsulated DO NOT OPEN " hazardous voltage " within the product’s enclosure, which sufficient Précaution... - Page 5 12) Use only with the cart, stand, tripod, bracket, or table specified by the manufacturer, or sold with the apparatus. When a cart is used, use caution when moving the cart/apparatus combination to avoid injury from tip-over. Portable Cart Warning 13) Unplug this apparatus during lightning storms or when unused for long periods of time.
-
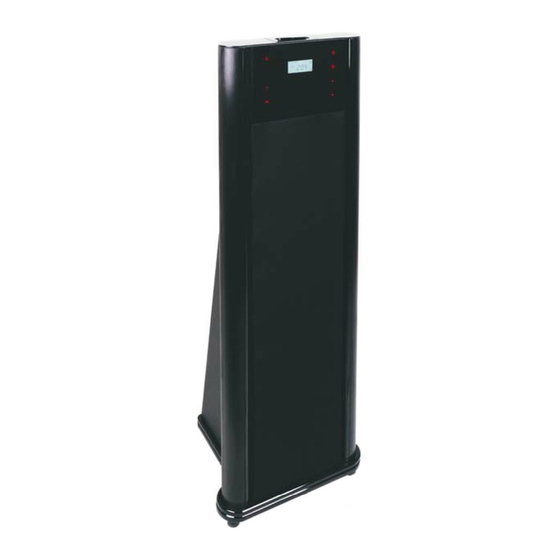
Page 6: Touch Screen Functions
2. Touch Screen Functions 6. Tuner indicate 1.Transmitter (42138T) insert 7. Alarm indicate 2.Wireless indicate 8. Master Vol+ touch 3.iPod pass indicate 9. Master Vol- touch 4.Function set touch 10. LCD display 5.Input selection touch 11. IR receiver LCD SCREEN 1. -
Page 7: Back Panel Diagram
3. Back Panel Diagram 1. TUNER AM300Ω antenna input 5. AUX RCA input 2. TUNER FM75Ω antenna input 6. AC Power input 3. Wireless OFF iPod composite video out 7. AC Power switch 4. Wireless OFF iPod S-Video out... -
Page 8: Remote Control Functions
4. Remote Control Functions 1. Standby 12. iPod menu down 2. Sleep 13. Enter/Auto 3. Mute/ VOL decrease 14. Previous track/ Fast backward 4. iPod or wireless input selection 15. Next track/ Fast forward 5. Tuner input selection 16. iPod play/ pause 6. -
Page 9: Remote Control Set Up &Notes
5. Remote Control Set Up &Notes Battery Installation 1. Release the side latch and pull out the battery holder. 2. Install only a 3 volts CR2025 battery cell and place battery polarity + respectively to the + sign of the holder. 3. -
Page 10: Installing Speaker Feet
6. Installing Speaker Feet... -
Page 11: Am/Fm/Cd-Dvd/Tv Connections
7. AM/FM/CD-DVD/TV Connections FM ANTENNA DIRECTION OF BROADCASTING STATION 75Ω/ohms COAXIAL AM LOOP ANTENNA CABLE (Supplied) FM INDOOR ANTENNA (Supplied) CD/DVD... -
Page 12: Wireless Transmitter Connection
8. Wireless transmitter connection Don’t connect the iPod/iPhone to , if connected it may damage the iPod/iPhone. Wireless Transmitter 1. It is rotatable to suit for different iPod/iPhone. 2. It is suitable for all iPod/iPhone insertion. 3. Volume control VOL-/VOL+ Keep pressing VOL- over 15 seconds, to enter matching status of transmitting and receiving. -
Page 13: Ipod,Tuner,And Aux Modes
9. iPod,Tuner,and Aux Modes (When Wireless function is on the control over the iPod is lost) START Make sure all the connections are correct then press the POWER button on the rear panel. This unit will be in operation mode, the LCD will displays the time, etc. - Page 14 9. iPod,Tuner,and Aux Modes (When Wireless function is on the control over the iPod is lost) SUB-WOOFER Press SUB switch on rear panel to turn on the sub-woofer. As a result, unit will be able to output 2.1 channel audio. The sub-woofer indicator on the front panel will light up to indicate that the sub-woofer is on.
- Page 15 9. iPod,Tuner,and Aux Modes (When Wireless function is on the control over the iPod is lost) FM forwards 0.1MHz each time, and AM forwards 10kHz each time. Press continuously for more than 3seconds, the unit will search next station automatically. b.
- Page 16 9. iPod,Tuner,and Aux Modes (When Wireless function is on the control over the iPod is lost) ALARM 1. Touch SET button on the touch screen of the unit or press ALARM SET button on remote control till the ALM1/ALM2 icons flicker. Touch +/- button on front panel of the unit or press ENTER button on the remote control to enter into alarm ON/OFF settings.
- Page 17 9. iPod,Tuner,and Aux Modes (When Wireless function is on the control over the iPod is lost) 7. You have four options of alarm audio source as follow: Touch +/- button on the touch screen of the unit or press the on the remote control to switch to your prefer option, Touch SET button on the touch screen of the unit or press ENTER button on the remote control ,...
-
Page 18: Setting The Time
10. Setting The Time & Clock Settings 1. Touch SET button on the touch screen of the unit or press the ALARM SET button on the remote control, until the CLOCK icon and the hour figures in the LCD to enter CLOCK setting mode. 2. -
Page 19: Specifications
11. SPECIFICATION VOLTAGE RATING: AC120V/ 60Hz POWER CONSUMPTION: 110W POWER CONSUMPTION STANDBY: 1.5W OUTPUT POWER: L/R CH (Nominal) 8W+8W THD = 1% 8 ohm (MAX) 15W +15W 8 ohm SW CH (Nominal) 24W THD = 1% 8 ohm (MAX) 36W 8 ohm FREQUENCY RESPONSE L/R CH (200Hz-20KHz at +1 / -3dB) SW (30Hz-200Hz at+1 / -3dB) - Page 20 Please contact one of our Product Specialists for assembly assistance or questions at 1-800-537-8484 or email: ps@frontgate.com. Specialists are available weekdays 8:00AM to 8:00PM EST or Saturdays 9:30AM to 6:00PM.
Need help?
Do you have a question about the 42138 and is the answer not in the manual?
Questions and answers