Table of Contents
Advertisement
Quick Links
Advertisement
Table of Contents

Summary of Contents for Gadmei UTV240
- Page 1 2.4GHz Wireless TV Box User’s Manual...
- Page 2 Contents Contents...
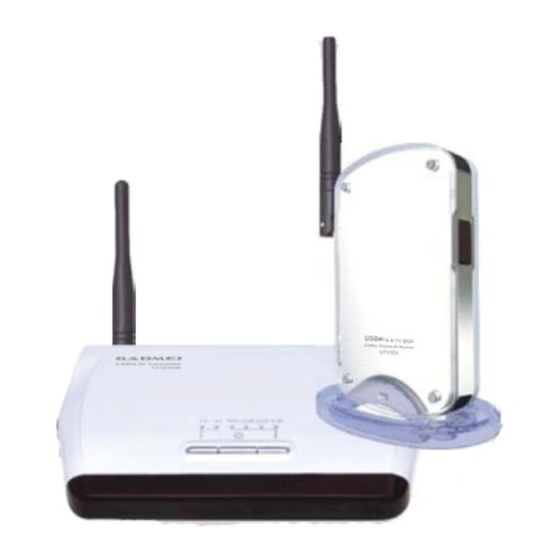
- Page 3 1. Introduction 1.1 Brief introduction Combining 2.4GHz wireless technic and USB TV box technic, UTV240 is known as a Hi-Tech product. Advanced 2.4GHz wireless transmission technic effectively realizes CATV or A/V signal wireless transmission in your house. Connected to your laptop or PC via USB cable, you will be satisfied with enjoying your favorite channels and Hi-Fi A/V programs while using computer.
- Page 4 1.3 Specifications TXV2408 wireless A/V transmitter: Power input: DC 5V 300mA Radio-frequency input: 47-870MHz Video input: 1Vp-p (PAL/NTSC) Audio input: 2Vp-p (L/R) 2.4GHz channel: Four channels (2414,2432,2450,2468MHz) UTV324 wireless USB TV box: USB2.0 port Video input: 1Vp-p (PAL/NTSC) Audio input: 1Vp-p (L/R) Audio output: 2Vp-p (L/R) 2.4GHz channel: Four channels (2414,2432,2450,2468MHz) 1.4 System requirements...
- Page 5 1.6 Common accessories UTV240 user’s manual ---------------------------1pcs Remote control ------------------------------------1pcs Power adapter -------------------------------------1pcs MMI AV cable -------------------------------------1pcs AV cable -------------------------------------------1pcs MINI USB cable& audio cable ------------------1pcs Software disc --------------------------------------1pcs 1.7 Optional accessory MMI S-Video cable(DIN 200S) -----------------1pcs Introduction...
-
Page 6: Rear Panel
2. Connection and operation 2.1 UTV324 connection illustration Antenna Speaker Sound card Laptop AV output device Note: Refer to Part4 (software instruction) to get UTV324 operation manual. 2.2 TXV2408 connection illustration and panel operation instruction: Rear panel: Power adapter AV output device Antenna Rear IR transmitting equipment... - Page 7 Front panel: 2.4GHz AV Transmitter TV/AV input source selecting: Freely switch to TV/AV signal or transmit to receiver via 2.4GHz channels (picture1). Only when the input source of transmitter goes with “video input” of receiver, can the signal be transmitted normally. TV selected status AV selected status Note: Receiver UTV324 input source selecting instruction: Right-click...
- Page 8 Power on/off Press to enter or exit standby status. Power on/off status panel indicator as below: ON: The previous power-off status OFF:All panel indicators off Channel selecting Press CH switch to switch the four 2.4GHz channels. Channels selected status indicator as below: Channel1 selected status Channel2 selected status Channel3 selected status...
- Page 9 3. USB TV driver and software installation 3.1 USB driver installation For better using, please upgrade your system to Windows XP(SP2) or Vista. Driver of USB2.0 TV box series can be installed automatically or manually. Note: Prior to driver installation, please install DirectX9.0 or higher version first.
- Page 10 Click “Next”, system installation as the following picture: Click “Finish”. USB TV driver and software installation...
- Page 11 Click “Yes, restart immediately” and then click “OK”. Manual installation: After correctly install the hardware, when power on to start Windows, the system will detect new hardware, noting “Found New Hardware Wizard”. As the following picture: Select option3, and then click “Next”, as the following picture: USB TV driver and software installation...
- Page 12 Select option2, and then click “Next”, as the following picture: Click “Browse” to select the right saving path, as the following picture: Click “Ok” and then click “Next”, as the following picture: USB TV driver and software installation...
- Page 13 USB2.0 TV box software, please install “DirectX9.0” or higher version first) Place the disc of GADMEI USB2.0 TV box software into the CD-ROM driver and the installation guide menu of the application software will pop up. If auto run function is terminated by your system, you need to browse the disc and double click “autorun.exe”, the following picture will pop up:...
- Page 14 Click “Software” button to enter TVR PLUS installation interface, as the following picture: The installation procedure will note you to select the desired language, and then click “Ok”, as the following picture: After automatic installation, the following picture will appear: USB TV driver and software installation...
- Page 15 Click “Next”, as the following picture: Click “Browse” to select the desired saving path and then click “Next (N)”as the following picture: Click “Next”, as below: USB TV driver and software installation...
- Page 16 After finishing automatic installation, the following picture will appear: Click “Finish” to complete software installation. Note: After installing the software driver, a small icon (TTrayIcon) will appear on the right down corner of your computer. Make sure not to close the icon which is for remote control use If res -tart TTrayIcon after exiting,please click Schedule TV in the driver installation list.
- Page 17 4. Application software instruction The main interface of the software, as below: Instruction for common keystrokes: Consecutively perform the following operation: Open “help” file, minimize and close. Tuning box: Click to open or hide tuning box. Digital input keystrokes: The left arrow is to decrease channels and the right arrow is to increase channels.
- Page 18 4.1 Device instruction to open “function attribute” page, as below: Click Country/region: Selecting country/region is to select frequency list of your area, please correctly select you country/region. Video system: When video or S-Video signal input, you can select video system according to the input source. (Note: If the selected system does not go with the input source, the image will be abnormal.) Input source: Respectively TV, video or S-Video.
- Page 19 Antenna: Wireless/cable. Channel list: Display the current channel information for editing channel skip , channel name and frequency. Import frequency list: Import the stored channel list as the current channel list. Export frequency list: Save the current frequency list for any time use. Fine tuning: To adjust for better image effect via fine tuning.
- Page 20 4.4 Recording instruction Recording format: To select the record format. Recording quality: Three options: high, medium, low Image path and video path: To display the saving path of image and video and you can change the saving path as well. Hard disc information list.
- Page 21 4.6 Scheduled recording: Click to open the scheduled recording setting window, as below: The main keystrokes function: Click “Setting”: To set new items Click “Edit”: To modify any selected item Click “Delete”: To delete the selected item Click “All delete”: To delete all the items in the list Click “Ok”: To exit the scheduled recording window Click “Cancel”: To exit the scheduled recording window Click “Setup”...
- Page 22 Input source selecting Select the channel number to be recorded or watched Select the time or way of watching Select recording or watching The starting time of performing the current task The total time of performing the current task Work setting after the current task is performed can be automatically recorded.
- Page 23 5. Remote control instruction 5.1 Remote control panel Power Mute Channel number input Return Play/Pause Stop Still ¡ü ¡ü Panel Attribute ¡ ü ¡ ü Full Screen TV Wall 5.2 Remote control and shortcut keys instruction Power: To power on/off the application program TVR PLUS. Right click the TTrayIcon and select “remote off ”.
- Page 24 Channel number input: Press the numeric keys and shortly wait. Then switch to your selected channels. The system needs time to confirm your input number. Return: Return to the previous selected channel. Play/Pause: Switch between play and pause. Still: Capture a still picture by every time pressing. REC: Press to begin to record and press again to stop.
- Page 25 6. Product placing and retransmitting 6.1 Transmitter TXV2408 placing CATV watching: When watching CATV, you only need to connect power to CATV signal and place the unit in the proper position. Make sure no obstacle around. A/V devices like DVD, STB watching: Method one: Use the front IR transmitting device Put the transmitter onto the A/V device and make sure IR transmitting sensor is 2-3 cm forward, right towards the IR receiver sensor of the...
- Page 26 Method two: Use the rear IR transmitting device Put the transmitter in front of the A/V device and make the rear IR remote sensor right towards that of the A/V device. Make sure no obstacles between them. Vertical view Left view (STB/DVD...) (STB/DVD...) 2.4GHz AV Transmitter...
- Page 27 6.3 Antenna placing 2.4GHz antenna using 2.4GHz antenna is all-direction antenna with multi-angle rotating function. When interruption appears on the image (such as snow spot, WIFI), please adjust the 2.4GHz antenna for better effect. Rear view Left view 433MHz antenna using Pay attention to the place of 433MHz antenna and make sure no obstacle around (especially metallic obstacle which seriously affects signal retransmission).
- Page 28 6.4 Retransmission function If the output source is the video source with remote control function like STB,DVD, video camera, the original matched remote control of the unit can be directly used to control these video sources. It is not necessary to operate at the side of transmitter. Step one: Refer to connection illustration, and make sure transmitter is well connected and no obstacle between IR sensor of transmitter and that of...
- Page 29 7. Precautions 7.1 Normal phenomenon Interruption appears while moving. Please move to a fixed place to watch. As adopting RF control technic, there will be momentary interruption in the picture when using remote control. The transmission distance varies according to the surroundings; the distance of ordinary house is about 10-20 meters.
- Page 30 Adjust the antenna place of transmitter and receiver (refer to antenna placing). Troubleshooting3: Image interrupted Solutions: Change the transmission channel of receiver (refer to channel selection). Adjust the place of transmitter and receiver (refer to connection and installation). GADMEI-UTV240 User’s Manual-V1.0 Troubleshooting...
- Page 31 FCC NOTE: THE MANUFACTURER IS NOT RESPONSIBLE FOR ANY RADIO OR TV INTERFERENCE CAUSED BY UNAUTHORIZED MODIFICATIONS TO THIS EQUIPMENT. SUCH MODIFICATIONS COULD VOID THE USER’S AUTHORITY TO OPERATE THE EQUIPMENT.
Need help?
Do you have a question about the UTV240 and is the answer not in the manual?
Questions and answers