Table of Contents
Advertisement
Advertisement
Table of Contents

Summary of Contents for Rowe RC 4000 + 6000
- Page 1 Operating instructions ROWE Series 4000 + 6000...
-
Page 3: Operating Instructions
Operating instructions ROWE Series 4000 + 6000 ROWE Operating instructions... - Page 4 2006. All rights reserved. Reprint, copy, processing or reproduction and publication, also in parts, is not allowed without written approval from ROWE. ROWE does not accept any warranty or liability for the content of this publication and hence rejects any tacit warranty for any suitability for commercial or other purposes in particular.
-
Page 5: Table Of Contents
ROWE Series 4000 + 6000 Operator 22 ROWE RS 4000 + 6000 network printer 23 ROWE RS 4000 + 6000 network scanner 24 ROWE RCS 4000 + 6000 network multifunction device 25 Chapter 2 Using the ROWE RS /RCS 4000/ 6000 for printing Preparing to start 30 Switching the ROWE RS/RCS network printer on. - Page 6 Chapter 3 Using the ROWE RS / RCS / RC 4000+6000 for copy jobs Preparing to start 50 Switching on the ROWE RC 4000 + 6000 50 Switching on the ROWE RS/RCS 4000 + 6000 51 Switching off the ROWE RC 4000 + 6000 52...
- Page 7 Chapter 4 Using the ROWE RCS / RC 4000/ 6000 for scanning Preparing to start 92 Switching on the ROWE RC 4000+6000 92 Switching on the ROWE RCS 4000 + 6000 93 Switching off the ROWE RC 4000 + 6000 94...
- Page 8 Logging on the ROWE Print Manager 160 Print menu overview 160 Chapter 7 ROWE Print Manager: Remote status Introduction 166 Starting the ROWE Print Manager: Remote status 166 Printer status 168 Roll status 170 Hardware status 172 ROWE Series 4000 + 6000 Operating instructions...
- Page 9 Readyjobs 186 Chapter 9 ROWE Print Manager: User management Introduction 190 Starting the ROWE User Manager 190 Logging on the ROWE User Manager 191 Groups 192 Users 194 Creating a new user 195 Changing the user data / password 197...
- Page 10 Creating a stamp 253 Changing a stamp 256 Deleing a stamp 257 Previewing a stamp 258 ROWE cover sheet editor 259 Creating a cover sheet 260 Changing a cover sheet 261 Deleting a cover sheet 262 ROWE Series 4000 + 6000 Operating instructions...
- Page 11 ROWE printer driver 272 Selecting a cost center account via the ROWE VIEW application 273 Selecting the cost center account via the operator panel of the ROWE RC/RCS network scanner 273 Chapter 13 ROWE printer driver Introduction 276 Prints using the ROWE PS printer driver 276...
- Page 12 Status reports 327 Warning messages 329 Malfunction messages 331 Removing jammed originals 341 Removing jams 342 Knife jam / Roll drawer jam 344 Drum jam 345 Fixing jam 346 Jam in exit 348 Troubleshooting 350 ROWE Series 4000 + 6000 Operating instructions...
-
Page 13: Contents
Material safety data sheet ROWE RC 388 Material safety data sheet magnet roller 389 Material safety data sheet OPC drum 390 Material safety data sheet ROWE Eco Toner 392 Appendix C Disposal WEEE (Waste Electrical and Electronic Equipment) notes 400... - Page 14 ROWE Series 4000 + 6000 Operating instructions...
-
Page 15: Introduction
Chapter 1 Introduction In this chapter you will receive a general introduction into the Series 4000 + 6000 systems from ROWE with a general description of the main functions, delivery options and software applications. Please consult the pertinent chapters for more information. -
Page 16: Graphic Rendition Conventions
In this manual some graphic rendition conventions are used that are designed to help you getting quickly familiarized with this manual and hence with the ROWE systems of the 4000 + 6000 series. Description Each paragraph or subparagraph contains a description of the system function that is addressed in the heading. -
Page 17: About This Manual
ROWE RS / RCS 4000 + 6000. Chapter 3: Using the ROWE RS / RC / RCS 4000 + 6000 for copying contains a brief description of the actions that can be carried out via the scanner operator panel of the ROWE EC / RCS 4000 + 6000 as well as the basic copy functions the system offers. - Page 18 Chapter 8: ROWE PRINT MANAGER: Queue manager describes the functions of the ROWE RS / RCS 4000 + 6000 print manager. The print queue is indicated and it is described how the active print job is aborted, print jobs in the print queues are deleted or stopped and how stopped print jobs are continued or printed jobs can be repeated.
- Page 19 Appendix A: Overview and tables contains information about the standard delivery scope, the options of the ROWE Series 4000 + 6000 as well as the technical specifications and licenses of the operating system. Appendix B: Information on safety contains instructions about safe use and the material safety data sheets.
-
Page 20: Rowe Series 4000 + 6000 Main Concepts
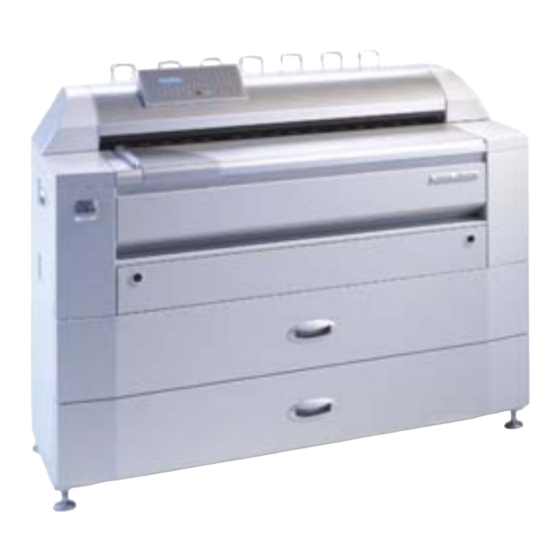
The ROWE Series 4000 + 6000 main concepts The devices of the ROWE Series 4000 + 6000 are wide-format print, copy and scan systems for medium to high print volumes. The systems are available as network printer [RS], [1a] ROWE network printer RS 4000 + 6000 with front exit (optional) - Page 21 All ROWE RS and RCS models can be optionally equipped with an ROWE online folding system. [1d] ROWE network multifunction devices RCS 4000 + 6000 with online folding system The ROWE Series 4000 + 6000 devices are highly productive systems offering you a wide range of functionality.
-
Page 22: Rowe Series 4000 + 6000 Operator
- Autodetection of roll width - 3rd roll can be upgraded on ROWE RS 4000 on site - 3rd and 4th roll can be upgraded on ROWE RS 6000 on site - ROWE 721 - 4 ONLINE FOLDING SYSTEM - Automatic tab applicator... -
Page 23: Rowe Rs 4000 + 6000 Network Printer
The ROWE network scanners are standard equipped, among others, with a scan-to-file kit and use the newly developed PRO LOGIC+ image processing hardware. The modular design of the ROWE network scanner RC 4000 + 6000 offers the following options to you: Hardware: - ROWE HEIGHT ADJUSTMENT... -
Page 24: Rowe Rs 4000 + 6000 Network Scanner
- ROWE STACKER - Autodetection of roll width - 3rd roll can be upgraded on ROWE RCS 4000 on site - 3rd and 4th roll can be upgraded on ROWE RCS 6000 on site - ROWE VIEWSTATION - ROWE 721 - 4 ONLINE FOLDING SYSTEM... - Page 25 Chapter 1 Introduction...
- Page 26 ROWE Series 4000 + 6000 Operating instructions...
- Page 27 Chapter 1 Introduction...
- Page 28 ROWE Series 4000 + 6000 Operating instructions...
-
Page 29: Using The Rowe Rs /Rcs 4000/ 6000 For Printing
This chapter contains a brief description of the actions that can be carried out via the printer or combination operator panel of the ROWE network printer RS / RCS 4000 + 6000. Using the ROWE RS / RCS 4000 + 6000 for printing... -
Page 30: Preparing To Start
Switching on the ROWE network printer RS/RCS 4000 + 6000 The ROWE network printer RS / RCS 4000 + 6000 is switched on via the power switch on the rear of the network printer. [2] On/Off switch on rear of printer 1. -
Page 31: Switching The Rowe Rs/Rcs Network Printer Off
Note: Satisfy yourself that no print process is running before switching of the device. 1. Keeping the "Offline" button depressed will shut down the ROWE network printer RS / RCS 4000 + 6000.[Figure 5] [5] Button 'Offline' on operator panel 2. -
Page 32: Printer Operator Panel
Printer operator panel The operator panel of the ROWE RS network printer is located on the right side of the device and consists of various buttons and a four-line LCD display (see Figure 7). The power LED is located at the operator panel and lights when the device is powered up and the two status LED would light if user intervention is required. -
Page 33: Keys
See page 30 for legend Buttons Using the buttons on the operator panel lets you make a number of settings on the ROWE RS /RCS network printer, e.g. material type/ format or setting the desired language. The operator panel has the following buttons:... - Page 34 (RS + RCS). Offline/Online buttonT10. Using this button lets you toggle betw een online and offline mode on ROWE RCS models [9] Overview of ROWE RS / RCS buttons Continued on next page ROWE Series 4000 + 6000 Operating instructions...
- Page 35 Aborting the printing process immediately after starting the medium lets the device automatically execute the command only after reaching a minimum length. [10] Overview of ROWE RS / RCS buttons Using the ROWE RS / RCS 4000 + 6000 for printing...
-
Page 36: Led Pilot Lamps
Offline LED This LED signals on ROWE RCS models that the printer in in "Offline" operating state. [11] Overview of ROWE RS / RCS LED pilot lamps Display The LCD display indicates the current printer status. Following information is indicated: Operating states The current print data are indicated, e.g.: Ready for printing,... -
Page 37: Copy Counter
ROWE network printer. You will need to open drawer one for reading the counters. The counters count square meters and linear meters.[Fig. 12] [12] Front view of the ROWE RS / RCS network printer. Position of mechanical counters Using the ROWE RS / RCS 4000 + 6000 for printing... - Page 38 1. Keep the enter button [Fig. 13] depressed for three seconds, then the menu will open [13] Enter button on the ROWE RS / RCS operator panel Using the arrow buttons 'Up/Down' [Fig. 14], select menu option "Machine data" and confirm your selection via the enter button. This will get you automatically to the next menu level.
-
Page 39: Operations On The Printer Operator Panel
- Selecting the desired device language Medium and format of the material in the printer One of the functions of the ROWE RS /RCS network printer is the automatic change of material. Using this function, the printer will change to another roll of identical format and material in the event that a roll has run out during printing. -
Page 40: Determining The Material Type
1. On the operator panel, press the offline button [Fig. 17] to switch the printer to offline. The display will then show "Offline". [17] left offline button on ROWE RS / right offline button on ROWE RCS 2. On the printer operator panel, press the button for the roll menu [Fig. - Page 41 - Special 1 - Special 2 - Special 3 - Special 4 - Special 5 - Special 6 - Special 7 - Special 8 Using the ROWE RS / RCS 4000 + 6000 for printing...
-
Page 42: Determining The Roll Width
1. On the operator panel, press the offline button [Fig. 22] to switch the printer to offline. The display will then show "Offline". [22] left offline button on ROWE RS / right offline button on ROWE RCS 2. On the printer operator panel, press the button for the roll menu [Fig. - Page 43 - ANSI C 22" 559 mm - ARCH B 24" 610 mm - ANSI C 30" 762 mm - ANSI C 34" 864 mm - ANSI 36" 914 mm Using the ROWE RS / RCS 4000 + 6000 for printing...
-
Page 44: Determining The User-Defined Roll Width
ANSI E 34" 864 mm ANSI 36" 914 mm > User 444 mm ISO A3 420 mm [28] Overview of display dialog and buttons to be pressed ROWE Series 4000 + 6000 Operating instructions... -
Page 45: Stopping Print Jobs
"Waiting to print" on the job list. [29] left offline button on ROWE RS / right offline button on ROWE RCS 2. Pressing the online button [Fig. 30] will resume print output. You may also have this process automatically executed after a predefined time. -
Page 46: Lacking Resources
Information: If you did not respond to the lack of resources dialog within one minute the printer will automatically assume the status "on hold"! This period can be individually adapted through a ROWE authorized service technician. ROWE Series 4000 + 6000 Operating instructions... -
Page 47: Single Sheet Feed
Now furnish the device with the paper sheet centered via the single sheet feed [Fig. 35]. [35] Front view ROW RS / Feeding paper via the single sheet feed Using the ROWE RS / RCS 4000 + 6000 for printing... -
Page 48: Selecting The Device Language
Selecting the device language You may specify on the operator panel of the ROWE system in what language the print information should display. Proceed as follows for setting it: 1. Keep the enter button [Fig. 36] depressed for three seconds, then... - Page 49 ROWE RC / RCS 4000 + 6000 as well as the basic copy functions the system offers. Chapter 3: Using the ROWE RS / RC / RCS 4000 + 6000 for copying...
-
Page 50: Preparing To Start
Preparing to start You will need to switch on the ROWE network printer RS / RCS / RC 4000 + 6000 before you can start printing. If you have an additional optional online folding system, you need to switch on this one too. -
Page 51: Switching On The Rowe Rs/Rcs 4000 + 6000
[Chapter 15 / Energy-saving mode] Chapter 3: Using the ROWE RS / RC / RCS 4000 + 6000 for copying... -
Page 52: Switching Off The Rowe Rc 4000 + 6000
Switching off the ROWE RS / RCS 4000 + 6000. Note: Satisfy yourself that no print process is running before switching of the device. 1. Keeping the"Offline" button depressed will shut down the ROWE RS / RCS 4000 + 6000.[Figure 46]. [46] 'Offline' button on the operator panel... -
Page 53: Scanner Operator Panel
The operator panel is located above the original feed. The operator panel consists of various buttons for operating the scanner (in the case of RCS models for scanner and printer) and a four-line LCD display. Chapter 3: Using the ROWE RS / RC / RCS 4000 + 6000 for copying... - Page 54 [48] Operator panel for network scanner ROWE RC See page 54 for legend The operator panel of the network scanner ROWE RC 4000 + 6000 is located on the left side of the scanner. It also contains the manipulation for the optional height adjustment. [Fig. 48]...
-
Page 55: Keys
ROWE RC /RCS network scanner, e.g. Zooming or setting the desired language. The operator panel has the following main buttons and button groups: Chapter 3: Using the ROWE RS / RC / RCS 4000 + 6000 for copying... - Page 56 [T4] for more the red stop button [T4] for more than 3 seconds. than 3 seconds. [50] Overview of ROWE RC / RCS buttons Continued on next page ROWE Series 4000 + 6000 Operating instructions...
- Page 57 [52] Overview of ROWE RC / RCS buttons Button group [G1]. "Exposure" Chapter 3: Using the ROWE RS / RC / RCS 4000 + 6000 for copying...
- Page 58 ROWE netw ork printer. ROWE netw ork printer. [53] Overview of ROWE RC / RCS buttons Button group [G2]. "Zoom" Button group G3. "Test": Type of button No.
-
Page 59: Keys
. menus . [55] Overview of ROWE RC / RCS buttons Button group [G4]. "Numeric block" Chapter 3: Using the ROWE RS / RC / RCS 4000 + 6000 for copying... - Page 60 , s o-c alled "templates ". s o-c alled "templates ". [56] Overview of ROWE RC / RCS buttons Button group [G5]. "Mode" ROWE Series 4000 + 6000 Operating instructions...
- Page 61 ROWE netw ork printer. w ith a ROWE netw ork printer. [57] Overview of ROWE RC / RCS buttons Button group [G6]. "Folding" Chapter 3: Using the ROWE RS / RC / RCS 4000 + 6000 for copying...
-
Page 62: Display
[58] Overview of ROWE RC / RCS buttons Button group [G7]. "Functions" Display The LCD display indicates the current scanner status. Following... - Page 63 This readout is abs olutely independent f rom reading [T5.] independent f rom reading [T5.] [60] Overview of ROWE RS / RCS display dialog Chapter 3: Using the ROWE RS / RC / RCS 4000 + 6000 for copying...
-
Page 64: Carrying Out Simple Copy Jobs
400 DPI 841 mm | AUTO [62] Display dialog on ROWE RC/RCS network scanner 3. Make sure that the correct printer has been selected. The selected printer is displayed on the right upper part of the display. Now press ROWE Series 4000 + 6000 Operating instructions... -
Page 65: Inputting The Type Of Original
You will get to a select menu for certain, difficult original types after hitting the Profile button. Please select the profile that matches your original. You will automatically get now the Chapter 3: Using the ROWE RS / RC / RCS 4000 + 6000 for copying... -
Page 66: Selecting The Printer
[64] Button group Mode [G5] on ROWE RC / RCS Selecting the printer 1. Press the "Function button [button group G7, p. 60]. The following menu will open [Fig. 65]. Using the arrow buttons 'Up/Down' [Fig. 65], select menu option "Printer selection"... -
Page 67: Best Quality Mode
[Fig. 67] 100 % BEST |ROWE RCS Copies 1 |Paper 400 DPI 841 mm | AUTO [67] Best Quality mode display dialog Chapter 3: Using the ROWE RS / RC / RCS 4000 + 6000 for copying... -
Page 68: Selecting The Output Medium
Selecting the output medium You can select the medium via the scanner operating panel to which the copy on the ROWE network printer should be directed to. This is how to proceed:: 1. Press the "Medium" button [button group G6, p. 59]. The following menu will open [Fig. -
Page 69: Setting The Margins
> front +5 mm left -15 mm right +0 mm [70] Overview of the buttons to be pressed for defining margins Chapter 3: Using the ROWE RS / RC / RCS 4000 + 6000 for copying... -
Page 70: Selecting The Input Format
Note: Negative margins means that the preset width on the corresponding page is cut and positive margin means that the preset width is added on the corresponding page. Note: This function is only available in connection with a ROWE network printer. Selecting the input format... - Page 71 This will automatically save the setting and exits you from the menu. > auto autoformat -> ANSI -> [72] Overview of the buttons to be pressed for selecting an input format. Chapter 3: Using the ROWE RS / RC / RCS 4000 + 6000 for copying...
-
Page 72: Zoom
% to 999.9 % via the keypad on the scanner operating panel. Scal. steps means that you may select format steps for zooming there. You may select following steps: 25.0% 200.0% 35.3% 282.8% 50.0% 400.0% 70.7% 565.1% 100.0% 800.0% 141.1% ROWE Series 4000 + 6000 Operating instructions... -
Page 73: Manual Feed / Roll Selection
"Roll selection" and confirm your selection via the enter button. This will get you automatically to the next menu level. Exit the menu by using the offline button: Chapter 3: Using the ROWE RS / RC / RCS 4000 + 6000 for copying... - Page 74 The current selection will be stored and the menu automatically closed. default > manualfeed Roll 1 Roll 2 [76] Overview of the buttons to be pressed for selecting a roll. ROWE Series 4000 + 6000 Operating instructions...
-
Page 75: Rotation / Head Position
'Up/Down' [Fig. 79] and confirm your selection via the enter button. The current selection will be stored and the menu automatically closed. Chapter 3: Using the ROWE RS / RC / RCS 4000 + 6000 for copying... -
Page 76: Stacker
Note: This function is only available in connection with a ROWE network printer. Stacker You may select the stacker directly on the ROWE network printer via the scanner operating panel. You have the choice of following options: Front means that if your ROWE RS network printer is equipped with the option of front-side output you may select is directly and output your copies on this stacker. -
Page 77: Set Processing
With the last drawing scanned, the printer will now issue two sets in that order in which they were filed in the folder. See [Fig. 82] Chapter 3: Using the ROWE RS / RC / RCS 4000 + 6000 for copying... - Page 78 You may select the following additional options for the output of sets: Instant printing means that the ROWE will already start with the output although the set has not been closed yet. Reverse order means: With this option enabled, the original last scanned will be issued first.
- Page 79 When you have scanned all originals, press the button 'Set' once more for closing the set and starting the output. [Fig. 85]: Chapter 3: Using the ROWE RS / RC / RCS 4000 + 6000 for copying...
- Page 80 You may abort the process and exit the menu by using the offline button: Roll selection > Instant printing Reverse order Stacker [86] Overview of the buttons to be pressed for setting the options for a set copy. ROWE Series 4000 + 6000 Operating instructions...
-
Page 81: Mirroring
2. Using the arrow buttons 'Up/Down' [Fig. 89], select the desired state and confirm your selection via the enter button. The current selection will be stored and the menu automatically closed. Chapter 3: Using the ROWE RS / RC / RCS 4000 + 6000 for copying... -
Page 82: Inverting
The current selection will be stored and the menu automatically closed. Invert > Invert [91] Overview of the buttons to be pressed for enabling the Invert function. ROWE Series 4000 + 6000 Operating instructions... -
Page 83: Cover Sheet
[93] Overview of the buttons to be pressed for enabling the Cover Sheet function. Selecting and enabling the output position of the cover sheet, proceed as follows: Chapter 3: Using the ROWE RS / RC / RCS 4000 + 6000 for copying... -
Page 84: Stamp And Training Texts
Note: This function is only available in connection with a ROWE network printer. Stamps and trailing texts You may directly select stamps and trailing texts stored on the ROWE network printer via the scanner operating panel and have them imprinted on your copies. Selecting and enabling a stamp or trailing... -
Page 85: Cost Centers
[Fig. 98]. Using the arrow buttons 'Up/Down' [Fig. 98], select menu option "Mirror" and confirm your selection via the enter button. This will get you automatically to the next menu level. You may abort Chapter 3: Using the ROWE RS / RC / RCS 4000 + 6000 for copying... -
Page 86: Originals Output
[99] Overview of the buttons to be pressed for enabling the Cost Center function. Note: Cost centers can be created and edited via the optional application ROWE COST CONTROL [chapter 12]. Note: This function is only available in connection with a ROWE network printer. Originals output... - Page 87 > Hold at rear Output to the front Hold at front [101] Overview of the buttons to be pressed for setting the function Output Option Chapter 3: Using the ROWE RS / RC / RCS 4000 + 6000 for copying...
-
Page 88: Selecting The Device Language
Selecting the device language You may specify on the operator panel of the ROWE system in what language the print information should display. Proceed as follows for setting it: 1. Keep the enter button [Fig. 102] depressed for three seconds, then... - Page 89 Chapter 3: Using the ROWE RS / RC / RCS 4000 + 6000 for copying...
- Page 90 ROWE Series 4000 + 6000 Operating instructions...
-
Page 91: Using The Rowe Rcs / Rc 4000/ 6000 For Scanning
6000 for scanning This chapter contains a brief description of the actions that can be carried out via the scanner operator panel of the ROWE RC / RCS 4000 + 6000 as well as the basic scan functions the system offers. -
Page 92: Preparing To Start
4000 + 6000 before you can execute a scan job. Switching on the ROWE RC 4000 + 6000 The ROWE network scanner RC 4000 + 6000 is switched on via the power switch on the rear of the device. [110] On/Off switch on rear of scanner 1. -
Page 93: Switching On The Rowe Rcs 4000 + 6000
7. To report the device as ready, you need to press button "Online" [Figure 113; see also Figure 7] if the message "Offline" instead of "Ready for printing" shows on the display. [113] 'Online' button on the operator panel Chapter 4: Using the ROWE RCS / RC 4000/ 6000 for scanning... -
Page 94: Switching Off The Rowe Rc 4000 + 6000
Switching off the ROWE RC 4000 + 6000. 1. Keeping the"Offline" button depressed will shut down the network scanner ROWE RC 4000 + 6000. [Fig. 114]. [114] 'Stop' button on the operator panel 2. The display shows "System being shut down". -
Page 95: Scanner Operator Panel
Scanner operator panel The ROWE RC / RCS 4000 + 6000 models are very user-friendly systems. The scanner particularly excels in easy operability. Normal scan jobs are simply executed by pressing the green start button on the operator panel. - Page 96 [118] Operator panel for network scanner ROWE RC Legend on following pages The operator panel of the network multifunction device ROWE RCS is located on the left side of the attached scanner. The only difference between its operator panel and the ROWE network scanner operator panel is integrated printer operation instead of the optional height adjustment operation [Fig.
-
Page 97: Keys
Using the buttons on the operator panel lets you make a number of settings on the ROWE RC /RCS network scanner, e.g. Zooming or setting the desired language. The operator panel has the following main buttons and button groups: Chapter 4: Using the ROWE RCS / RC 4000/ 6000 for scanning... - Page 98 The device w ill be shut dow n w hen you press the red stop button [T4.] for more than 3 seconds. [120] Overview of ROWE RC / RCS buttons Continued on next page ROWE Series 4000 + 6000 Operating instructions...
- Page 99 [122] Overview of ROWE RC / RCS buttons Button group [G1]. "Exposure" Chapter 4: Using the ROWE RCS / RC 4000/ 6000 for scanning...
- Page 100 Set button the s et f unc tion Pres s ing onc e more w ill quit the s et f unc tion. [123] Overview of ROWE RC / RCS buttons Button group [G2]. "Zoom" Button group G3. "Test": Type of button No.
-
Page 101: Keys
. [125] Overview of ROWE RC / RCS buttons Button group [G4]. "Numeric block" Chapter 4: Using the ROWE RCS / RC 4000/ 6000 for scanning... - Page 102 Us ing the Prof ile button, y ou may s elec t and load s tored pref erenc es , s o-c alled "templates ". [126] Overview of ROWE RC / RCS buttons Button group [G5]. "Mode" ROWE Series 4000 + 6000 Operating instructions...
- Page 103 Y ou may s et positive and negative Margin button margins using the Margin button. [127] Overview of ROWE RC / RCS buttons Button group [G6]. "Folding" Chapter 4: Using the ROWE RCS / RC 4000/ 6000 for scanning...
-
Page 104: Display
[128] Overview of ROWE RC / RCS buttons Button group [G7]. "Functions" Display The LCD display indicates the current scanner status. - Page 105 RCS s y s tem. This readout is abs olutely independent f rom reading [T5.]. [113] Meaning of the texts shown on the display Chapter 4: Using the ROWE RCS / RC 4000/ 6000 for scanning...
-
Page 106: Rowe Pro Logic
Fileformat Rotate Backlight [132] Overview of the buttons to be pressed for setting the brightness of ROWE BACKLIGHT 2. Using the arrow buttons 'Up/Down' [Fig. 133], select menu option "Backlight" and confirm your selection via the enter button. This will get you automatically to the next menu level. -
Page 107: Rowe Height Adjustment
Backlight [134] Overview of the buttons to be pressed for setting the brightness of ROWE BACKLIGHT Note: The backlight setting range is divided into 255 steps, i.e.e 255 is maximum brightness and the backlight is switched off at value 0. Take it as empirical formula: The darker the original, the higher the backlight value needs to be set. -
Page 108: Scanning To File
1. Place the original against the original ruler with the lettered page up and justified to the left sliding the original into the originals entry slot till the original is pulled in [Fig. 136]. [136] Inserting an original into the ROWE network scanner ROWE Series 4000 + 6000 Operating instructions... -
Page 109: Scanning Into A File, Settings (Scan To File)
You may change the settings for scanning to file (Scan-to-File) via the operator panel as follows: File mode There are two file modes you may select on the ROWE RC / RCS network scanners: 1. A file is created in the 'File' mode and automatically stored in a user-defined directory via the network. -
Page 110: Target Directory
The system works with an automated naming of file to ensure that your files will receive the desired name. The authorized ROWE service technician can adapt the automatic naming of file. You may select a fixed part of name or a continuous number or a time stamp. -
Page 111: Selecting A Predefined Target Directory
3. Using the arrow buttons 'Up/Down' [Fig. 143], select the desired destination directory and confirm your selection via the enter button. The current selection will be stored and the menu automatically closed. Chapter 4: Using the ROWE RCS / RC 4000/ 6000 for scanning... -
Page 112: File Type
PDF (Portable Document Format) is a file format that acquires all elements of a printed document in form of an electronic image that you may display, print or pass on. ROWE Series 4000 + 6000 Operating instructions... -
Page 113: Tiff Subformat
You should therefore carefully use compressions in these cases. Chapter 4: Using the ROWE RCS / RC 4000/ 6000 for scanning... -
Page 114: Pdf/ Jpeg Compression
PDF / JPEG compression The authorized ROWE service technician will gladly adapt the compressions for PDF and JPEG for you individually. Selecting the file type Selecting this file type, proceed as follows: 1. Press the "File" button [button group G7] [Fig. 144]: [144] 'File' button see button group [G7]. -
Page 115: Resolution
[Fig. 147]. Using the arrow buttons 'Up/Down' [Fig. 147], select the desired file format and confirm your selection via the enter button. The current selection will be stored and the menu automatically closed. Chapter 4: Using the ROWE RCS / RC 4000/ 6000 for scanning... -
Page 116: Zoom
[Fig. 148]. Using the arrow buttons 'Up/Down' [Fig. 148], select the desired menu option and confirm your selection via the enter button. This will get you automatically to the next entry level. You ROWE Series 4000 + 6000 Operating instructions... - Page 117 You have the choice of the following format systems: ANSI ARCH USER You may select user-defined formats in menu 'USER' that were created via the software. Chapter 4: Using the ROWE RCS / RC 4000/ 6000 for scanning...
-
Page 118: Selecting The Required Input Mode
Use this mode when scanning monochrome line drawings. Photo: Use this mode when scanning monochrome photos or graphics. Color: Use this mode when scanning colored originals. [149] Keypad [G5]. Selecting the scan mode ROWE Series 4000 + 6000 Operating instructions... -
Page 119: Best Quality Mode
Printer selection -> File selection -> > Rotation/Head position-> Cost center -> [151] Overview of the buttons to be pressed for setting a rotation Chapter 4: Using the ROWE RCS / RC 4000/ 6000 for scanning... -
Page 120: Mirroring
[153] Overview of the buttons to be pressed for enabling the 'Mirror' function. 2. Using the arrow buttons 'Up/Down' [Fig. 154], select the desired state and confirm your selection via the enter button. The current selection will be stored and the menu automatically closed. ROWE Series 4000 + 6000 Operating instructions... -
Page 121: Inverting
The current selection will be stored and the menu automatically closed. Invert > Invert [156] Overview of the buttons to be pressed for enabling the 'Mirror' function. Chapter 4: Using the ROWE RCS / RC 4000/ 6000 for scanning... -
Page 122: Originals Output
Originals output The ROWE RC/RCS network scanner offers four selectable options of originals output Output to the rear: In this setting, the original is ejected from the rear scanner output after scanning. Hold at rear: In this setting, the original is run out from the rear scanner output after scanning but the end of the original will be held by the scanner's last rear pair of rollers. -
Page 123: Selecting The Device Language
[158] Overview of the buttons to be pressed for setting the scanner output options Selecting the device language You may specify on the operator panel of the ROWE system in what language the information should display. Proceed as follows for setting it: 1. - Page 124 You may abort the process and exit the menu by using the offline button [Fig .161]. Deutsch > English Italiano Polski [161] Overview of display dialog and buttons to be pressed ROWE Series 4000 + 6000 Operating instructions...
- Page 125 ROWE Series 4000 + 6000 Operating instructions Chapter 5 ROWE Scan Manager This chapter contains a brief description of the actions that can be carried out via the web-based ROWE Scan Manager. Chapter 5: ROWE Scan Manager...
-
Page 126: Introduction
ROWE Scan Manager Introduction The ROWE Scan Manager is the web-based platform on which the standard software ROWE View and the optional software ROWE EDIT are arranged. In addition, the ROWE San Manager features administrative and service-relevant applications. System prerequisites... -
Page 127: Rowe View
1. Start the browser on a workstation that is connected to the ROWE system via the network. On the address line, enter the IP address or the host name of the ROWE device. The following page will open: [170]ROWE Print Manager /ROWE Scan Manager on ROWE RCS... - Page 128 2. The ROWE View application opens: [172] ROWE View Operating ROWE VIEW The user interface of the ROWE VIEW application comprises various buttons and operating groups: [173] User interface of the ROWE View application Legend on next page ROWE Series 4000 + 6000 Operating instructions...
- Page 129 Highquality mode for the black-and- Mode button w hite lines and photo mode. This mode has been designed for creating maximum detail resolution from difficult originals. [174] Description of the button functions of the ROWE View application Chapter 5: ROWE Scan Manager...
- Page 130 The original w ill be scanned, displayed and a copy or file (depending on mode) w ill be immediately created. [175] Description of the button functions of the ROWE View application Operation groups in Scan-to-File mode Operation group G1. "Resolution": Fie ld No.
- Page 131 Lands cape form at the s et f unc tion Pres s ing onc e more w ill quit the s et f unc tion. [177] Overview operation groups ROWE View [G2] Operation group G3. "File" Fie ld No. Function...
- Page 132 1001 dpi f rom a 200 dpi scanned original through ROWE V IEW. [179] Overview operation groups ROWE View [G3] ROWE Series 4000 + 6000 Operating instructions...
- Page 133 A ll data w ill now be automatically s tored in this direc tory. [180] Overview operation groups ROWE View [G4] Operation group G5. "Template" Fie ld No. Function...
- Page 134 The def ault is 127. Low ering the value reduc es brightness, increasing the v alue w ill enhance brightness. [182] Overview operation groups ROWE View [G6] ROWE Series 4000 + 6000 Operating instructions...
- Page 135 The def ault v alue is 0. Inc reas ing the v alue w ill enhanc e s harpening, dec reas ing it w ill reduc e the f unc tion. [183] Overview operation groups ROWE View [G7] Chapter 5: ROWE Scan Manager...
- Page 136 No. Function Language Y ou may s et the language f or the ROWE V IEW applic ation in this f ield. Y ou may s et the blac k point in this f ield. Black point The blac k point des ignates...
- Page 137 [185] Overview operation groups ROWE View [Settings] Chapter 5: ROWE Scan Manager...
- Page 138 Operation groups in Scan-to-Copy mode [186] User interface of the ROWE View application in the Scan-to-Copy mode Operation group G1. "Printer": Fie ld No. Function Selec t the des ired printer in this f ield on Select printer: w hic h the c opies s hould be is s ued.
- Page 139 Y ou s et the v arious modes f or Mode monoc hrome lines and photos in this f ield. [188] Overview operation groups ROWE View [G2] Operation group G3. "Format": Fie ld No. Function Y ou s et the s c anner input f ormat in...
- Page 140 Y ou c an s elec t the medium in this f ield Medium on w hic h the c opy on the ROWE netw ork printer s hould be is s ued. In this f ield y ou may determine the C opies number of c opies .
- Page 141 The s elec ted prof ile is s how n on the the right s ide of the prof ile button [191] Overview operation groups ROWE View [G5] Button group "Settings": Chapter 5: ROWE Scan Manager...
- Page 142 The original w ill be inv erted, i.e. w hite pixels are repres ented black and vice versa. The result is a negativ e of the original. [192] Overview operation groups ROWE View [Settings] ROWE Series 4000 + 6000 Operating instructions...
- Page 143 In this f ield y ou may s elec t the c ov er C over s heet s heets def ined on the ROWE netw ork printer. In this f ield y ou may enable the c ov er...
- Page 144 Button group "Expert mode": ROWE Series 4000 + 6000 Operating instructions...
- Page 145 In this f ield y ou may determine the Fallbackonerror reac tion to a general f ault on the ROWE netw ork printer. The s tandard s etting is "Def ault", i.e. the s tandard s ettings of the printer are us ed.
- Page 146 2 In this f ield you may set the priority Priority w hen outputting on a ROWE netw ork printer. The higher the value the higher the priority. A job having increased priority w ill be output earlier against a job of low priority.
-
Page 147: Function Bar
Function bar The function bar offers you a number of options to view the scanned image and have it further processed: [196] Overview ROWE View function bar Chapter 5: ROWE Scan Manager... - Page 148 Highquality Using this button w ill activate the Highquality preview , i.e. the displayed Preview button scan is represented in full print quality to you. [197] Overview buttons of ROWE View function bar ROWE Series 4000 + 6000 Operating instructions...
-
Page 149: Simple Scan Process
Initiating a scan process from the ROWE VIEW application, proceed as follows: 1. Start the browser on a workstation that is connected to the ROWE system via the network. On the address line, enter the IP address or the host name of the ROWE network scanner. The following page will open: [Fig. - Page 150 [Fig .201]. [201] Inserting an original into the ROWE network scanner 4. The scanner will run a 100 mm long prescan for original width detection purposes provided the 'Automatic width detection' had been enabled.
- Page 151 841 mm | AUTO [202] Displaying identified width 5. Now set on the ROWE VIEW in which mode and with what parameters you want to scan. Following this, start the scan process using the green start button [Fig. 203]. [203] ROWE VIEW start button 6.
- Page 152 [Fig. 206]. [206] The scan as shown Note: You may have a look at the scan result at first by starting the scan job via the yellow 'Pre-can' button and then select the parameters ROWE Series 4000 + 6000 Operating instructions...
-
Page 153: Rowe Edit
Note: Scanning in color mode will be only possible if the network scanner is provided with the optional color module. ROWE EDIT You may professionally edit your scanned originals using ROWE EDIT. See the operating instructions supplied with the software for further information. - Page 154 ROWE Series 4000 + 6000 Operating instructions...
-
Page 155: Chapter 6
ROWE Series 4000 + 6000 Operating instructions Chapter 6 ROWE Print Manager This chapter contains a brief description of the web-based main screen on which all print, control and user applications are arranged. Chapter 6: ROWE Print Manager... -
Page 156: Introduction
ROWE Print Manager Introduction The ROWE Print Manager is a web-based platform on which the print applications ROWE PRINT MASTER / PRINT MASTER LT, the control applications ROWE QUEUE MANAGER / QUEUE MANAGER LT, the editors ROWE PRINT SPECIALS and the cost center application ROWE COST CONTROL as well as the user management are arranged. -
Page 157: Starting The Rowe Print Manager
Starting the ROWE Print Manager, proceed as follows: 1. Start the browser on a workstation that is connected to the ROWE system via the network. On the address line, enter the IP address or the host name of the ROWE device. The following... - Page 158 3. The ROWE PRINT MANAGER screen opens [Fig. 212]: [212] ROWE Print Manager Overview of the selectable buttons: Type of buttons No. Symbols Function This button gets you to the print Print button menu. All print applications are arranged in this menu, e.g. the ROWE PRINT MASTER or the ROWE QUEUE MANAGER.
-
Page 159: Logging On The Rowe Print Manager
ROWE PRINT MANAGER. [214] Description of the button functions of the ROWE Print Manager Note: Access and functionality of the individual application depends on the assigned user rights as well as the acquired options. See chapter 14 "Administrative settings"... - Page 160 [Fig. 215] [215] ROWE Print Manager logon dialog User name and password have to be defined by the system administrator or a main user in the ROWE User Management. See chapter 9. "ROWE PRINT MANAGER: User MANAGEMENT" for further information.
- Page 161 This application enables you to compile sets of draw ings, view the draw ings in a preview and send the draw ings w ith individual settings to the ROWE netw ork printer. See chapter 10 "ROWE PRINT MASTER" for further information. PRINT MASTER LT...
-
Page 162: Chapter 7
In this menu you are informed about the current status and current button remaining length of the rolls inserted in the ROWE netw ork printer. See chapter 7 "ROWE PRINT MANAGER: PRINT MANAGER: Remote status" for further information In this menu you are informed about... - Page 163 Note: Access and functionality of the individual application depends on the assigned user rights as well as the acquired options. See chapter 14 "Administrative settings" for further information Chapter 6: ROWE Print Manager...
- Page 164 ROWE Series 4000 + 6000 Operating instructions...
-
Page 165: Chapter 7
This chapter contains a description of the web-based remote status applications that display information about the status of rolls, devices and hardware of the ROWE network printer RS / RCS series 4000 + 6000. Chapter 7: ROWE Print Manager: Remote status... -
Page 166: Introduction
Starting the ROWE Print Manager, proceed as follows: 1. Start the browser on a workstation that is connected to the ROWE system via the network. On the address line, enter the IP address or the host name of the ROWE device. The following... - Page 167 2. Start the application through clicking onto the name "PRINT MANAGER" [Fig. 221]: [221] Starting the application 'ROWE PRINT MANAGER' 3. The ROWE PRINT MANAGER screen opens [Fig. 222]: You may now open the corresponding remote status application by clicking onto it:...
-
Page 168: Printer Status
Field Function Status In this field the current status of the ROWE netw ork printer is show n. The indicated messages are identical w ith the indicated w arning and fault messages on the printer operator panel. See chapter 16 "Troubleshooting"... - Page 169 Models of series 4000 + 6000 have standard 600x600 dpi. Rolls In this field the number of rolls of the ROWE netw ork printer is show n. Serial number In this field the serial number of the selected ROWE netw ork printer is show n.
-
Page 170: Roll Status
Function Output units In this field the number of available stacking trays for folded draw ings on the ROWE online folder is shown. For instance, "3" is displayed in the case of a connected optional 3-tray sorter. [227] Description of the menu options "Printer status"... - Page 171 Column Function Rolls In this column the available rolls on the connected ROWE network printer are shown. Width In this column the preset roll widths on the ROWE network printer are shown. See chapter 15 "Replacing the toner / Inserting paper" for further information.
-
Page 172: Hardware Status
ROWE network printer. Note: The information contained on the menu "Hardware status" may be interesting in case of fault that may be solved through ROWE authorized support on the phone. ROWE Series 4000 + 6000 Operating instructions... -
Page 173: Rowe Print Manager: Queue Management
Chapter 8 ROWE Print Manager: Queue management This chapter describes the functions of the ROWE RS / RCS 4000 + 6000 queue management. The print queue is indicated and it is described how the active print job is aborted, print jobs in the print queues are deleted and stopped and how print jobs on hold are continued or printed jobs can be repeated. -
Page 174: Introduction
ROWE Print Manager. The first application is the ROWE Queue Manager LT. This application gives you an overview of the queued print jobs on the ROWE network printer. May may put them on hold, start, delete them or view a preview. - Page 175 2. Start the application through clicking onto the name "PRINT MANAGER" [Fig. 233]: [233] Starting the application "ROWE PRINT MANAGER" 3. The ROWE PRINT MANAGER screen opens [Fig. 234]: You may now open the corresponding Queue Manager application by clicking:...
-
Page 176: Rowe Queue Manager Lt
Function Job no. In this column a continuous job number automatically generated by the ROWE netw ork printer is show n. The job number w ill start at One again after each restart of the netw ork printer. In this column the user-assigned job name that w as sent Job name to the netw ork printer is show n. -
Page 177: Status
Note: The executable actions in column "Action" depend on the assigned user rights. See chapter "User management" for further information. Status The following table contains an overview of the possible messages in the "Status" column of the ROWE Queue Manager Chapter 8: ROWE Print Manager: Queue management... - Page 178 A corrupted file may be a file of a format that the printer cannot process or a file that w as corrupted on its transfer via the netw ork. [238] Description of the "ROWE Queue Manager LT" status ROWE Series 4000 + 6000 Operating instructions...
-
Page 179: Action
"Troubleshooting" Action The following table contains an overview of the button functions in the "Action" column of the ROWE Queue Manager LT. [239] Buttons in the "Action" column Message Meaning Start Clicking onto this button will restart the job concerned with "Suspend"... -
Page 180: Rowe Queue Manager
The following page will open after having clicked onto the "Queue Manager" button: [241] Overview of "ROWE Queue Manager" The "Queue Manager" menu is divided into five columns: The following section will explain the pages: ROWE Series 4000 + 6000 Operating instructions... -
Page 181: Configuration
ROWE network printer. This information is structured as follows: Status The current status of the ROWE network printer and the optional online folder are represented on the "Status" field. Furthermore, the inserted rolls with medium and width display. - Page 182 Queues The field "Queues" [Fig. 242] displays the queues selectable on the ROWE Print Master. Clicking onto the individual queues with the right mouse key opens a select menu [Fig. 243]: [243] Overview of the buttons of the select menu Start you enable the queue using this function.
- Page 183 Jobs The "Jobs" field [Fig. 244] displays the print jobs that were sent to the ROWE network printer. Clicking onto the individual jobs with the right mouse key opens a select menu: [244] Overview of the buttons of the select menu Details clicking onto this function will display the job properties (user, file name, etc.
-
Page 184: History
See chapter "User management" for further information. History The "History" page displays the jobs processed on the ROWE network printer on a list indexed by date. You cannot repeat print jobs from this page. This page serves for overview only. The "History"... - Page 185 [246] "History" page of the ROWE "Queue Manager" Selecting a day The following select menu [Fig. 247] will open on clicking onto the "Date" button: [247] Select menu for entering the date Select the corresponding date of the day you want to view on this selection window [Fig.
-
Page 186: Info
Readyjobs The "Readyjobs" page displays all print jobs processed and sent to the ROWE network printer since last reboot. The print jobs on this list can be issued again by clicking onto them. The "Readyjobs" page is structured as follows:... - Page 187 [249] "Readyjobs" page of the ROWE "Queue Manager" Select menu A select menu will open by clicking onto it using the right mouse key [Fig. 250]: [250] Select menu page "Readyjobs" Delete you delete the relevant print job using this function.
- Page 188 Note: The executable actions in the select menu depend on the assigned user rights. See chapter "User management" for further information. Note: The ROWE authorized service technician can set how long the print jobs on the "Readyjobs" page should be preserved for a second output.
-
Page 189: Rowe Print Manager: User Management
ROWE Series 4000 + 6000 Operating instructions Chapter 9 ROWE Print Manager: User management This chapter describes how the access rights for users and groups can be configured on the ROWE print manager. Chapter 9: ROWE Print Manager: User management... -
Page 190: Introduction
Starting the ROWE User Manager, proceed as follows: 1. Start the browser on a workstation that is connected to the ROWE system via the network. On the address line, enter the IP address or the host name of the ROWE device. The following... -
Page 191: Logging On The Rowe User Manager
3. The ROWE PRINT MANAGER screen opens [Fig. 257]: Now you can open the ROWE User Manager through clicking onto the corresponding button: [257] ROWE Print Manager Logging on to the ROWE User Manager The following page will open after having clicked onto the "User"... -
Page 192: Groups
The following section describes how to create new user groups and how to delete user groups. Click onto the "Groups" button to open the group menu [Fig. 260 no. 1]. The following page will open: ROWE Series 4000 + 6000 Operating instructions... - Page 193 "Description". Once you have entered these data, click onto button "Add group" in the "Action" column for creating a group. [261] Adding a group to the group administration of the ROWE User Management Chapter 9: ROWE Print Manager: User management...
-
Page 194: Users
Email the email address of the user concerned displays in this column. There is the optional possibility that the ROWE network printer sends a message to the user concerned via one of the mail server existing in the network that the print job originated by the user has been assigned. -
Page 195: Creating A New User
[263] Adding a user in the user management of ROWE User Management The following page will open [Fig. 264]: [264] Dialog field for adding a user in the user management of ROWE User Management Chapter 9: ROWE Print Manager: User management... - Page 196 Password enter the future logon password of the user to be created here. The user has to enter this password into the "Password" field on logging on to the ROWE Print Manager. Complete name you may enter the complete name of the user into this field.
-
Page 197: Changing The User Data / Password
The following figure represents a completely filled out input box as exemplarily: [265] Dialog field for adding a user in the user management of ROWE User Management Now conform your entries via the "OK" button. The following page will show: [266] Acknowledgement that a user has been added to the user management. - Page 198 [267] Changing a user account in the user management of ROWE User Management The following page will open [Fig. 268]: [268] Dialog field for changing a user in the user management of ROWE User Management You may now edit the user-specific data. Changing a password, you need to click onto the "Change password"...
-
Page 199: Deleting A User
[269] Dialog field for changing the password in the user management of ROWE User Management Now confirm your entries via the "OK" button. The following page will show [Fig. 270]: [270] Acknowledgement that a user has been changed to the user management. -
Page 200: Rights
[271] Changing a user account in the user management of ROWE User Management The following page will open [Fig. 272]: [272] Acknowledgement that a user has been changed to the user management. Rights The structure of the "Rights" page is described in the following section. - Page 201 The "Rights" page [Fig. 273] is divided into following columns: Page this column displays the applications and overview pages of the ROWE Print Manager to which the access rights can be defined. Description you may enter an individual description of the application into this column.
-
Page 202: Assigning The Access Rights
"Change" button in the line of the application concerned [Fig. 275]: [275] Changing the rights of access in the user management of ROWE User Management. The following page will open [Fig. 276]: ROWE Series 4000 + 6000 Operating instructions... - Page 203 [276] Dialog for changing the rights of access in the user management of ROWE User Management. Now select the users or groups in the input boxes who is to be granted access to the application concerned. The following input boxes are available:...
-
Page 204: Application Pages Overview
Function Name of the relevant application admin_accounting.py This page is in the "Admin" sector of the ROWE Print manager. You may create accounts for the optional Cost Control - Admin "Cost Control" application and make settings for the CSV file. See chapter 12 "Cost Control" for further information. -
Page 205: Chapter 10
Function Name of the relevant application admin_email.py This page is in the "Admin" sector of the ROWE Print manager. You may make settings for email notification on E-Mail - Admin this page. See chapter 14 "Administrative settings" for further information. - Page 206 "Stamp and Training Text Editor" application. See chapter preview 11 "Print Specials" for further information. help_java.py This page is in the start page of the ROWE Print Manager. It concerns the page containing information about the Java help text Java runtime environment. See chapter 14 "Administrative settings"...
-
Page 207: Chapter 10
See chapter 14 "Administrative settings" for further information. plot_accounting.py This page is in the "Cost Control" sector of the ROWE Print Manager. You may view an account overview on Cost Control this page which you also may download. See chapter 12 "Cost Control"... -
Page 208: Chapter 10
Function Name of the relevant application plot_jobs_view.py This page is in the "Print" sector of the ROWE Print Manager. It concerns the preview function in the "Queue Queue Manager LT _View Master LT" application. See chapter 8 "Queue Management" for further information. - Page 209 Function Name of the relevant application status_view_config This page is in the "Print" sector of the ROWE Print Manager. You configure over this page w hether the Queue Manager _View "Configuration" page is show n in the "Queue Manager" application. See chapter 8 "Queue Management" for further information.
- Page 210 ROWE Series 4000 + 6000 Operating instructions...
-
Page 211: Rowe Print Master
ROWE Series 4000 + 6000 Operating instructions Chapter 10 ROWE PRINT MASTER This chapter describes the functions of the application for transmitting jobs by means of which you may send print jobs with individual settings to the printer via the Web browser. -
Page 212: Introduction
ROWE network printer. You may load files into the ROWE PRINT MASTER LT, set print options for the job and send them to the ROWE printer. The second application is the ROWE PRINT MASTER. This application features... - Page 213 3. The ROWE Print Manager screen opens [Fig. 287]. You may now open the corresponding ROWE PRINT MASTER by clicking: [287] ROWE Print Manager Overview of the selectable applications: Chapter 10: ROWE PRINT MASTER...
-
Page 214: Rowe Print Master Lt
"Add to list" button. In this field you may print a single file. You may select Loading a file the corresponding file using the "Search" button. [289] Description of the "ROWE PRINT MASTER LT" structure Series 4000 + 6000 Operating instructions... - Page 215 Column Function In this field you may assign a job name to the file or set Job name to be output. This name w ill be indicated in the ROWE Queue Manager and acquired in the "COST CONTROL" application. Filetyp The ROWE netw ork printer identifies the file format of the draw ing automatically.
- Page 216 User name In this field the name w ill automatically be entered by w hich you have logged on the ROWE Print Manager. Rotate You may set rotational angles in this field by w hich the print files are rotated.
- Page 217 Output unit In this field you may select a certain stacking tray of the optional ROWE Sorter. Furthermore, you may select the front output of ROWE network printers that are equipped with this feature. Profile You determine via this field whether the gray or color parameters defined on the print file should be represented in gray steps.
-
Page 218: Executing A Print Job
Stamps In this field you may select and enable a stamps file defined on the ROWE network printer such that it will be printed onto the draw ing. In this field you may enter any texts that should be Labeling 1–8:... - Page 219 [Fig. 295] [295] Dispatching a print job in ROWE PRINT MASTER LT Note: The number of displayed fields in ROWE PRINT MASTER LT depends on the parameters set through the system administrator or the main user in the "Admin" section.
-
Page 220: Rowe Print Master
The following page will open after having clicked onto the "PRINT MASTER" button [Fig. 296]: [296] Overview of "ROWE PRINT MASTER" The "PRINT MASTER" application is divided into various fields. The function of the groups are explained in the following overview and the table following it: [297] Overview of "ROWE PRINT MASTER"... -
Page 221: Toolbar
You start the print job using this button. The file Print from the file list w ith the set parameters w ill be output on the selected printer. [298] Overview of ROWE PRINT MASTER toolbar Chapter 10: ROWE PRINT MASTER... -
Page 222: File List
Load initial Using this button w ill load the default values of values the ROWE PRINT MASTER into all fields. [299] Overview of ROWE PRINT MASTER toolbar File list The file list [Fig. 297 no. 2] states the drawings selected for output. -
Page 223: Print Job
"COST CONTROL" application. In this field you may assign a job name to the file or set Job name: to be output. This name w ill be indicated in the ROWE Queue Manager and acquired in the "COST CONTROL" application. -
Page 224: Bottleneck Response
[302] Description of the ROWE PRINT MASTER "Job" page Bottleneck response You define the response of the ROWE network printer to an event at job output on the "Bottleneck response" page [Fig. 297 no. 4] . [303] View of the ROWE Print Master "Bottleneck response" page... - Page 225 Request: The print file will only be output if the required format is available. The printer will indicate lack of resources at missing format. See chapter 2 "Lack of resources" for further information! [304] Description of the ROWE PRINT MASTER "Bottleneck response" page Chapter 10: ROWE PRINT MASTER...
-
Page 226: Preset
Request: The printer w ill indicate lack of resources if the desired tray is busy. See chapter 2 "Lack of resources" for further information! [305] Description of the ROWE PRINT MASTER "Bottleneck response" page Preset The file-related standard settings are made on the "Preset" page [Fig. - Page 227 Tray In this field you may select a certain stacking tray of the optional ROWE Sorter " Belt 1–3 ". Furthermore, you may select the front output of ROWE network printers that are equipped with this feature " Front ". The default settings are "...
- Page 228 The docum ent will be autom atically fed to the folder in correct position in connection with input of the title block position. [308] Description of the ROWE PRINT MASTER "Preset" page Series 4000 + 6000 Operating instructions...
- Page 229 DIN A3 roll for still being output to this roll. The output will of course be cut by these 2 mm. The tolerance can be changed in steps of 0.25 mm. [309] Description of the ROWE PRINT MASTER "Preset" page Chapter 10: ROWE PRINT MASTER...
- Page 230 "Job" page. In this field you may select and enable a stamps file Stamp defined on the ROWE network printer such that it will be printed onto the drawing. Note: Stamps can be created via the optional stamp editor in the "ROWE PRINT SPECIALS"...
-
Page 231: Margins
Following settings are available: [311] Overview of the ROWE PRINT MASTER "Change margin" page Note: The margins are directly conveyed to the printer and hence are always absolute values. They will neither be influenced by rotation nor scaling. -
Page 232: Executing A Print Job
A stamp placed outside would not be visible on the output document. Executing a print job Executing a print job on ROWE PRINT MASTER, proceed as follows: 1. Upload the file to be printed to the ROWER PRINT MASTER by clicking onto the "Add file"... - Page 233 [314] Printing from the ROWE PRINT MASTER Note: See chapter 11 "ROWE PRINT SPECIALS" for further information about the subjects stamping and labeling Note: See chapter 12 "ROWE COST CONTROL" for further information about the subject cost centers Chapter 10: ROWE PRINT MASTER...
- Page 234 Series 4000 + 6000 Operating instructions...
-
Page 235: Rowe Print Specials
ROWE Series 4000 + 6000 Operating instructions Chapter 11 ROWE PRINT SPECIALS This chapter describes the software applications for editing stamps, trailing texts, cover sheets and folding programs. Chapter 11: ROWE PRINT SPECIALS... -
Page 236: Introduction
Starting the ROWE PRINT SPECIALS, proceed as follows: 1. Start the browser on a workstation that is connected to the ROWE system via the network. On the address line, enter the IP address or the host name of the ROWE device. The following... - Page 237 2. Start the application through clicking onto the name "PRINT MANAGER" [Fig. 321] [321] Starting the application "ROWE PRINT MANAGER" 3. The ROWE PRINT MANAGER screen opens [Fig. 322]. Now open the ROWE PRINT SPECIALS by clicking: [322] ROWE Print Manager...
-
Page 238: Rowe Folding Program Editor
4. The ROWE PRINT SPECIALS screen opens [Fig. 323]: [323] ROWE PRINT SPECIALS Overview of the selectable applications: ROWE Folding program editor The following page will open after having clicked onto the "Folding programs" button: [324] Overview of "Folding program editor"... - Page 239 " True " or not " False ". Note: The automatic tab applicator is an optional accessory to the online folding system. [325] Description of the ROWE folding program editor structure Chapter 11: ROWE PRINT SPECIALS...
- Page 240 Note: The number of standard folding programs depends on the installed options (automatic tab applicator / perforating device / sorter) of the online folding system. The ROWE fold editor is provided with three additional buttons [Fig. 327]: Add folding program: Clicking onto this button will open the editor for creating a new folding program.
-
Page 241: Creating A Folding Program
[327] Overview of "Folding program editor" Creating a folding program Creating a folding program, proceed as follows: 1. Click onto the "Add folding program" button [Fig. 328]. [328] Adding a folding program 2. The following page will open: [Fig. 329] Chapter 11: ROWE PRINT SPECIALS... - Page 242 10. You create the folding program by clicking onto the "OK" button. 11. Using the newly created folding program you want to enable the folding program overview through clicking onto the "Enable folding programs" button. [Fig. 330] [330] Enabling a folding program ROWE Series 4000 + 6000 Operating instructions...
-
Page 243: Changing A Folding Program
4. You create the folding program by clicking onto the "OK" button. 5. Using the newly created folding program you want to enable the program through clicking onto the "Enable folding programs" button. [Fig. 333] Chapter 11: ROWE PRINT SPECIALS... -
Page 244: Deleting A Folding Program
[334] Deleting a folding program 2. The following page will open: [Fig. 335] [335] Folding program deleted 3. Update the folding program overview by clicking onto the "Enable folding programs" button. [Fig. 336] ROWE Series 4000 + 6000 Operating instructions... -
Page 245: Rowe Labeling Editor
ROWE Labeling editor The following page will open after having clicked onto the "Labeling" button: [337] "Labeling editor" overview The "Labeling editor" application is divided into six columns: The following table explains the functions of the columns: Chapter 11: ROWE PRINT SPECIALS... -
Page 246: Creating Labeling
Action "change", "delete" labeling or "preview " it. See section "Actions" from page xx for further information [338] Description of the ROWE labeling editor structure Note: You may represent any labeling inside or outside the drawing; i.e. if you position the labeling outside the drawing then the output document will be issued correspondingly larger by the labeling - as opposed to any stamp. - Page 247 [339] Adding labeling 2. The following page will open: [Fig. 340] [340] Labeling editor 3. Now define the desired parameters. The next table shows on overview of the input boxes. [Fig. 341] Chapter 11: ROWE PRINT SPECIALS...
- Page 248 In this field, you may set the absolute position of labeling Absolute on the print file via X and Y values. Note: When you enter an absolute position then the relative position w ill be disregarded. [341] Description of the labeling editor ROWE Series 4000 + 6000 Operating instructions...
-
Page 249: Changing Labeling
[342] Description of the labeling editor 4. Now select the desired parameters and confirm your entry through clicking onto the "OK" button. Changing labeling Changing labeling, proceed as follows: 1. Click onto the "Change" button [Fig. 343]. Chapter 11: ROWE PRINT SPECIALS... -
Page 250: Deleting Labeling
"OK" button. Deleting labeling Deleting labeling, proceed as follows: 1. Click onto the "Delete" button [Fig. 344]. [344] Deleting labeling 2. The following page is shown: [Fig. 345] [345] Deleting labeling ROWE Series 4000 + 6000 Operating instructions... -
Page 251: Labeling Preview
Labeling preview For labeling preview, proceed as follows: 1. Click onto the "Preview" button [Fig. 346]. [348] Labeling preview 2. The following page is shown: [Fig. 347] [347] Labeling preview Chapter 11: ROWE PRINT SPECIALS... -
Page 252: Rowe Stamp Editor
This columns offers you three buttons enabling you to This columns offers you three buttons enabling you to Action "change", "delete" the stamp or "preview" it. "change", "delete" the stamp or "preview" it. [349] Description of the ROWE stamp editor structure ROWE Series 4000 + 6000 Operating instructions... -
Page 253: Creating A Stamp
Creating a stamp Creating a stamp, proceed as follows: 1. Click onto the "Add stamp" button [Fig. 350]. [350] Adding a stamp 2. The following page will open: [Fig. 351] [351] Stamp editor Chapter 11: ROWE PRINT SPECIALS... - Page 254 [352] Stamp editor 3. Now define the desired parameters. The next table shows an overview of the input boxes. [Fig. 353] ROWE Series 4000 + 6000 Operating instructions...
- Page 255 In this field, you may set the absolute stamp position on Absolute the print file via X and Y values. Note: When you enter an absolute position then the relative position will be disregarded. [353] Stamp editor description Chapter 11: ROWE PRINT SPECIALS...
-
Page 256: Changing A Stamp
4. Now select the desired parameters and confirm your entry through clicking onto the "OK" button. Changing a stamp Changing a stamp, proceed as follows: 1. Click onto the "Change" button [Fig. 355]. ROWE Series 4000 + 6000 Operating instructions... -
Page 257: Deleing A Stamp
"OK" button. Deleting a stamp Deleting a stamp, proceed as follows: 1. Click onto the "Delete" button [Fig. 356]. [357] Deleting a stamp 2. The following page is shown: [Fig. 358] [358] Deleting a stamp Chapter 11: ROWE PRINT SPECIALS... -
Page 258: Previewing A Stamp
Stamp preview For stamp preview, proceed as follows: 1. Click onto the "Preview" button [Fig. 359]. [359] Stamp preview 2. The following page is shown: [Fig. 360] [360] Stamp preview ROWE Series 4000 + 6000 Operating instructions... -
Page 259: Rowe Cover Sheet Editor
This columns offers you two buttons enabling you to Action "change" or "delete" the cover sheet. [362] Description of the ROWE Cover Sheet Editor structure Note: You may upload a wallpaper into the cover sheet. The corresponding file should not be larger than a A4 sheet and have the TIFF file format. -
Page 260: Creating A Cover Sheet
[363] Adding a cover sheet 2. The following page will open: [Fig. 364] [364] Cover sheet editor 3. Now define the desired parameters. The next table shows on overview of the input boxes. [Fig. 365] ROWE Series 4000 + 6000 Operating instructions... -
Page 261: Changing A Cover Sheet
"OK" button. Changing a cover sheet Changing a cover sheet, proceed as follows: 1. Click onto the "Change" button [Fig. 366]. [366] Changing a cover sheet 2. The editor page will open: [Fig. 367] Chapter 11: ROWE PRINT SPECIALS... -
Page 262: Deleting A Cover Sheet
Deleting a cover sheet, proceed as follows: 1. Click onto the "Delete" button [Fig. 368]. [368] Deleting a cover sheet 2. The following page is shown: [Fig. 369] [369] Deleting a cover sheet ROWE Series 4000 + 6000 Operating instructions... - Page 263 ROWE Series 4000 + 6000 Operating instructions Chapter 12 ROWE COST CONTROL This chapter describes the use of the comprehensive cost center management. You may assign any print job to a cost center and have it stored as log file.
-
Page 264: Introduction
Starting the ROWE COST CONTROL, proceed as follows: 1. Start the browser on a workstation that is connected to the ROWE system via the network. On the address line, enter the IP address or the host name of the ROWE device. The following... - Page 265 2. Start the application through clicking onto the name "PRINT MANAGER" [Fig. 376] [376] Starting the application "ROWE PRINT MANAGER" 3. The ROWE PRINT MANAGER screen opens [Fig. 377]. Now open the ROWE COST CONTROL application by clicking on it: [377] ROWE Print...
- Page 266 4. The ROWE COST CONTROL screen opens [Fig. 378]: [378] ROWE COST CONTROL The "ROWE COST CONTROL" application is divided into three columns. The following table explains the meanings of the columns: Column Meaning Account This column indicates the name of the cost center account.
-
Page 267: Storing The Cost Center Data
[380] Downloading the cost center data 2. The following selection window will open: [Fig. 381] [381] Selection window 3. Assign an individual file name, select the desired storage position and store the file through clocking onto the "Save" button. Chapter 12: ROWE COST CONTROL... -
Page 268: Selecting The Data For The Cost Center File
Selecting the data for the cost center file, proceed as follows: 1. Click onto the "Preferences" button [Fig. 382]. [382] Setting the cost center data 2. The following selection window will open: [Fig. 383] ROWE Series 4000 + 6000 Operating instructions... -
Page 269: Creating A New Cost Center Account
"Save" button. Creating a new cost center account Creating a new cost center account, proceed as follows: 1. Now open the administrative sector by clicking onto the "Admin" button [384]: Chapter 12: ROWE COST CONTROL... - Page 270 [384] "Admin" sector 2. The "Admin" screen opens [Fig. 385]. Select "Configuration accounting" by clicking onto the link. [385] "Admin" sector 3. Select "Edit accounts" by clicking onto the link [Fig. 386]. ROWE Series 4000 + 6000 Operating instructions...
- Page 271 [387] Edition the "Admin" sector Note: Access to the optional applications described depends on which user rights were assigned to you by the main user or system administrator and whether the device has the described option. Chapter 12: ROWE COST CONTROL...
- Page 272 Selecting a cost center account via the ROWE printer driver: You may select the available cost centers in the print settings of the ROWE printer driver via the "Account" field on the "ROWE" page [Fig. 389]: [389] "Printer driver" overview...
-
Page 273: Selecting A Cost Center Account Via The Rowe View Application
Selecting a cost center account via the ROWE VIEW application: With the ROWE network printer selected, you find the field "Account" on the "Setting" page in the "Scan to Copy" sector where you may select the available cost centers [Fig. 390]: [390] "Printer driver"... - Page 274 Trailing text Cover sheet options [391] Overview "Cost centers" on ROWE network scanner Note: See chapter 3 "Using the ROWE RS / RCS / RC 4000 + 6000 for copying" for further information: ROWE Series 4000 + 6000 Operating instructions...
-
Page 275: Chapter 13
ROWE Series 4000 + 6000 Operating instructions Chapter 13 ROWE Printer driver This chapter describes printing via the ROWE Post Script. Chapter 13: ROWE Printer driver... -
Page 276: Introduction
ROWE Printer driver Introduction Using the ROWE printer driver, you may print of the ROWE network printer from various applications. You may make a number of settings such as selecting a folding program via the printer driver. The ROWE printer drivers split up into the standard ROWE Postscript printer driver and the ROWE HPGL printer driver. - Page 277 [396] Advanced options overview 3. Select a paper source from the "Paper/Quality" page [Fig. 397] [397] Paper/Quality overview 4. You may make the following settings on the "ROWE" page: [398] [398] ROWE overview Chapter 13: ROWE Printer driver...
- Page 278 The following overview explains all options of the "ROWE" page: Column Function In this field, you may select the material onto w hich the Material file should be printed. In this field you may determine the scaling mode for the Scaling mode job to be printed.
- Page 279 [400] Description of the "ROWE" page Adopt your selection via the "OK" button. Note: The structure of the ROWE HPGL printer driver is almost identical to the ROWE PS printer driver Note: The ROWE authorized service technician will give you individual instructions on how to print from your applications.
- Page 280 ROWE Series 4000 + 6000 Operating instructions...
-
Page 281: Chapter 14
ROWE Series 4000 + 6000 Operating instructions Chapter 14 Administrative settings This chapter describes the parameters enabling the system administrator to adapt the device to the local structural network conditions and applications. Chapter 14: Administrative settings... -
Page 282: Introduction
1. Start the browser on a workstation that is connected to the ROWE system via the network. On the address line, enter the IP address or the host name of the ROWE device. The following page will open: ROWE Series 4000 + 6000 Operating instructions... - Page 283 [405]ROWE Print Manager /ROWE Scan Manager on ROWE RCS 2. Start the application through clicking onto the name "PRINT MANAGER" [Fig. 406]: [406] Starting the application 'ROWE PRINT MANAGER' 3. The ROWE PRINT MANAGER screen opens [Fig. 407]: Now you can open the ROWE User Manager through...
- Page 284 [408] Overview ROWE User Management "User". The system will prompt you to log on after clicking onto the buttons: [409] ROWE Print Manager logon dialog The factory-set standard access data are: User name: administrator Password: admin ROWE Series 4000 + 6000 Operating instructions...
- Page 285 [410] Changing a user account in the user management of ROWE User Management The following page will open [Fig. 411]: [411] Dialog field for changing a user in the user management of ROWE User Management You may now edit the user-specific data. Changing a password, you need to click onto the "Change password"...
- Page 286 "Password" line and then enter the new password [Fig. 412]: [412] Dialog field for changing the password in the user management of ROWE User Management Now conform your entries via the "OK" button. The following page will show [Fig. 413]: [413] Acknowledgement that a user has been changed to the user management.
-
Page 287: System Configuration
1. Start the browser on a workstation that is connected to the ROWE system via the network. On the address line, enter the IP address or the host name of the ROWE device. Start the application on the following page by clicking onto the name "System configuration":... -
Page 288: Changing The System Language
1. Start the browser on a workstation that is connected to the ROWE system via the network. On the address line, enter the IP address or the host name of the ROWE device. Start the application on the following page by clicking onto the name "System configuration":... -
Page 289: Changing The Network Settings
1. Start the browser on a workstation that is connected to the ROWE system via the network. On the address line, enter the IP address or the host name of the ROWE device. Start the application on the following page by clicking onto the... - Page 290 "System configuration": [420]ROWE Print Manager /ROWE Scan Manager on ROWE RCS 2. The password query will show (factory setting: administrator / admin) [Fig. 421]: [421] System configuration, password query 3. Select the menu option "Network" on the opening screen.
-
Page 291: Changing The System Time
1. Start the browser on a workstation that is connected to the ROWE system via the network. On the address line, enter the IP address or the host name of the ROWE device. Start the application on the following page by clicking onto the name "System configuration":... - Page 292 3. Select the menu option "Time" on the opening screen. You may now change the network settings on this page: [425] Setting the network settings Adopt the time settings using the "Change" button and exit the page over the "Main menu" button. ROWE Series 4000 + 6000 Operating instructions...
-
Page 293: Shutting Down The System
1. Start the browser on a workstation that is connected to the ROWE system via the network. On the address line, enter the IP address or the host name of the ROWE device. Start the application on the following page by clicking onto the name "System configuration":... - Page 294 1. Start the browser on a workstation that is connected to the ROWE system via the network. On the address line, enter the IP address or the host name of the ROWE device. Start the application on the following page by clicking onto the name "System configuration":...
- Page 295 [429]ROWE Print Manager /ROWE Scan Manager on ROWE RCS 2. The password query will show (factory setting: administrator / admin) [Fig. 430]: [430] System configuration, password query 3. Select the menu option "Remote maintenance" on the opening screen. You may now change the network settings...
- Page 296 Enter the user passw ord into this field at enabled proxy_auth_passwd authentication. [432] Remote maintenance overview Note: Enter a "0" into the "proxy_enabled" field if your direct Internet connection is established via router. All the device needs is an activated port 443. ROWE Series 4000 + 6000 Operating instructions...
-
Page 297: Enabling Remote Maintenance
1. Start the browser on a workstation that is connected to the ROWE system via the network. On the address line, enter the IP address or the host name of the ROWE device. Start the application on the following page by clicking onto the name "System configuration":... -
Page 298: Energy Saving Mode
Energy saving mode You may set different energy saving modes via the operator panel on the ROWE network printer. The operating mode to be set depends on the queued print volume and the desired printer availability. When in energy-saving phase, the fusing heating will be reduced or completely switched off after an adjustable delay. - Page 299 You may determine the energy-saving parameters on the operator panel of the ROWE network printer RS / RCS. Setting the energy- saving mode, proceed as follows: 1. Keep the enter button [Fig. 436] depressed for three seconds, then the menu will open [436] Enter button on the operator panel Using the arrow buttons 'Up/Down' [Fig.
- Page 300 Operating mode 3 . The energy-saving mode will be only enabled outside the preset core time. In this mode, energy saving is additionally enabled during the preset weekend. ROWE Series 4000 + 6000 Operating instructions...
- Page 301 Delay Using the arrow buttons 'Left/Right' [Fig. 441], you may now set "Delay" in minutes. Confirm you selection using the enter button. You may abort the process and exit the menu by using the offline button: Delay: 5 min. [441] Delay overview The delay time determines after what time (minutes) the network printer that waked up from the energy-saving mode through a print job and output the job will fall back into the energy-saving mode...
- Page 302 Setting is in °C. This value is the temperature to which the fusing system is lowered at energy-saving mode. The lower the preset temperature the lower the energy consumption will be, however, the longer the period will be ROWE Series 4000 + 6000 Operating instructions...
- Page 303 the printer would need after a long energy-saving time to reach its operating temperature again. Settings are possible in the range of 25 °C to 150 °C. Chapter 14: Administrative settings...
- Page 304 ROWE Series 4000 + 6000 Operating instructions...
-
Page 305: Chapter 15
Operating instructions Chapter 15 Replacing the toner / Inserting paper This chapter describes how to replenish paper and toner. It is furthermore explained how you would configure the ROWE DISPLAY OF REMAINING LENGTH Chapter 15: Replacing the toner / Inserting paper... - Page 306 Material The ROWE network printer series 4000 + 6000 is available in a variety of configurations, ranging from two rolls in a single drawer, three rolls in two drawers or, in a maximum configuration, fours rolls also in two drawers.
-
Page 307: Rowe Paper Input Assistant
ROWE PAPER INPUT ASSISTANT. [450] Removing of the additional trough metal sheet in the ROWE Paper Input Assistant. ROWE PAPER INPUT ASSISTANT The ROWE PAPER INPUT ASSISTANT is the innovative media feed system of the ROWE series 4000 + 6000. Changing of paper roll is simple, quick and absolutely ergonomic and without roll core. -
Page 308: Replenishing Paper
1. Press the "Offline" button for setting the ROWE RS/RCS 4000 + 6000 network printer to offline mode. [Fig. 451] [451] Right: 'Offline' button on ROWE RS; Left: 'Offline' button on ROWE RCS 2. Open the respective roll feeder [Fig. 452]. - Page 309 6. Insert a new roll [Fig. 455]. [455] Inserting a roll into the ROWE PAPER INPUT ASSISTANT 7. Now slide the ROWE PAPER INPUT ASSISTANT together [Fig. 456]. [456] Sliding the ROWE PAPER INPUT ASSISTANT together Chapter 15: Replacing the toner / Inserting paper...
- Page 310 [459] Cutter buttons for roll 1 and 2 11. Close the drawer now and press the 'Online' button [Fig. 460] to indicate that the device is ready. [460] Right: 'Online' button on ROWE RS; Left: 'Online' button on ROWE RCS ROWE Series 4000 + 6000 Operating instructions...
- Page 311 R4 297 mm paper 100% [461] Overview of display dialog and buttons to be pressed Note: The ROWE RS / RCS network printer can automatically detect the roll width. However, you will need to inform the device about the type of medium and remaining length nevertheless. You have to preselect the size of the inserted material if you do not have optional roll width detection since the device cannot identify this by itself.
- Page 312 >Paper Transparent Polyester Film [464] Overview of display dialog and buttons to be pressed The following materials are standard stored on the device: - Paper - Transparent - Polyester - Film ROWE Series 4000 + 6000 Operating instructions...
- Page 313 1. On the operator panel, press the offline button [Fig. 465] to switch the printer to offline. The display will then show "Offline". [465] Left: 'Offline' button on ROWE RS; Right: 'Offline' button on ROWE RCS 2. On the printer operator panel, press the button for the roll menu [Fig.
- Page 314 [469] Overview of display dialog and buttons to be pressed The following standard roll widths are standard stored on the device. Further standard formats can be set on request or you use the user- defined roll width: - ISO A3 297 mm ROWE Series 4000 + 6000 Operating instructions...
-
Page 315: Determining The Roll Width
- ISO A2 420 mm - ISO A1 594 mm - ISO A0 841 mm - ISO B3,364 mm - ISO B2,515 mm - ISO B1 728 mm - ARCH B 12" 305 mm - ANSI C 17" 432 mm - ARCH B 18"... -
Page 316: Rowe Display Of Remaining Length
1. On the operator panel, press the offline button [Fig. 472] to switch the printer to offline. The display will then show "Offline". [472] left offline button on ROWE RS / right offline button on ROWE RCS 2. On the printer operator panel, press the button for the roll menu [Fig. - Page 317 3. Using the arrow buttons 'Up/Down' [Fig. 474], select the roll to be set and confirm your selection via the enter button. This will get you automatically to the next entry level. You may abort the process and exit the menu by using the offline button. >...
-
Page 318: Filling-Up The Toner
1. On the operator panel, press the offline button [Fig. 476] to switch the printer to offline. The display will then show "Offline". [476] left offline button on ROWE RS / right offline button on ROWE RCS 2. Now open the upper printer cover. The toner cartridge is located under the cover. - Page 319 3. Remove the old toner cartridge. For this purpose, pull back the green mounting block and remove the cartridge [Fig. 478] [Removing the old toner cartridge] 4. Shake the new cartridge at least 20 times before inserting it [Fig. 479]. [479] Shaking the new toner cartridge 5.
-
Page 320: Replacing The Waste Toner Container
Thereby the original toner concentration will be restored. [482] left offline button on ROWE RS / right offline button on ROWE RCS Note: Check the toner level in the store tank after removing the empty cartridge. - Page 321 1. On the operator panel, press the offline button [Fig. 483] to switch the printer to offline. The display will then show "Offline". [483] left offline button on ROWE RS / right offline button on ROWE RCS 2. Now open the left side flap on the printer. The waste toner container is located behind the cover [Fig.
- Page 322 [Fig. 486]. [486] Removing the protective film of the adhesive tape 5. Now fold the upper flap of the container downward thus closing the inlet opening [Fig. 487]. [487] Closing the waste toner container ROWE Series 4000 + 6000 Operating instructions...
- Page 323 6. You may dispose the waste toner container once you have closed it [Fig. 488]. [488] Disposing the waste toner container 7. Make sure that all toner cartridges have been removed from the toner covering box. Following this, remove the protective film from the adhesive tape on the sides and lower edge [Fig.
- Page 324 Thereby the original toner concentration will be restored. [492] left offline button on ROWE RS / right offline button on ROWE RCS Note: Make sure that the waste toner outlet tube is inside the opening of the waste toner container since otherwise there might be a fault in the region of the waste toner cleaning unit.
-
Page 325: Chapter 16
ROWE Series 4000 + 6000 Operating instructions Chapter 16 Troubleshooting This chapter describes the faults that may occur operating the ROWE systems series 4000 + 6000 and how you would remedy them. Chapter 16: Troubleshooting... - Page 326 There is the following differentiation of messages: Note: An occurring fault will cause ROWE RCS models to use the whole display for indicating a disturbance. You may acknowledge the fault over the red Stop button or go back to standard view. The fault is displayed again once you depressed the online/offline button for three seconds.
-
Page 327: Status Messages
Roll 3 empty Roll 4 empty Fault messages Immediate stop of print process The display indicates in the case of fault what problem it is and where it occurred. Immediate user intervention is requested. The following messages are fault messages: Jam magazine Jam cutter Jam drum... - Page 328 [497] Display of "Shut down" Energy-saving mode: The printer is in the energy-saving mode. The energy-saving mode will be left upon a new print job [Fig. 498]. Energy-saving mode [498] Display of "Energy-saving mode" ROWE Series 4000 + 6000 Operating instructions...
-
Page 329: Warning Messages
The following warning messages can display: Service check: "Service check" [Fig. 500] on the display means that the printer needs to be serviced by a ROWE authorized service technician. Make a service check appointment with the ROWE authorized specialist dealer. See chapter 17 for further information. - Page 330 Note: If you did not respond to the lack of resources dialog within one minute the printer will automatically assume the status "on hold"! This period can be individually adapted through a ROWE authorized service technician. Toner warning: The toner is almost empty. You need to refill toner.
-
Page 331: Fault Messages
The following fault messages can display: No PC contact : The internal device control is without contact to the internal PC. Shut down the ROWE system using the red Stop button (offline). Switch off the device via the master switch. Wait 30 seconds and then switch on the ROWE system again. - Page 332 Jam fusing : This message [Fig. 508] means that there is a jam in the region of the fusing unit or rear output. See this chapter, section "Removing paper jams" for further information. Jam fusing [508] Jam message "Jam fusing" ROWE Series 4000 + 6000 Operating instructions...
- Page 333 Jam transition device [510] Jam message "Jam transition device" Jam fan folder : This message [Fig. 511] can only appear on ROWE systems with connected online folder. The message means that there is a jam in the fan folding region of the folder. See chapter "Jam elimination"...
- Page 334 [514] Fault message "Jam cutter" Jam fusing heating : This message [Fig. 515] means that there is a fault in the fusing region of the printer. Shut down the ROWE system using the red Stop button (offline). Switch off the device via the master switch.
- Page 335 Fault memory : This message [Fig. 516] can only appear on ROWE systems with connected online folder. The message means that there is a fault in the job memory of the folder. Shut down the ROWE system using the red Stop button (offline). Switch off the network printer and the folder via the master switch.
- Page 336 [518] Fault message "Fault perforator" General fault : The internal device control is without contact to the external modules. Shut down the ROWE system using the red Stop button (offline). Switch off the device via the master switch. Wait 30 seconds.
- Page 337 This message can occur after a print process on film and a following job on paper. If this message does not disappear within a couple of minutes, shut down the ROWE system via the red Stop (offline) button. Switch off the device via the master switch. Wait 30 seconds.
- Page 338 This message can occur after a print process on paper and a following job on film. If this message does not disappear within a couple of minutes, shut down the ROWE system via the red Stop (offline) button. Switch off the device via the master switch.
- Page 339 Toner empty [525] Message "Toner empty" Folder open : This message [Fig. 526] can only appear on ROWE systems with connected online folder. It means that a door or cover of the folder is not closed. See chapter "Open cover" in the folder operating instructions for further information.
- Page 340 Folder service mode [529] Message "Folder service mode" Folder manual : This message [Fig. 530] can only appear on ROWE systems with connected online folder. It means that the folder is used as offline folder via manual feed right now. That is to say, no online folding processes can be carried out.
-
Page 341: Removing Jammed Originals
Tray 1 full [Message "Tray 1 full"] No filing tab : This message [Fig. 532] can only appear on ROWE systems with connected online folder with automatic tab applicator. It means that the filing tab roll on the folder is empty, i.e. jobs with filing tabs can no longer be executed. -
Page 342: Removing Paper Jams
2. With the drives stationary, open the upper part of the scanner by depressing the release button on the right side [Fig. 534]. [534] Stop button on the ROWE RS / ROWE RCS 3. Remove the jammed original [Fig. 535]. -
Page 343: Drum Jam
papers is dynamically monitored during the print process. There will be a corresponding jam message in the event that the front edge of the paper did not turn up after the calculated time. The printer responds automatically to a jam by turning off the drives, releasing a cut and retracting the paper rolls into the drawers. - Page 344 1. Press the "Offline" button for setting the ROWE RS/RCS 4000 + 6000 network printer to offline mode. [Fig. 537] [537] Right: 'Offline' button on ROWE RS; Left: 'Offline' button on ROWE RCS 2. Open the respective roll feeder [Fig. 538].
-
Page 345: Troubleshooting
8. Close the drawer now. 9. Press the 'Online' button [Fig. 540] for reporting the device ready. [540] Right: 'Online' button on ROWE RS; Left: 'Online' button on ROWE RCS Jam drum The drum region is sensor-monitored. The message "Jam drum" signals that the print medium has not been properly separated from the drum. - Page 346 Please be extremely careful when removing a paper jam in this region. Let the device cool at least 15 minutes with its rear cover open before you start eliminating the jam. Procedure at non-automatic paper clearance: ROWE Series 4000 + 6000 Operating instructions...
- Page 347 1. Press the "Offline" button for setting the ROWE RS/RCS 4000 + 6000 network printer to offline mode [Fig. 543] . [543] Right: 'Offline' button on ROWE RS; Left: 'Offline' button on ROWE RCS 2. On the rear of the device, open the cover above the paper output [Fig.
- Page 348 7. Press the 'Online' button [Fig. 546] for reporting the device ready. [546] Right: 'Online' button on ROWE RS; Left: 'Online' button on ROWE RCS Jam in output in the case of a jam in the A cut is automatically carried out...
- Page 349 6. Now close all covers. 7. Press the 'Online' button [Fig. 550] for reporting the device ready. [550] Right: 'Online' button on ROWE RS; Left: 'Online' button on ROWE RCS Troubleshooting The following faults may normally be remedied through the operator.
- Page 350 The device is operational, the system signals "Ready for printing" on the display but you do not have network connection to the device. >> Check the network lead. >> Check network connection from another workstation. ROWE Series 4000 + 6000 Operating instructions...
- Page 351 ROWE Series 4000 + 6000 Operating instructions Chapter 17 Maintenance This chapter describes cleaning of the glass plate and the reference roll as well as the behavior at service check display. Chapter 17: Maintenance...
- Page 352 1. On the operator panel, press the offline button [Fig. 555] to switch the printer off. [555] Stop button on the ROWE RS / ROWE RCS 2. After the network scanner has been shut down, switch it off and isolate the device from mains.
- Page 353 The device informs you automatically about due service. You do not have to interrupt you work in this case but you should order ROWE authorized service within the next days. 1. The device signals maintenance requirements using the message "Service check".
- Page 354 ROWE Series 4000 + 6000 Operating instructions...
-
Page 355: Technical Specifications
Technical data / Options Technical specifications Operating system licenses This chapter contains information about the standard scope of delivery, the options of the ROWE Series 4000 + 6000 as well as the technical specifications and licenses of the operating system. Appendix A... - Page 356 ROWE. Java runtime environment Prerequisite for full functionality of the ROWE application are browser and Java runtime from following versions: Internet Explorer from version 6 or higher Netscape Navigator from version 7 or higher Mozilla from version 1.2 or higher...
- Page 357 Appendix A Technical specifications Network integration The printer needs to be connected to the computer environment via a LAN port and supports all standard network protocols via the operating system. Hence the printer can be employed in various network environments, e.g.
- Page 358 ROWE Series 4000 + 6000 Operating instructions...
-
Page 359: Information On Safety
ROWE Series 4000 + 6000 Operating instructions Appendix B Disclaimer Information on safety Safety notes Safety data sheets This chapter informs you about the risks of the ROWE systems 4000 + 6000 series pertaining to health and material assets Appendix B... - Page 360 ROWE whether this is the latest version of the data sheet. We do not accept any liability for completeness and correctness of these material safety data sheets to the extent permitted by law.
-
Page 361: Safety Notes
Appendix B Safety notes Before installation Peruse the operating instructions with their safety notes. See that every operator reads the operating instructions. Always leave the documents at the device. Check the conditions at the designated place of installation. Room conditions Provide for: sufficient free space beside the machine sufficient ventilation of the system... -
Page 362: Appendix B
Appendix B Safety notes Installation and commissioning The connecting terminal must only be a VDE checked grounding-type receptacle that must be located in the vicinity of the machine. Check before connecting whether the mains voltage corresponds to the rated voltage stated on the type plate. -
Page 363: Appendix B
Exclusively use original ROWE toner units (BT0000/07/ 00/22) and original ROWE developer units (BT0000/07/00/ 27) . Use of third-party toner units or developer units may damage the ROWE system. ROWE will not accept any liability for damages caused by using third-party toner units or developer units. -
Page 364: Appendix B
Appendix B Safety notes The operating staff is obliged to the following: Refrain from any mode of operation that compromises system safety and functionability. Make sure that only instructed and authorized personnel are working on the systems. Report changes that compromise system safety and functionability. -
Page 365: Appendix B
Appendix B Safety data sheets Safety data sheet Product Safety data sheet Magnet Roller Safety data sheet OPC photoconductor drum Safety data sheet Toner unit - according to EC Directive 91/155 Appendix B... -
Page 366: Appendix B
Room temperature: Recommendation 20 – 27 °C Relative air humidity: Recommendation 30 – 60 % Working material: ROWE Organic photoconductor drum BT 0000/07/00/001 ROWE Toner BT 0000/07/00/022 ROWE Developer BT 0000/07/00/001 ROWE copy materials Approval codes: CEEG Low -voltage Directive (73/23 and 93/68 EEC) -
Page 367: Appendix B
Room temperature: Recommendation 20 – 27 °C Relative air humidity: Recommendation 30 – 60 % Working material: ROWE Organic photoconductor drum BT 0000/07/00/001 ROWE Toner BT 0000/07/00/022 ROWE Developer BT 0000/07/00/001 ROWE copy materials Approval codes: CEEG Low -voltage Directive (73/23 and 93/68 EEC) -
Page 368: Appendix B
Appendix B Safety data sheets Safety data sheet RC Network printer ROWE RC 4000 + 6000 Manufacturer: ROTH+WEBER GmbH 57520 Niederohmig - Germany Description: Wide-format scanner (914) With CIS technology Dimensions: Width: 1375 mm / Depth: 700 mm / Height: 960 mm... -
Page 369: Appendix B
Appendix B Safety data sheets Safety data sheet Magnet Roller General: Permanent magnets and magnetic materials are technical products that require precautions when used Danger warnings: Persons with pace makers must not be exposed to any magnetic fields! Keep magnetic data carriers away from magnetic fields! The function of electronic devices can be affected by magnetic fields! Risk of injuries through squashing! -
Page 370: Appendix B
Appendix B Safety data sheets Safety data sheet OPC photoconductor drum General: The coating of the OPC photoconductor drum does not serve as protection decoration primarily represents semiconductor. For this reason, these OPC photoconductor drums are highly sensitive to contamination, chemical reactions and physical contacts. -
Page 371: Appendix B
Appendix B Safety data sheets Safety data sheet OPC photoconductor drum Cleaning procedure: Never touch the drum surface with bare hands. You should only hold the drum on its flanges during the cleaning process. Never get the drum into contact with water, oil or organic solvents since this would develop a very high risk of surface contamination with residues and chemical reactions with the coating. -
Page 372: Appendix B
Appendix B Safety data sheets Safety data sheet Toner unit - according to EC Directive 91/155 Product identification marking: Product name: Toner BT 0000/07/00/022 Source of supply: ROTH+WEBER GmbH Composition / Statement of contents: Chemical characteristics: CAS.registration number Polyester resin 119681-86-6 Carbon Black 1333-86-4... -
Page 373: Appendix B
Procedures on unintentional release: Do not cause dust development. Sweep off spilled material or vacuum-clean and then dispose of using a lockable container. Beware of inhaling toner dust. Handling: Heed general precautions when handling chemicals. Keep away from heat and ignition sources. Do not smoke at work. -
Page 374: Appendix B
Appendix B Safety data sheets Safety data sheet Toner unit - according to EC Directive 91/155 Storage: Only store in original container at a temperature not exceeding 40 °C. Must not get into the hands of children. Keep off from foodstuffs, beverages and animal food. Personal protective equipment: Wear plastic gloves Explosion containments:... -
Page 375: Appendix B
Toxicological information: Toner dust may cause skin, eye and respiratory irritations. Ecological information: Does not pose environmental danger. Water pollution class 0 (self certification) Notes on disposal: No specific disposal procedures. Burn in closed containers only. Disposal to be in conformity with the local, regional or national legislation. -
Page 376: Appendix B
Appendix B Safety data sheets Safety data sheet Toner unit - according to EC Directive 91/155 Transportation instructions: UN no.: Hazard class: Packing group: Road/rail traffic (GGVS/ADR and GGVE/RID) ADR UN no.: Hazard class: ADR part no.: Hazard class: TREM card: Overseas (GGVSee/IMDG) IMDG UN no.: IMDG Hazard class:NA... -
Page 377: Appendix B
Further information: The exact composition of this product is strictly confidential. Further information will be disclosed to persons from the medical sector and in special cases only if a special treatment is given. This product conforms to all European safety regulations. Water pollution class: Water pollution class (WGK) 0 = none;... - Page 378 Series 4000 + 6000 Operating instructions...
- Page 379 ROWE Series 4000 + 6000 Operating instructions Appendix C Disposal This chapter informs you about equipment returns of the ROWE systems 4000 + 6000 series at the end of their life. Appendix C...
- Page 380 Appendix C Disposal WEEE: Equipment returns at the end of equipment life The device supplied from Roth+Weber (ROWE) to you comes under the provisions of the European Directive 2002/96/EC and the corresponding transposition into the law of the EC member states.
- Page 381 Appendix C...
- Page 382 ROWE: Paper, toner and much more – ng matched to your system. made by ROWE 9 (0) 2743 9217 -24 9 (0) 2743 2018 aterial@rowe.de ou should encounter difficulties sometime ... blem – our competent service will gladly provide further assistance!
Need help?
Do you have a question about the RC 4000 + 6000 and is the answer not in the manual?
Questions and answers