
Summary of Contents for Xterra RSX1500
- Page 1 FITNESS 箱視角 RSX1500 SEATED STEPPER OWNER’S MANUAL PLEASE CAREFULLY READ THIS ENTIRE MANUAL BEFORE OPERATING YOUR NEW SEATED STEPPER...
-
Page 3: Table Of Contents
Table Of Contents Product Registration Important Safety Instructions Important Electrical Instructions Important Operation Instructions RSX1500 Assembly Instructions Operation of Your Console General Maintenance Manufacturer’s Limited Warranty WARNING THIS PRODUCT MAY CONTAIN A CHEMICAL KNOWN TO THE STATE OF CALIFORNIA TO CAUSE CANCER, BIRTH DEFECTS, OR OTHER REPRODUCTIVE HARM. -
Page 4: Product Registration
Seated Stepper has been manufactured by one of the leading fitness manufacturers in the world. XTERRA Fitness will do all we can to make your ownership experience as pleasant as possible for many years to come. If you have questions, or if parts are missing or damaged, or you require customer service, call (870)336-4286. -
Page 5: Important Safety Instructions
User Weight Limit: 300 lbs. Failure to follow all guidelines may compromise the effectiveness of the exercise experience, expose yourself (and possibly others) to injury, and reduce the longevity of the equipment. SAVE THESE INSTRUCTIONS - THINK SAFETY! RSX1500 Seated Stepper... -
Page 6: Important Electrical Instructions
These distractions may cause you to lose balance, resulting in serious injury. • Transportation The Seated Stepper is equipped with transport wheels, which are engaged when the rear of the Seated Stepper is lifted. RSX1500 Seated Stepper... -
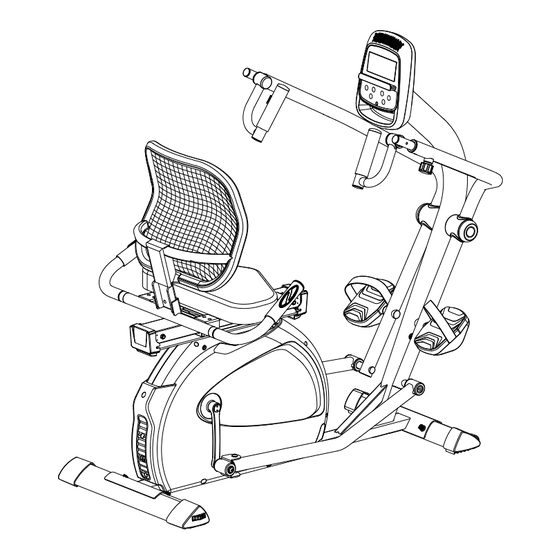
Page 7: Rsx1500 Assembly Instructions
RSX1500 Assembly Pack Checklist STEP 1 STEP 2 STEP 3 STEP 4 RSX1500 Seated Stepper... - Page 8 STEP 5 TOOLS #129. 14/15m/m Wrench ( 1 pc) #130. Combination M5 Allen Wrench & Phillips Head Screw Driver( 2 pcs) RSX1500 Seated Stepper...
- Page 9 RSX1500 Assembly Instructions Console Mast & Stabilizers Transport Wheels RSX1500 Seated Stepper...
- Page 10 RSX1500 Assembly Instructions Hardware Step 1 Console Mast & Stabilizers #131. 6x27x120L_L Allen Wrench #100. 5/16”x 3/4” Socket Head Cap Bolts - 9pcs 1. Use the Allen Wrench (#131) to tighten both front and rear Stabilizers #98. 5/16”x1.5T Split (#12,13) with 4 Socket Head Cap Bolts (#100), 4 Split Washers (#98) Washers - 9pcs and 4 Flat Washers (#99).
- Page 11 1. Insert the Handgrip Axle (#76) to slide through the Lower Handle Bar (R)(#6) and use Allen Wrench & Phillips Head Screw Driver (#130) to secure with Button Head Socket Bolt (#112), Split Washer (#98) and Flat Washer (#99). RSX1500 Seated Stepper...
- Page 12 3. Install Front Handle Bar Cover (#38) and Rear Handle Bar Cover (#39) on right and left Lower Handle Bar (#6) & (#5) with 8 Sheet Metal Screws (#96) by using Allen Wrench & Phillips Head Screw Driver (#130). RSX1500 Seated Stepper...
- Page 13 2. Joint Pedal Bar Assembly (#10) with the crank axle and use the Allen Wrench & Phillips Head Screw Driver (#130) to secure with 4 Button Head Socket Bolts (#112), 4 Flat Washers (#99) and 4 Split Washers (#98). 3. Use Wrench (#129) to tighten pedal (#62) on the Lower Handle Bar. RSX1500 Seated Stepper...
- Page 14 4. Install Seatback (#64) on Seat Back Fixing Plate (#16) and use Allen Wrench & Phillips Head Screw Driver (#130) to tighten with 4 Phillips Head Screws (#97) and 4 Flat Washers (#89) to secure Seat Back Fixing Plate (#16) then with Seatback Cover (#56). 5. Connect Lower and Upper handpulse wires (#27,26). RSX1500 Seated Stepper...
- Page 15 (#105) from Seat Assembly (#18) 2. Detach Lever (#78)from the plastic tie that secures the handle for shipping. Move out the Lever (#78) from Seat Assembly (#18). DO NOT CUT OR DETACH THE METAL WIRE ON THE END OF THE LEVER RSX1500 Seated Stepper...
- Page 16 (#44) to 90 degrees as seen in diagram so the Anchor can slide into Seat Assembly (#18) with the holes aligned. 4. Use the Allen Wrench (#130) to secure the Flat Head Socket Screws (#105), on the Seat Assembly (#18). RSX1500 Seated Stepper...
-
Page 17: Operation Of Your Console
1 to 6. A score of 1 is an indication of a high level of fitness and a score of 6 indicates poor condition. MODE: Press to switch display from RPM to SPEED, ODO to DIST, WATT to CALORIES. RSX1500 Seated Stepper... - Page 18 Using UP / DOWN KEY you may set the desired time value. Press ENTER KEY to input value. Flashing prompt will move to the next parameter. Continue use of UP / DOWN KEY. Press START / STOP to start workout. RSX1500 Seated Stepper...
- Page 19 Note: When any One of the workout parameters counts down to zero the console emits a beep sound and the workout stops automatically. Press START KEY to continue the workout to reach the unfinished workout goals set. RSX1500 Seated Stepper...
- Page 20 When any one of the workout parameters counts down to zero the console emits a beep sound and the workout stops automatically. Press START KEY to continue the workout to reach the unfinished workout goals set. RSX1500 Seated Stepper...
- Page 21 Pre-Set Programs (P2 - P13) RSX1500 Seated Stepper...
- Page 22 60 seconds then it will decrease the resistance load 1 level every 10s. When any one of the workout parameters counts down to zero the console emits a beep sound and the workout stops automatically. Press START KEY to continue the workout to reach the unfinished workout goals set. RSX1500 Seated Stepper...
- Page 23 Note: When any one of the workout parameters counts down to zero the console emits a beep sound and the workout stops automatically. Press START KEY to continue the workout to reach the unfinished workout goals set. RSX1500 Seated Stepper...
- Page 24 80% or 60%, respectively, of your MHR on a schedule approved by your physician. Consult your physician before participating in any exercise program. RSX1500 Seated Stepper...
- Page 25 In this condition, your pace will feel difficult. Again, this will show up in your RPE and you will train at the proper level for that day. RSX1500 Seated Stepper...
-
Page 26: General Maintenance
This inherent play can result in slight noises during use such as clicks and small thumps. Please expect that the Seated Stepper will not be completely silent. RSX1500 Seated Stepper... -
Page 27: Manufacturer's Limited Warranty
Effective December 20, 2017- Seated Stepper LIMITED WARRANTY XTERRA Fitness Inc. warrants all its home use Seated Stepper parts for a period of time listed below, from the date of retail sale, as deter- mined by a sales receipt or in the absence of a sales receipt, eighteen (18) months from the original factory shipping date. XTERRA Fitness’... - Page 28 3000 Nestle Road Jonesboro, AR 72401 - Phone:870-336-4286 - Fax:870-935-7611 www.xterrafitness.com RSX1500 Seated Stepper ©2017 All Rights Reserved. RSX1500 Owner’s Manual...
Need help?
Do you have a question about the RSX1500 and is the answer not in the manual?
Questions and answers
what is the purpose of E-1 on screen,can not turn off machine.
what causes E-1 to show on screen on Xxterra rsx1500 recumbent steeper?