
Related Manuals for Diagraph TJ500

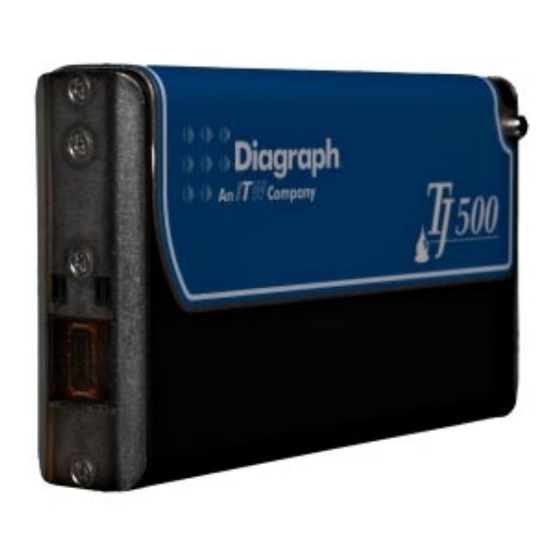
Summary of Contents for Diagraph TJ500
- Page 1 Operations Manual Thermal Jet Ink Jet System 5780-320 Revision C 1 Missouri Research Park Drive • St. Charles, MO 63304 • Service Line 1-800-526-2531 Illinois Tool Works Inc © 2009...
- Page 2 Ink Jet System Operations Manual 5780-320 Revision C Ink Cartridge: The TJ500 has been engineered and designed to work with Diagraph ink cartridges. The TJ500’s Smart Level Ink Detection System, which provides ink level monitoring to ensure complete ink usage and product safety, will not be functional if used with non-Diagraph ink cartridges.
- Page 3 The TJ500 Thermal Jet system, including all components unless otherwise specified, carries a limited warranty. The inks and conditioners used with the TJ500 Thermal Jet system carry a limited warranty. For all warranty terms and conditions, contact Diagraph an ITW Company for a...
-
Page 4: Table Of Contents
Step 3: Assemble TJ500 and Power Supply to Bracketry ....... -
Page 5: Section 1: Safety And Ink Cartridge Usage
Store inks and solvents under the recommended conditions found on the MSDS (Material Safety Data Sheet). Ink Cartridge: The TJ500 has been engineered and designed to work with Diagraph ink cartridges. The TJ500’s Smart Level Ink Detection System, which provides ink level monitoring to ensure complete ink usage and product safety, will not be functional if used with non-Diagraph ink cartridges. -
Page 6: Section 2: Quick Start
Thermal Jet Section 2: Quick Start Section 2: Quick Start OPTIONAL IJ3000-ES CONTROLLER TYPICAL INSTALLATION Contents: • TJ500 Print Head • Bracketry Kit • Power Supply, 15 V • Power Supply Bracket • Power Cord • Software CD 5780-320 Operations Manual Rev C... -
Page 7: Step 1: Assemble Bracketry
Thermal Jet Section 2: Quick Start Step 1: Assemble Bracketry Step 2: Assemble Bracketry to Conveyor 5780-320 Operations Manual Rev C Page 3... -
Page 8: Step 3: Assemble Tj500 And Power Supply To Bracketry
Thermal Jet Section 2: Quick Start Step 3: Assemble TJ500 and Power Supply to Bracketry Ensure bar is behind front face of TJ500 5780-320 Operations Manual Rev C Page 4... -
Page 9: Step 4: Adjust Tj500 Print Head To Substrate
Thermal Jet Section 2: Quick Start Step 4: Adjust TJ500 Print Head to Substrate Adjust TJ500 vertically to meet requirement. ADJUST TJ500 VERTICALLY WITH EITHER OF THESE TWO BRACKETS Adjust TJ500 horizontally to set print gap. .1" (2.5mm) GAP ADJUST THE PRINT... -
Page 10: Step 5: Insert Cartridge Pen Into Print Head
Thermal Jet Section 2: Quick Start Step 5: Insert Cartridge Pen into Print Head PEN STOP Rotate Cover Open Insert Pen Cartridge at an angle up to Pen Stop PEN STOP When inserting cartridge, aim nose at an angle towards black pogo pin component. Slide pen cartridge up to Pen Stop. -
Page 11: Step 6: Cabling, Power, And Serial Port Setup
Connect the included serial cable between a computer or an IJ3000-ES COM port to the input port of the first TJ500 in the daisy chain. Connect up to four total TJ500 print heads (per COM port) with their included serial cables in a daisy chain from the output port of the first TJ500 to the input port of the next TJ500 and so on. -
Page 12: Serial Port Setup
NOTE: Depending on GUI / IJ3000-ES status, this step may already be complete. If a computer will be used, install the TJ500 / IJ3000-ES PC software using the CD included with the print head. Follow the installation prompts, and then launch the program. - Page 13 Thermal Jet Section 2: Quick Start Press the System Setup button, and then the Serial Ports tab. Press the first Port/Baud button and ensure the baud rate is set for 57600. Press the OK button to exit the Serial Port Setup screen. Press the first Function button and select the Serial Print Head option.
-
Page 14: Step 7: Configure The Print Head
User types in the detected via TJ500 encoder and connected desired line speed photocells to the last TJ500 in the daisy chain Touch this box, then type in the desired speed 5780-320 Operations Manual Rev C... -
Page 15: Step 8: Create A Message
Thermal Jet Section 2: Quick Start Step 8: Create a Message From the home screen, select the Messages button and then the New button to enter the message editor. Create and save the message, and then exit the message editor. Quick Save Product Side Product Setup... -
Page 16: Step 9: Print A Message
Thermal Jet Section 2: Quick Start Step 9: Print a Message From the home screen, push the Print button. Select the desired message to print, and push the Print It button. The message will print on the next photocell trigger. 5780-320 Operations Manual Rev C Page 12... -
Page 17: Section 3: Ij3000-Es Or Gui Functionality
Thermal Jet Section 3: IJ3000-ES or GUI Functionality Section 3: IJ3000-ES or GUI Functionality Keypad or Keyboard BACKSPACE POWER SCREEN BRIGHTNESS ESC (Escape): • Closes the current window, a dialog box, or menu. • Restores the original contents of any input entry box, if Enter has not been pressed. Arrow Keys: •... -
Page 18: Home Screen
Thermal Jet Section 3: IJ3000-ES or GUI Functionality Home Screen Print Head Zoom Daisy Chain Button Identifier Task 1 Message Select Window Button Task 1 Task 2 Select Print / Pause Button Button Status Task 1 & Task 2 Screen Ink Status Access Button... - Page 19 Zoom button or the ESC key to zoom back out. Counter: • Count codes can be printed but can not be adjusted from the Home Screen. Variable Field: • Function not available on TJ500 system. 5780-320 Operations Manual Rev C Page 15...
-
Page 20: Main Menu
Cancels print immedi- ately after a confirmation dialog popup box Fires all jets for a short period of time on the selected TJ500 Closes this menu immediately NOTE: The Variable Field but- ton is not available. In order to Returns to... - Page 21 Thermal Jet Section 3: IJ3000-ES or GUI Functionality Message Editor: Reverts message to the last saved File Menu Clears contents of message editor Calculates Quick estimated ink usage for the save of contents of current the editor message Prints the contents Zoom of this editor on the next photocell...
- Page 22 External Encoder: Auto Speed Line speed measured by Detect: an externally mounted Line speed encoder and connected automatically to the last TJ500 in the detected via daisy chain TJ500 photocells (dis- ables the External product sensor) Optional externally mounted photocell connected to the...
- Page 23 Thermal Jet Section 3: IJ3000-ES or GUI Functionality Network: Regional Settings: User Access: Utilities: After performing the "Restore default configura- tion" function, the serial port must be reconfigured for a serial print head. 5780-320 Operations Manual Rev C Page 19...
-
Page 24: Status Screen
Thermal Jet Section 3: IJ3000-ES or GUI Functionality Time & Date Setting Screens Status Screen Note: This set off status screens represents two print heads setup in a daisy chain. The first print head (Head 1) is properly connected and detected. The second print head has not been properly connected to the daisy chain. -
Page 25: Section 4: Maintenance & Shutdowns
Requirements: • Deionized or distilled water • Sponge Swabs (Diagraph p/n: 5760-832) Procedure: 1. Lightly dampen sponge swab with deionized water. 2. Rub up and down across the orifice face with light force several times with one side of the sponge swab. -
Page 26: Shutdowns Less Than 3 Days
For extended shutdowns, follow the Daily Maintenance procedure, PEN CARTRIDGE remove the ink cartridge from the print head and store in the optional Cartridge Boot Cap (Diagraph Kit p/n: 5780-208). CARTRIDGE BOOT CAP 5780-320 Operations Manual Rev C Page 22... -
Page 27: Section 5: Troubleshooting
• Print head is mounted • Adjust the print head according to “Section 2: greater than an 1/8" Quick Start”, See “Step 4: Adjust TJ500 Print away from the sub- Head to Substrate” on page 5. strate • Locate print head in an area where there are min- •... -
Page 28: Appendix A: Specifications
Thermal Jet Appendix A: Specifications Appendix A: Specifications TJ500: 6.23in [158.2mm] 1.32in [33.6mm] 3.65in [92.6mm] 1.53in [38.9mm] 2X X 1/4-20 UNC - 2B X x .12in [3.05mm] 0.87in [22.1mm] 0.80in [20.3mm] PROVIDED FOR PRINT HEAD MOUNTING. LOWEST NOTE: THE MAXIMUM ALLOWABLE FASTENER CHANNEL 1.00in [25.4mm]... - Page 29 Thermal Jet Appendix A: Specifications IJ3000-ES: Weight 6.6 lbs (3.0 kg) User Interface Type: Graphical User Interface Keyboard: 70-key, QWERTY style, elasto- meric keyboard 5.7" Display: 320 X 240 color LCD with touch screen, 5.7" diagonal Fonts Arial Style 30, 75, and 150 Storage 16 MB flash memory Print Speed...
-
Page 30: Appendix B: Theory Of Operation
As with all Diagraph inkjet printing solutions, the TJ500 can print as a stand-alone printer or as part of a daisy chain. Up to four TJ500 print heads can be daisy chained. A message can be sent down to the TJ500(s) via the optional IJ3000-ES controller, the included GUI software interface program for a computer, or an optional hand-held device. -
Page 31: Ij3000-Es
Thermal Jet Appendix B: Theory of Operation IJ3000-ES Functional Description The IJ3000-ES Ink Jet System prints text, autocodes (such as product counts or time and date stamps), bar codes, and/or graphics onto products as they travel by conveyor past stationary print heads. Print can be on any one of, or a combination of, the product's sides. The conveyor speed is monitored using a variable speed encoder or a built-in fixed speed encoder. -
Page 32: Cpu Board
Thermal Jet Appendix B: Theory of Operation CPU Board The CPU Board has a microcontroller, flash, SDRAM and SRAM memory, a touch screen controller, a real time clock/calendar, an Ethernet port, two USB 2.0 ports, two serial ports, 12V, 5V, 3.3V and 1.8V regulators, a 3V battery, PC/104 connectors and connectors for attaching the system display and keyboard assemblies. -
Page 33: Interconnect Diagram
Thermal Jet Appendix B: Theory of Operation Interconnect Diagram IJ3000-ES Controller CPU Diagram 5780-320 Operations Manual Rev C Page 29... -
Page 34: Appendix C: Part Numbers - Consumables And Service Parts
Parts Consumables Ink Cartridge: The TJ500 has been engineered and designed to work with Diagraph ink cartridges. The TJ500’s Smart Level Ink Detection System, which provides ink level monitoring to ensure complete ink usage and product safety, will not be functional if used with non-Diagraph ink cartridges. - Page 35 5760-746 Cable, Display to CPU PCB, 40 Conductor 5765-001DTJ IJ3000-ES Controller 5765-201 Keyboard Replacement 5765-202 CPU PCB Replacement 5765-205 Color Display Replacement Bracketry Item Kit No. Description 5765-200 Bracketry, IJ3000-ES 5780-200 Bracketry, TJ500 5780-320 Operations Manual Rev C Page 31...
- Page 36 Thermal Jet Appendix C: Part Numbers - Consumables and Service Parts Encoder Item Kit No. Description 5760-820-IJ Encoder Assembly with Mounting Bracket & 25’ Cable 5765-206 Encoder O-ring Replacement Roller & Retractor Bracketry Item Kit No. Description 5780-206 Roller Bracket Only 5780-207 Roller and Retractor Bracket Roller &...
-
Page 37: Appendix D: File Backup And Restore
Thermal Jet Appendix D: File Backup and Restore Appendix D: File Backup and Restore Use these procedures for making archival copies of the system configuration and print message files, and for preserving the system's configuration and print messages during firmware upgrades. File types saved during a backup are .cfg, .prd, .bmp and .alp. These are the system configuration files, message files, logo files and label files, respectively. -
Page 38: File Backup
Thermal Jet Appendix D: File Backup and Restore File Backup To backup the sys- tem files, click the Backup files link. dialog shown at right (or a similar dialog box) will appear. Click the Save button. A Save As dialog appears. The IJ3000-ES files backed up are compressed and put into a single file, and are given the default name and file extension backup.tgz. -
Page 39: Restoring Backed-Up Files
Thermal Jet Appendix D: File Backup and Restore Restoring Backed-Up Files To restore the controller’s backed up system files, click the Restore files from backup link. The web page shown below appears. Click the Browse... button to locate and select the backup file to be sent to the controller. Click the Restore button to send the file to the controller. -
Page 40: Appendix E: Configuring A Pc To Communicate With The Ij3000-Es
Thermal Jet Appendix E: Configuring a PC to Communicate with the IJ3000-ES Appendix E: Configuring a PC to Communicate with the IJ3000-ES This appendix has instructions for setting the IP address and subnet mask of the PC so it can communicate with the IJ3000-ES Controller. Included are instructions for Windows XP®, Windows 2000®, Windows 98®, and Windows 95®. - Page 41 Thermal Jet Appendix E: Configuring a PC to Communicate with the IJ3000-ES 3. Select Internet Protocol (TCP/IP) then click Properties button. 4. Click the Use the following IP address radio button. Enter an IP address of 10.1.2.4, a subnet mask of 255.255.255.0, click the OK button.
-
Page 42: Windows 2000
Thermal Jet Appendix E: Configuring a PC to Communicate with the IJ3000-ES Windows 2000® 1. Open the Start menu; select Settings, then Network and Dial-up Connections. 2. Click the desired connection, then open the File menu and select Properties. 5780-320 Operations Manual Rev C Page 38... - Page 43 Thermal Jet Appendix E: Configuring a PC to Communicate with the IJ3000-ES 3. Select Internet Protocol (TCIP/IP) then click Properties button. 4. Click the Use the following IP address radio button. Enter an IP address of 10.1.2.4, a subnet mask of 255.255.255.0, and click the OK button.
-
Page 44: Appendix F: Font Samples
Thermal Jet Appendix F: Font Samples Appendix F: Font Samples Arial 30-1/8 in (3.1 mm): AaBbCcDdEeFf 1234567890 Arial 75 -1/4 in (6.35 mm): AaBbCcDdEeFf 1234567890 Arial 150 - 1/2in (12.7 mm): AaBbCcDdEeFf 1234567890 5780-320 Operations Manual Rev C Page 40... -
Page 45: Appendix G: Creating Logo Files
Thermal Jet Appendix G: Creating Logo Files Appendix G: Creating Logo Files Open Paint from a PC by selecting Start, Programs, Accessories, and then Paint. Bring up the Attributes dialog box by selecting Image and then Attributes. Enter the Width and Height of the logo in Pixels. The maximum number of pixels for width and height is 2046 and 150, respectively. - Page 46 Thermal Jet Appendix G: Creating Logo Files Define the pixels of the logo using the drawing tools… Bring up the Flip and Rotate dialog by selecting Image, Flip/Rotate. Select Rotate by angle, then 270°. Click Ok. From the File Menu, select Save As and save in a directory location that you will remem- ber.
-
Page 47: Appendix H: Uploading Files To The Print Head
Thermal Jet Appendix H: Uploading Files to the Print Head Appendix H: Uploading Files to the Print Head CAUTION: Power should be disconnected from the print head prior to connecting or dis- connecting any external devise, including: PC, handheld, controller or print head daisy chain cables.
Need help?
Do you have a question about the TJ500 and is the answer not in the manual?
Questions and answers