Table of Contents
Advertisement
English
EN2
Français
FR2
繁體中文
TC2
Thank you for purchasing this Panasonic product.
Before operating this unit, please read these instructions completely and save them for future use.
Merci d'avoir acheté ce produit de Panasonic.
Avant d 'utiliser cet appareil, veuillez lire ces instructions et les conserver pour une utilisation ultérieure.
感謝您購買本 Panasonic 產品。
使用本產品之前,請仔細閱讀本說明書,並妥善保存以供未來使用。
2
Operating Instructions
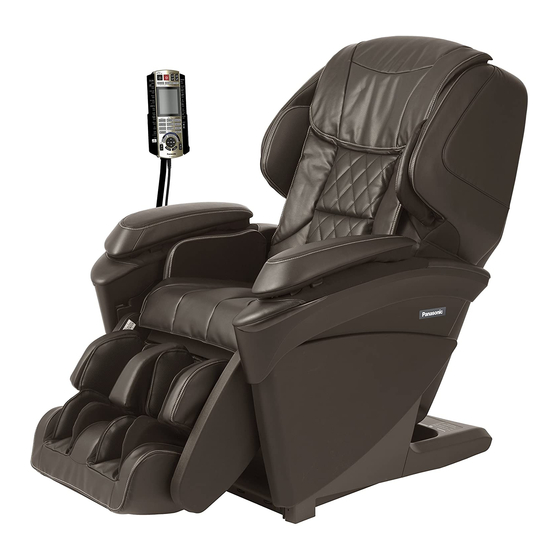
(Household) Massage Lounger
Fauteuil vibromasseur
Mode d'emploi
使用說明書
(家用)電動按摩椅
Model No.
EP-MAJ7
№ de modèle
型號
Advertisement
Table of Contents

Related Manuals for Panasonic EP-MAJ7


Summary of Contents for Panasonic EP-MAJ7
-
Page 1: Operating Instructions
English Français 繁體中文 Thank you for purchasing this Panasonic product. Before operating this unit, please read these instructions completely and save them for future use. Merci d'avoir acheté ce produit de Panasonic. Avant d 'utiliser cet appareil, veuillez lire ces instructions et les conserver pour une utilisation ultérieure. - Page 2 Searching for FAQs has been made easier. EN12 Page Transport, installation and assembly ● Dimensions of main unit! (Page EN55) EN22 Page What kind of courses are there? ● The back massage intensity controller display differs according to the course and action! Back massage intensity control of auto course Page EN38 Back massage intensity control of manual action...
-
Page 3: Table Of Contents
Contents Page Before Use IMPORTANT SAFETY INSTRUCTIONS . . . EN4 Part names and functions of main unit . . . EN10 Setting up the massage lounger ..EN12 Assembly ......EN14 Before sitting down . -
Page 4: Important Safety Instructions
DANGER Denotes a potential hazard that will result in serious injury or death. WARNING Denotes a potential hazard that could result in serious injury or death. CAUTION Denotes a hazard that could result in minor injury or property damage. IMPORTANT SAFETY INSTRUCTIONS Basic precautions should always be followed when using an electrical unit, including the following. -
Page 5: Grounding Instructions
GROUNDING INSTRUCTIONS This unit must be grounded. If it should malfunction or breakdown, grounding provides a path of least resistance for electric current to reduce the risk of electric shock. This unit is equipped with a cord having an equipment-grounding conductor and a grounding plug. - Page 6 IMPORTANT SAFETY INSTRUCTIONS (Continued) Denotes a specific operating procedure that Denotes a specific operating procedure that must not be performed. must be performed. WARNING Symptoms The following persons should not use this unit: (1) Persons who are prohibited from receiving massages by a physician (e.g.: due to thrombosis, severe aneurism, acute varicose veins, any type of dermatitis and skin infections (including inflammation of the hypodermis), etc.) (2) Persons suffering from osteoporosis, spine fracture, sprain or acute pain such as a pulled or torn muscle...
- Page 7 Take note of the following points as well Absolutely do not modify. Furthermore, do not attempt to disassemble or repair the unit yourself. (Doing so may cause fire, or may cause the unit to function abnormally resulting in injury.) When in use ...
- Page 8 IMPORTANT SAFETY INSTRUCTIONS (Continued) CAUTION To avoid risk of injury. Symptoms Use only on a horizontal surface. (Failure to do so may result in a falling accident.) Persons who are otherwise healthy but have any of the conditions listed below should ...
- Page 9 Before and during use Take note of the following points as well Do not use the massage heads on your head, Do not allow children to use the controller stomach or bare skin. Also, do not place your holder fixing screw.
-
Page 10: Part Names And Functions Of Main Unit
Part names and functions of main unit Shoulder side massage section ● Includes integrated air massage function. Retracted position of massage heads Controller (Pages EN20 – EN21) Pillow Backrest Seat ● Massage heads ● Air bag for seat/thigh ● “HEAT” massage massage is built in. - Page 11 Back cover Controller holder Controller stand Rating sticker Castor Leg cover Castor Power cord Power plug Power switch section Lock switch lock switch power open Power switch lock Lock switch key Lock switch key tag ● For preventing children from swallowing it by accident.
-
Page 12: Setting Up The Massage Lounger
Setting up the massage lounger 1) Checking the accessories ● ● Armrests (Right/Left) The holes in the fabric at the back of the hand & arm massage Comfort cushion section are due to the manufacturing process and are not a fault. ●... - Page 13 ● Controller stand ● ● ● Lock switch key Allen key Attachment screws (1 pc.) (1 pc.) (M6 × 13) Black Controller holder (4 pcs.) (M6 × 29) Silver Controller holder (Cross section) This is initially inserted fixing screw 4 mm 4 mm (2 pcs.) in the lock switch of the...
-
Page 14: Assembly
Assembly Attaching the controller stand The controller stand can be attached on either the left or right side. <When attaching on the right armrest> ① Align the 2 prongs of the side panel with the holes of the controller stand. Controller stand ■... - Page 15 Inserting the air plug ① Insert the air plug into the air plug jack on the armrest with your fingers until it clicks into position. <View from bottom> Air plug jack Air plug Protrusion Press until the protrusion clicks into place. ㅡ...
- Page 16 Assembly (Continued) Attaching the pillow Attach the pillow using the velcro fastener. Velcro fastener Velcro fastener Pillow ● Recommended position of the pillow when using the massage lounger (Page EN19) Attaching the comfort cushion Attach the cushion with zipper. Zipper Comfort cushion EN16...
- Page 17 ■ When the controller stand is attached on the left side ● Run the controller cord to the left as follows. ● The product is shipped with the controller cord fastened to the right side. ① Press on the controller. Legrest ②...
-
Page 18: Before Sitting Down
Before sitting down Check the surrounding area Make sure there are no objects, persons, or pets in the vicinity of the unit. ● The massage lounger may not work when pets such as dogs and cats chew on or trip over the controller cord. (This may result in a breakdown.) Adjust the Controller holder Horizontal orientation can be adjusted. - Page 19 Check the power cord and power plug before turning on the unit. (Page EN13) Adjust the pillow position Remove the pillow and adjust the height of the pillow so that the bottom edge is at ear level. ● If positioned too low, the pillow may interfere with a massage of the area around the neck. ●...
-
Page 20: Part Names And Functions Of The Controller
Part names and functions of the Controller Controller OFF/ON button MEMORY buttons (Pages EN31 – EN35) Child lock button (Page EN23) Quick stop button ● Press this button to lock the operating parts in order to prevent action of the massage ●... - Page 21 Display ● This illustration is when all lamps are illuminated. Voice guidance volume Memory course display (Pages EN31 – EN35) display (Page EN42) Memory course display (Page EN33) ● • Remaining time This display appears when using a course that you have created on your own.
-
Page 22: Simple Use
Simple use Course Operation Auto course Select one For those who want a full body automatic massage (Page EN25) Manual action For those who want an Select your intensive massage using their favorite action on a favorite Select one favorite area action and (Pages EN26 –... - Page 23 Action Adjustable functions during Start massage a massage Pages EN36 – EN39 Start massage Setting and canceling the child lock ■ How to set With the screen of the controller blank, press and hold for about 5 seconds. ● When set, will light up for about 5 seconds Start air before the power is cut off automatically.
- Page 24 Simple use (Continued) Body scanning Body scanning is where the massage heads move along the back and the shoulder position detected, the body shape including height is estimated, and a massage is made to suit the body shape. ● During body scanning, will flash.
-
Page 25: When You Want A Complete Massage
When you want a complete massage Press to turn on the power. ( When the unit has not been operated for more than 3 minutes, the display automatically disappears.) Select and press one of the buttons. ● Body scanning will commence when the program is selected. (See page EN24 for details) After Body scanning ends, massage starts. -
Page 26: When You Want A Concentrated Massage
When you want a concentrated massage of a particular body part with your favorite action WARNING Do not massage any one part of your body for more than 5 minutes at a time. (Doing so may result in adverse effect or injury.) Press to turn on the power. -
Page 27: Action
Press to start the action. ● The massage heads will move to selected position automatically to start the massage after the body scanning is completed. (See page EN24 about body scanning) ● See pages EN36 – EN39 for setting the massage in accordance with your preferences. -
Page 28: Air Stretching And Sole Massage
Air stretching and Sole massage ■ Air massage …………… “SHOULDER”, “HAND/ARM”, “PELVIS”, “LEG/FOOT” ■ Stretch …………………… “NECK”, “CHEST”, “LOWER BACK”, “PELVIS”, “LEG”, “CORE” Press to turn on the power. ( When the unit has not been operated for more than 3 minutes, the display automatically disappears.) Select the part you want to massage. - Page 29 To save in the memory course Press the MEMORY button for 2 seconds during the action. ● You can save the stretch action that you like, to create your own course. (Pages EN33 – EN34) ● Air actions can be saved at the same time when saving manual action in the memory course. How to use the hand &...
- Page 30 Air stretching and Sole massage (Continued) Description of stretch action The PELVIS stretch The NECK stretch Stretches and twists the muscles around the pelvis to Stretches the muscles of the left and right alternately. the neck. Seat air bag inflates alternately left and ①...
-
Page 31: Memory Course
Memory Course Up to 3 memory courses can be saved. Refer to “Saving a Auto Course with My Own Favorite Settings” (Page EN31) and “Creating Your Own Course” (Page EN33) to see how to save a memory course. Saving a Auto Course with My Own Favorite Settings Memory settings that can be saved (Pages EN36 –... - Page 32 Memory Course (Continued) To start the saved program Press to turn on the power. ( When the unit has not been operated for more than 3 minutes, the display automatically disappears.) ● The saved MEMORY button will flash. Select one of the MEMORY buttons with a saved course.
- Page 33 Creating Your Own Course You can create your own course by saving manual action and stretch action in sequence in one of the memory courses. Air action can also be saved simultaneously together with manual action. Favorite settings that can be saved (Pages EN36 – EN39) How to save a manual action Select and activate manual action.
- Page 34 Memory Course (Continued) How to save a stretch action Select and activate the stretch action. If you want to save several actions at the same time, select and activate all the stretch actions that you want to save. ● Adjust the setting to suit your preference. ●...
- Page 35 How to save an air action setting An air action setting can be saved in combination with a manual action. If you want to save the setting with an air action, perform the following steps after saving the air action in the memory course. Select and activate the air action.
-
Page 36: Adjusting The Intensity
Adjusting the intensity Depending on the setting, a course may terminate mid-way due to the timer function. Adjustment function Buttons used Must be adjustable AIR MASSAGE selection OFF/ON The selected air massage and stretch action can be adjusted individually in 3 levels and turned OFF/ON. ●... - Page 37 Items that have this mark can be saved and used with your favorite settings. (Page EN31) Auto course Manual action Air action* Stretch action Example) Every time you press the air stretch , the setting can be adjusted and turned OFF/ON in the following ○...
- Page 38 Adjusting the intensity (Continued) Depending on the setting, a course may terminate mid-way due to the timer function. Adjustment function Buttons used Must be adjustable The back massage intensity can be adjusted. ● You can check the area that is currently being massaged in the display.
- Page 39 Items that have this mark can be saved and used with your favorite settings. (Page EN31) Auto course Manual action Air action Stretch action ○ ○ <Back massage intensity display> ○ Maximum 5 - 5 levels of back Adjustable Current back levels of intensity massage intensity level...
- Page 40 Adjusting the intensity (Continued) Hip massage During a hip massage, the seat air bag will lift up your hip and the massage heads will go round your hip to massage. In addition, by supporting your lower back with the lower back air bag to raise your hip, the massage heads will be able to reach the muscles of your hip more effectively.
- Page 41 “HEAT” The warm section in the “Heat” massage heads will warm up “Heat” massage heads the fabric of the massage areas. rubber section ● Heat function cannot be used alone. ● Sense of warmth differs depending on the room temperature, clothing, body shape, action, position, and course;...
- Page 42 Adjusting the intensity (Continued) Voice guidance function This is a function which briefly explains the operation procedures and contents of the action. Adjust the position of the pillow. Press the OK button if the position is OK. ■ Adjusting the volume Press to adjust (volume raises/lowers with each press).
-
Page 43: After Completing The Massage
After completing the massage Return your chair to normal status Attach the comfort cushion to the backrest. To exit in the middle of a massage Fully return the sole massage section to the original position and then press ● The massage head will return to stowed position even with the legrest down and the backrest up. -
Page 44: Moving The Unit
Moving the unit Requires at least 2 persons to lift and move Lift and move with one person holding the sides of the legrest and one person holding the backrest cover groove. (Page EN12) Moving the unit on its castors Hold the legrest at the sides and move Hold at the sides the unit on its castors. -
Page 45: Cleaning And Maintenance
Cleaning and maintenance Synthetic leather part Wipe with a soft and dry cloth ● For hard-to-clean soiling, wipe with the same neutral kitchen detergent solution, etc. but using a commercially ● Never use chemicals such as thinner, benzine, alcohol, etc. available “sponge of melamine foam material”. -
Page 46: Q&A
Q&A Question Answer Before Use Can I use the unit if I have an Consult your doctor before using this unit. illness that requires regular Massage is a form of stimulation by tactile pressure in which pressure is medical attention? applied to the muscles to relax them and improve blood circulation. - Page 47 Question Answer During Operation During body scanning or a Massages stop for safety if the body cannot be detected for one of massage, the buttons flashed, the following reasons. 5 short beeps sounded ● The user is not sitting. was displayed) and ●...
-
Page 48: After Use
Q&A (Continued) Question Answer During Operation (Continued) The angle of the backrest, The angle automatically changes in the following cases. legrest or armrest ● When auto course, stretch action or manual action are started. automatically changes at The chair automatically reclines to the massage position. times. - Page 49 Question Answer How to adjust the <Intensity> The auto course is “not strong Try the following methods. enough even at the strongest ● When the auto course is not strong enough even at the strongest setting, setting...” or is “too strong recline the backrest.
- Page 50 Q&A (Continued) Question Answer Other (Continued) Is there a timer function? Yes. To prevent overuse, the massage automatically ends at a maximum of 19 minutes after starting. (Page EN41) When the timer ends, the legrest automatically lowers and the massage heads are stowed.
-
Page 51: Troubleshooting
Troubleshooting Investigate the “Problem” and apply the “Remedy” below. If the problem still exists after following the remedy, contact an authorized service center. Problem Cause and Remedy The action stops mid-way. If excessive force is applied to the massage heads during operation, in the interests of safety the action may stop. -
Page 52: Error Display
Troubleshooting (Continued) Problem Cause and Remedy The unit will not operate at all. The power plug has been disconnected. (Page EN13) Power switch on the rear panel is set to “off”. The child lock has been applied. (Page EN23) An auto selection button or manual selection button hasn’t been pressed after pressing It is not possible to massage The air plug on the armrest is disconnected. -
Page 53: Sounds And Sensations Of The Unit
Sounds and sensations of the unit The following sounds and sensations occur while using the unit. However, they occur due to the construction of the unit and are perfectly normal. From each air massage unit (see page EN10 for the position of each air massage unit) “Snapping”... -
Page 54: Specifications
Specifications Power supply AC 120 V 60 Hz Rated Current 3.0 A Massage area Approx. 79 cm (31.1 in.) (The massage heads move a total of approx. 63 cm (24.8 in.)) (Up-Down) Distance between massage heads during operation (including width of massage heads) Neck, shoulder, back: Approx.
Need help?
Do you have a question about the EP-MAJ7 and is the answer not in the manual?
Questions and answers