Table of Contents
Advertisement
Quick Links
Advertisement
Table of Contents

Summary of Contents for Schiller S1-C
- Page 1 2017 S1-C User Manual...
- Page 2 Schiller was founded on the daring belief that a blue planet is meant for biking. We want to give people of all athletic abilities the most exhilarating and dynamic cycling experience riding the world’s most advanced water bike. Our commitment to design, technology, safety and engineering, matched with a passion for all things aquatic, is what guides us each and every day.
-
Page 3: Table Of Contents
1. Getting to Know Your S1 2. Box Contents 3. Assembly 4-14 Protective caps Handle Bars Left Pedal Right Pedal Outdrive 8-10 Struts 11-12 Pontoon in ation Running Boards 4. General Guidlines 15-19 Seat height adjustment Outdrive pivot ajustment Outdrive use positions General best practices 18-19 6. -
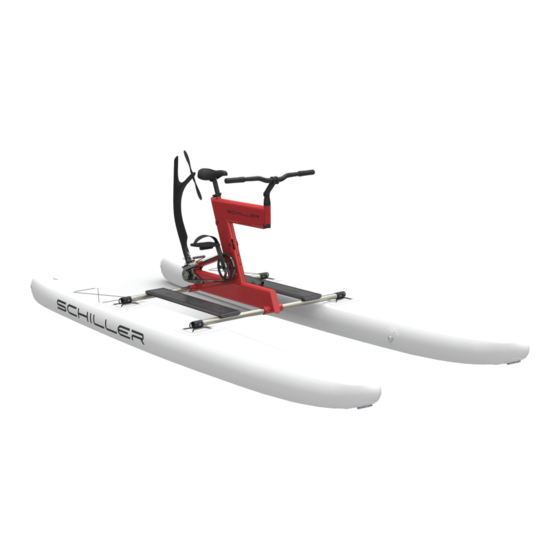
Page 4: Getting To Know Your S1
5. Saddle Assembly 1. Outdrive 6. Handlebar Assembly 2. Gearbox 7. Pedals & Cranks 3. Struts 8. S1 Frame 9. Running Board 4. Pontoons 10. Pontoon Sockets Getting to know your S1... - Page 5 Repair Kit What’s in the box...
- Page 6 Remove protective caps. Assembly: Removing Protective Caps...
-
Page 7: Handle Bars
Gently tighten until snug. Repeat step 3 until snug. Assembly: Handlebars... -
Page 8: Left Pedal
Tighten by hand rst. Note which pedal by nding the letter on the bottom. Remove rubber band, or protective cap from threads Gently tighten Pedel with wrench until snug. Assembly: Left Pedal... -
Page 9: Right Pedal
Note which pedal by nding the letter on the bottom. Remove rubber band, or protective cap from threads Tighten by hand rst. Gently tighten Pedel with wrench until snug. Assembly: Right Pedal... -
Page 10: Outdrive
Line up tabs. Do not force outdrive on. Assembly: Outdrive... - Page 11 Twist Prop to fully engage Outdrive. The outdrive will drop into slot when succesfully engaged. Assembly: Outdrive Cont.
-
Page 12: Outdrive
Clip tether cord to gearbox Insert Outdrive Lock pin Assembly: Outdrive Cont. -
Page 13: Struts
Longer end inserts into bike frame sockets. Insert struts before in ating pontoons. Bike Frame Spring button with Press spring buttons to “Click” into place. engage strut. Assembly: Struts... -
Page 14: Struts
Shorter end inserts into pontoon sockets. Pontoon socket Spring button with “Click” into place. Assembly: Struts... - Page 15 Closed postion In ation In ate pontoon Open position to 10 PSI De ation Replace cap after pontoon is in ated. Push and twist to lock hose into pon- toon valve. Assembly: In ate Pontoon...
- Page 16 A running board can be used as a paddle. Assembly: Running Boards...
- Page 17 General Guidlines: Seat Adjustment...
- Page 18 Adjust the resistance of the pivot function on the outdrive. General Guidlines: Outdrive Pivot Tension...
- Page 19 1. Non-operational 2. Shallow Water Mode 3. Normal Mode General Guidlines: Outdrive use...
-
Page 20: General Guidlines
General Guidlines The S1 was designed to enjoy smooth waterways such as harbors, inlets, bays and lakes with no previous maritime experi- ence. As with any small marine craft, safety should be your number one priority. You should always wear a coast guard approved personal otation device (PFD) and ride in conditions that you are con - dent and comfortable in. - Page 21 Steering The best way to steer your S1 is slowly and gently from the handle bars. Do not quickly torque the handlebars back and forth. This excessively stresses the entire steering system. It may cause the steering cables to snap. Stopping &...
-
Page 22: Maintenance
Replace your steering cables at least twice a year, or after 50 hrs use. Contact Schiller Support for replacement parts The Outdrive to gearbox steering interface does require periodic lubrication. To do this remove the Outdrive, and wipe clean inside the Outdrive top tting along with the corresponding male portion of the gearbox using a clean rag. -
Page 23: Warranty & Support
-Damage or failure due to accident, misuse, abuse, or neglect -Labor charges for part replacement or change over. Product Support: If you have any questions regarding your S1 please contact the Schiller team at info@schillerbikes.com and we will be happy to assist.
Need help?
Do you have a question about the S1-C and is the answer not in the manual?
Questions and answers