
Related Manuals for HCT HLD-320TB

Summary of Contents for HCT HLD-320TB
- Page 1 Order Number : GETEC-C1-09-110 FCC Class B Certification Page 1 / 1 Test Report Number : GETEC-E3-09-058 APPENDIX G : USER’S MANUAL EUT Type: LCD TV/Monitor FCC ID.: TGELT32U5...
- Page 2 32” LCD TV USER’S GUIDE HLD-320TB PLEASE READ CAREFULLY BEFORE USE Before Connecting, operating or adjusting this product, please read the instructions completely. Please keep this manual for future reference. For future reference, record the serial number of your LCD TV.
-
Page 3: Caution
Warning / Caution WARNING / CAUTION The lightning flash with arrowhead WARNING/CAUTION symbol, within an equilateral triangle, RISK OF ELECTRIC SHOCK is intended to alert the user to the DO NOT OPEN presence of uninsulated “dangerous voltage” within the product’s enclosure TO REDUCE THE RISK OF ELECTRIC that may be of sufficient magnitude to SHOCK DO NOT REMOVE COVER (OR... - Page 4 Warning / Caution WARNING / CAUTION To prevent fire or shock hazards, do not expose this product to rain or moisture. FCC NOTICE Class B digital device This equipment has been tested and found to comply with the limits for a Class B digital device, pursuant to Part 15 of the FCC Rules.
-
Page 5: Important Safety Instructions
Important Safety Instructions Important Safety Instructions Read these instructions. Keep these instructions. Heed all warnings. Follow all instructions. Do not use this apparatus near water. Clean only with dry cloth. Do not block any ventilation openings. Install in accordance with the manufacturer's instructions. Do not install near any heat sources such as radiators, heat registers, stoves, or other apparatus (including amplifiers) that produce heat. - Page 6 Important Safety Instructions Prolonged use of headphones at a high volume may cause health damage on your ears. The lightning flash with arrowhead symbol within an equilateral triangle, is intended to alert the user to the presence of uninsulated "dangerous voltage" within the product's enclosure that may be of sufficient magnitude to constitute a risk of electric shock to persons.
-
Page 7: Table Of Contents
Contents Contents WARNING / CAUTION WARNING CAUTION Important Safety Instructions Front Panel Controls Swivel Stand Rear Panel Connectors Remote Control Wall mount Installation Installation Desktop Pedestal Installation Antenna Connection VCR Connection DVD Connection HDSTB Connection Connection External A/V Source Digital Audio Out PC Connection Resolution Turning On or Off... - Page 8 Contents Advanced Adaptive Luma Control Video Gamma Color Temperature Adjusting The Sound Controls Manual Sound Controls Sound Digital Output Controls Auto Volume Control Stereo/SAP Broadcast Setup Time Zone Setting Auto Time Setting Time Manual Time Setting Setting Auto On/Off Time Setting Sleep Timer Closed Caption-Analog Closed Caption-Digital...
- Page 9 Accessories Accessories Supplied Accessories Ensure that the following accessories are included with your product. If an accessory is missing, please contact the dealer where you purchased the product. User must use shielded signal interface cables with ferrite cores to maintain standard compliance for the product. 1.5V Batteries Owner’s Manual...
-
Page 10: Front Panel
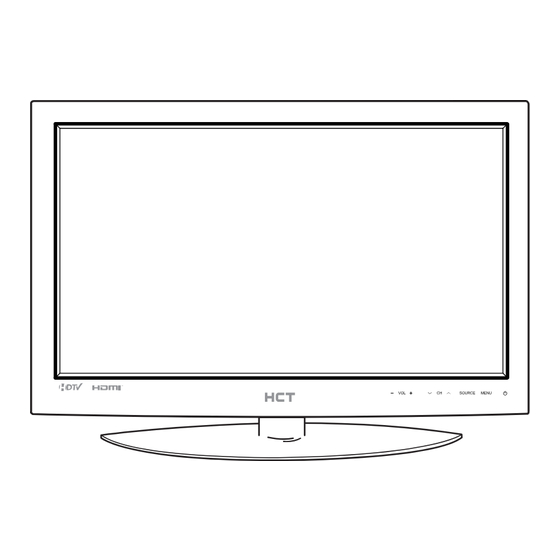
Controls And Connectors Controls And Connectors Front Panel SOURCE MENU SOURCE MENU 1. VOL + / VOL - 4. MENU Adjusts menu setting. Display on screen menus. Adjusts sound level. 5. POWER 2. CH / CH Switches the set on or off. Select a channel. -
Page 11: Rear Panel
Controls And Connectors Rear Panel AV IN COMPONENT IN AV IN VIDEO 1 AUDIO1 AUDIO2 AUDIO VIDEO AC IN HDMI/DVI IN HDMI IN RGB IN AUDIO IN DIGITAL AUDIO ANTENNA/ (PC) (RGB/DVI) OUT(COAXIAL) CABLE IN S-VIDEO VIDEO 2 1. AC IN 6. -
Page 12: Remote Control
Controls And Connectors Remote Control - All the functions can be controlled with the remote control handset. - Some functions can also be adjusted with the buttons on the front panel of the set. - Before using remote control handset, please install the batteries. POWER Switches the set on or off. - Page 13 Controls And Connectors Recalls your preferred picture setting. POWER SOURCE Recalls your preferred sound setting. SLEEP Sets the sleep timer. ZOOM Selects your desired picture format. Select the Caption menu directly. EXIT Select MTS sound : Mono, Stereo and SAP in Analog Channel.
-
Page 14: Installation
Installation Installation Wall mount Installation 4 inches 4 inches 4 inches 4 inches 4 inches The set can be installed on a wall as shown above. For proper ventilation, allow a clearance of 4 inches on all four sides from the wall. Detailed instructions are available from your dealer, refer to the optional Wall Mounting Bracket Installation and Setup Guide. -
Page 15: Antenna Connection
Connections Connections Antenna Connection Multi-family Dwellings / Apartments (Connect to wall antenna socket) AUDIO IN DIGITAL AUDIO ANTENNA/ (RGB/DVI) OUT(COAXIAL) CABLE IN Wall Antenna Socket RF Coaxial Wire (75 ohm) Turn clockwise to tighten. Outdoor Antenna Be careful not to bend the bronze wire when connecting to an antenna port. -
Page 16: Vcr Connection
Connections VCR Connection - To avoid picture noise (interface), leaves an adequate distance between the TV and the VCR. When connecting with an antenna 1. Connect the Antenna Out socket on the VCR to the Antenna Input socket on the TV. 2. - Page 17 Connections When connecting with a S-Video cable 1. Connect the S-VIDEO Output on the VCR to the S-VIDEO Input on the TV. ANT IN 2. Connect the audio outputs of the VCR to the VIDEO (L) AUDIO (R) AUDIO L / R input jacks under AV IN on the TV. ANT OUT S-VIDEO OUTPUT...
-
Page 18: Dvd Connection
Connections DVD Connection When connecting with a S-Video cable 1. Connect the S-VIDEO Output of the DVD player to the S-VIDEO Input on the TV. ANT IN VIDEO (L) AUDIO (R) 2. Connect the Audio Outputs on the DVD player to the AUDIO L / R Input jacks under AV IN on the ANT OUT S-VIDEO... - Page 19 Connections When connecting with a HDMI cable 1. Connect the HDMI Output on the DVD player to the HDMI/DVI IN1 or HDMI IN2 Input on the TV. HDMI-DVD OUTPUT 2. Select the HDMI1 or HDMI2 input source on your TV by pressing either the SOURCE buttons on the remote control.
-
Page 20: Hdstb Connection
Connections HDSTB Connection - This TV can receive Digital Over-the-air/Cable signals without an external digital set-top box. However, if you do receive Digital signals from a digital set-top box or other digital external device, refer to the figure as shown below. When connecting with a D-Sub 15 pin cable 1. - Page 21 Connections When connecting with a Component cable 1. Connect the Video Outputs (Y, PB, PR) on the digital set-top box to the COMPONENT1 or COM- Digital Set-top Box PONENT2 Video Inputs on the TV. (L) AUDIO (R) 2. Connect the Audio Outputs on the digital set-top box to the COMPONENT1 or COMPONENT2 Audio Inputs on the set.
-
Page 22: External A/V Source
Connections External A/V Source 1. Connect the composite jacks between AV Input on the TV and AV Output on the External Device. Make sure the jack colors match with the connec- VIDEO L-AUDIO-R tor colors on both ends. (Video = yellow, Left Audio = white, and Right Audio = red) Camcorder Video game set... -
Page 23: Pc Connection
Connections PC Connection When connecting with a D-Sub 15 pin cable 1. Connect the RGB output of the PC to the RGB IN (PC) jack on the set. AUDIO OUT PC OUTPUT 2. Connect the PC Audio Output to the AUDIO IN (RGB/DVI) jack on the TV using a male-to-male 3.5mm mini jack. -
Page 24: Resolution
Connections Resolution Horizontal Vertical Resolution Frequency (kHz) Frequency (Hz) 640 x 480 59.94 31.47 56.25 35.16 800 x 600 37.88 60.32 1024 x 768 60.00 48.36 a. The synchronization input form is separate. b. If the resolution is not supported, ‘Not Support!’ message will be displayed. -
Page 25: Turning On Or Off
Basic Operation Basic Operation Turning On or Off Standby Setup: The AC power cord must be connected to have the TV in standby mode and ready to be turned on. Press the ON/OFF button on the front panel of the TV to go into standby mode. 1. -
Page 26: Input Selection
Basic Operation Input Selection Input Source 1. Press the SOURCE button to change the input mode. 2. Press the Down or Up button to select your desired S-Video mode. YPbPr1 YPbPr2 3. Press the OK button to change your selected mode. HDMI1 HDMI2 Language Selection... -
Page 27: On Screen Menus
On Screen Menus On Screen Menus Your TV’s OSD (On Screen Display) may differ slightly from what is shown in this manual. 1. Press the MENU button on enter the on-screen menu and then use either the Down or Up button to select each sub-menu. -
Page 28: Setting Up Tv Channel
Setting up TV Channel Setting up the TV Channels Auto Scan This function automatically finds all channels available through the Antenna or Cable and stores them in memory on the channel list. 1. Press the MENU button to enter the on-screen menu and then press either the Down or Up button to select Tuner Mode Cable... -
Page 29: Add/Delete Channel
Setting up TV Channel Add / Delete a Channel You can manually store or remove channels in whatever order you desire. 1. Press the MENU button to enter the on-screen menu and then press either the Down or Up button to select Tuner Mode Cable F F G G... -
Page 30: Epg(Electronic Program Guide)
Setting up TV Channel EPG (Electronic Program Guide) Displays the broadcasting guide of the current digital channel. 1. Press the EPG button on the remote control to display the Electronic Program Guide. 2. Press the Left or Right button to change channel and display the broadcasting guide at the bottom of the screen. -
Page 31: Picture Controls
Picture Controls Picture Controls Adjusting The Picture Controls The various Picture Modes allow you to adjust the display to your viewing preference. 1. Press the MENU button to enter the on-screen menu Video and then press either the Down or Up button to select Picture Mode User F F G G... -
Page 32: Manual Picture Controls
Picture Controls Manual Picture Controls This mode will allow you to fine-tune the display settings to your viewing preference. 1. Press the MENU button to enter the on-screen menu Video and then press either the Down or Up button to select Picture Mode User F F G G... -
Page 33: Reset Picture Mode
Picture Controls Reset Picture Mode When changing your settings, you can select the Reset Picture Mode option to restore the previous settings. 1. Press the MENU button to enter the on-screen menu Video and then press either the Down or Up button to select Picture Mode User F F G G... -
Page 34: Dynamic Noise Reduction
Advanced Video Advanced Video Dynamic Noise Reduction Use this feature to reduce the amount of noise, or film grain, that may be present in the picture. 1. Press the MENU button to enter the on-screen menu Video and then press either the Down or Up button to select Picture Mode User F F G G... -
Page 35: Black Level Extender
Advanced Video Black Level Extender This feature increases the image reproduction performance in the dark areas of the picture. 1. Press the MENU button to enter the on-screen menu Video and then press either the Down or Up button to select Picture Mode User F F G G... -
Page 36: Cti (Color Transient Intensity)
Advanced Video CTI (Color Transient Intensity) This feature is used to reduce the time the display takes to transition from one color to another. The effect of CTI will be seen as sharpening the border between colors. 1. Press the MENU button to enter the on-screen menu Video and then press either the Down or Up button to select Picture Mode... -
Page 37: Adaptive Luma Control
Advanced Video Adaptive Luma Control Large amounts of dark areas present in a picture will result in a lower Average Picture Level (APL) and the overall picture will look too dark; activation of this feature will raise the APL to counteract this effect. 1. -
Page 38: Color Temperature
Advanced Video Color Temperature The Color Temperature settings will allow you to adjust the lighting in the display to compliment your viewing prefer- ence. The Cool setting will add more Blues and Greens into the image to give it a “cooler ” feeling. The Warm setting will add more Reds and Yellows into the image to give it a “warmer ”... -
Page 39: Adjusting The Sound Controls
Sound Controls Sound Controls Adjusting The Sound Controls The Sound Mode preset selection will allow you to adjust the sound to your listening preference. 1. Press the MENU button to enter the on-screen menu Audio and then press either the Down or Up button to select Balance the Audio sub-menu. -
Page 40: Manual Sound Controls
Sound Controls Manual Sound Controls This function allows you to manually adjust the individual audio settings to your preferred levels. 1. Press the MENU button to enter the on-screen menu Audio and then press either the Down or Up button to select Balance the Audio sub-menu. -
Page 41: Digital Output
Sound Controls Digital Output This option activates the Digital Audio Output. This is recommended for use with other devices capable of receiving digital audio signals. (This mode is set to Off by default) 1. Press the MENU button to enter the on-screen menu Audio and then press either the Down or Up button to select Balance... -
Page 42: Auto Volume Control
Sound Controls Auto Volume Control This function automatically stabilizes the volume level while changing to channels with different audio levels. 1. Press the MENU button to enter the on-screen menu Audio and then press either the Down or Up button to select Balance the Audio sub-menu. -
Page 43: Time Zone Setting
Time Setting Time Setting Time Zone Settings This mode allows you to set the Time Zone for your local area. 1. Press the MENU button to enter the on-screen menu Setup and then press either the Down or Up button in order to OSD Language English F F G G... -
Page 44: Auto Time Setting
Time Setting Auto Time Settings The Auto Time Setting receives the current time from an available digital channel. The digital channel signal includes information for the current time provided by the broadcasting station. 1. Press the MENU button to enter the on-screen menu Setup and then press either the Down or Up button in order to OSD Language... -
Page 45: Manual Time Setting
Time Setting Manual Time Settings If the current time setting is wrong when using the Auto Synchronization function, this setting allows you to set the clock manually. 1. Press the MENU button to enter the on-screen menu Setup and then press either the Down or Up button in order to OSD Language English F F G G... -
Page 46: Auto On/Off Time Setting
Time Setting Auto On /Off Time Settings The timer function will only operate when the current time has been set. This function automatically turns the TV On and Off at the specific time you designate. 1. Press the MENU button to enter the on-screen menu Setup and then press either the Down or Up button in order to OSD Language... -
Page 47: Sleep Timer
Time Setting Sleep Timer The sleep timer automatically switches the set to standby after the preset time elapses. 1. Press the MENU button to enter the on-screen menu Setup and then press either the Down or Up button in order to OSD Language English F F G G... -
Page 48: Closed Caption-Analog
Captions Captions Closed Caption - Analog The Analog Caption function operates when watching a regular analog channel. 1. Press the MENU button to enter the on-screen menu Setup and then press either the Down or Up button in order to OSD Language English F F G G... -
Page 49: Captions
Captions Closed Caption - Digital The Digital Caption function only operates on digital channels. 1. Press the MENU button to enter the on-screen menu Setup and then press either the Down or Up button in order to OSD Language English F F G G select the Setup sub-menu. -
Page 50: Closed Caption Options
Captions Digital Closed Caption Options Customize the DTV captions that appear on your screen. 1. Press the MENU button to enter the on-screen menu Caption and then press either the Down or Up button in order to Analog Closed Caption F F G G select the Setup sub-menu. -
Page 51: Reset
Reset Reset Reset Default This function returns all of the menu selections back to their original factory preset values. This function removes all TV channels from memory. Channels must be scanned for again after resetting to the unit to factory defaults. 1. -
Page 52: Enter Your Password
Parental Control Parental Control Entering your password Parental Control can be used to block specific channels, ratings and other viewing sources. The default password of 0-0-0-0 is required to gain access to this menu. 1. Press the MENU button to enter the on-screen menu Parental and then press either the Down or Up button in order to Password... - Page 53 Parental Control Ratings - Enable / Disable Enables or disables a parental blocking scheme. 1. After entering the Parental sub-menu, press the Down Parental or Up button to choose Program Block. Program Block Change Password 2. Press the OK button and then press the Down or Up Clean All button to select Rating Enable.
-
Page 54: Rating Enable/Disable
Parental Control TV Ratings for USA This rating system has been established to help you monitor and block the types of programs viewed on TV. Ratings with a lock next to them will be blocked from being viewed. 1. After entering the Parental sub-menu, press the Down Parental or Up button to choose Program Block. - Page 55 Parental Control TV (FCC) Age Categories This rating system has been established to help you monitor and block the types of programs viewed on TV. Ratings with a lock next to them will be blocked from being viewed. TV-MA TV-G Mature audiences only.
-
Page 56: Movie Ratings
Parental Control Movie Ratings This rating system has been established to help you monitor and block the types of movies viewed. These ratings apply to movies broadcasted on TV and allows you to select which ratings you want blocked. 1. After entering the Parental sub-menu, press the Down Parental or Up button to choose Program Block. -
Page 57: Control
Parental Control English TV Ratings for Canada This rating system has been established to help you monitor and block the types of programs viewed on TV. Ratings with a lock next to them will be blocked from being viewed. 1. After entering the Parental sub-menu, press the Down Parental or Up button to choose Program Block. - Page 58 Parental Control French TV Ratings for Canada This rating system has been established to help you monitor and block the types of programs viewed on TV. Ratings with a lock next to them will be blocked from being viewed. 1. After entering the Parental sub-menu, press the Down Parental or Up button to choose Program Block.
-
Page 59: Downloadable Rating
Parental Control Downloadable Rating Your TV’s OSD (On Screen Display) may differ slightly from what is shown in this manual. 1. After entering the Parental sub-menu, press the Down Parental or Up button to choose Program Block. Program Block Change Password 2. -
Page 60: Clean All
Parental Control Clean All This function cleans and resets all current parental block settings. 1. After entering the Parental sub-menu, press the Down Parental or Up button to choose Clean All. Program Block Change Password 2. Press the OK button on the remote control to select Clean All Clean All and then press the Left or Right button to select OK button. -
Page 61: Setting The Pc Mode
Setting the PC Mode Setting the PC Mode Adjusting The Picture Controls The various Picture Modes allow you to adjust the display to your viewing preference. 1. Press the MENU button to enter the on-screen menu Video and then press either the Down or Up button to select Picture Mode User F F G G... -
Page 62: Manual Picture Controls
Setting the PC Mode Manual Picture Controls This mode will allow you to fine-tune the display settings to your viewing preference. 1. Press the MENU button to enter the on-screen menu Video and then press either the Down or Up button to select Picture Mode User F F G G... -
Page 63: Color Temperature
Setting the PC Mode Color Temperature The Color Temperature settings will allow you to adjust the lighting in the display to compliment your viewing pref- erence. The Cool setting will add more Blues and Greens into the image to give it a “cooler ” feeling. The Warm setting will add more Reds and Yellows into the image to give it a “warmer ”... -
Page 64: Automatic Screen Adjustment
Setting the PC Mode Automatic Screen Adjustment This function automatically adjusts the screen position, clock, phase and scale in pc mode. The displayed image will disappear for a few seconds while the auto configuration is in progress. If the result of the automatic adjustment is not correct, you can manually adjust the settings to fit your viewing preference. -
Page 65: Manual Screen Adjustment
Setting the PC Mode Manual Screen Adjustment If the result of the automatic adjustment is not correct, you can manually adjust the settings to fit your viewing pref- erence. 1. Press the MENU button to enter the on-screen menu Video and then press either the Down or Up button to select Picture Mode User... -
Page 66: Special Functions
Special Functions Special Functions Picture Format You can watch the screen in various picture formats; 4:3, ZOOM, Auto, Normal. To scroll through the various picture formats, press the ZOOM button on the remote control. Below are descriptions of the available picture formats. •... -
Page 67: Specification
Specification Specification Model HLD-320TB 794.5mm (31.28") x 512.0mm (20.16") x 99.5mm (3.92") Without Stand Dimension (Width x Hight x Depth) 794.5mm (31.28") x 573.0mm (22.56") x 228mm (8.98") With Stand 11.8 kg (26.01 lbs) Without Stand Weight (kg / lbs) 13.3 kg (29.32 lbs) -
Page 68: Troubleshooting
Troubleshooting Troubleshooting Problem Solution • Check whether the set is turned on. • Make sure the power cord is plugged into the wall. No picture on screen. • Test if there is power coming from the wall outlet by plugging in another product into the same wall outlet where the set’s power cord was plugged in. - Page 72 P/NO : 3350GDKM0079A GPN09MA001J...
Need help?
Do you have a question about the HLD-320TB and is the answer not in the manual?
Questions and answers