
Related Manuals for Goji GCRLIW14

Summary of Contents for Goji GCRLIW14
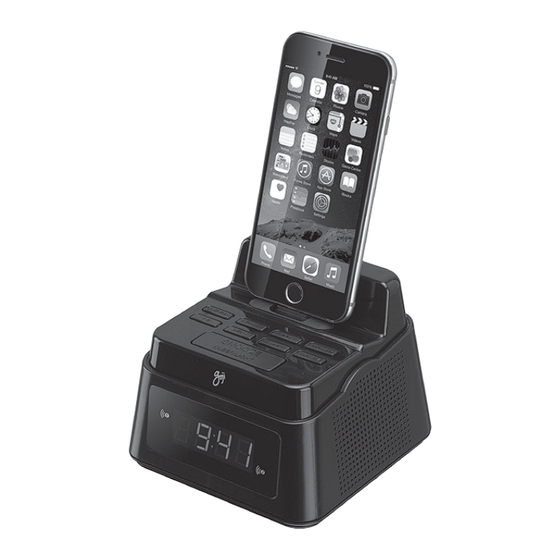
- Page 1 Clock radio for iPod and iPhone with a Lightning connector Instruction Manual GCRLIW14 / GCRLIB15 (iPhone, iPod touch and iPod nano are not included)
-
Page 3: Table Of Contents
Contents Safety Warnings ..............4 Unpacking ................10 Product Overview ..............11 Front & Side View ..............11 Rear View..................11 Top View ..................12 Power Source ..............14 Mains Power ................14 Basic Operation ..............15 Powering ON/OFF ..............15 Adjusting the Volume...............15 Setting the Time .................15 Setting the Alarm ...............16 Sleep Function ................17 FM Operation ..............18 Set Preset Station ...............18... -
Page 4: Safety Warnings
Safety Warnings • Read all the instructions carefully before using the unit and keep them for future reference. • Retain the manual. If you pass the unit onto a third party make sure to include this manual. • Check that the voltage marked on the rating label matches your mains voltage. - Page 5 Naked Flames • Never place any type of candle or naked flame on the top of or near the unit. Moisture • To reduce the risk of fire, electric shock or product damage, do not expose this unit to rain, moisture, dripping or splashing.
- Page 6 Safety • Always disconnect the unit from the mains supply before connecting / disconnecting other devices or moving the unit. • Unplug the unit from the mains socket during a lightning storm. • In the interests of safety and to avoid unnecessary energy consumption, never leave the unit switched on while unattended for long periods of time, e.g.
- Page 7 Interference • Do not place the unit on or near appliances which may cause electromagnetic interference. If you do, it may adversely affect the working performance of the unit, and cause a distorted sound. Earphones • Listening to loud sounds for prolonged periods of time may permanently damage your hearing.
- Page 8 Supervision • Children should be supervised to ensure that they do not play with the unit. • Never let anyone especially children push anything into the holes, slots or any other openings in the case - this could result in a fatal electric shock. CAUTION RISK OF ELECTRIC SHOCK DO NOT OPEN...
- Page 9 Maintenance • Ensure to unplug the unit from the power supply before cleaning. • Do not use any type of abrasive pad or abrasive cleaning solutions as these may damage the unit’s surface. • Do not use liquids to clean the unit.
-
Page 10: Unpacking
Thank you for purchasing your new Goji Clock radio. We recommend that you spend some time reading this instruction manual in order that you fully understand all the operational features it offered. You will also find some hints and tips to help you resolve any issues. -
Page 11: Product Overview
Product Overview Front & Side View Rear View Display Speaker FM Ant Socket Extend to receive FM reception DC-5V-IN Socket... -
Page 12: Top View
Top View POWER/FUNC MEM/SET VOL+/AL1 MEM+ VOL+/AL2 SNOOZE SLEEP/LIGHT POWER/FUNC Button Press to turn alarm clock radio on, and press to change from iPod/iPhone mode to FM mode, hold the button to turn to standby mode. Button Press to play and pause the music track in iPod/iPhone mode. - Page 13 MEM/SET Button Press to store the FM station in the preset memory, In power off mode hold the button to be able to change the time. iPod/iPhone Dock Button Press to play the next track or hold to fast forward through the current track in iPod/iPhone mode.
-
Page 14: Power Source
Power Source Mains Power • This unit is designed to operate with the provided mains adapter. • Connecting the unit to any other power may damage the unit. Unwind the mains adapter cable to its full length. Connect the end of the cable to DC-5V-IN socket at the rear of the unit and then connect the mains adapter to the mains socket. -
Page 15: Basic Operation
Basic Operation Powering ON/OFF • Press and hold the POWER/FUNC button to switch the unit on. • Press POWER/FUNC button again to switch the unit off. • To switch the unit off completely, unplug the mains adapter from the main socket. Adjusting the Volume • Press VOL+/ AL1 or VOL-/AL2 Button to increase or decrease the volume. -
Page 16: Setting The Alarm
Setting the Alarm • The Unit provide two alarm setting that work independently from each other thus allowing you to customize each one to your preference , you can set the alarm and the source of alarm • For setting the Alarm time of the clock, 1. -
Page 17: Sleep Function
Sleep Function This function allows you to programme the unit to switch off by itself after a set sleep time. Make sure the iPod/iPhone or radio is switched on before setting the sleep time. To activate the sleep function, press the SNOOZE/ SLEEP/LIGHT button on the top of the unit, to set the play time between 10, 20, 30, 40, 50, 60, 70, 80 and 90 minutes. -
Page 18: Fm Operation
FM Operation Extend the FM wire antenna fully to gain the FM reception. Do not strip or alter or attach to any other antenna. Press and hold POWER/FUNC button to switch the unit on. Press POWER/FUNC button repeatedly to select the mode to play the radio. -
Page 19: Ipod/Iphone Operation
iPod/iPhone Operation This unit can support the following iPhone/iPod models. Type Support Model iPhone iPhone 5 iPhone 5S iPhone 5C iPhone 6 iPhone 6Plus iPod iPod nano (7th generation) iPod touch (5th generation) Insert the iPhone/iPod into the iPhone/iPod dock. Press and hold POWER/FUNC button to switch the unit on. -
Page 20: Maintenance
Maintenance Cleaning the Unit • To clean the unit, wipe the case with a slightly moist, lint-free cloth. • Do not use any cleaning fluids containing alcohol, ammonia or abrasives. • Do not spray an aerosol at or near the unit. Hints and Tips If a problem does occur, it may often be due to something very minor. - Page 21 Sound is Volume is too high. Adjust the distorted volume. Desired station Weak signal. Search manually. not found No coverage in Adjust the position of the aerial. your area or poor reception. The display is This may occur if the broadcaster blank changes the label of a service or removes a label while tuned.
-
Page 22: Specifications
Specifications Model GCRLIW14 / GCRLIB15 Mains Adapter Input: AC 100 – 240 V ~50/60 Hz Output: DC 5V Speaker Output 2 x 1 W Power Radio Frequency FM 87.5 – 108 MHz Dimensions 120 (L) x 120 (W) x 101 (H) mm Net weight 0.36 kg... - Page 23 The symbol on the product or its packaging indicates that this product must not be disposed of with your other household waste. Instead, it is your responsibility to dispose of your waste equipment by handing it over to a designated collection point for the recycling of waste electrical and electronic equipment.
- Page 24 For general information about this appliance and handy hints and tips, please visit www.knowhow.com/knowledgebank or call 0344 5611234. Visit Partmaster.co.uk today for the easiest way to buy electrical spares and accessories. With over 1 million spares and accessories available we can deliver direct to your door the very next day. Visit www. partmaster.co.uk or call 0344 800 3456 (UK customers only) Calls charged at National Rate.
Need help?
Do you have a question about the GCRLIW14 and is the answer not in the manual?
Questions and answers