
Related Manuals for Olympia Carrera De Luxe MD


Summary of Contents for Olympia Carrera De Luxe MD
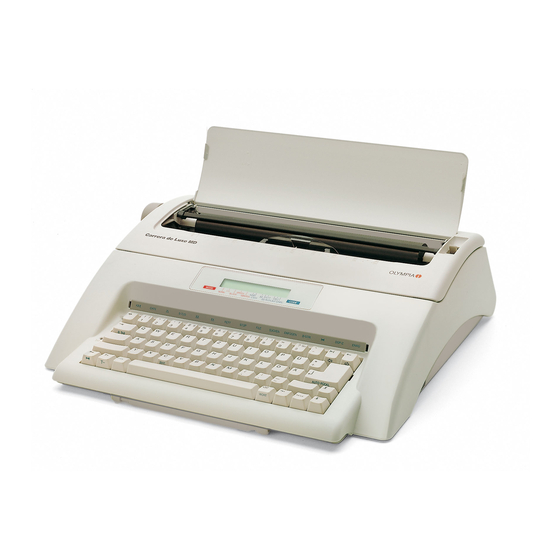
- Page 1 SERVICE MANUAL Olympia Carrera De Luxe MD Electronic Typewriter EDITION 3 JUNE 2009 001-03139-03...
-
Page 2: Table Of Contents
Table of Contents 1. Specifications ・・・・・・・・・・・・・・・・・・・・・・・・・・・・・・・・・・・・・・・・・・・・・・・・・・・ 1.1 General Specifications ・・・・・・・・・・・・・・・・・・・・・・・・・・・・・・・・・・・・・・・・・・・・・・・・・・・・・・・・・・・・・・・・・・ 1.2 Hardware Specifications ・・・・・・・・・・・・・・・・・・・・・・・・・・・・・・・・・・・・・・・・・・・・・・・・・・・・・・・・・・・・・・・・・ 2. General Construction ・・・・・・・・・・・・・・・・・・・・・・・・・・・・・・・・・・・・・・・・・・・・ 2.1 Basic Assemblies ・・・・・・・・・・・・・・・・・・・・・・・・・・・・・・・・・・・・・・・・・・・・・・・・・・・・・・・・・・・・・・・・・・・・・・・ 2.2 Electronic Assemblies ・・・・・・・・・・・・・・・・・・・・・・・・・・・・・・・・・・・・・・・・・・・・・・・・・・・・・・・・・・・・・・・・・・・ 2.3 Components and General Operation ・・・・・・・・・・・・・・・・・・・・・・・・・・・・・・・・・・・・・・・・・・・・・・・・・・・・・・ ・・・・・・・・・・・・・・・・・・・・・・・・・・・・・・・・・・・・・ 3. Circuit Diagrams and Layouts 3.1 Power Supply ・・・・・・・・・・・・・・・・・・・・・・・・・・・・・・・・・・・・・・・・・・・・・・・・・・・・・・・・・・・・・・・・・・・・・・・・・・... - Page 3 ・・・・・・・・・・・・・・・・・・・・・・・・・・・・・・・・・・・・・・・・・ 6. Lubrication and Cleaning 6.1 Lubrication ・・・・・・・・・・・・・・・・・・・・・・・・・・・・・・・・・・・・・・・・・・・・・・・・・・・・・・・・・・・・・・・・・・・・・・・・・・・・ 6.2 Cleaning ・・・・・・・・・・・・・・・・・・・・・・・・・・・・・・・・・・・・・・・・・・・・・・・・・・・・・・・・・・・・・・・・・・・・・・・・・・・・・・ ・・・・・・・・・・・・・・・・・・・・・・・・・・・・・・・・・・・・・・・・・・・・・・・・・・・・・・・・・・・ 7. Tools ・・・・・・・・・・・・・・・・・・・・・・・・・・・・・・・・・・・・・・・・・・・・・・・・・ 8. Troubleshooting...
-
Page 4: Specifications
1. Specifications 1.1 General Specifications Print mode Printing mechanism: Printwheel (no rubber); all characters Number of characters: 100 characters Line spacing: Single-line spacing (6 LPI (lines per inch)) 1-1/2-line spacing (4 LPI) Double-line spacing (3 LPI) Print pitch: Pica:90 characters per line Elite:108 characters per line Micro:135 characters per line Printing width:... -
Page 5: Hardware Specifications
1.2 Hardware Specifications Power supply Primary circuit voltage: 100V AC ±10% 50/60Hz 120V AC ±10% 50/60Hz 230V AC ±10% 50/60Hz Secondary circuit voltage: +15V DC (+VH) unstable voltage (with DC 1.5A load) +5V DC (+VC) stable voltage Power consumption: Under rated load: Approximately 4W (standby) Approximately 18W (operation) Under no load: 2W (power off) Fuses... - Page 6 LCD (liquid crystal display) Type: The Epson (ECM-A0697) type LCD or JIC (MSBZ9129) type LCD is used; furthermore, different versions are provided for use with USA/Europe keyboards, Eastern Europe keyboards, and with Thailand keyboards. Number of display characters: 20 characters × 2 lines (100 columns × 16 rows) Drive duty: 1/16 duty Character configuration:...
- Page 7 Battery Type: Model CR2032 lithium (Li/MnO ) battery with tab (manufactured by Matsushita, Sanyo, Sony, etc.), or equivalent. Voltage: +3.0V (210 mAh) Size: 0.85" (21.5 mm) diameter × 0.15" (3.8 mm) Applications: Store memory backup Operational life: Five years at operating temperature Replacement and disposal for the battery Note: Servicing to be performed only by manufacture's qualified personal.
-
Page 8: General Construction
2. General Construction 2.1 Basic Assemblies This typewriter consists of the following five major assemblies. Chassis frame and platen This assembly consists of the carrier motor, the LF (line feed) motor, the carrier drive mechanism, and the platen. Input circuit and control PCB This assembly consists of the transformer, input circuit, and the control PCB (printed circuit board). -
Page 9: Electronic Assemblies
2.2 Electronic Assemblies The basic configurations of the electronic assemblies are described below: Input circuit This assembly supplies voltage through the power cord, transformer, and power switch. Control PCB (power supply smoothing circuit and drive circuit) In the power supply smoothing circuit AC voltage is transformed into DC voltage. In the drive circuit, the ICs (such as the CPU and SRAM) and transistors drive and control the stepping motors, hammer solenoid, etc. -
Page 10: Components And General Operation
2.3 Components and General Operation Original version (Control PCB:Artwork No. 999-32300) The control PCB includes the CPU (IC201), the gate array (IC202), the EP ROM (IC203) programmed with the data necessary for typewriter operation, the SRAM (IC205) that holds the store data, and their peripheral devices. - Page 11 2nd version (Control PCB:Artwork No. 999-35810) The control PCB includes the CPU (IC201), the FROM built-in CPU (IC201) programmed with the data necessary for typewriter operation, the SRAM (IC203) that holds store data, and their peripheral devices. If the unit is equipped with the spelling checker function, the CPU (IC201) is equipped FROM in 512K byte.
-
Page 12: Circuit Diagrams And Layouts
3. Circuit Diagrams and Layouts 3.1 Power Supply Power supply assembly diagram for Original version (Control PCB:Artwork No. 999-32300) Connection diagram for Original version (Control PCB:Artwork No. 999-32300) - Page 13 Power supply assembly diagram for 2nd version (Control PCB:Artwork No. 999-35810) Connection diagram for 2nd version (Control PCB:Artwork No. 999-35810)
-
Page 14: Keyboard
3.2 Keyboard Keyboard layout Keyboard contact layout (membrane sheet) - Page 15 Keyboard contact diagram (keyboard matrix)
-
Page 16: Motor Diagrams
3.3 Motor Diagrams Carrier motor Original version (Control PCB:Artwork No. 999-32300) + Matsushita motor 2nd version (Control PCB:Artwork No. 999-35810) + NMB-MAT motor Selection motor Original version (Control PCB:Artwork No. 999-32300) + Matsushita motor 2nd version (Control PCB:Artwork No. 999-35810) + NMB-MAT motor... - Page 17 LF motor Original version (Control PCB:Artwork No. 999-32300) + Matsushita motor 2nd version (Control PCB:Artwork No. 999-35810) + NMB-MAT motor Ribbon motor Original version (Control PCB:Artwork No. 999-32300) + Matsushita motor 2nd version (Control PCB:Artwork No. 999-35810) + NMB-MAT motor...
-
Page 18: Solenoid And Switch Diagrams
3.4 Solenoid and Switch Diagrams Hammer solenoid Original version (Control PCB:Artwork No. 999-32300) 2nd version (Control PCB:Artwork No. 999-35810) Left end switch Original version (Control PCB:Artwork No. 999-32300) 2nd version (Control PCB:Artwork No. 999-35810) -
Page 19: Lcd
3.5 LCD LCD layout Epson (ECM-A0697) type JIC (MSBZ9129) type... - Page 20 LCD block diagram Epson (ECM-A0697) type JIC (MSBZ9129) type...
-
Page 21: Control Pcb
3.6 Control PCB Control PCB layout Original version (Control PCB:Artwork No. 999-32300) 3-10... - Page 22 2nd version (Control PCB:Artwork No. 999-35810) 3-11...
- Page 23 Control PCB diagram Original version (Control PCB:Artwork No. 999-32300) 3-12...
- Page 24 2nd version (Control PCB:Artwork No. 999-35810) Page 1/3 3-13...
- Page 25 2nd version (Control PCB:Artwork No. 999-35810) Page 2/3 3-14...
- Page 26 2nd version (Control PCB:Artwork No. 999-35810) Page 3/3 3-15...
-
Page 27: Adjustment And Measurements
4. Adjustment and Measurements 4.1 General Adjustment Procedure Unless specifically stated otherwise (unless not using adjustment mode), always turn the power switch off and unplug the unit before making adjustments. 4.2 Self Printing Test This typewriter is equipped with a self printing test function. This function prints all of the characters and performs a line feed and return. -
Page 28: Setting Adjustment Mode
4.3 Setting Adjustment Mode Adjustment mode is used to adjust the carrier and selection home positions and to adjust the carrier and platen positions. Entering adjustment mode: Hold down the code key and the margin release key and turn the power switch on. Release the keys. -
Page 29: Adjustment Procedure
4.4 Adjustment Procedure 4.4.1 Carrier Home Position Adjustment Check: While in adjustment mode, press the return key and make sure that the beeper does not sound when the typewriter checks the carrier home position. Adjustment: 1) After turning the power switch off, move the left edge of the rail slide (1) close to the right marking on the front guide rail markings (2-A). -
Page 31: Selection Motor Home Position Adjustment
4.4.2 Selection Motor Home Position Adjustment Check: When the selection motor is activated, the centerline of the hammer and the centerline of the wheel set pin must be lined up. Adjustment: 1) Loosen the two screws (1) and then hand-tighten the selection motor screws so that the top one is at the right end of the upper oval (2-A) and the bottom one is at the left end of the lower oval (2-B). - Page 32 Positioning for hand-tightening the selection motor and positioning for inserting the selection gears onto the selection gear shaft Printwheel, hammer, and selection gear adjustment position...
-
Page 33: Hammer Position Adjustment
4.4.3 Hammer Position Adjustment Check: The centerline of the hammer and the centerline of the spoke (printwheel) must match. Adjustment: 1) Enter adjustment mode. While holding down the code key, press the express key to activate the selection motor. (Refer to 4.3.2 "Selection Motor Home Position and Hammer Position Adjustment Mode".) 2) Loosen the two screws (2) holding the hammer bracket (1-A) in place. -
Page 34: Carrier And Platen Position Adjustment
4.4.4 Carrier and Platen Position Adjustment Check: There must be no missing parts of characters when printing, and the intensity of the top and bottom halves of printed characters must be equal. Adjustment: 1) Enter adjustment mode. (Refer to 4.3.3 "Carrier and Platen Position Adjustment Mode".) (Adjust the printing impression so that characters are printed faintly on the paper (so that they can be checked).) - Page 35 The bottom half of the character strikes the platen first, and the top half of the character is faint or missing. The character strikes the platen squarely, and prints correctly. The top half of the character strikes the platen first, and the bottom half of the character is faint or missing.
-
Page 36: Correction Tape Lift And Ribbon Tape Position Adjustment
4.4.5 Correction Tape Lift and Ribbon Tape Position Adjustment Check: When a character is printed, the character that is transferred must leave a space of 0.03 to 0.05 inches (0.8 to 1.2 mm) from the top of the ribbon tape (1) and a space of 0.04 to 0.08 inches (1.0 to 2.0 mm) from the bottom of the ribbon tape (1). - Page 37 Ribbon tape Correction tape 4-11...
-
Page 38: Carrier Drive Tension Adjustment
4.4.6 Carrier Drive Tension Adjustment Check: The tension on the belt tension spring (1) must be applied evenly to the entire drive belt (2). Adjustment: 1) After loosening the screw (3-A), hook the belt tension spring (1) onto the idle pulley bracket (3) and the left slide frame (4). 2) After moving the carrier to the right edge, move it to the left approximately 0.2 inches (5.0 mm) to 0.8 inches (20.0 mm). -
Page 39: Line Locator Adjustment
4.4.7 Line Locator Adjustment Check: The front plate (1) must be mounted with no gaps. The gap between the platen (2) and the line locator (3) must be between 0.01 to 0.02 inches (0.3 to 0.6 mm). Adjustment: 1) Loosen the left and right screws (3-A) for the line locator (3) and adjust the gap between the platen (2) and the line locator (3) so that it is 0.01 to 0.02 inches (0.3 to 0.6 mm). -
Page 40: Disassembly And Reassembly
5. Disassembly and Reassembly 5.1 Housing Removal After confirming that the power switch is off, unplug the power supply cord (1) from the outlet. Remove the keyboard cover (2). Pull the platen knob (3) straight off. Remove the top cover (5) and the cord cover (6) from the main cabinet (4). Remove the paper stand (7) from the top cover (5). - Page 41 Reassembly Reverse the procedure described on the previous page. Note: Do not bend the LCD cable (11) when plugging it into the connector. Make sure that the connectors and the LCD cable (11) are both oriented in the same direction before attempting to connect it.
-
Page 43: Keyboard And Control Pcb
5.2 Keyboard and Control PCB Removal Keyboard: Remove the housing. (Refer to 5.1 "Housing".) Make sure that the PCB cover has been removed. Only Original version (Control PCB:Artwork No. 999-32300): Remove the left and right FG wires (2) from the keyboard (1). Note: By change for double-sides PCB (2nd version control PCB:Artwork No. - Page 44 Control PCB: Following steps 1 and 3 above, remove the housing and the keyboard assembly. (Refer to the previous page.) Disconnect the eight connectors for the power supply (CN201), selection motor (CN202), ribbon motor (CN203), carrier motor (CN204), LF motor (CN205), hammer solenoid (CN206), left end switch (CN207), and the LCD cable (CN210) from the control PCB (4).
- Page 46 Part code (number) for program (or ROM) The part code (number) for the program (or ROM) including version number is printed on the label as illustrated below. Abbreviation Arrangement Abbreviation Arrangement Hispano German 2 Danish Hispano 3 Danish 2 New Spanish 2 New Canadian French Belgian Greek Latin...
- Page 47 Original version (Control PCB:Artwork No. 999-32300)
- Page 48 2nd version (Control PCB:Artwork No. 999-35810)
- Page 49 Using the spelling check function (if applicable) The American and Spanish dictionaries can be used with the Spain and Hispano keyboards. The American and French dictionaries can be used with the France and Canada-France keyboards. The American and German dictionaries can be used with the Germany keyboard. The American dictionary can be used with the USA and UK keyboards.
- Page 50 Conversion work Replace the EP ROM (IC203) with one that is suited for the previous keyboard specifications and is compatible with the spelling check function (Ver. 2.0*), solder IC204 in the IC socket, and install the mask ROM. Replace the EP ROM (IC203) with a 4M bit mask ROM (Ver. 3.0*) that is suited for the previous keyboard specifications.
-
Page 51: Chassis Frame And Platen
5.3 Chassis Frame and Platen Removal Chassis frame: Remove the housing and the keyboard. Disconnect the connectors from the control PCB. (Refer to 5.2 "Keyboard and Control PCB".) Remove the lead wires from the bottom cabinet (1). In order to remove the chassis frame (2) from the groove in the bottom cabinet (1), lift the frame (2) forwards about 0.8 inches (20 mm), and then pull the frame out and away. - Page 52 5-13...
-
Page 53: Lf (Line Feed) Motor And Carrier Drive
5.4 LF (Line Feed) Motor and Carrier Drive Removal LF (line feed) motor: Remove the chassis frame and platen. (Refer to 5.3 "Chassis Frame and Platen".) Remove the LF motor spring (1). Remove the LF middle gear (2). Remove the LF motor plate screw (3). Remove the two screws (6) holding the LF motor (4) to the LF motor plate (5) and then remove the LF motor (4). - Page 54 Reassembly Reverse the procedure described on the previous page. Readjustment The carrier drive belt tension adjustment will be necessary. (Refer to 4.4.6 "Carrier Drive Tension Adjustment".) The carrier home position adjustment will be necessary. (Refer to 4.4.1 "Carrier Home Position Adjustment".) Make sure that the carrier motor gear and the LF motor gears are not loose.
- Page 55 5-16...
-
Page 56: Cassette Base And Ribbon Drive
5.5 Cassette Base and Ribbon Drive Removal Remove the ribbon cassette and the correction tape. Remove the carrier from the chassis frame. (Refer to 5.4 "LF Motor and Carrier Drive".) Remove the ribbon cassette base spring (2) from the carrier box (1). Remove the two screws (5) holding the ratchet hook (3) and the ribbon base stopper (4) in place. - Page 57 18) Do not remove the cassette holding spring (37) unless necessary, as removing and reinstalling it will make it loose. Reassembly Reverse the procedure described on the previous page. Fix the ratchet hook (3) in place roughly at the center of the oval hole. With the ribbon cassette base (6) up as high as it will go, engage the hook on the ribbon cassette base (6) and the ratchet hook (3) approximately half way with the teeth on the correct feed ratchet gear (11).
- Page 58 5-19...
-
Page 59: Selection And Hammer
5.6 Selection and Hammer Removal Remove the cassette base and the ribbon drive mechanism. (Refer to 5.5 "Cassette Base and Ribbon Drive".) Make sure that the tie has been cut and that the carrier cable guide has been removed. Remove the wheel release spring (1). Remove the left and right screws (2) from the carrier box and then remove the carrier metal (3). - Page 60 Reassembly Reverse the procedure described on the previous page. Note: Attach the adjust plate (5) in roughly the center of the oval hole. If this position is not correct, it will not be possible to perform the rail slide adjustment properly. In addition, hand-tighten the selection motor at the right end of the upper oval hole and at the left end of the lower oval hole.
- Page 61 5-22...
-
Page 62: Power Supply
5.7 Power Supply Removal Remove the housing and the keyboard. Disconnect the connector for the power supply (CN201) from the control PCB. (Refer to 5.2 "Keyboard and Control PCB".) Remove the power supply cord (2-A) from the protrusions (1-A) on the bottom cabinet. Remove the screw (3) holding the switch cover (4) in place, and then remove the switch cover. - Page 63 5-24...
-
Page 64: Wire Routing
5.8 Wire Routing Bottom cabinet Lead wires Connector for lead wires side Connector for control PCB side Power supply cord and White (2 pins) White (CN201) power switch Yellow/Matsushita motor (6 pins) Carrier motor Yellow (CN204) White/NMB-MAT motor (6 pins) LF motor White (6 pins) White (CN205) - Page 65 Flexible flat cable FFC side Connector for control PCB side Contact point (14 pins) White (CN210) Carrier Lead wires Connector for lead wires side Connector for control PCB side Selection motor White (6 pins) White (CN202) Hammer solenoid Red (2 pins) Red (CN206) Ribbon motor Red (6 pins)
- Page 66 Top view Original version (Control PCB:Artwork No. 999-32300) 2nd version (Control PCB:Artwork No. 999-35810) Note: When setting the lead wire bundle in the bottom cabinet, do so with the carrier positioned at the right end. 5-27...
- Page 67 6. Lubrication and Cleaning 6.1 Lubrication Proper lubrication is essential in order to maintain trouble-free operation. Lubricants and the locations where they are to be applied are shown below. Number Type of lubricant Sumico Sumitec #331 Mobil Mobilith SHC 15 Mobil Mobilith SHC 460 Dow Corning Molykote EM-60L Mobil Gargoyle Arctic SHC 226...
- Page 68 Chassis frame and platen...
- Page 69 Carrier drive Hammer solenoid...
- Page 70 6.2 Cleaning Notes on cleaning: Thinners or other cleaning liquids that contain organic solvents or chlorine-based compounds can damage the housing and metal components. Dropping pins or paper clips inside of the unit can short circuit electronic components and interfere with moving parts. In order to prevent the rusting of internal components and short-circuiting of electronic components, the inside of the typewriter should only be wiped with a clean, dry cloth.
-
Page 71: Tools ・・・・・・・・・・・・・・・・・・・・・・・・・・・・・・・・・・・・・・・・・・・・・・・・・・・・・・・・・・・
7. Tools The following tools are required: Needle nose pliers Phillips screwdrivers (large and small) Standard screwdrivers (large and small) Wrenches (5.5 mm, 6.0 mm, 7.0 mm) Nut drivers (5.5 mm, 6.0 mm, 7.0 mm) Wire cutter (Nippers) Soldering iron and solder Spring hook Precision (Jeweler's) screwdrivers 10) Multimeter (Tester) -
Page 72: Troubleshooting ・・・・・・・・・・・・・・・・・・・・・・・・・・・・・・・・・・・・・・・・・・・・・・・・・
8. Troubleshooting Symptoms Possible Cause Solution Ref. in Manual 1. Power supply Even though the power is on, * Either the power supply cord Plug in the 3.1, 5.7 the typewriter does not operate is not plugged in properly, or cord or and the LED does not light. - Page 73 Symptoms Possible Cause Solution Ref. in Manual 5. Platen The platen does not feed paper * The connector (CN208 or Connect the 3.6, 5.2 forward, or does not feed it CN209) is not connected. connector. forward evenly. * The connector (CN205) is not Connect the 3.3, 3.6, 5.4 connected.
- Page 74 Symptoms Possible Cause Solution Ref. in Manual 6. Printing The characters that are printed * The printwheel is not set Reassemble, Ref. to operating do not correspond to the keys properly, or is not installed. replace, or instructions that are pressed. (The front plate is positioned press the 4.4.2, 5.6...
- Page 75 Symptoms Possible Cause Solution Ref. in Manual 8. Ribbon The ribbon does not feed * The ribbon drive gear, drive Reassemble properly. ratchet, drive bevel gear, or replace. ribbon bevel gear, ribbon gear, or ribbon feed pole has failed. * The rail slide is not positioned Adjust the 4.4.4, 5.5 correctly.
- Page 76 Printed in Japan 001-03139-03 090616 FN AX160VF OP...
Need help?
Do you have a question about the Carrera De Luxe MD and is the answer not in the manual?
Questions and answers