Table of Contents
Advertisement
Quick Links
Advertisement
Table of Contents

Related Manuals for COBHAM Thrane IP Handset


Summary of Contents for COBHAM Thrane IP Handset
- Page 1 Thrane IP Handset User manual...
- Page 3 Thrane IP Handset User Manual Document number: 98-126059-J Release date: January 19, 2018...
- Page 4 In the event of any discrepancies, the English version shall be the governing text. Thrane & Thrane A/S is trading as Cobham SATCOM. Copyright © 2018 Thrane & Thrane A/S. All rights reserved.
-
Page 5: Safety Summary
Safety Summary The following general safety precautions must be observed during all phases of operation, service and repair of this equipment. Failure to comply with these precautions or with specific warnings elsewhere in this manual violates safety standards of design, manufacture and intended use of the equipment. -
Page 6: About The Manual
About the Manual Intended readers This manual is a user manual for the Thrane IP Handset. The readers of the manual include anyone who is using or intends to use the IP Handset. No specific skills are required to operate the IP Handset. However, it is important that you observe all safety requirements listed in the beginning of this manual, and operate the handset according to the guidelines in this manual. -
Page 7: Table Of Contents
Table of Contents Safety Summary ................iii About the Manual ................iv Chapter 1 Introduction Welcome ....................1 Your IP Handset ................1 ....................1 Functions ..................2 The IP Handset Features ....................3 Chapter 2 Get started Get started with the IP Handset ......... 5 .................... - Page 8 Table of Contents IP Handset functions ..............30 ..................... 30 Handle calls ..........38 Make a call using a BGAN terminal ..........39 Use the IP Handset for Voice Distress ..................39 Quick settings ..........42 How to enter text in the IP Handset ...................
- Page 9 Technical specifications IP Handset specifications ............. 93 IP Handset outline dimensions ......... 95 IP cradle outline dimensions ..........97 App. B Conformity Thrane IP Handset, wired ............99 ..................99 CE (LVD & EMC) ......................99 Glossary ........................101 Index...
- Page 10 Table of Contents viii...
-
Page 11: Introduction
Chapter 1 Introduction Welcome Congratulations on the purchase of your IP Handset! The IP Handset communicates using Voice over Internet Protocol (VoIP), which means that voice conversations are routed over the Internet or through an IP-based network. Your IP Handset Functions The IP Handset is used for making phone calls over an IP... -
Page 12: The Ip Handset
The IP Handset is powered directly from the LAN interface using Power over Ethernet (PoE), so an external power supply is not needed. The TT-3670A Thrane IP Handset & Cradle, wired, includes the following main units: • TT-3672A Thrane IP Handset, wired •... -
Page 13: Features
Chapter 1: Introduction Features The IP Handset offers the following features: Plain voice communication over Internet or IP based network Start and stop IP data connections in a connected BGAN terminal Contacts list with up to 100 entries ... - Page 14 Chapter 1: Introduction Features...
-
Page 15: Get Started
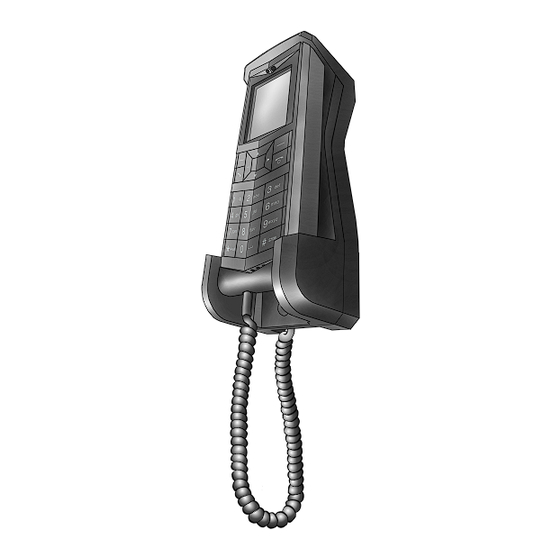
Chapter 2 Get started This chapter describes how to install and start up the IP Handset and make the first call. It also gives an overview of the display and keypad and explains how to navigate with the keypad. Get started with the IP Handset Introduction The IP Handset connects to the cradle with a coil cord. -
Page 16: Connectors On The Handset
Chapter 2: Get started Connectors on the handset IP Handset connectors The IP Handset has a coil cord with a LAN connector for connecting to the cradle or directly to a LAN (PoE) interface. The handset also has two connectors on the side of the handset: •... - Page 17 Chapter 2: Get started J101 J103 Fit coil cord here J102 Cable relief 2. Connect the coil cord from the IP Handset to the cradle connector marked J103. Then fit the cable relief mounted on the coil cord into the groove at the cradle exit.
-
Page 18: Install The Cradle
Chapter 2: Get started Install the cradle Mount the cradle on a wall or a desktop with 3 screws fitting in the holes indicated in the drawing below (front view). Get started with the IP Handset... -
Page 19: Connect The Ip Handset To A Bgan Terminal
Chapter 2: Get started Connect the IP Handset to a BGAN terminal The LAN interface on the BGAN terminal must supply Power over Note Ethernet. To connect the IP Handset to a BGAN terminal do as follows: 1. Start up the BGAN terminal as described in the user manual for the terminal. -
Page 20: Start Up The Ip Handset
Chapter 2: Get started Start up the IP Handset To switch on the IP Handset The IP Handset is automatically powered when it is connected to a LAN interface with PoE. If the handset has been switched off, you can switch it back on by pressing and holding the on hook key until the display lights up. -
Page 21: Establish A Connection Using Bgan Terminal
Chapter 2: Get started Establish a connection using BGAN terminal To use a BGAN terminal Introduction By connecting the IP Handset to a BGAN terminal you gain access to the BGAN satellite network with your IP Handset. When connected with the BGAN terminal the IP Handset provides a dedicated menu for the terminal. - Page 22 Chapter 2: Get started If no SIM PIN is required If the IP Handset is connected to a BGAN terminal where the SIM PIN is disabled or has already been entered, the BGAN terminal automatically sets up a communication profile (SIP profile) and assigns the first available local number to the handset, if the startup option Auto BGAN SIP is enabled under Settings >...
- Page 23 Chapter 2: Get started When the PIN is accepted, the BGAN terminal automatically sets up a SIP profile and assigns the first available local number to the handset, if the startup option Auto BGAN SIP is enabled under Settings > Startup options in the handset menu.
-
Page 24: Change User Name And Password For An Ip Handset
Chapter 2: Get started Change user name and password for an IP Handset By default, the startup option Auto BGAN SIP is selected under Settings > Startup options in the handset menu. This means that an IP Handset that is connected to the terminal automatically gets the first available user name (local number) and password. - Page 25 Chapter 2: Get started To enter user name and password in the BGAN terminal To match the IP Handset with the BGAN terminal you must enter the local number and password for each IP Handset in the web interface of the BGAN terminal.
-
Page 26: Make The First Call
Chapter 2: Get started Make the first call To make a call, do as follows: 1. Type the phone number on the keypad. If the number is in the Contacts list of the handset, you can also select the number from there. 2. -
Page 27: Ip Handset Keypad And Display
Chapter 2: Get started IP Handset keypad and display The keypad The following drawing shows the keypad of the handset. Select Volume up Up/ Down / Left/ Right Left select Right select Off hook On hook/ Power Volume down Alpha-numeric keys The next sections explain the functions of each key in the keypad. - Page 28 Chapter 2: Get started Control keys The below table shows the functions of the control keys in the upper section of the keypad. Functions Left select. Selects the function shown in the display just above the key (left soft key). Right select.
- Page 29 Chapter 2: Get started Functions Select (center). Selects/confirms the function highlighted in the display. Navigation. Navigates through the menu system in the display. Right/Left are also used to change settings in the menus. From main screen: Volume up, down See also Keypad shortcuts on page 22.
- Page 30 Chapter 2: Get started Alpha-numeric keys This section shows the functions of the alpha-numeric keys in the lower section of the keypad. The functions available depend on whether you are typing a phone number (number mode) or text (text mode). In number mode, you get the number of the key pressed.
- Page 31 Chapter 2: Get started Numeric output Lowercase output Uppercase output m n o M N O p q r s P Q R S t u v T U V w x y z W X Y Z [space] [space] Switches between lowercase, uppercase and numbers ...
- Page 32 Chapter 2: Get started To navigate with the keypad To enter the menu system from the main screen, press the center select key. To move through the menus, press the navigation keys (arrows). To select a highlighted menu item, press the center select key. To select one of the items in the action texts area, press the key just below the text you want to select.
-
Page 33: The Display
Chapter 2: Get started The display The display of the IP Handset is divided into sections with different types of information. The sections are outlined below. BGAN Signal status for Time General IP Handset terminal indications call status Selected menu item Main display area Action texts area BGAN signal status... - Page 34 Chapter 2: Get started Time The display shows the time of day. The format is selectable in the Settings > Date and time menu. General indications General indications are icons that show dynamic information such as missed calls, sounds off, keypad locked and microphone muted. For explanations of the icons, see Icons in the display on page 25.
- Page 35 Chapter 2: Get started Icons in the display The below table explains the icons in your display. Icon Meaning BGAN terminal connected (used together with signal strength). Signal strength for BGAN terminal. The handset is ready for making calls. The handset is not ready for making calls. Active alarm in BGAN terminal.
- Page 36 Chapter 2: Get started Icon Meaning Call ended. Missed call. See the Call log for information on the call. The microphone is muted. To reactivate the microphone, select Options (left select key) > Microphone. The handset is in silent mode. All external sounds from the handset - including ring tones - are muted.
- Page 37 Chapter 2: Get started Screensaver You can choose to have a screensaver activated when the handset is not used for one minute. This screen shows only the time, handset status and general indications such as missed calls. When you press a key the display returns to the normal display function.
- Page 38 Chapter 2: Get started IP Handset keypad and display...
-
Page 39: To Use The Ip Handset
Chapter 3 To use the IP Handset This chapter describes how to use the IP Handset. It also describes how to configure the handset and use the display menu system, including a short description of how to use the IP Handset with a BGAN terminal. For information on how to connect and start up the handset, and how to navigate with the keypad, refer to the previous chapter, Get started. -
Page 40: Ip Handset Functions
Chapter 3: To use the IP Handset IP Handset functions Handle calls Handset ready When the status field for the IP Handset shows ready , you can make or receive calls. To make a call or #. To make a call, simply type the phone number and press If the handset is in the cradle while you make the call, the mode Note will automatically be hands-free (default function). - Page 41 Chapter 3: To use the IP Handset The display shows the progress as follows: Press off hook The call is answered Hang up You can also call a number from your contacts or from a list of recent calls: • Contacts: Press the right select key from the main screen and move to the contact you want to call.
- Page 42 Chapter 3: To use the IP Handset For information on how to make calls using a BGAN terminal, see Make a call using a BGAN terminal on page 38. To receive a call When the handset is ringing, the display shows the calling name or number, if known.
- Page 43 Chapter 3: To use the IP Handset To transfer a call, do as follows: 1. Having taken the call, you press Options. 2. Scroll to Transfer <number to transfer> and press Select. 3. If the local numbers are entered in the phone book, the display shows the local numbers available for transferring the call.
- Page 44 Chapter 3: To use the IP Handset 4. If there are no entries for local phones in the phone book, select Enter number and press Select. In the example the call is transferred to the local phone 0503. 5. Enter the local number, in this case 0503, and press Transfer.
- Page 45 Chapter 3: To use the IP Handset To transfer a call with announcement When transferring a call, you can put the current call on hold, call the new number and announce the call to be transferred, terminate the announcement call and then transfer the original call. To transfer a call with announcement, do as follows: 1.
- Page 46 Chapter 3: To use the IP Handset 2. Select Hold. 3. The incoming call is put on hold. 4. Select Enter number to enter the local number you want to transfer the call to or select Contact search to select a number from the Contacts list.
- Page 47 Chapter 3: To use the IP Handset 6. When 0503 picks up the call you can announce the original call that is on hold. 7. To be able to transfer the original call that is on hold, the announcement call to the local number must be terminated, either by you or the final recipient.
-
Page 48: Make A Call Using A Bgan Terminal
Chapter 3: To use the IP Handset To end or reject a call Press the on hook key to end an ongoing call or to reject an incoming call. When the handset is in hand-held mode, you can also end the call by placing the handset in the cradle. -
Page 49: Use The Ip Handset For Voice Distress
Chapter 3: To use the IP Handset • + is the prefix used in front of the country code for international calls. This is 00 when calling from most countries. • Mobile number: The mobile number of the BGAN terminal you are calling. - Page 50 Chapter 3: To use the IP Handset In hands-free mode the sound is routed to a speaker, so that you can use the phone without holding it close to the ear. You can adjust the volume with or as described in the previous section. Handset in cradle: You can also make a hands-free call by leaving the handset in the cradle while making the call.
- Page 51 Chapter 3: To use the IP Handset To unlock the keypad, do as follows: 1. Press the center select key. 2. Press the left select key. To use night mode The display has a night mode for operation in low light areas. In night mode, the colors are changed to make the display more suitable for night operation.
-
Page 52: How To Enter Text In The Ip Handset
Chapter 3: To use the IP Handset Note Stealth mode is only activated for the items you have selected in the menu Settings, Stealth. See To set up stealth mode on page 52. How to enter text in the IP Handset When entering your contacts in the IP Handset you use the keypad to enter the names. - Page 53 Chapter 3: To use the IP Handset Use a headset with the connector type: 3.5 mm SMT phone jack, Note Switchcraft 35RASMT3BHNTR. Other headset types may not work with the IP Handset. The microphone and speaker of the IP Handset are automatically disabled and the headset is used instead.
-
Page 54: Ip Handset Menus
Chapter 3: To use the IP Handset IP Handset menus The menu system gives you access to the user parameters of the IP Handset. To access the menu system from the main screen, press the center select key. Move around in the menus with the arrow keys and select with the select keys. -
Page 55: Call Log
Chapter 3: To use the IP Handset Call log The IP Handset logs all calls and dialled numbers. The log entry shows the name (if known), the number, time of the call and duration. Note that the call log can hold maximum 100 calls. You can delete calls from the call log. To display the call log To display the call log do as follows: 1. - Page 56 Chapter 3: To use the IP Handset To delete a number from the call log To delete a number from the call log do as follows: 1. In the call log, go to the call and select Options. 2. Select Delete. 3.
-
Page 57: Contacts
Chapter 3: To use the IP Handset Contacts Use the contact list of the IP Handset to find a contact and make a call or manage your contacts. You have access to the contacts in the BGAN phone book. To display your contacts To display your contacts, do one of the following: •... - Page 58 Chapter 3: To use the IP Handset To edit a contact To edit a contact, do as follows: 1. In your Contacts list, scroll to the contact you want to edit. 2. Press the left select key, Options. 3. Select View/Edit. 4.
-
Page 59: Status
Chapter 3: To use the IP Handset Status In the Status section you find the serial number of the IP Handset, the network settings and the software version of the IP Handset. To view status for the handset, do as follows: 1. -
Page 60: Network
Chapter 3: To use the IP Handset Network To select the IP address mode You can select whether or not the IP Handset should use DHCP to automatically obtain an IP address. Static IP addresses are also supported. It is recommended to use DHCP. Automatic IP (DHCP) is the default setting. To select the IP mode, do as follows: 1. -
Page 61: Settings
Chapter 3: To use the IP Handset Settings To access the Settings menu, select Settings from the main menu. To adjust the sound You can adjust the ringing tone, the tone volume and the keypad click. To adjust the sounds of the handset, do as follows: 1. - Page 62 Chapter 3: To use the IP Handset To set up stealth mode Stealth mode is used when the IP Handset should not be noticed. In stealth mode you can turn off all lights in the display and/or sounds for external events.
- Page 63 Chapter 3: To use the IP Handset To set call services (Noise cancellation) The IP Handset has efficient noise suppression software which you can switch on or off, depending on the noise level in your environment. Noise cancellation should only be selected when the handset is used in a noisy environment.
- Page 64 Chapter 3: To use the IP Handset To set up the function of the cradle The IP Handset can be operated as hand-held or hands-free. You can select whether the handset should detect the cradle or not. To set up the cradle settings, do as follows: 1.
- Page 65 Chapter 3: To use the IP Handset To set up the display You can customize the following items in the display: • Active backlight can be adjusted from 10 to 100 percent. The backlight is on for 15 seconds after the last key press. •...
- Page 66 Chapter 3: To use the IP Handset To select the startup options You can select whether or not you want to clear the log and the Contacts in your handset every time you start up the handset. You can also select whether or not you want handsets to be automatically set up when they are connected to a BGAN terminal.
- Page 67 Chapter 3: To use the IP Handset To enable or disable the web server A web server is built into the IP Handset. It is primarily used for uploading software and for editing contacts. You can enable or disable the web server. To enable or disable the built-in web server, do as follows: 1.
- Page 68 Chapter 3: To use the IP Handset To set the date and time The date and time is only maintained as long as the handset is Note powered! To set the date and time, do as follows: 1. From the Settings menu, select Date and time.
- Page 69 Chapter 3: To use the IP Handset To use a PIN code for the handset There may be 2 PIN codes for the system: Note • one for the BGAN terminal (SIM PIN, described in To establish a connection on page 11) and •...
- Page 70 Chapter 3: To use the IP Handset 2. Select Edit. If there is already a PIN code for the handset, you must enter this PIN code before you can change it. 3. Type in the PIN code you want to use and select OK.
- Page 71 Chapter 3: To use the IP Handset To apply factory default settings You can reset the IP Handset to factory default settings. To return to factory default for all settings, do as follows: 1. From the Settings menu, select Factory default. All settings and status Important information are lost...
-
Page 72: Sip Telephony And Profiles
Chapter 3: To use the IP Handset SIP telephony and profiles The IP Handset has an integrated SIP (Session Initiation Protocol) client used for SIP telephony between the handset and the BGAN terminal, which has an integrated SIP server, or another SIP server. How to set up the SIP profile depends on your subscription and the SIP server and network to which the handset is connected. - Page 73 Chapter 3: To use the IP Handset To add a new SIP profile Add a new SIP profile if you want to connect the SIP client of the IP Handset to a SIP server. You need to enter several network specific values so the handset can communicate with the SIP server.
- Page 74 Chapter 3: To use the IP Handset 3. Type in the name to use for the new profile and select OK. Example: The profile name is New Profile. 4. Move to SIP server and select Edit. 5. At Server name / IP:, select Edit again.
- Page 75 Chapter 3: To use the IP Handset 9. Move to the setting you want to change and select Edit. Type in the information and enter with OK. Note Use the down key to scroll down to the last items in this sub menu.
- Page 76 Chapter 3: To use the IP Handset To edit a SIP profile To edit a SIP profile, do as follows: 1. In the list of profiles, go to the profile you want to change and select Options > Edit/View. 2. Edit the settings as described in the previous section. To delete a SIP profile To delete a SIP profile, do as follows: 1.
- Page 77 Chapter 3: To use the IP Handset To delete all SIP profiles To delete all SIP profiles, do as follows: 1. From the SIP settings menu, select Options (left select key). 2. Select Manage. 3. Select Delete all. All profiles except BGAN Important are deleted - this means that you will only be able...
-
Page 78: Information From The Bgan Terminal
Chapter 3: To use the IP Handset Information from the BGAN terminal When the IP Handset is connected to a BGAN terminal, the handset provides a dedicated BGAN menu. Through this menu you have access to a subset of controls and views of the BGAN terminal. - Page 79 Chapter 3: To use the IP Handset To start and stop IP background or streaming connections (0501 only) You can use the IP Handset that has the local number 0501 to start or stop data connections set up in the network user groups of the BGAN terminal. The network user groups and types of data connections are configured in the web interface of the BGAN terminal.
- Page 80 Chapter 3: To use the IP Handset For detailed information about using IP data connections and setting up network user groups with standard and streaming profiles refer to the BGAN terminal’s user manual. Optimize airtime and bandwidth usage: You must manually Note stop the connection when not used any longer.
- Page 81 Chapter 3: To use the IP Handset To enter the PIN for the BGAN terminal Note that this menu item is only available if the BGAN terminal is waiting for a PIN. To enter the PIN for the BGAN terminal, do as follows: 1.
- Page 82 Chapter 3: To use the IP Handset To display active alarms from the BGAN terminal Besides the alarm alert you can display a list over active alarms and click for details for each active alarm. To read BGAN terminal alarms, do as follows: 1.
- Page 83 Chapter 3: To use the IP Handset To display the signal strength The handset display can show the signal strength of the BGAN satellite signal when the handset is not in use. While the signal strength screen is Note displayed, the screensaver is disabled.
- Page 84 Chapter 3: To use the IP Handset IP Handset menus...
-
Page 85: Introduction To The Web Server
Chapter 4 To use the web server This chapter describes how to use the web server in your IP Handset system. Introduction to the web server The web server is built into the IP Handset and is primarily used for uploading software and for editing contacts in the IP Handset. -
Page 86: Browser Settings
Chapter 4: To use the web server Browser settings If you are connecting your computer using a LAN or WLAN interface, the Proxy server settings in your browser must be disabled before accessing the web interface. Most browsers support disabling of the Proxy server settings for one specific IP address, so you can disable Proxy server settings for the web interface only, if you wish. - Page 87 Chapter 4: To use the web server When the proxy server settings are disabled, close and restart your browser. You may need to change this setting back on return to your Internet connection. Access and navigate the web server The following procedure is valid if the IP Handset is used together Note with a BGAN terminal.
- Page 88 Chapter 4: To use the web server Overview of the web server The web server consists of the following sections. Contents section Icon Bar Navigation Pane • The navigation pane holds the main menu. Clicking an item in the menu opens a submenu in the navigation pane or a new page in the contents section.
-
Page 89: To Use The Web Server
Chapter 4: To use the web server To use the web server The Home page The web server starts up on the Home page. To go back to the Home page from another location in the web server, select Home from the left navigation pane. -
Page 90: Contacts
Chapter 4: To use the web server Contacts The web server gives access to the Contacts list of the handset. Select CONTACTS from the left navigation pane. The page shows the name and number of all contacts in the handset. You can sort the list by name or number by clicking Name or Number in the heading row of the list. -
Page 91: Call Log
Chapter 4: To use the web server Call log To display the call log of the handset, select CALL LOG from the left navigation pane. For each call the CALL LOG page shows date and time, phone number, duration and whether the call was incoming, outgoing or missed. If the phone number is in the Contacts list, the name of the contact is shown with the number. -
Page 92: Sip Settings
Chapter 4: To use the web server SIP settings Overview The handset communicates using SIP (Session Initiation Protocol). To view the SIP settings of the handset, select SIP SETTINGS from the left navigation pane. The page shows the settings for the current SIP profile. To use the web server... - Page 93 Chapter 4: To use the web server To add a new SIP profile The list of SIP profiles can hold maximum 10 profiles. To add a new profile, do as follows: 1. Click New profile at the top of the page. 2.
-
Page 94: To Upload Firmware
Chapter 4: To use the web server To upload firmware You can use the web server to upload firmware from your computer to the IP Handset. To upload firmware, do as follows: 1. Select UPLOAD FIRMWARE from the left navigation pane. 2. -
Page 95: Import And Export Settings
Chapter 4: To use the web server Import and Export settings If you want to copy settings from one handset to another you can use the Import/Export function. You can import settings to your handset from a file, or export settings from the handset to a file. Select IMPORT/EXPORT from the left navigation pane. - Page 96 Chapter 4: To use the web server To import settings from a file You can import three types of settings file, each containing a subset of the handset settings: Contacts, SIP settings or Phone settings. The name of the file indicates which settings are included in the file. To import a settings file, do as follows: 1.
-
Page 97: Help And Diagnostics Report
Chapter 4: To use the web server Help and diagnostics report The IP Handset can generate a diagnostics report. This report includes information that can be very useful for a service technician. If you are reporting an error with your IP Handset, you may be asked to provide a diagnostics report. - Page 98 Chapter 4: To use the web server To use the web server...
-
Page 99: Chapter 5 Service & Maintenance
You may be asked to generate a diagnostics report. For information on how to generate a report, see Help and diagnostics report on page 87. An updated list of distributors is available on Cobham SATCOM’s web site: cobham.com/satcom, select Technical Service Partner List. -
Page 100: Maintenance Tasks
Chapter 5: Service & maintenance Maintenance tasks Software update For instructions how to make a software update see To upload firmware on page 84. Clean the IP Handset Wipe the IP Handset or cradle with a clean dry cloth if they become dirty. Make sure that the charging contacts of the handset and cradle are clean. -
Page 101: Troubleshooting Guide
Chapter 5: Service & maintenance Troubleshooting guide The below table provides information on some of the problems that might occur, including possible causes and remedies to solve the problems. Problem Possible Cause Remedy The handset is An error Press and hold the on hook key for not responding occurred in the at least 10 seconds to switch off the... - Page 102 Chapter 5: Service & maintenance Troubleshooting guide...
-
Page 103: Ip Handset Specifications
This appendix contains specifications and outline drawings for the IP Handset and cradle. IP Handset specifications Item Specification Type TT-3672A Thrane IP Handset, wired Dimensions (L x B x H) 152 mm x 55 mm x 26.5 mm Weight 190 g ±20 g (without cable) Display 2.2", 240 x 320 pixel TFT color LCD... - Page 104 Appendix A: Technical specifications Item Specification VoIP Protocol SIP v2 Session Initiation Protocol (RFC3261), SDP (RFC2327) Voice Codecs G711 and G729 Physical interfaces RJ-45 male connector on fixed cable Headset 3.5 mm SMT phone jack Not currently used: Mini-USB 5-pin Certifications FCC, CE Compass safe distance,...
-
Page 105: Ip Handset Outline Dimensions
Appendix A: Technical specifications IP Handset outline dimensions Dimensions are in millimeters IP Handset outline dimensions... - Page 106 Appendix A: Technical specifications IP Handset outline dimensions, continued (side view and back view). Dimensions are in millimeters IP Handset outline dimensions...
-
Page 107: Ip Cradle Outline Dimensions
Appendix A: Technical specifications IP cradle outline dimensions IP cradle outline dimensions... - Page 108 Appendix A: Technical specifications IP cradle outline dimensions, continued (front and side). IP cradle outline dimensions...
-
Page 109: Thrane Ip Handset, Wired
Conformity Thrane IP Handset, wired CE (LVD & EMC) The Thrane IP Handset, wired, is CE certified (LVD & EMC directives) as stated in the simplified “EU Declaration of Conformity”, enclosed in copy on the next page. This equipment has been tested and found to comply with the limits for a Class A digital device, pursuant to Part 15 of the FCC Rules. - Page 110 The full text of the EU declaration of conformity is available at the following internet address: http://sync.cobham.com/satcom/support/downloads Document no.: 99-157672-A Thrane & Thrane A/S trading as Cobham SATCOM. Registered no.: DK - 65 72 46 18. Registered address: Lundtoftegaardsvej 93 D, 2800 Kgs. Lyngby, Denmark. www.cobham.com...
-
Page 111: Glossary
Glossary Glossary BGAN Broadband Global Area Network. A satellite network based on geostationary satellites, delivering broadband data and telephony to virtually any part of the earth, with full UMTS (3G) compatibility. BGAN enables users to access e-mail, corporate networks and the Internet, transfer files and make telephone calls. - Page 112 Glossary Internet Protocol. The method or protocol by which data is sent from one computer to another on the Internet. Local Area Network Media Access Control address. A hardware address that uniquely identifies each node of a network. Network Address Translation. Printed Circuit Board Personal Identification Number.
- Page 113 Glossary QVGA Quarter Video Graphics Array. A popular term for a computer display with 320 × 240 resolution. QVGA displays are often seen in mobile phones, PDAs and some handheld game consoles. Subscriber Identity Module.The SIM provides secure storing of the key identifying a mobile phone service subscriber but also subscription information, preferences and storage of text messages.
- Page 114 Glossary VoIP Voice over Internet Protocol. The routing of voice conversations over the Internet or through an IP-based network.
-
Page 115: Index
Index Index Numerics BGAN critical alarms, 72 BGAN software version, 70 3.1 kHz Audio number, 38 BGAN terminal, 15 501 phone number setup, 15 data connections, 68 BGAN terminal type, 70 870, call, 38 cable relief, 7 active alarms call BGAN, 72 +870, 38 adjust... - Page 116 Index connecting Default gateway BGAN terminal, 9 show, 49 connecting cradle default settings, 61 LAN cable, 7 DHCP, 50 connecting the handset, 6 diagnostics report, 87 connection, start dialled number, 45 IP background, 69 dimensions IP streaming, 69 cradle, 97 connector handset, 95 cradle, 6...
- Page 117 Index gateway IP Handset enter, 50 getting to know, 1 Getting started, 5 setup, 14 GPS position, 70 switch off, 10 switch on, 10 IP mode, 50 IP streaming start connection, 69 hand-held mode, 40 handset, 14 connecting, 6 connecting to BGAN terminal, 9 dimensions, 95 keypad features, 3...
- Page 118 Index memory usage power call log, 46 off, 10 menus on, 10 main, 23 on, off, 17 microphone, muting, 40 Power over Ethernet missed calls, 45 standard, 9 mobile number, 38 PUK code, 13 muting the microphone, 40 received calls, 45 network information, 79 register night mode, 41...
- Page 119 Index SIP fault, 91 switch off SIP profiles, 82 IP Handset, 10 activating, 62 switch on adding, 63, 83 IP Handset, 10 codec priority, 65 deleting, 66, 83 editing, 66, 83 selecting, 62 technical specifications, 93 SIP server, 63 terminal type, BGAN, 70 name, 64 test port number, 64...
- Page 120 Index web server accessing, 77 browser settings, 76 call log, 81 contacts, 80 enabling or disabling, 57 Home, 79 import/export settings, 85 introduction, 75 overview, 78 SIP settings, 82 using, 75 writing text in display, 42 X-Stream, 68...
- Page 122 98-126059-J www.cobham.com/satcom...
Need help?
Do you have a question about the Thrane IP Handset and is the answer not in the manual?
Questions and answers