Aim Solo 2 User Manual
Gps lap timer
Hide thumbs
Also See for Solo 2:
- Installation manual (2 pages) ,
- Installation manual (2 pages) ,
- User manual (22 pages)

Subscribe to Our Youtube Channel
Related Manuals for Aim Solo 2


Summary of Contents for Aim Solo 2
- Page 1 Solo 2 GPS Lap Timer USER GUIDE Made in Italy www.aim-sportline.com...
-
Page 2: Table Of Contents
7.2 Data Recall “Performance” 4 At power on 8 Wi Fi configuration 5 Configuration menu 8.1 Configuring Solo 2 as an access point AP Type of racing 8.2 Adding Solo 2 to an existing network Track management 8.3 Wi Fi network settings 5.2.1 Creating a track with Solo 2... -
Page 3: Solo 2 In A Few Words
CHAPTER 1 SOLO 2 1. Solo 2 in a few words What is Solo 2? Anything else? Solo 2 is the new AiM GPS lap timer Of course, yes! Why Solo 2? Because it features: An app for iPhone is coming! - Page 4 2. What is in the kit? Solo 2 kit includes: 1 - Solo 2 2 - Solo 2 power cable with car lighter socket 3 - Solo 2 power cable with AC adapter 4 - Solo 2 mounting bracket with screws...
-
Page 5: Installation, Powering And Accessories
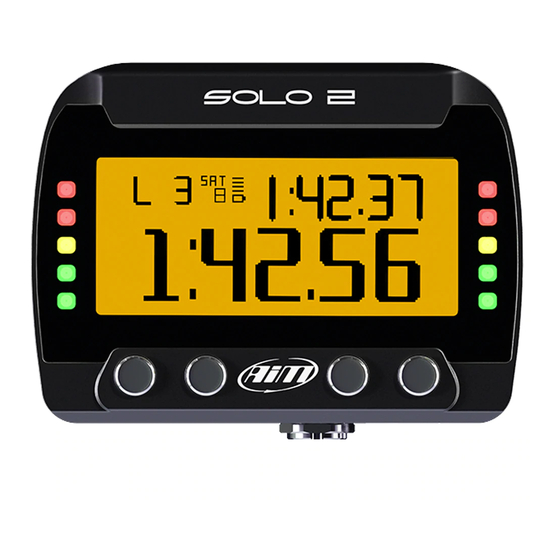
Thanks to its small dimensions and to the different accessories available for installation Solo 2 can be installed on any kind of motorsport vehicle. The internal battery keeps Solo 2 alive for about 4/5 hours: please, keep in mind that the power consumption depends upon the activity of:... - Page 6 CHAPTER 3 SOLO 2 Solo 2 Wide display Integrated GPS Magnets Power and battery charge RGB predictive lights Nylon body...
-
Page 7: At Power On
4. At power ON 5. Configuration menu When switched on Solo 2 shows satellite page. Before using your Solo 2 you need to set some parameters as explained here below. Press “MENU” and this page shows up. The icons are to manage: To optimize the display management, the keyboard disappears when not necessary. -
Page 8: Type Of Racing
CHAPTER 5 SOLO 2 5.1 Type of racing Solo 2 features two different type of races, each of them with different options: Speed racing n speed (left image below) Solo2 automatically selects the track in which you are performing: after having found... -
Page 9: Track Management
5.2.1 Creating a track with Solo 2 Solo 2 built in GPS receiver is used for: If you are running in a track NOT included in Solo 2 database the device switches to n Lap time calculation “learning” mode and behave this way:... -
Page 10: Display Setup
Selecting this icon the page shown below shows up. Solo 2 can show from two up to five pages according to the type of race you set. Some pages are enabled by default and need to be set while other – custom, available only if you set type of race: speed –... -
Page 11: Wi Fi
Auto: switches Wi-Fi on when the vehicle is stopped and automatically switches it here you will see different options in “Type of Race” menu if selecting “Performance” off when Solo 2 starts recording (speed higher than 10 km/h for 3 seconds with a type (refer to the related paragraph for further information) -
Page 12: Led Bar Type Of Race: Speed Only
5.5.3 Date Time Selecting this icon you enter this page: Here you can set the time zone of your Solo 2 as well as enable/disable “Daylight Saving time” option. Time zone is always set manually. Date and time can be shown in different format. -
Page 13: System Info
5.5.5 System info 6. On the track This page shows serial number as well as firmware and boot version of your Solo 2. Some Solo 2 pages are available for online visualization. To scroll them press “NEXT” (“Type of Race: Speed” only). -
Page 14: Other
“NEXT” button to scroll them. Data Recall is different according to the type of race you set your Solo 2 on. Laptime page is shown no matter which type of race you set your Solo 2 on. It shows the lap time. -
Page 15: Data Recall "Performance
CHAPTER 7 SOLO 2 This page is a histogram test summary. “Session page” shows you all the laps Moving the cursor left and right you of the session from the most recent can see all laps. backwards. Press “ENTER” to enter “TEST” page. -
Page 16: Wi Fi Configuration
1 – As an Access Point (AP – default) This is the ideal configuration if you have one only device and one only computer. In this situation your Solo 2 creates a Wi-Fi network and works as an Access Point you can connect your PC to. -
Page 17: Configuring Solo 2 As An Access Point Ap
This is Solo 2 default configuration and is the easiest and most direct connection Characters allowed in the password are all letters, also capital, all digits and these mode, ideal if you want to communicate with one Solo 2 using one PC. It is free and characters: ‘+-_()[]{}$£!?^#@*\\\”=~.:;/%"... -
Page 18: Adding Solo 2 To An Existing Network
“00101” is your device serial number assigned by the factory. to communicate with one or more AiM devices using the same PC network. Each Solo 2 can have its password that adds another security and privacy level to the network. -
Page 19: Wi Fi Network Settings
AiM devices and a PC. Here below is an example of configuration. When the PC is authenticated to the network called “AiM” it can see all devices you configured to access the same network. In the image below two AiM devices are connected to the same “AiM”WLAN. -
Page 20: The Internet Connectivity
It means that the WLAN network name is “network_1. ” A PC has to be authenticated For an optimal speed of your AiM device(s) we recommend not to allow the Internet in this network to interact with any AiM device of this network. -
Page 21: Working On Mac
CHAPTER 8 SOLO 2 8.6 Working on Mac™ with virtualized Windows™ To ensure that the communication works select “Open Network preferences…” menu. Race Studio 3 only works on Windows operative systems; Mac users can eventually use a virtualized Windows machine. -
Page 22: Connected Device Visualization Issues
This is why we always suggests using an Wi-Fi (WLAN) router. This router work as an Access Point allowing more external devices to connect to its network. Solo 2 Wi-Fi configuration is to be set on Existing Network as explained in the related paragraph. -
Page 23: Pc Connection
Tracks: to manage the tracks stored in the device memory n Logo: transmit/receive the logo that shows up when switching Solo 2 on; supported image format are JPEG or BMP; always use the most recent Windows n Firmware: to check or update your Solo 2 firmware version. -
Page 24: Track Management
10.1 Creating a track with Solo 2 Solo 2 built in GPS receiver is used for: If you are running in a track NOT included in Solo 2 database the device switches to “learning” mode and behave this way: n Lap Time calculation... -
Page 25: Data Download
SOLO 2 11. Data download 12. Data Analysis Once Solo 2 - PC connection is established activate “Download” tab to download When data have been downloaded press Analysis icon and Race Studio Analysis sampled data. software will open showing this page. -
Page 26: New Firmware Upgrade
CHAPTER 13 SOLO 2 13. New firmware upgrade Select your file double clicking on it and start analysing it. Our technicians and engineers are constantly working to improve both the firmware A lot of pages, graphs and images will help you analysing your data in the best way. -
Page 27: Technical Specification And Drawings
CHAPTER 14 SOLO 2 14. Technical specification and drawings Solo 2 pinout n Display Graphical n Display resolution 238 x 99 pixels n Display pages Up to 5 freely configurable n Backlight 7 configurable RGB colour n ShiftLights/alarms LEDs 10 configurable RGB LEDs... - Page 28 Our web site, www.aim-sportline.com is constantly upgraded. Please, refer to it for downloading the last release of our documentation...
Need help?
Do you have a question about the Solo 2 and is the answer not in the manual?
Questions and answers