Advertisement
Advertisement
Table of Contents

Summary of Contents for Rad Power Bikes RadRhino
- Page 1 2017...
-
Page 2: Welcome
This manual contains details of the product, its equipment, and information on its operation and maintenance and other helpful tips for owners. Read it carefully and familiarize yourself with the RadRhino before using it in order to ensure a safe use and prevent tragic accidents. Be sure to retain this manual as your convenient RadRhino information source. -
Page 3: Table Of Contents
Table of Contents Welcome........................................ 2 Using This Manual ....................................2 Table of Contents ....................................3 General Info ......................................4 Assembly Instructions ................................... 5 Battery Charging ....................................10 Operation ......................................14 Maintenance......................................20 Troubleshooting ....................................23 Warnings and Safety .................................... 25 Link to Assembly Video and Online Resources ............................ -
Page 4: General Info
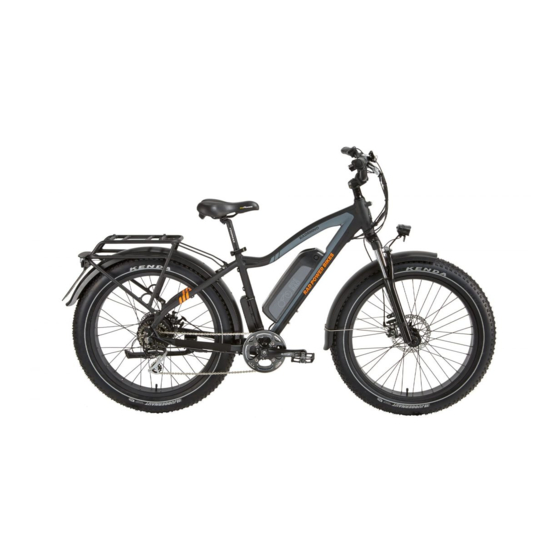
General Info General Components and Overall Dimensions... -
Page 5: Assembly Instructions
RadRhino Vehicle Category The RadRhino is a type approved L1e-A powered cycle. Please check relevant legislation in the locations you intend to ride, for a full understanding of all necessary legal requirements for operating your RadRhino. Changing Components or Attaching Accessories The use of non-original components or spare parts can jeopardize the safety of your RadRhino, invalidate your warranty and in some cases cause your RadRhino to not conform with laws pertaining to your bike. - Page 6 3. Pedals (Left and Right) 4. Headlight 5. Charger 6. Keys for battery pack 7. Assembly tools and manuals. 8. Front Fender Step 2: Install handlebar onto stem as shown in the assembly video for the RadRhino at www.radpowerbikes.com...
- Page 7 Set desired saddle height. Secure tightly with the quick release lever at the desired height. Ensure saddle post is not extended beyond the minimum insertion marking near the base of the saddle post. Step 7: Check that the battery pack is locked to the frame of the RadRhino.
- Page 8 If you are not able to ensure all the assembly steps in the assembly video are performed properly, or you are unable to view the assembly video please consult a certified local bicycle service provider for assistance in addition to contacting Rad Power Bikes for help.
- Page 9 3) After tightening the finger nut on the seat post quick release properly, close the quick release lever by swinging the lever back 180 degrees until it looks like the image below and the saddle cannot move up, down or to the left or right. Before using the bike, check that the saddle post quick release skewer is closed and tightened properly.
-
Page 10: Battery Charging
NOTICE: Ensure saddle post and saddle are properly adjusted before riding. Do not raise the saddle post beyond the minimum insertion marking etched into the saddle post tube. If your saddle post projects from the frame beyond these markings, the saddle post or frame may break, which could cause you to lose control and fall. - Page 11 Always charge your battery in temperatures between 10 and 26 degrees Celsius and ensure the battery and charger are not damaged before initiating charge. If you notice anything unusual while charging please discontinue charging and use of the bike and contact Rad Power Bikes for help. Basic Battery Charging Tips o The battery should be recharged after each use.
- Page 12 o Charge in a clear area away from potential to trip on the charging cords, or damage to occur to the bike, battery or charging equipment while parked. When the Battery Is Removed o Do not touch the “+” and “-“ terminal contacts on the bottom of the battery when the battery is removed from the bike. o Be careful not to drop or damage the battery pack when loose from the bike.
- Page 13 Do not charge the battery with any other chargers than what was originally supplied with your Rad Power Bike or a charger purchased directly from Rad Power Bikes for use with your specific bike serial number, as approved by Rad Power Bikes.
-
Page 14: Operation
License Plate Installation Depending on the location of use, a driving permit/license and insurance/number plate may be required to operate the RadRhino L1e-A Powered Cycle. The license/number plate mounting bracket included on all RadRhino’s is sized to accommodate most license/number plates designed for L1e-A type vehicles. - Page 15 Not taking care to familiarize yourself and practice the operation of the power system on your Rad Power Bikes can lead to death or serious injury, please head this warning.
- Page 16 The following table provides general estimates and outlines various factors effecting range and their combined estimated effects on range. This table is meant to help owners understand the factors that can increase of decrease range but Rad Power Bikes makes no claims to the range that individual users might obtain.
- Page 17 32 km Hilly Terrain Heavy Payload Windy High Speeds Light Pedaling 48 km Flat Terrain Normal Payload Not Windy Medium Speeds Light Pedaling 64 km Flat Terrain Normal Payload Not Windy Low Pedal Assist Level Moderate to Heavy Pedaling Battery Capacity Display The display on the handlebar of your Rad Power Bike features a battery capacity gauge (much like the fuel gauge on an automobile).
- Page 18 Do not park, store, or transport your Rad Power Bike on a rack that is not designed for the size and weight of the bike. o Wide tires, as used on Rad Power Bikes, cannot fit into all bike racks, please select an appropriate rack for the width of...
- Page 19 MAXIMUM PAYLOAD FOR RADRHINO The total maximum weight limit of the RadRhino (125 Kilograms) includes the weight of the rider as well as clothing, riding gear, cargo, etc. The kickstand is not designed to be used for loading cargo. You MUST hold onto the bike whenever loading cargo. Do not assume the bike is stable and balanced when using the kickstand, always hold onto the bike when cargo is being loaded or in place.
-
Page 20: Maintenance
• Cargo should be loaded as low as possible to lower the center of gravity and improve stability, but ensure that cargo does not interfere with any moving components or the ground. • Ensure your loads are properly secured and periodically check that nothing loosens. •... - Page 21 9. Regularly clean and lubricate all moving parts, tighten components and adjust as required. 10. The RadRhino comes equipped with a full fender set as well as a rear rack, both of which should be inspected to ensure mounting hardware is properly secured and these parts are in good working condition.
- Page 22 Ensure handlebar and stem are correctly adjusted and tightened, and 3. Steering allow proper steering. Ensure the handlebar is set correctly in relation to the forks and the direction of travel. Ensure the chain is oiled, clean and runs smoothly. 4.
-
Page 23: Troubleshooting
Troubleshooting Basic Troubleshooting Symptoms Possible Causes Most Common Solutions It doesn’t work Insufficient battery power Charge the battery pack Faulty connections Clean and repair connectors Battery not fully seated in tray Install battery correctly Improper turn on sequence Turn on bike with proper sequence Brakes are applied Disengage brakes Irregular acceleration and/or... - Page 24 Error Code Definition Abnormal Current Throttle Fault Motor Phase Problem Motor Hall Defect Brake Failed Or Brake Applied While Turning On Abnormal Communication...
-
Page 25: Warnings And Safety
Wiring Diagram The basic wiring diagram of the complete electronic system is meant for use in basic diagnostics or troubleshooting with the help of a Rad Power Bike technical support agent. Warnings and Safety General Warnings Like any sport bicycling involves risk of injury and damage. - Page 26 Riders must have the physical condition, reaction time and metal capability to ride and manage traffic, road conditions, and sudden situations and respect the laws governing electric bicycle use where they ride, regardless of age. If you have an impairment or disability such as a visual impairment, hearing impairment, physical impairment, cognitive/language impairment, or a seizure disorder, consult your physician before riding any bicycle.
- Page 27 Tire Inflation and Replacement The RadRhino employs 26’’x4’’ rubber tires with inner tubes. The tires are designed for durability and safety for regular cycling activities however tires need to be checked before each use for proper inflation and condition. Proper inflation, care and timely...
- Page 28 Rad Power Bikes technical support. A Note for Parents and Guardians As a parent or guardian, you are responsible for the activities and safety of your child. The RadRhino is not designed for use by children. Safety Notes The following safety notes provide additional information on the safe operation of your Rad Power Bike and should be closely reviewed.
- Page 29 Ensure handle bar grips are not damaged and properly installed. Loose or damaged grips can cause you to lose control and fall. Do not use this product with standard bicycle trailers, stands or bicycle racks. Contact Rad Power Bikes to check if your equipment will work with the bicycle.
-
Page 30: Link To Assembly Video And Online Resources
In any countries where EU-regulations are applied, Rad Power Bikes accepts liability for material defects for two years after the date of sale. One prerequisite for Rad Power Bikes assuming this liability is the that your RadRhino’s use and maintenance was in line with all conditions outlined in the pages of this manual, any model specific tutorials available at www.radpowerbikes.com... - Page 31 Components of the RadRhino are subject to higher wear when compared to cycles without power assistance. This is because the RadRhino can travel at higher average speeds than regular cycles and has a greater weight. Higher wear is not a defect in the product and is not subject to warranty.
- Page 32 When the useful life of a component is surpassed it can cause unexpected loss of function. This can result in serious injuries or even death. Therefore, pay attention to wear characteristics such as cracks, scratches or changes in the color or operation of components which could indicate useful life has been exceeded.
Need help?
Do you have a question about the RadRhino and is the answer not in the manual?
Questions and answers
I have my key turned off & plugged in for charing. There's power in the charger but doesn't seem to be charging my bike