Table of Contents
Advertisement
JP02-R01-120_201610
Assembly, Installation, Care,
Maintenance and Use Instructions
USER'S MANUAL
10FT X 7.5FT RECTANGULAR INGROUND TRAMPOLINE
AND "STEEL FLEX" METAL RING ENCLOSURE COMBO
YOU MUST THOROUGHLY READ AND UNDERSTAND THE INSTRUCTIONS IN THIS
MANUAL, BEFORE ASSEMBLING AND USING THIS TRAMPOLINE.
SAVE THIS MANUAL FOR FUTURE REFERENCE.
MAXIMUM WEIGHT OF THE USER SHALL NOT EXCEED 220LBS (100KG).
DO NOT ALLOW MORE THAN ONE PERSON ON THE TRAMPOLINE AT A TIME.
DO NOT ALLOW YOUNG CHILDREN TO USE UNLESS SUPERVISED BY AN ADULT.
Customer Service Number: (1) 877-512-9188
Please contact us, before Returning the item to the store, where purchased.
Advertisement
Table of Contents

Related Manuals for Jump Power JP02-R01-120


Summary of Contents for Jump Power JP02-R01-120
- Page 1 JP02-R01-120_201610 Assembly, Installation, Care, Maintenance and Use Instructions USER’S MANUAL 10FT X 7.5FT RECTANGULAR INGROUND TRAMPOLINE AND “STEEL FLEX” METAL RING ENCLOSURE COMBO WARNING YOU MUST THOROUGHLY READ AND UNDERSTAND THE INSTRUCTIONS IN THIS MANUAL, BEFORE ASSEMBLING AND USING THIS TRAMPOLINE. ...
- Page 2 Thank you for purchasing this product. We hope that you will enjoy it. It will take a little time to assemble it. Please take it as an exercise in assembling this product. It is not unusual for you to take more than an hour to assemble this product;...
- Page 3 PARALYSIS OR DEATH CAN NO MORE THAN ONE RESULT IF YOU LAND ON PERSON AT A TIME ON THE YOUR HEAD OR NECK! TRAMPOLINE! DO NOT PERFORM MULTIPLE JUMPERS SOMERSAULTS (FLIPS) AS INCREASE THE RISK OF THIS WILL INCREASE YOUR INJURY SUCH AS BROKEN CHANCES OF LANDING ON HEAD, NECK, LEG OR BACK.
- Page 4 Ladder lets young children climb onto trampoline. Keep objects away which could interfere with the performer. Maintain a clear area around the trampoline. Do not use the trampoline while under the influence of alcohol or drugs. For information concerning skill training, contact a certified trampoline instructor.
- Page 5 Damaged, missing or insecurely attached frame pad Protrusions of any types (especially sharp typed) on the frame, springs or mat or suspension Always close the net opening before practice Empty pockets and hands before practice Do not exit the mat by a jump ...
- Page 6 IT IS RECOMMENDED THAT THE NET BE REPLACED ON A YEARLY BASIS OR EARLIER UNDER NORMAL USE, EVEN IF IT DOES NOT SHOW ANY VISIBLE SIGNS OF DAMAGE. INFORMATION ON USE OF THE TRAMPOLINE Initially, you should get accustomed to the feel and bounce of the trampoline. The focus must be on the fundamentals of your body position and you should practice each bounce (the basic bounces) until you can do each skill with ease and control.
- Page 7 Use of alcohol or Drugs: DO NOT consume any alcohol or drugs when using this trampoline! This will increase your chances of getting injured since these foreign substances might impair your judgments, reaction time, and overall physical coordination. Multiple Jumpers: If you have multiple jumpers (more than one person on the trampoline at any one time), you increase the chances of getting injured.
- Page 8 Poor Maintenance of Trampoline: A trampoline in poor condition will increase your risk of getting injured. Please inspect the trampoline before each use for bent steel tubes, torn mat, loose or broken springs, and overall stability of the trampoline. Weather Conditions: Please be aware of the weather conditions when using the trampoline. If the mat of the trampoline is wet, the jumper could slip and injure him or herself.
- Page 9 Never use the trampoline when it is wet, damaged, dirty, or worn out. The trampoline should be inspected before any jumpers start bouncing on it. Keep all objects that could interfere with the jumper away from the trampoline. Be aware of what is overhead, underneath, and around the trampoline.
- Page 10 FRONT BOUNCE 1. Start with a low bounce. 2. Land in prone (face down) position and keep hand and arms extended forward on mat. 3. Push off the mat with arms to return to standing position. 180 DEGREE BOUNCE 1. Start with the Front Bounce position. 2.
- Page 11 Working Drawing Please refer to the following figure to dig a pit. Long Side View : Short Side View :...
- Page 12 Trampoline and Enclosure Parts List Trampoline Part Diagram Description Quantity Number Trampoline Mat, stitched with Triangle- Rings Frame Pad Top Rail with Leg Sockets A Top Rail with Leg Sockets B Top Rail with Leg Sockets C Top Rail with Leg Sockets D Leg Base A Leg Base B Galvanized Springs...
- Page 13 Enclosure Part Diagram Description Quantity Number Upper Frame Tube with Foam Lower Frame Tube with Foam Plastic Cap Small Spring Lock Washer Self-Locking Screw Enclosure Safety Instruction Placard Cord Enclosure Netting Wrench Cable Wire Sets TOOLS REQUIRED FOR ASSEMBLY ARE LISTED ABOVE. PHILLIPS SCREW DRIVER, WHICH IS NOT INCLUDED, COULD BE USED FOR EASIER ASSEMBLY.
- Page 14 Trampoline Assembly STEP 1 Locate the following 12 pieces of steel tubing parts that are needed to assemble the trampoline frame: Top Rail with Leg Sockets A (# 3) Top Rail with Leg Sockets B (# 4) Top Rail with Leg Sockets C (# 5) Top Rail with Leg Sockets D (# 6)
- Page 15 STEP 2 Connect Top Rail with Leg Sockets B (# 4) and Top Rail with Leg Sockets C (# 5) as shown. Secure the Leg Base B(# 8)to the ASSEMBLED Top Rails with Leg Sockets by using Self-Locking Screw (# 12) , Small Spring Lock washer (# 11) as shown in STEP 2.
- Page 16 STEP 3 Connect Top Rail with Leg Sockets A (# 3) and Top Rail with Leg Sockets D (# 6) as shown. Secure the Leg Base A(# 7)to the ASSEMBLED Top Rails with Leg Sockets by using Self-Locking Screw (# 12) , Small Spring Lock washer (# 11) as shown in STEP 3.
- Page 17 STEP 4 Insert Large Cap(# 10) to Leg Base.
- Page 18 STEP 5 Place the Trampoline Mat (# 1) flat on the ground inside the assembled frame with the warning labels facing up as shown in STEP 5. Select a starting point on the frame and let it be called point “ONE” , hook one end of the Spring (# 9) into the Triangle-Ring on the Mat (# 1).
- Page 19 STEP 6 Lay the Frame Pad (# 2) over the trampoline so that the springs and steel frame are fully covered. Next, line up the elastic straps to the Top Rail and wrap. First, tie a knot and then a one-sided bow as shown in STEP 6. Finally, wrap the inner elastic straps around the triangle-ring and tie a half-knot , then tie it into a one-sided bow.
- Page 20 Trampoline Enclosure Assembly STEP 7 Insert Lower Frame Tube with Foam (# B) to holes in Top Rail with Leg Sockets and secure them by using Self-Locking Screw (# E) , Small spring Lock washer (# D) as shown in STEP 7.
- Page 21 STEP 8 list the cable wires as below : There are 10 Cable Wires (# J) needed to form the enclosure top frame. 4-STYLE A 6-STYLE B STYLE B STYLE A Thread 7.5FT SIDE STYLE B 10FT SIDE...
- Page 22 STEP 9 Assembly the Cable wire sets Connect the two ends of the Cable Wires and securely tighten using the Wrench (# I). Please ensure that the cable wires are securely fastened together using the Wrench. Failing to do so may increase the chance of injury due to the enclosure frame snapping apart during assembly or trampoline use.
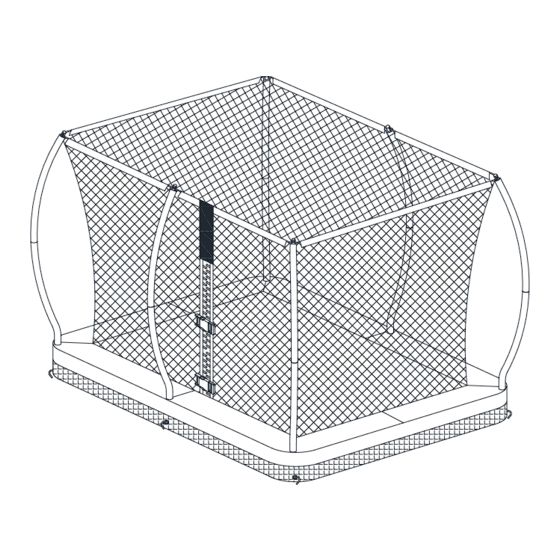
- Page 23 STEP 10 Lay out the Enclosure Netting (# H) on top of the trampoline frame and then insert the four sets of assembled cable wires into the sleeves of the netting as shown below. Make sure the zipper door of the enclosure netting is positioned on the side where you intend to enter the trampoline.
- Page 24 STEP 11 First, attach Plastic Cap (# C) to Upper Frame Tube with Foam (# A), and secure using Self-Locking Screw (# E) by Allen Wrench (# 14), and then attach the assembled Plastic Cap (# C) and Upper Frame Tube with Foam (# A) to the Cable Wire as shown in STEP 11.
- Page 25 STEP 12 Connect the Upper Frame Tube with Foam (# A) to the Lower Frame Tube with Foam (# B) by using Self- Locking Screw (# E) as shown in STEP 12.
- Page 26 STEP 13 Insert Anchor Set (# 13) to holes in Frame Pad and Leg Base to fix the trampoline.
- Page 27 STEP 14 Secure the trampoline netting to the trampoline frame using the Cord (# G). Lift up the frame pad and tie one end of the cord to any one of the triangle-rings on the trampoline mat as shown in STEP 14.
- Page 28 STEP 15 Close the zipper which is located at the entrance of the Enclosure Netting (# H) and secure the entrance by connecting the Buckles as shown in STEP 15. Hanging Trampoline Safety Instruction Placard (#16) and Enclosure Safety Instruction Placard (# F). Disassembly of the Trampoline To disassemble the trampoline, follow assembly steps in reverse order.
- Page 29 WARNING CARE AND MAINTENANCE This trampoline was designed and manufactured with quality materials and craftsmanship. If proper care and maintenance is provided, it will provide all jumpers with years of exercise, fun, and enjoyment as well as reduce the risk of injury. Please follow the guidelines listed below: This trampoline is designed to withhold a certain amount of weight and use.
- Page 30 USE INSTRUCTIONS Before you begin use of this trampoline and trampoline enclosure, be sure to carefully read all the information provided to you in this manual. Just like any other type of physical recreational activity, participants can be injured. To reduce the risk of injury, be sure to follow appropriate safety rules and tips. Trampolines over 20 in.
- Page 31 *Do not bounce recklessly on the trampoline since this will increase your chances of getting injured. The key to safety and having fun on the trampoline is control and mastering the various bounces. Never try to out-bounce another bouncer in terms of height! Never use the trampoline without supervision.
Need help?
Do you have a question about the JP02-R01-120 and is the answer not in the manual?
Questions and answers