Table of Contents
Advertisement
Quick Links
Advertisement
Table of Contents

Subscribe to Our Youtube Channel
Related Manuals for ATX ucrypt q2q

Summary of Contents for ATX ucrypt q2q
- Page 1 UC r ypt ® Patent Pending UCrypt QAM to QAM ® Quick Start Guide...
- Page 2 In no event shall ATX Networks Corp.
-
Page 3: Table Of Contents
Contact ATX Networks ........ - Page 4 This page intentionally left blank MDU Solutions – UCrypt QAM to QAM – Quick Start Guide ® ®...
-
Page 5: Safety
CHAPTER 1: SAFETY SAFETY Safety WARNING! FAILURE TO FOLLOW THE SAFETY PRECAUTIONS LISTED BELOW MAY RESULT IN PROPERTY DAMAGE OR PERSONAL INJURY. PLEASE READ AND COMPLY WITH THE FOLLOWING: SAFETY GROUND: The connection to earth of the supplementary grounding conductor shall be in compliance with the appropriate rules for terminating bonding jumpers in Part V of Article 250 of the National Electrical Code, ANSI/NFPA 70, and Section 10 of Part I of the Canadian Electrical Code, Part I, CSA C22.1. - Page 6 CHAPTER 1: SAFETY This page intentionally left blank MDU Solutions – UCrypt QAM to QAM – Quick Start Guide ® ®...
-
Page 7: Quick Start Guide - Read Me First
Operation Manual for installation details. You can get it from the ATX website (atxnetworks.com) in the Resource & Support section, User Documents sub-section. You will first need to get a user name and password from your ATX Networks support or sales representative and the contact numbers are on this same web page. -
Page 8: Pair The Cablecard™ With Its Host
TV or STB with built-in Pro:Idiom to view Pro:Idiom encrypted programs. ® Download the full Installation & Operation Manual from the ATX website (atxnetworks.com) in the Resources & Support section, User Documents sub-section for more details than are presented here. Click the Help tab to download it to your Management Computer. -
Page 9: Important Configuration Information
CHAPTER 3: IMPORTANT CONFIGURATION INFORMATION IMPORTANT CONFIGURATION INFORMATION Important Configuration Information Support for Two Simultaneous Configurations As work on configuration progresses, changes will need to be made to multiple pages in the Management Interface. As work is completed on each page, the changes must be saved and there is a Save button conveniently located on every configuration page where configuration changes can be made. - Page 10 CHAPTER 3: IMPORTANT CONFIGURATION INFORMATION This page intentionally left blank MDU Solutions – UCrypt QAM to QAM – Quick Start Guide ® ®...
-
Page 11: Installation Summary
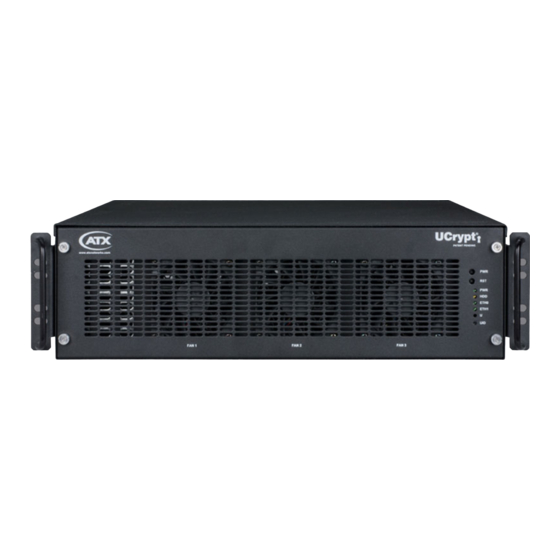
CHAPTER 4: INSTALLATION SUMMARY INSTALLATION SUMMARY Installation Summary Mounting NOTE: If the UCrypt unit is to be mounted in a rack, it is essential to attach the rear mounting ears of the unit to rear mounting rails to provide support or alternately install the equipment on a well supported shelf Rack mount brackets for front and rear are provided with the UCrypt device for mounting in a standard EIA 19”... - Page 12 CHAPTER 4: INSTALLATION SUMMARY voltages from 115 VAC to 230 VAC. There is no need to configure the power supply to operate on any voltage in this range. The power cord provided with the UCrypt device is a North American configuration with a NEMA 5-15 grounded plug for 115 VAC.
-
Page 13: Cabling Connection
CHAPTER 5: CABLING CONNECTION CABLING CONNECTION Cabling Connection The input signal level presented to the UCrypt device must be in the range of +5 to +10 dBmV per digital carrier as measured at the RF input port. The output RF level is +38 dBmV +/- 2 dB at the RF output port. Adjacent QAM carriers should be equal in level. - Page 14 CHAPTER 5: CABLING CONNECTION This page intentionally left blank MDU Solutions – UCrypt QAM to QAM – Quick Start Guide ® ®...
-
Page 15: Powering Up
CHAPTER 6: POWERING UP POWERING UP Powering Up NOTE: The factory default configuration is that all QAM outputs are disabled so no unintended output into the distribution network is possible. If the UCrypt device has been pre-provisioned elsewhere, before powering up, ensure that the network output cables are disconnected from the distribution network to avoid unintentional service outages if there are overlaps between the QAM output frequencies of the UCrypt device and existing services on the network. - Page 16 CHAPTER 6: POWERING UP This page intentionally left blank MDU Solutions – UCrypt QAM to QAM – Quick Start Guide ® ®...
-
Page 17: Management Interface
CHAPTER 7: MANAGEMENT INTERFACE MANAGEMENT INTERFACE Management Interface Connect to the Management Interface Minimum Management Computer Requirements • Computer running Windows or other OS ® • Ethernet Network port available • Web browser such as Internet Explorer , Firefox or similar ®... -
Page 18: Log In To The Management Interface
CHAPTER 7: MANAGEMENT INTERFACE ◦ In the IP address field, enter 192.168.0.x (where x represents any number from 1-253 except 23). ◦ In the Subnet mask field enter 255.255.255.0. Click OK and then OK again in the previous window. ◦ Log in to the Management Interface On the management computer, open a web browser and enter https://192.168.0.23 in the address field. - Page 19 CHAPTER 7: MANAGEMENT INTERFACE After navigating the security warnings, you should be presented with the following screen, on the left, displaying the login window: Enter the appropriate User Name and Password for the access level you require from the table below. The master user is the only user that can perform configuration.
- Page 20 CHAPTER 7: MANAGEMENT INTERFACE This page intentionally left blank MDU Solutions – UCrypt QAM to QAM – Quick Start Guide ® ®...
-
Page 21: Activating Cablecard™ Modules
CHAPTER 8: ACTIVATING CABLECARD™ MODULES ACTIVATING CableCARD™ MODULES Activating CableCARD™ Modules Activate CableCARD Modules by pairing them with the UCrypt device host slots. MDU Solutions – UCrypt QAM to QAM – Quick Start Guide ® ®... -
Page 22: Cablecard™ Module Authorization Best Practice
CHAPTER 8: ACTIVATING CABLECARD™ MODULES CableCARD™ Module Authorization Best Practice Each CableCARD module must be validated and authorized before it will decrypt. Validation means that the ID numbers for the CableCARD and host port match as entered in the billing system. Authorization means that the CableCARD has received an entitlement to decrypt specific content. -
Page 23: Channel View Tab - Configuration
CHAPTER 9: CHANNEL VIEW TAB - CONFIGURATION CHANNEL VIEW TAB - CONFIGURATION CHANNEL View Tab - Configuration Select programs from the system channel map for processing here: NOTE: Clicking the Apply button will cause a service interruption while the UCrypt device re- provisions itself with the new working configuration. - Page 24 CHAPTER 9: CHANNEL VIEW TAB - CONFIGURATION This page intentionally left blank MDU Solutions – UCrypt QAM to QAM – Quick Start Guide ® ®...
-
Page 25: Cablecard™ View Tab - Configuration
It is best to make all changes necessary on all configuration pages and apply the changes when completed. For detailed information on configuration of this page, go to the ATX website (atxnetworks.com) in the Resources & Support section, User Documents sub-section to download the Installation & Operation Manual. - Page 26 CHAPTER 10: CABLECARD™ VIEW TAB - CONFIGURATION This page intentionally left blank 10-2 MDU Solutions – UCrypt QAM to QAM – Quick Start Guide ® ®...
-
Page 27: Output Qam View Tab - Configuration
It is best to make all changes necessary on all configuration pages and apply the changes when completed. For detailed information on configuration of this page, go to the ATX website (atxnetworks.com) in the Resources & Support section, User Documents sub-section to download the Installation & Operation Manual. - Page 28 CHAPTER 11: OUTPUT QAM VIEW TAB - CONFIGURATION This page intentionally left blank 11-2 MDU Solutions – UCrypt QAM to QAM – Quick Start Guide ® ®...
-
Page 29: Output Mpts View Tab - Configuration
It is best to make all changes necessary on all configuration pages and apply the changes when completed. For detailed information on configuration of this page, go to the ATX website (atxnetworks.com) in the Resources & Support section, User Documents sub-section to download the Installation & Operation Manual. - Page 30 CHAPTER 12: OUTPUT MPTS VIEW TAB - CONFIGURATION This page intentionally left blank 12-2 MDU Solutions – UCrypt QAM to QAM – Quick Start Guide ® ®...
-
Page 31: System Tab - Configuration
For detailed information on configuration of this page, go to the ATX website (atxnetworks.com) in the Resources & Sup- port section, User Documents sub-section to download the Installation & Operation Manual. MDU Solutions – UCrypt QAM to QAM – Quick Start Guide 13-1 ®... - Page 32 SYSTEM TAB - CONFIGURATION System Configuration Tab - Part 2 For detailed information on configuration of this page, go to the ATX website (atxnetworks.com) in the Resources & Support section, User Documents sub-section to download the Installation & Operation Manual.
-
Page 33: Configuration Tab - Configuration
It is best to make all changes necessary on all configuration pages and apply the changes when completed. For detailed information on configuration of this page, go to the ATX website (atxnetworks.com) in the Resources & Support section, User Documents sub-section to download the Installation & Operation Manual. - Page 34 CHAPTER 14: CONFIGURATION TAB - CONFIGURATION This page intentionally left blank 14-2 MDU Solutions – UCrypt QAM to QAM – Quick Start Guide ® ®...
-
Page 35: Service & Support
Please contact ATX Technical Support for assistance with any ATX products. Please contact ATX Customer Service to obtain a valid RMA number for any ATX products that require service and are in or out-of-warranty before returning a failed module to the factory. - Page 36 1-501 Clements Road West, Ajax, ON L1S 7H4 Canada Tel +1 (905) 428-6068 Toll Free +1 (800) 565-7488 Fax +1 (905) 427-1964 Toll Free Fax +1 (866) 427-1964 www.atxnetworks.com support@atxnetworks.com Printed in Canada Rev. 10/17 (ANW0836)
Need help?
Do you have a question about the ucrypt q2q and is the answer not in the manual?
Questions and answers