Advertisement
Advertisement
Table of Contents

Related Manuals for STATESMAN LEGACY 50 GSLF

Summary of Contents for STATESMAN LEGACY 50 GSLF
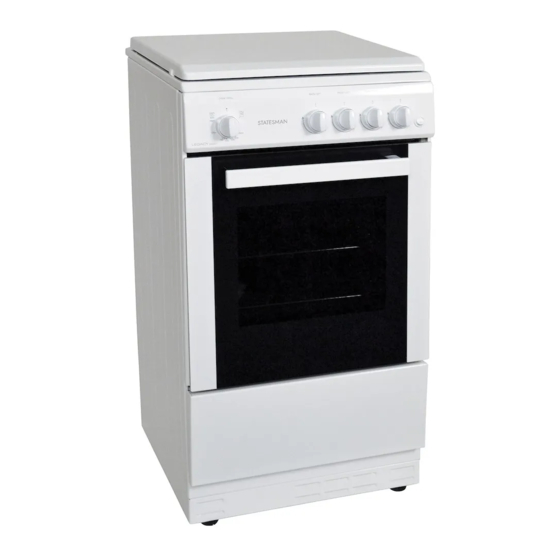
- Page 1 USER / INSTALLER INSTRUCTION BOOKLET Please read the instructions before using the appliance MODEL LEGACY 50 GSLF ...
-
Page 3: Table Of Contents
CONTENTS Introduction..............Page 4 Safety (General) .............Page 6 Using the Oven………………………………………………Page 8 Using the Hotplate……………………………….…………Page 9 Using the Grill………………………………………………..Page 9 Cleaning………………………………………….….….……Page 10 Installation.........……………………...Page 11 LPG Conversion…………………………………………….. Page 14 Technical Data........………………..…….Page 16 Specification ........………………..…….Page 17 ... -
Page 4: Introduction
INTRODUCTION Thank you for choosing a STATESMAN appliance. IMPORTANT; Before using your appliance, please read this manual carefully to assist safe and successful operation I N S T A L L A T I O N ( S e e P a g e 8 ) W A R N I N G –... - Page 5 NOTE This is a modern safety design of gas cooker and the oven uses a base burner below the floor of the oven. As a result, the performance characteristics may vary considerably from previous experience using older oven designs with exposed rear gas burners.
-
Page 6: Safety (General)
Check for any damage once unpacked. If there are any defects or damage, do not use the appliance. Report the defect/damage to your supplier or Statesman Service. Remove and dispose of all packaging immediately to prevent any risk of harm to children. - Page 7 SAFETY CONTINUED When heating fats or oils, do not leave pans unattended as there is risk of fire. Keep children away from this appliance. CAUTION: Accessible parts may be hot when the grill is in use. Young children should be kept away.
- Page 8 SAFETY CONTINUED Always protect the appliance from the effects of damp or wet weather conditions. Prior to installation, ensure that the local distribution conditions (nature of the gas and gas pressure) and the adjustment of the appliance are compatible ...
-
Page 9: Using The Oven
USING THE OVEN N o t e – This is a modern design of gas cooker using a base burner below the floor of the oven. As a result, the performance characteristics may vary considerably from previous experience using older oven designs with exposed rear gas burners. -
Page 10: Using The Hotplate
USING THE HOTPLATE I G N I T I O N Push in and turn the selected control knob anticlockwise to the ‘full on’ position (as indicated by the flame symbols), whilst pressing the ignition button until the burner lights. ONCE THE BURNER HAS LIT, HOLD THE CONTROL KNOB IN FOR 5-10 SECONDS BEFORE SLOWLY RELEASING. -
Page 11: Cleaning
If the burner fails to light, keep the oven door open and do not attempt to re- light it for 1 min. Allow 5 minutes for the grill burner flame to stabilize and reach the required temperature. Adjust the grill pan on the runner positions to allow for different types of food. WARNING: The grill burner in this appliance can’t be modulated and acts as a constant source of heat. -
Page 12: The Oven
Household detergents and bleaches; Impregnated pads unsuitable for non-stick saucepans; Steel wool pads; Bath/sink stain removers. CONTROL PANEL AND LID Before cleaning the control fascia and lid, ensure that the fascia surface is cool. For best results use a soft dampened cloth, if marks should remain use a very mild detergent using a light rubbing action being particularly careful around graphics. -
Page 13: Installation
INSTALLATION I M P O R T A N T - Installation of this cooker must be carried out by qualified personnel. CLEARANCES COOKER HOOD Min.650mm with hood Min.700mm Min.110mm without hood Min.420mm O O O O O Min. 2 mm This cooker may be fitted flush to the base units. -
Page 14: Ventilation Requirements
VENTILATION REQUIREMENTS This appliance needs 2m /h of air per KW input. This appliance must not be installed in a bed sitting room of less than 20m in a bathroom or shower room. If there are other fuel burning appliances in the same room, BS5440; Part2; 1989 should be consulted to determine the air vent requirements. - Page 15 ANTI-TILT DEVICE The cooker must be fitted with an anti-tilt/restraint device to prevent it tipping forward when in use. To use the floor mounted bracket supplied, see the instructions provided. LEVELLING Place a spirit level on an oven pan or shelf and adjust the feet accordingly. Make sure that the appliance is stable and does not rock.
-
Page 16: Electrical Connection
ELECTRICAL CONNECTION WARN ING - Th is ap p lia nc e must be e art he d . M ak e s ur e t ha t th e e lec t r ic i ty supply is compatible with t h e t ype s ta t ed o n the d a ta p la t e o f t he a ppl i ance . - Page 17 IMPORTANT: How to wire a 3 amp plug The wires in the mains lead on this appliance are colored in accordance with the following code: • Green and Yellow – Earth • Blue – Neutral • Brown – Live GREEN-YELLOW EARTH BROWN LIVE...
-
Page 18: Lpg Conversion
LPG CONVERSION This cooker has been pre-set for use on Natural Gas (G20 – 20 mbar). A conversion kit is included for converting the appliance for use on LP Gas. This should only be carried out by a suitably qualified engineer. The instructions below must be followed in full, otherwise the guarantee becomes invalid. - Page 19 3. The by-pass adjustment screw can now be accessed and adjusted as necessary. When converting from NG to LPG, completely fasten the by- pass screw. When converting from LPG to NG, the same screw must be loosened. 4. Carry out the oven adjustment before re-assembling. OVEN;...
-
Page 20: Technical Data
TECHNICAL DATA G A S T Y P E - N a t G a s @ 2 0 m b a r L P G - P r o p a n e @ 3 7 m b a r L P G - B u t a n e @ 2 8 . -
Page 21: Specification
SPECIFICATION INJECTOR DIAMETERS Small Medium Large Oven Grill GAS TYPE Burner Burner Burner Burner Burner G20 20mbar 0.72 0.97 1.15 0.77 1.29 0.97 0.87 G30 29mbar 0.65 0.85 0.70 0.70 0.68 0.68 G31 37mbar 0.65 0.85 0.70 0.68 0.68 0.87 0.70 Natural Gas 95.2 lt/h...
Need help?
Do you have a question about the LEGACY 50 GSLF and is the answer not in the manual?
Questions and answers