
Related Manuals for Mod Duo

Summary of Contents for Mod Duo
- Page 1 MOD D uo User’s M anual Rev. A Before u sing t he u nit c arefully r ead t he “ Important S afety I nstructions” p resent i n t his m anual.
-
Page 2: Important S Afety I Nstructions
Important S afety I nstructions Carefully r ead t hese i mportant s afety i nstructions a nd s ave t hem f or f uture r eference. ... -
Page 3: Table Of Contents
Table o f C ontents Important S afety I nstructions Table o f C ontents Getting r eady Overview Connecting t he M OD D uo Adjusting v olumes Inputs Outputs Headphone... - Page 4 CPU U sage LED a udio m eters About p lugins Upgrading t he M OD D uo More i nformation o nline Social N etworks...
-
Page 5: Getting R Eady
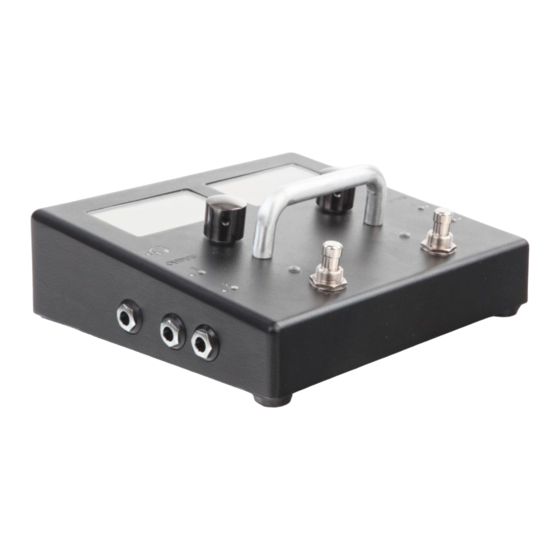
Getting r eady Overview... -
Page 6: Connecting T He M Od D Uo
4. Wait u ntil t he M OD D uo b oots u p Adjusting v olumes The MOD Duo allows each input and output volume to be individually adjusted. To access the V olume and Gains menu, first press and hold the left knob for one second. The SETTINGS menu will show up, now turn the left knob to select the ... -
Page 7: Inputs
In the V olume and Gains menu, turn the knob to select the input or output you want to adjust a nd s hort p ress t he k nob t o a ccess i t. Inputs The... -
Page 8: Outputs
There is also the option to enable the D irect Monitoring . By enabling the direct monitoring the headphone will work as a monitor for the dry sound coming into the MOD Duo. To toggle the monitor between O N a nd O FF p ress the knob while the D irect Monitoring option is... -
Page 9: Tuning
To exit the tuner press and hold the right knob for one second. If you see a question mark on the tuner screen, it means the MOD Duo is not receiving any input. To tune a guitar, play an unfretted note on a string and tune it until you see the correct note on the display. -
Page 10: Playing
Playing After you have powered on and adjusted the volumes of your MOD Duo, it is ready for playtime. The MOD Duo comes with many pedalboards ready to be used. They are organised i n b anks a nd c an b e a ccessed v ia S ETTINGS m enu. - Page 11 These parameters you see on the displays were considered important to be accessible to the user when the pedalboard is loaded. To adjust the value of each parameter you just need to turn the knob until the desired value is reached. More than one parameter can be assigned to the same knob, to cycle between them, short press the knob.
-
Page 12: Editing
To access the GUI via Bluetooth you will need a Bluetooth USB dongle (version 3 or higher). Connect the Bluetooth dongle to the USB host port on the MOD Duo, then press and hold the left knob for one second to open the S ETTINGS menu, turn the knob to select the Bluetooth... - Page 13 You will see a message saying the discovery mode will be enabled for 2 minutes, short press the knob again to close this message. Now your MOD Duo is ready to be connected to your PC, Mac or tablet. From this point on you should proceed with the Bluetooth connection...
-
Page 14: Creating A P Edalboard
On the right edge there are another 3 connectors: 2 audio outputs and 1 MIDI output. All those connectors represent the real inputs and outputs of your MOD Duo. Be aware that on the interface the signal flows from left to right. Purple cables transport audio signals, cyan cables... -
Page 15: Adding A Nd C Onnecting P Lugins
Adding a nd c onnecting p lugins To add plugins, drag-and-drop one from the plugins bar to the pedalboard assembler area. To make a new connection, click on the plugin’s output jack and drag it to where you want to connect it to. -
Page 16: Adjusting P Lugins P Arameters
Note that the inputs and outputs of the MOD Duo are completely independent and can process multiple audio paths. The MOD Duo allows you to create multiple connections coming out from the same output and also allows multiple connections to come in the same input.... -
Page 17: Assigning P Lugins P Arameters T O A Ctuators
Assigning p lugins p arameters t o a ctuators One of the most powerful features that the MOD Duo offers is the ability to assign plugin parameters a nd p reset l ists t o p hysical a ctuators, l ike k nobs a nd f ootswitches. - Page 18 would like to assign the parameter to from the dropdown list. The knobs can hold multiple assignments b ut f ootswitches c an o nly h old o ne. Any parameter can be assigned, but some parameters can only be assigned to a specific type of actuator.
-
Page 19: Saving / L Oading P Edalboard P Resets
Once you have done the adjustments, click on the s ave b utton to execute the assignment. At this point you should see the assigned information on the display and be able to operate the p arameter t hrough t he a ctuator y ou h ave c hosen. Saving... -
Page 20: Saving A P Edalboard
A single click on the name of the preset will load it. You also have the option to assign the presets l ist t o a n a ctuator b y u sing t he A ssign a ll b utton. Saving... -
Page 21: Organizing I N B Anks
By default the MOD Duo comes with many plugins installed, but you can install even more. The plugins available for download on the MOD Duo are created either by the MOD team, or by independent developers. To learn more about plugins please check the A dvanced... - Page 22 i nstall b utton. The plugin will be automatically downloaded and installed on your MOD Duo. You can also r emove o r u pgrade a n already installed plugin by...
-
Page 23: Sharing A P Edalboard
Sharing a p edalboard Another great feature that the MOD Duo has is allowing you to share and load pedalboards from the existing MOD online community. To share a pedalboard, go to the pedalboard assembler and click on the share button in the pedalboard actions bar. - Page 24 load pedalboards from another user, visit: https://pedalboards.moddevices.com , listen to the samples and once you find a pedalboard you like, click on the T ry Now b utton. Note that in order to load an online pedalboard, you need...
- Page 25 Use the V iew More button to see what plugins were used to create the pedalboard. Additionally you can list the pedalboards that were made using a specific plugin. In order to do this, open the plugin description dialog (for example by clicking on the info button on the...
-
Page 26: Expanding T He M Od D Uo C Ontrols
Expanding t he M OD D uo c ontrols MIDI d evices The MOD Duo has two ways to connect MIDI devices, via the classic MIDI DIN connector and v ia U SB. -
Page 27: Midi D In - O Utput
In addition to the classic MIDI ports you can also use the USB port to connect your MIDI device. The MOD Duo will recognize your MIDI device when it is plugged in and add it to the MIDI ports list. Because a single MIDI device can have multiple ports, they are not visible in the assembler by default. -
Page 28: Control C Hain D Evices
L ED c olors t o i ndicate s pecific s tates. The Control Chain devices are connected to the MOD Duo using a regular Ethernet cable and they have two connectors, which allows an extra external controller to be connected,... -
Page 29: Assigning P Lugins P Arameters T O C Ontrol C Hain A Ctuators
Control Chain actuators i n the same way as the regular actuators on the MOD Duo . Right after a Control Chain device is connected to the MOD Duo, it will be ... -
Page 30: Advanced I Nformation
This c hapter c overs e xtra f eatures o f y our M OD D uo. True B ypass The MOD Duo has a true bypass circuit for each pair of input/output. This allows you to physically connect input 1 to output 1, and input 2 to output 2. The true bypass is enabled when the MOD Duo is off and it is automatically disabled after the current pedalboard is loaded. -
Page 31: Cpu U Sage
Signal > - 3 d B About p lugins The MOD Duo is not only a platform for musicians but also for developers, because it uses the LV2 open standard for audio plugins and thus allows any developer to create his/her own plugin (without any license restrictions). -
Page 32: More I Nformation O Nline
Do n ot d isconnect y our M OD D uo f rom t he p ower o utlet d uring t his p rocess. Remember to always keep your MOD Duo updated to receive the latest features and bug fixes. -
Page 33: Social N Etworks
To listen and see what other MOD Duo users are doing you can check our pedalboards page: h ttps://pedalboards.moddevices.com...
Need help?
Do you have a question about the Duo and is the answer not in the manual?
Questions and answers