Table of Contents
Advertisement
Available languages
Available languages
Advertisement
Table of Contents

Related Manuals for Phottix Aion


Summary of Contents for Phottix Aion
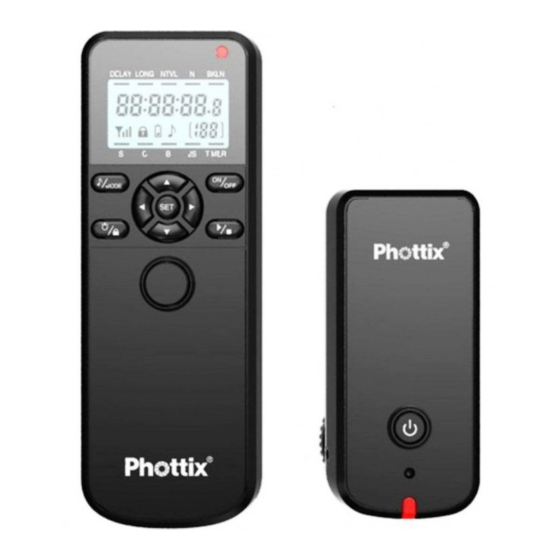
- Page 3 Phottix Aion Wireless Timer Instructions Parts Timer Receiver 1. Cable Port 1. Cable Port 2. Function LED 2. Function LED 3. LCD Display 3. Power Button 4. Sound / Mode Button 4. Cold Shoe 5. Backlight / Lock Button 5. 3/16 Mounting Lug 6.
- Page 4 Using the Backlight Turning timer and Receiver on/off 1. Use the Backlight to illuminate the LCD 1. To turn on the Phottix Aion Timer and screen. Receiver unit – press the Power Button. 2. Press and release the Backlight / Lock Button.
- Page 5 2. Attach a compatible Phottix Accessory Cable the LCD shows the signal strength between to the Timer or Receiver. the timer and Receiver if The Aion system is 3. Attach the other end to camera’s remote being used wirelessly. port.
- Page 6 The LED on the Timer and Receiver will light red. To Using the Timer stop the exposure fully press the Stutter Button to The Phottix Aion Wireless Digital Timer has two close the shutter. modes: Shutter release modes and Timer mode.
-
Page 7: Setting The Timer
will shoot during the current program (-- being unlimited, 199 being programmable maximum.) BKLN: Bracketed Long Exposure. Useful for low-light multiple exposure HDR images. Setting the timer Timer Mode 1. Press the left or right Adjustment Buttons to select DELAY, LONG, INTVL, N, BKLN. A Using Timer mode small indicator line will appear on the LCD 1. - Page 8 Starting and Stopping the Timer The Aion Timer will double the exposure time (one stop) set under the LONG setting for each of the 1. Pressing the Play / Stop Button will start number of frames set under the N setting.
-
Page 9: Technical Specifications
Environmental objects, such as large buildings or walls, trees, fences, or cars can also affect performance. If your Phottix Aion will not trigger move its location slightly. - Page 10 NOTE: This equipment has been tested and found Company: Phottix (HK) Ltd. to comply with the limits for a Class B digital device, Name: Phottix Aion Wireless Timer Remote pursuant to Part 15 of the FCC Rules. These limits are designed to provide reasonable protection against Model Number: Aion harmful interference in a residential installation.
- Page 11 --Connect the equipment into an outlet on a circuit different from that to which the receiver is connected. --Consult the dealer or an experienced radio/TV technician for help.
- Page 12 Phottix Aion Funktimer Bedienungsanleitung Bestandteile Empfänger Timer (Sender) 1. Kabelanschluss 1. Kabelanschluss 2. Kontroll-LED 2. Kontroll-LED 3. Power An / Aus 3. LCD Display 4. Blitzschuhanschluss 4. Sound / Modus (Cold Shoe) 5. Hintergrundbeleuchtung / Sperren 5. 3/16“ Mounting Lug 6.
- Page 13 Timer(Sender)und Empfänger ein-/ ausschalten 1. Zum Einschalten des Phottix Aion Timers und Empfängers drücken Sie die Powertaste. 2. Zum Ausschalten des Phottix Aion Timers und Empfängers drücken Sie die Powertaste. Das Phottix Aion System kann als Funk- oder 3. Nach dem Einschalten ertönt ein Kontrollton Kabeltimer und als Funk- oder Kabelauslöser...
- Page 14 F u n k e m p f a n g z w i s c h e n T i m e r u n d um das LCD-Display aufzuhellen. Empfänger an, wenn der Phottix Aion mittels 2. Drücken Sie 1x die Hintergrundbeleuchtung/ Funksignal verwendet wird.
- Page 15 Funktionen Das Phottix Aion Timer-System hat 5 Haupt-Modi: 4 Auslöse -Modi und einen Timer-Modus, der wiederum weitere Funktionen bereit hält. Modusauswahl Timer (Sender) und Empfänger mit der Drücken Sie die Sound/Modustaste bis Sie den Kamera verbinden gewünschten Modus ausgewählt haben. Den ausgewählten Modus erkennen Sie an der kleinen...
- Page 16 2 Sekunden grün und leuchten dann rot, N = Anzahl: Anzahl der Fotos, die während des wenn die Auslösung erfolgt. Programms ausgelöst werden. Es können entweder Timer = Timer-Modus: Das Phottix Aion System 1-199 oder unendlich Auslösungen eingestellt befindet sich im Timer-Modus und kann nun werden.
- Page 17 Timer starten und stoppen 1. Drücken Sie die Start/Stopptaste und Ihr eingestelltes Programm wird gestartet. 2. Drücken Sie die Start/Stopptaste und das laufende Programm wird gestoppt. INT VL, N, BKLN. Die Auswahl wird im Die BKLN Funktion (nur für Kameras mit Display durch eine Linie unter der Funktion angezeigt.
- Page 18 Das Phottix Aion Timer System wird die Zeit, die immer von der 1. Aufnahme. Dies ist bei den Kamera unter LONG eingestellt wurde für jede Aufnahme, HDR-Funktionen meist anders, diese rechnen von die unter N eingestellt wurde automatisch allein hoch und runter.
-
Page 19: Technische Daten
Empfänger Empfangsempfindlichkeit: -90dBm Betriebsspannung: 3.0V Dimensionen: 85 x 37.4 x 30.9mm Gewicht: 37.5g Große Gebäude, Mauern, Bäume, Zäune oder Autos können sich negativ auf die Leistung auswirken. Technische Daten Reichweite: bis zu 60m Batterien/Akkus: AAA/Micro Lagertemperatur: -10C° bis 60C° Standby-Timer: 48 Stunden Timer (Sender) Sendeleistung:... - Page 20 Phottix Aion intervallomètre sans fil Mode d'emploi Composants Récepteur Corps 1. Port câble 2. Indicateur LED 1. Port câble 3. Commande démarrage/arrêt 2. Indicateur LED 4. Griffe sans contact 3. Panneau de commande 5. Monture 3/16 4. Bouton de son/mode 6.
- Page 21 Mise en marche/arrêt de Phottix Aion 1. Pour mettre en marche l'intervallomètre et le récepteur Phottix Aion – appuyez sur la commande démarrage/arrêt. 2. Pour mettre en arrêt l'intervallomètre et le récepteur Phottix Aion – appuyez sur la L e P h o t t i x A i o n p e u t ê t r e u t i l i s é c o m m e commande démarrage/arrêt.
- Page 22 1. Utilisez le rétro-éclairage pour activer le distance rétro-éclairage du panneau de commande. 2. Appuyez sur le bouton de verrouillage/rétro- 1. Lorsque le système Phottix Aion est utilisé éclairage. Le rétro-éclairage reste allumé sans fil, l'indicateur de la puissance du pendant environ 10 secondes avant de signal à...
- Page 23 2. S'allumera en fort vert lorsque le signal de mise au point est réceptionné de l'émetteur. Utilisation de l'intervallomètre 3. S'allumera en rouge pendant la prise de vue. Le Phottix Aion fonctionne en deux modes: Connexion de l'intervallomètre ou du déclencheur et retardateur. récepteur à l'appareil...
- Page 24 Réglage des modes de l'intervallomètre d'exposition. L'indicateur LED sur l'intervallomètre et le récepteur s'allumera en rouge. Pour arrêter Appuyez sur le bouton de son/mode pour faire l'exposition et fermer l'obturateur enfoncez votre sélection. Au cours de sélection d'un mode complétement le déclencheur. le petit indicateur s'affichera sur le panneau de 2S: Enfoncez à...
- Page 25 BKLN. La sélection active est indiquée par le curseur sur le panneau de commande. 2. Appuyez sur le bouton de Set (réglage) pour programmer le temps. 3. Appuyez sur le bouton flèche le haut ou le bas pour faire la modification du temps. DELAY (Temporisation): Délai d’ouverture de 4.
- Page 26 L'inte r vall om è t re Phot t ix Aio n d o u blera le en avant. Contrairement à l'auto-bracketing de temps d'exposition réglé en mode LONG (d'un l'appareil, le Phottix Aion déclenchera les photos diaphragme) pour chaque nombre de cadres réglé progressivement et avec une exposition plus en mode N.
- Page 27 Si le Phottix Aion ne déclenche pas repositionnez-le. Spécification technique Portée: 60 mètres Précautions: Batteries: C'est un système électronique. Ne manipulez Température de traitement: -10—60°C pas le produit avec les mains mouillées, ne Temps de veille: 48 heures l’immergez pas et ne l’exposez pas à...
- Page 28 Phottix Aion temporizador sin cable Manual de instrucciones Partes Cuerpo Receptor 1. Puerto para cable 2. Indicador LED 1. Puerto para cable 3. Panel de control 2. Indicador LED 4. Botón de la señal acústica/modo 3. Botón encendido/apagado 5. Botón de la luz/bloqueo 4.
- Page 29 4. El indicador LED del receptor parpadeará en Consejo: Apague el equipo – temporizador Phottix verde y después en rojo mientras el sistema Aion, receptores, cámaras – antes la conexión o la Phottix Aion está encendido. El indicador LED desconexión.
- Page 30 2. Mientras la señal acústica esta activa, 2. Pulse el botón de la luz/bloqueo hasta aparezca el icono de la nota en el panel de que aparezca el icono de bloqueo en el control. panel de control. Todos los controles están 3.
- Page 31 Uso del temporizador El Phottix Aion presenta las funciones de: disparador y temporizador. Co n e x i ó n d e l te m p o r i z a d o r o d e l Ajustar los modos del temporizador receptor a la cámara.
- Page 32 Fotografía temporizada y receptor se pondrá rojo. Puede mantener el disparador para tomar mas de cinco fotografías. Las Uso de la fotografía temporizada fotografías serán agrupadas por 5. 1. Para tener acceso a la fotografía temporizada B: Bulb. Pulse el disparador hasta la mitad para pulse el botón de la señal acústica/modo comprobar el foco y púlselo por completo para hasta que aparezca el icono del temporizador...
- Page 33 Las funciones DELAY, LONG, INTVL y N pueden combinarse una con otra o todas en la misma configuración. Encender/Apagar el temporizador 1. Pulse el botón Play / Stop para disparar las Ajustes del temporizador configuraciones seleccionadas. 1. Utilice el botón de flechas para ajustar el 2.
- Page 34 .5 segundo. Las fotografías serán tomadas según el primer El temporizador Phottix Aion doble el tiempo tiempo de exposición y serán contadas adelante. En de exposición seleccionado en modo LONG (de contraste al auto-bracketing de la cámara el Phottix...
- Page 35 Pilas: Temperatura de guardar: -10—60°C Tiempo de espera: 48 horas Temporizador: - Interferencias : Para transmitir y recibir la señal radio el sistema Phottix Aion Poder de transmisión: ≤-10dBm usa la frecuencia 2.4 GHz. Manténgase Voltaje: 3.0V lejos de campos magnéticos potentes: Dimensiones: 130.4 X 46.2 X 22 mm...
- Page 36 Instrukcja obsługi inter wałometra bezprzewodowego Phottix Aion Odbiornik Elementy 1. Wejście przewodu Interwałometr 2. Kontrolka sygnalizacyjna LED 1. Wejście przewodu 3. Przycisk zasilania 2. Kontrolka sygnalizacyjna LED 4. Zimna stopka 3. Wyświetlacz LCD 5. Gwint mocowania 4. Przycisk dźwięku/trybu 3/16 5.
- Page 37 B e z p r z e w o d o w y i n t e r w a ł o m e t r P h o t t i x zasilania. Aion posiada funkcję w yz walania zarówno 3. Urządzenie wyda krótki dźwięk i wyświetlacz przewodowego jak i zdalnego.
- Page 38 2. Widoczny symbol muzyczny na wyświetlaczu 3. W c e l u w y ł ą c z e n i a b l o k a d y w c i ś n i j i oznacza włączoną sygnalizację dźwiękową. przytrzymaj przycisk podświetlenia/blokady 3.
- Page 39 2. Świeci na zielono po ustawieniu ostrości. Bezprzewodowy inter wałometr Phottix Aion 3. Z m i e n i a k o l o r n a c z e r w o n o p o d c z a s posiada dwa tryby: wyzwalacz migawki i tryb wyzwalania migawki.
- Page 40 C: Tryb ciągły. Wciśnięty do połowy przycisk Funkcja interwałometru wyzwalania migawki ustawi ostrość, wciśnięty do Używanie interwałometru końca wyzwoli migawkę i wykona 5 zdjęć. Kontrolka sygnalizacyjna na nadajniku i odbiorniku będą 1. W celu włączenia funkcji interwałometru świeciły na czerwono podczas wykonywania zdjęć. wciśnij przycisk dźwięku/trybu do momentu Ciągłe przyciśnięcie przycisku wyzwalania migawki wybrania trybu Timer na wyświetlaczu.
- Page 41 * Tryby DELAY, LONG, INTVL i N mogą być łączone. 6. Wciśnięcie przycisku Play / Stop Button uruchomi program. Phottix Aion podwoi czas ekspoz ycji ( jedna przysłona) ustawiony w trybie LONG dla każej ilości klatek ustawionych w trybie N.
- Page 42 Phottix Aion nie wyzwala, spróbuj zmienić wynosić .5 sekundę. Zdjęcia zostaną wykonane w jego położenie. oparciu o pierwszy czas ekspozycji i liczone naprzód. Inaczej niż ma to miejsce w auto bracketingu w aparatach Phottix Aion będzie wykonywał co raz to dłuższe ekspozycje.
- Page 43 Specyfikacja Zasięg: 60 metrów Zasilania: Baterie AAA Temperatura przechowywania: -10 C do 60 C Czas działania w trybie oczekiwania: 48 godzin Nadajnik Moc nadajnika: ≤-10dBm Napięcie: 3.0 V Wymiary: 130.4 X 46.2 X 22 mm Waga: 56.5g Odbiorni Moc odbiornika: -90 dBm Napięcie: 3.0 V...
- Page 44 Ин струкция для б еспр оводн ого таймера Phottix Aion Компоненты: Таймер Приёмник 1. Порт для кабеля 1. Порт кабеля 2. Лампочка статуса 2. Лампочка статуса 3. ЖК-экран 3. Кнопка питания 4. Кнопка звука/режима 4. Крепление башмака 5. Кнопка подсветки/замка...
- Page 45 4. При включении приёмника, освещение отключения данного устройства, выключите экрана смениться с зелёного на красный, а позже снова на зелёный цвет. фотоаппарат, Phottix Aion таймер и приёмники. Включени/выключение звука Установка батарей 1. По умолчанию звуки таймера включены. 1. Нажмите на батарейную крышку, и плавно...
- Page 46 жк-экране появится графический символ Использование Таймера: замка. Все кнопки будут заблокированы. 3. Для выключения блокировки нажмите и Безпроводной цифровой таймер Phottix Aion удерживатйе кнопку замка пока на экране работает в двух режимах: режим спуска затвора не исчезнет графический символ замка.
- Page 47 дальнейшие серийные снимки, по 5 в группе. В: режим Bulb – длительной экспозиции. Неполное нажатие кнопки спуска активизирует фокус, её полное нажатие откроет створки затвора и заблокирует их. На экране таймер отобразиться отсчёт времени экспозиции. Изменение режимов таймера Лампочки статуса на таймере и приёмнике будут красного...
- Page 48 Режим Таймера Настройка таймера: 1. Нажмите кнопки регулирования (влево Использование режима таймера или вправо) для выбора режимов DELAY, 1. Для доступа к режиму таймера нажмите LONG, INTVL, N, BKLN. Под выбранным кнопку звук/режим и выберите режим режимом появится небольшая полоса- Таймер.
- Page 49 быть от 1 до 7. 6. Нажмите кнопку воспроизведения/стоп для начала программы. Старт/стоп таймера Таймер Aion будет удваивать время эскпозиции (с каждым шагом) выбранное для настройки LONG 1. Нажатие кнопки воспроизведения/стоп для каждого количества снимков выбранных для приведёт в действие функции таймера.
- Page 50 заборы или машины могут повлиять на считаться вперёд. Иначе будет происходить при работоспособность устройства. Если ваш автобрекетировании - в фотоаппаратах Phottix приёмник Phottix Aion не срабатывает, Aion будет производить с каждым снимком более переместите его на небольшое растояние длительную экспозицию. и попробуйте ещё раз. Предупреждения: Н...
- Page 51 Приёмник: Чувствительность приёмника сигнала: -90 dBm Рабочее напряжение: 3.0В Размер: 85 х 37.4 х 30,9 мм Вес: 37,5 г Технические характеристики: Дальности действия: 60 метров Батареи: ААА Температура хранения: от -10Ц до 60Ц Время нахождения в режиме ожидания: 48 часов Таймер: Сила...
- Page 52 Phottix Aion 无线定时器说明书 部件: 定时器: 接收器 1. 数据线接口 2. 功能 LED 指示灯 1. 数据线接口 3. 液晶显示屏 2. 功能 LED 指示灯 4. 声音 / 模式按钮 3. 开关按钮 5. 背光灯 / 锁键按钮 4. 冷靴 6. 开关按钮 5. 3/16 旋转螺口 7. 播放 / 停止按钮...
- Page 53 2. 关闭 Phottix Aion 定时器和接收器装置—按 下开关按钮。 3. 打开装置电源开关后,LCD 液晶显示屏上 面会出现图案。 4. 打开装置电源开关后,接收器上的 LED 将 会闪烁绿灯,然后闪烁红灯。当装置一直 Phottix Aion 无线定时器和快门线可以用作一个有 被打开时,LED 会不断闪烁绿灯。 线 / 无线定时器和遥控快门释放系统。 关掉 / 打开声音 注意:安装和拆卸定时器或接收器,必须关闭所 1. 默认情况下声音是开机运行的。当第一次 有装置:相机,Phottix Aion 定时器或接收器。 开机和开始或终止程序时,以及拍照时, 你都将会听到从 Phottix Aion 传出来的 “滴” 在定时器和接收器上安装电池 的声音。...
- Page 54 1. 接收器处于打开的状态时: LED 闪烁绿色。 上会出现一个锁住的标识。装置被锁定后, 2. 当从定时器接收到对焦信号时, LED 灯不 所有的按键功能将不能使用。 再闪烁,转为绿色。 3. 解锁:再次按住背光灯 / 锁键按钮直到锁键 3. 拍照时,LED 转为红色。 标志消失。 将定时器或接收器连接到相机 无线信号强度指示灯 1. 关闭定时器与相机。 1. LCD 上的无线信号强弱指示灯用来显示定 2. 将一根可兼容的 Phottix 配件连接线接到定 时器与接收器之间的信号强弱。 时器或接收器。 2. 用来指示范围 ---- 当发送器与接收器在使 3. 将连接线的另一端接到相机的遥控端口。 用范围内时,LCD 显示屏上将出现三条竖 4. 打开定时器与相机。 线型符号。...
- Page 55 半按快门按钮则为对焦;全按快门按则是释放快 门。接收器和定时器上的 LED 指示灯在成功对焦 后会闪绿光。 C: 连拍模式 半按快门则为对焦,全按快门将会打 开快门连续拍摄五张照片。拍照时,定时器和接 将定时器或者接收器与相机分离 收器上的 LED 指示灯会亮红灯。按住快门按钮不 放就能拍摄更多的照片,一组 5 张(具体张数视 1. 关闭定时器或者接收器与相机。 相机而定)。 2. 将 Phottix 配件连接线从相机的遥控端口移 B:Bulb 长时间曝光模式 半按快门则为对焦, 除。 全按快门就能打开快门并且锁定它。定时器上的 3. 将 Phottix 配件连接线从定时器或接收器上 液晶显示屏就会开始对曝光计时。定时器和接收 移除 。 器上的 LED 指示灯也会亮红灯,要结束曝光,只 需全按快门按钮,快门关闭。 定时器的使用...
- Page 56 定时器模式 2. 按设置键来编辑时间。 3. 上下调节键可用来更改时间。 使用定时器模式 4. 左右调节键可用来在小时,分钟,秒数以 及不足秒数之间进行切换。 左右调节键也 1. 要获得定时器模式,需按“声音 / 模式按钮” 可以用来前一种或后一种定时器功能的切 直到在 LCD 显示屏选中 Timer 的功能栏。 换。 2. 选择了“Timer”模式,你就能实现以下定 * 延时曝光模式, 长时间曝光模式, 间隔曝光模式, 时器功能: 数量模式可一起使用。可编制一个程序,既可以 DELAY:延时曝光模式——在拍照前自定延时 使用其中一个功能也可以使用所有这些功能。 LONG:长时期模式——针对拥有 B Bulb 模式的 相机设定的可编程长时间曝光。在预设的时间内 定时器的启动与停止 相机快门一直开启。 INTVL:间隔曝光模式——定时器会按照定时器 1. 按播放 / 停止按钮启动指定的定时器功能。 内已经设置好的间隔时间进行拍照。...
- Page 57 - 本产品属精密电子仪器,请注意防潮防尘。 - 不要摔落或碰撞。 例如: - 不要用化学或有机溶剂清洁机身 , 请用柔软 L 模式设置为 .5 秒 干净的布或镜头纸对其外表面进行擦拭。 N 模式设置为 5 秒 - 干扰:Phottix Aion 发送与接收无线电信号 将 BKLN 设置为 .5,连同上面的设置一起你将获 的频率是 2.4 GHz。其性能会受到电流, 得如下: 磁场,无线电信号,无线路由器,移动电 话及其它电子设备的影响。周边环境物品 , 图片 1: .5 秒 如 : 大型公共建筑、树木、围栏或墙壁或汽...
- Page 58 技术规格: 有效范围: 60 米 电池: 储存温度 : C - 60 待机时间: 48 小时 定时器 发送功率: ≤ -10dBm 工作电压: 3.0 V 尺寸大小: 130.4 X 46.2 X 22 mm 重量: 56.5g 接收器 接收灵敏度 : -90 dBm 工作电压: 3.0 V 尺寸大小: 85 X 37.4 X 30.9 mm 重量:...
- Page 59 Phottix Aion 无线定时器说明书 部件: 接收器 定时器: 1. 数据线接口 1. 数据线接口 2. 功能 LED 指示灯 2. 功能 LED 指示灯 3. 开关按钮 3. 液晶显示屏 4. 冷靴 4. 声音 / 模式按钮 5. 3/16 旋转螺口 5. 背光灯 / 锁键按钮 6. 锁环 6. 开关按钮 7. 电池盖...
- Page 60 Phottix Aion 无线定时器和快门线可以用作一个有 关掉 / 打开声音 线 / 无线定时器和遥控快门释放系统。 1. 默认情况下声音是开机运行的。当第一次 开机和开始或终止程序时,以及拍照时, 注意:安装和拆卸定时器或接收器,必须关闭所 你都将会听到从 Phottix Aion 传出来的 “滴” 有装置:相机,Phottix Aion 定时器或接收器。 的声音。 2. 声音功能开启时,在液晶显示屏上可以看 到一个音乐符号。 在定时器和接收器上安装电池 3. 关闭声音只需长按声音 / 模式按钮,直到声 1. 先按住定时器或接收器上的电池盖,再朝 音图标消失。 外推电池盖就会滑开。 2. 取下电池盖。 使用背光灯 3. 按图所示插入 AAA 电池。...
- Page 61 1. 接收器处于打开的状态时: LED 闪烁绿色。 2. 当从定时器接收到对焦信号时, LED 灯不 再闪烁,转为绿色。 3. 拍照时,LED 转为红色。 3. 解锁:再次按住背光灯 / 锁键按钮直到锁键 将定时器或接收器连接到相机 标志消失。 1. 关闭定时器与相机。 无线信号强度指示灯 2. 将一根可相容的 Phottix 配件连接线接到定 时器或接收器。 1. LCD 上的无线信号强弱指示灯用来显示定 3. 将连接线的另一端接到相机的遥控埠。 时器与接收器之间的信号强弱。 4. 打开定时器与相机。 2. 用来指示范围 ---- 当发送器与接收器在使 用范围内时,LCD 显示屏上将出现三条竖 线型符号。...
- Page 62 定时器的使用 2S:延时两秒模式 半按快门则为对焦,全按快 门按钮就会在两秒钟后拍照。定时器上的 LED 指 Phottix Aion 无线定时器有两种模式:快门释放模 示灯在延时的两秒钟内会闪烁绿灯,当拍照时就 式与定时模式。 会变成红灯。 定时:实现定时模式功能 定时器模式的更改: 按着声音 / 模式按钮,循环显示模式。在执行选 定时器模式 择时,LCD 显示屏上会出现一个小的指示线,模 使用定时器模式 式分别为: 1. 要获得定时器模式,需按“声音 / 模式按钮” S: 快门释放模式 直到在 LCD 显示屏选中 Timer 的功能栏。 半按快门按钮则为对焦;全按快门按则是释放快 2. 选择了“Timer”模式,你就能实现以下定 门。接收器和定时器上的 LED 指示灯在成功对焦 时器功能:...
- Page 63 BKLN 功能 等长时间曝光功能允许多组照片在曝光次数变更 时自动的呈指数拍摄。 1. 将相机设置为 B bulb 模式。 2. 在定时器模式中选定 BKLN。 3. 按 设 置 按 钮 与 向 上 的 箭 头 选 择 按 钮 开 启 定时器的设置 BKLN。 1. 按左右调节键来选择延时曝光模式,长时 4. 在 (L) 长时间曝光模式下设置长时间曝光。 间曝光模式, 间隔曝光模式, 数量曝光模式, 5.
- Page 64 - 本产品属精密电子仪器,请注意防潮防尘。 尺寸大小: 130.4 X 46.2 X 22 mm - 不要摔落或碰撞。 重量: 56.5g - 不要用化学或有机溶剂清洁机身 , 请用柔软 干净的布或镜头纸对其外表面进行擦拭。 接收器 - 干扰:Phottix Aion 发送与接收无线电信号 的频率是 2.4 GHz。其性能会受到电流, 接收灵敏度 : 90 dBm 磁场,无线电信号,无线路由器,移动电 工作电压: 3.0 V 话及其它电子设备的影响。周边环境物品 , 尺寸大小: 85 X 37.4 X 30.9 mm 如...
Need help?
Do you have a question about the Aion and is the answer not in the manual?
Questions and answers