Table of Contents
Advertisement
Advertisement
Table of Contents

Related Manuals for PIONEER DJ rekordbox

Summary of Contents for PIONEER DJ rekordbox
- Page 1 LIGHTING mode Operation Guide...
-
Page 2: Table Of Contents
Terms ........................... 6 Steps to easily control lighting ..................9 Connect equipment ....................10 Activate rekordbox dj or start trial ................10 Install rekordbox 5.2.0 or later ................11 Download data used in LIGHTING mode .............. 11 Assign your fixtures (LIGHTING mode) ..............12 Perform phrase analysis .................. - Page 3 Scene editor screen ....................41 Macro editor screen ....................44 6.5 ............................. 44 Preferences ....................... 47 Online support site ..................... 48...
-
Page 4: Before Start
Before Start 1.1 Before getting started This Operation Guide explains rekordbox LIGHTING mode and related features. For instructions on rekordbox in general, go to rekordbox.com [Support] > [manual] and see the rekordbox Operating Instructions. 1.2 System requirements Regarding the supported OS and required system (minimum operating environment), please refer to rekordbox.com [Support] >... -
Page 5: Overview Of Lighting Mode
1.3 Overview of LIGHTING mode The Lighting mode is a mode to assign fixtures and edit scenes. Select Lighting mode from the global section The contents of the Lighting mode are as follows. ・Fixture Library screen: You can assign and select settings for your fixtures. - Page 6 ・Macro Mapping screen: You can change relations between scenes and phrases. ・Macro Editor screen: You can quickly edit scenes to match the flow of the track. Please see the overview of LIGHTING mode at rekordbox.com.
-
Page 7: Terms
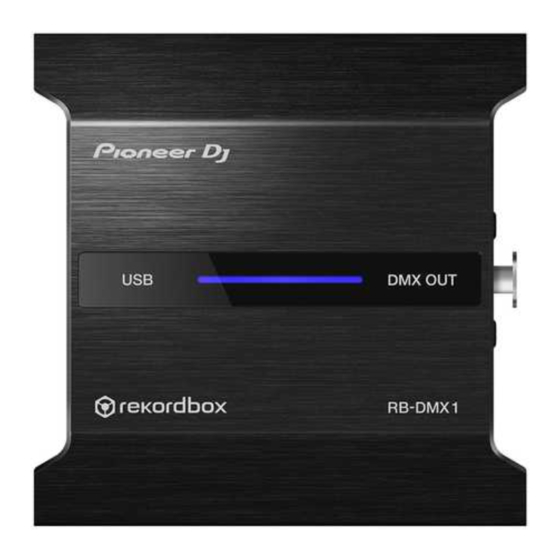
* Select PERFORMANCE mode to perform scenes in sync with tracks. For details, please see 3. Steps to easily control lighting. Terms The major terms used in this operation guide are explained as below. DMX/DMX512: DMX512 is a communication protocol used for controlling stage lighting equipment (fixtures). DMX interface: This is the hardware for converting the lighting control signals sent from the computer into the DMX 512 signals and transmitting it to the connected fixtures. - Page 8 Lighting package: The lighting package is a set of 16 fixtures which has a predetermined positional relationship as shown below. Lighting packages consist of the following categories of fixtures. ・Par Light ・Par Light(Simple) ・Bar Light ・Bar Light(Simple) ・Moving Head ・Moving Head(Simple) ・Strobe...
- Page 9 ・Mirrorball Spot cenes pre-set in rekordbox are created with this lighting package as the target. By making the same configuration, you can play your scene close to the original scene. Scene: Scene means lighting effects composed of multiple different types of fixtures. Up to 16 kinds of lighting effects information can be saved per one scene.
-
Page 10: Steps To Easily Control Lighting
Below is the procedure for executing the scene in sync with tracks.。 3.1 Connect equipment (page 10) 3.2 Activate rekordbox dj or start trial (page 10) 3.3 Install rekordbox 5.2.0 or later (page 11) 3.4 Download data used in LIGHTING mode (page 11) 3.5 Assign your fixtures (LIGHTING mode)(page 12)... -
Page 11: Connect Equipment
3.2 Activate rekordbox dj or start trial To use rekordbox LIGHTING mode, you need to activate rekordbox dj or start trial. (see the following 1 ~ 4) 1. Activate rekordbox dj license key bundled with Pioneer DJ product*. -
Page 12: Install Rekordbox 5.2.0 Or Later
2. Purchase rekordbox dj Plus Pack and activate rekordbox dj license key. 3. Subscribe to rekordbox dj (with monthly payment). 4. Start trial. For details on how to activate rekordbox dj or start trial, go to rekordbox.com > [Support] > [Manual] and see rekordbox instruction. 3.3 Install rekordbox 5.2.0 or later rekordbox LIGHTING mode can be used on rekordbox 5.2.0 and later. -
Page 13: Assign Your Fixtures (Lighting Mode)
*For the DMX address, please set the same address as the setting value of each fixture. The selected fixture is registered in rekordbox, and the DMX address is fixed at the same time. * To change the address, click with the mouse and drag it to an address you would like to fix. - Page 14 The category of the assigned fixture is fixed. *If you assign no category, select [No Assign]. *Simple category You can use Simply category for Par Light, Bar Light and Moving Head. When you select the Simple category, the pre-set scene is applied which is optimized when there are 2 lighting devices assigned to each category.
-
Page 15: Perform Phrase Analysis
*When the Moving Head is connected, you can check the initial position. 3.6 Perform phrase analysis For details on how to analyze phrases of tracks, refer to rekordbox.com > [Support] > [manual] > [rekordbox Operating Instructions]. 3.7 Play phrase-analyzed tracks (PERFORMANCE mode) Load and play a phrase-analyzed track on deck 1 or deck 2 in PERFORMANCE mode. -
Page 16: Using Rekordbox With A Controller
Using rekordbox with a controller You can assign the followings to performance pads to control them using your DJ controller. Press a pad to enable turn on the feature. Press again to reset. ・HIGH: Switch the current mood to HIGH. -
Page 17: Customize Lighting Control
*Available only in PERFORMANCE mode *For compatible DJ equipment, see > rekordbox.com > [Support] > [Compatible DJ units]. *For MIDI LEARN settings, see rekordbox.com > [Support] > [Manual] > [MIDI LEARN Operation Guide]. For Pad Editor operation, SEE rekordbox.com> [Support] > [Manual] > [Pad Editor Operation Guide]. -
Page 18: Change Relation Between Phrases And Scenes (Lighting Mode)
* This change will not be saved. To save the change, see 5.3 Change relation between scenes and phrases per track (LIGHTING mode). 5.2 Change relation between phrases and scenes (LIGHTING mode) Click to display Macro Mapping screen and select the mood and bank of the phrase you want to change relation with the scene in mood/bank selection area [1]. - Page 19 From the browser, select a track you want to change the relation of the scene and load it to the track display area. The selected track will be loaded to the track display area. Select the scene tab. The scene tab will be displayed. Drag and drop the thumbnail of a scene onto the scene you want to change the relation.
-
Page 20: Create A New Scene (Lighting Mode)
Click the save button in the upper part of the macro editor screen to save the relation of scenes per track. 5.4 Create a new scene (LIGHTING mode) Click to display macro mapping screen. Click [+] button on the bottom of the scene thumbnail in the scene display area. From the dialog below, you can select the number of bars and file name for a new scene. -
Page 21: Edit Scenes (Lighting Mode)
Select the number of the bars and file name and click OK to show a screen to create a new scene. *For details on the editing work, please see 5.9 Details of editing in LIGHTING mode and 6.4 Scene editor screen. 5.5 Edit scenes (LIGHTING mode) Click to display macro mapping screen and... -
Page 22: Delete Scenes (Lighting Mode)
The scene edit screen appears. * For details on the editing work, please see 5.9 Details of editing in LIGHTING mode and 6.4 Scene editor screen. 5.6 Delete scenes (LIGHTING mode) Click to display macro mapping screen and right-click a thumbnail of a scene you want to delete in the scene display area. *You can only delete scenes you created. -
Page 23: Reset Scenes (Lighting Mode)
Select [DELETE] from the menu. The below dialog appears. Click [OK]. The selected scene has been deleted. 5.7 Reset scenes (LIGHTING mode) Click to show macro mapping screen and right-click a scene you want to reset in the scene display area. *The scenes you created cannot be reset. -
Page 24: Edit Scenes Per Track (Lighting Mode)
Select [RESET] from the menu. The below dialog opens. Click [OK]. Selected scene has been reset. 5.8 Edit scenes per track (LIGHTING mode) Click to display macro editor screen and select the browser tab to display the browser. -
Page 25: Details Of Editing In Lighting Mode
Select the track you want to edit the scene from the browser and load it in the track display area. The track will be loaded to the track display area. When you close the tab, the scene appears in the edit area. * For details on the editing work, please see 5.9 Details of editing in LIGHTING mode and 6.4 Scene editor screen. - Page 26 *For the anchor, the lowest position means all turned off and the highest position means all lit. * You can click the anchor to move up, down, left and right. Copy an anchor Select the area of the anchor you want to copy with your mouse and right-click to show the drop-down menu.
-
Page 27: Setting Color
-Move an anchor Keep clicking the anchor and move it. The anchor has been moved. *The anchor cannot be moved to the left of the leftmost anchor It also cannot be moved to the right of the rightmost anchor. In addition, you cannot move multiple anchors at the same time. Delete an anchor Select the anchor you want to delete with the mouse and right click to show the drop- down menu. - Page 28 Select [Color]. The dialog for color setting appears. Select a color in the dialog and click OK. The color has been set at the selected area. Copy color Select the area you want to copy with the mouse and right-click to display the drop- down menu.
- Page 29 Select [Copy]. The selected area has been copied. Paste color Click at the position you want to paste and right click on the same position. The drop-down menu appears. Click [Paste]. The color has been pasted. Adjust color length Move the mouse to the right or left edge of the color you want to adjust its length. ←|→...
- Page 30 Click and hold the ←|→ icon to move left and right to change the length. * You cannot overlap right or left color area. Delete color Right-click the color you want to delete to show the drop-down menu. Click [Delete]. The selected color has been deleted.
-
Page 31: Setting Color Transition
Select a color in the dialog above and click [OK] to edit. 5.9.3 Setting color transition Select the beat in the area you want to set color transition with the mouse and right click or click to show the drop-down menu. Click [Color Transition]. - Page 32 Set the color for the start point in the dialog above. The color for the start point of the selected area has been set. Set the color for the end point in the same way. The color for the end point of the selected area has been set. Click OK.
- Page 33 Select [Edit]. The dialog for color transition settings appears. Set the color for the start point in the dialog above. The color for the start point of the selected area has been set. Set the color for the end point in the same way. The color for the end point of the selected area has been set.
-
Page 34: Setting Strobe
5.9.4 Setting strobe Select the area you want to set the strobe with the mouse and right-click or click to show the drop-down menu. Click [Strobe] to show the dialog for strobe settings. In the dialog above, set the strobe amounts for the start point (left side) and end point (right side), and click OK. -
Page 35: Setting Moving Head Pattern
Click [Edit]. The dialog for strobe settings appears. In the dialog above, set the strobe amounts for the start point (left side) and end point (right side), and click OK. The selected strobe has been edited. 5.9.5 Setting moving head pattern Select the area you want to set the pattern of the moving head with the mouse and right click or click to show the drop-down menu. - Page 36 Click [Pattern]. The dialog for moving head pattern settings appears. ・Pattern: Select the moving head pattern from below 9 patterns. :Circle :Eight :Line :Line2 :Diamond...
- Page 37 :Square :SquareChoppy :Leaf :Lissajous Parameters ・Width Adjusts the width of the selected pattern. ・Hight: Adjusts the height of the selected pattern. ・X Offset: Adjusts the panning position of the selected pattern. ・Y Offset: Adjusts the tilting position of the selected pattern. ・Rotation: Adjusts the rotational position of the selected pattern.
- Page 38 * Copying, adjusting length, and deleting are the same as described in color settings. Please refer to 5.9.2 Color settings. Edit moving head pattern Right-click the moving head pattern you want to edit to show the drop-down menu. Click [edit]. The dialog for moving head pattern settings appears.
-
Page 39: Part Names
In the dialog above, select a pattern and parameters and click OK. The selected moving head pattern has been edited. Part names 6.1 Global section You can select EXPORT/PERFORMANCE/LIGHTING mode. 6.2 Fixture Library screen This screen is for fixture assignment and settings. - Page 40 You can assign your fixture to an address on DMX. Category selection area You can select the category of fixtures assigned to rekordbox. Fixture library version number display area The version number of the fixture library is displayed with a 4-digit number.
-
Page 41: Macro Mapping Screen
Button to check fixture library update You can ask the server if the fixture library is updated. Fixture display area Fixture names are displayed in an alphabetical order. 6.3 Macro Mapping screen You can change relations between scenes and phrases. Click to display the screen below. -
Page 42: Scene Editor Screen
Undo/Redo button Undo : You can cancel the last action Redo : You can do an action again after you've undone the action (reverse the undo). Reset button You can reset all the relations between phrases and scenes. Scene filter You can filter scenes displayed in scene display area [6] by following filters. - Page 43 RETURN button You can finish editing work and go back to the macro mapping screen. SAVE button You can save the edited scene. Undo/Redo button Undo : You can cancel the last action Redo : You can do an action again after you've undone the action (reverse the undo). Collective quantize button You can move existing anchors to the nearest grid position.
- Page 44 Strobe setting button The dialog for strobe settings is shown. Moving head setting button The dialog for moving head settings is shown. Anchor quantize button When you click this button, anchors are set only on grid position. [10] Fixture information display area The names and addresses of fixtures are displayed.
-
Page 45: Macro Editor Screen
6.5 Macro editor screen You can intuitively edit scenes matching the flow of the music. Click to display the screen. Venue selection area You can select a venue you want to edit its macro. Save button You can save edited macro per venue. Undo/Redo button Undo : You can cancel the last action... - Page 46 Color setting button The dialog for color settings is shown. Color transition setting button The dialog for color transition settings is shown. Strobe setting button The dialog for strobe settings is shown. Moving head setting button The dialog for moving head settings is shown. Anchor quantize button When you click this button, anchors are set only on grid position.
- Page 47 [15] Track display area You can open the browser by clicking browser tab [17] and load a track. [16] Bank selection drop-down menu You can select macro’s banc from the drop-down menu per a track: COOL/NATURAL/HOT/SUBTLE/WARM/VIVID/CLUB 1/CLUB 2. [17] Browser tab You can open the browser and load a track to track display area [15].
-
Page 48: Preferences
For details on grid edit, go to rekordbox.com> [Support] > [Manual] and see rekordbox Operating Instructions. For details on phrase edit, go to rekordbox.com> [Support] > [Manual] and see PHRASE EDIT Operation Guide. Preferences ① In PERFORMANCE mode, open [Preferences] > [Lighting] and you can select the following settings. -
Page 49: Online Support Site
Before making inquiries on rekordbox operating procedures or technical issues, read rekordbox Operating Instructions and check the FAQs provided on rekordbox.com. ・Pioneer DJ is a trademark of the PIONEER CORPORATION and is used under license. ・rekordbox is a registered trademark of Pioneer DJ Corporation.
Need help?
Do you have a question about the rekordbox and is the answer not in the manual?
Questions and answers