Table of Contents
Advertisement
Quick Links
- 1 Installing Your Network Video Recorder System
- 2 Installing the System
- 3 Check Nvr Network, Change Nvr System Login Password
- 4 Viewing on Your Smartphone
- 5 How Can I Troubleshoot Camera Issues?
- 6 How Do I Add a New Camera? What Should I Do When There Is no Camera Display on the Screen?
- 7 How Do Restore My Unit to the Factory Settings?
- 8 How Do I Reset the Nvr Login Password?
- Download this manual
See also:
User Manual
Advertisement
Table of Contents

Related Manuals for SMONET 2PCS

Summary of Contents for SMONET 2PCS
- Page 1 Wireless Network Video Recorder System User Manual 2PCS/4PCS/6PCS/8PCS 720P/960P/1080P 2CH/4CH/6CH/8CH NVR Kits V.7-201709...
-
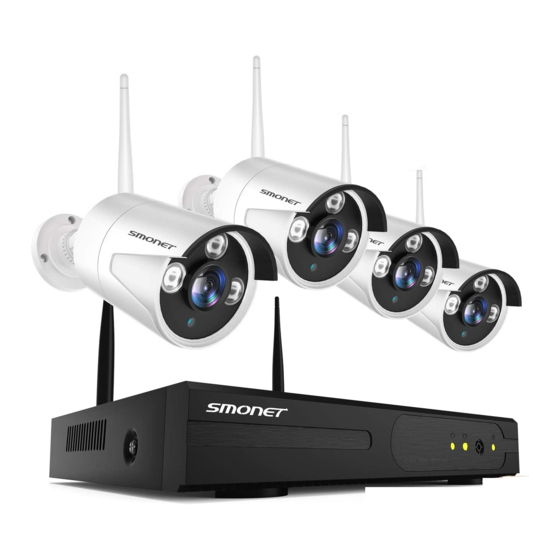
Page 2: Package Contents
Package Contents Thank you for choosing Smonet product. Here is the list for product and relevant accessories. Item Quantity IP Camera(2CH/4CH/6CH/8CH) 2/4/6/8 pcs DC 12V/2A power supply(for NVR)-3.3 feet DC 12V/1A power supply(for IPC2CH/4CH/6CH/8CH)-10 feet 2/4/6/8 pcs 3.3 Ft network cable... -
Page 3: Getting Started
Installing your Network Video Recorder System Getting Started Before you begin installation, be sure to have the following: PC or TV monitor VGA or HDMI cable Router (WAN) Hard drive.If you purchased the system without hard drive, you must first install it. If you do not have a hard drive, you will not be able to record and playback video. - Page 4 Installing the System Connect the NVR and cameras with power adapters provided. Attach the anten nas to the cameras, connect the mouse to the NVR. (Please note, power supply for NVR box is 12V-2000mA) Connect the PC or TV monitor to the NVR with a VGA or HDMI cable. You must use a PC or TV monitor, you cannot connect to a laptop.
- Page 5 Check NVR Network , Change NVR system login password Once you have completed connecting the NVR, wait approximately 2-3 minutes. Next you will see the window below on your monitor screen. No password is neces- sary, click ok to continue. Right click on the home screen of your monitor, navigate to System setup >...
- Page 6 Once you power up, repeat the steps outlined as above. Cloud status must be ONLINE and Network Status must be Healthy Network. If this does not happen, you will not be able to view remotely. Right click on the home screen of your monitor, navigate to System setup > System admin, click User on the left menu bar >...
- Page 7 Viewing on your SmartPhone From your Smartphone, go to the App store. Download “IP PRO” or “Eseecloud”. Ceate an account and password.Be sure to remember your account login info.#Pic 1 Click "+", then click Add device by ID.#Pic2 On your device, either scan the QR code or manually enter your Cloud ID. You can locate your Cloud ID on your monitor screen as seen earlier in section 2 of this manual.
- Page 8 System Setup and then go to the Network setup tab and get your IP address, Gateway etc. Please note, if you use MAC OS system, please send e-mail to smonet@hotmail.com. E-mail Subject: Request CMS software for MAC OS system...
- Page 9 Record Video. Here is an easy way to set the recording function if you need record 24 hours everyday: Right click on the home screen of your monitor, navigate to Manual record > select all > click All on > click ok. Once you have completed setting up the recording function, you will see a red dot in the upper right corner of each video.
- Page 10 Right click on the home screen of your monitor and navigate to System setup > Record Setup again, click Copy to, check All, Click Ok. Copy the same setting for Channel 1 for the remaining channels. Playback Video. To use the playback feature, you must first set up the recording function as described in the section above.
-
Page 11: Frequently Asked Questions
Search the time which you want to playback, click search, click Playback. Frequently Asked Questions Q:How do I format my new hard drive and check my hard drive information? A:From the home screen of your monitor, right click the mouse, navigate to System setup >... - Page 12 Q:Do I need to connect the camera with network cable? No, the cameras are wireless. You do, however, need to connect the camera with a power supply. The cameras and NVR are already paired. The camera will connect with the NVR automatically once attached to a power supply. Do not attempt to install your cameras until you are able to view images on your TV or PC monitor first.
- Page 13 After you have finished setting your preferred channel as outlined above, repeat the process for your remaining preferred channels. Starting from the home screen of your monitor, right click the mouse, navigate to System setup > Channel Setup > Video detection. Next, select Copy to and either select the All option for all cameras, or you can select the specific channel(s) you prefer.
- Page 14 From the home screen of your monitor, right click your mouse and navigate to System Setup, select Network setup, select Email from the left menu bar. From there, click Enable, enter the information in the fields as shown in the figure below. For the dot, please be sure to use the correct key on the keyboard next to the forward slash as shown in this figure: Complete the fields on the screen as follows(take hotmail account as an example):...
- Page 15 After you have entered all of your information, click Test until the Test success message appears on the screen. Please allow a few minutes for the testing cycle to complete. If the test failed, try another Email account.Click Ok. Whether or not your test was successful, be sure to click Ok to save your settings.
- Page 16 Q.How do I use a USB to Back-up my data? You need to make sure you have recorded video in your hard driver first, from the home screen of your monitor, navigate to Video backup. Select all or any channel(s) you prefer, select the particular time frame you desire, then click Search then Backup Next, click Yes, remove your mouse directly and insert USB storage in one minute,then wait for the system to perform the back-up.
- Page 17 Q: How can I strengthen the wireless signal? Adjust the direction of the antennas as shown in the figure below Best wireless signal Worst wireless signal Q:How do I adjust the Date and Time? First way: Verify that your system have a healthy network. Right click the mouse from the home screen of your monitor, navigate to System setup>Network Setup.
- Page 18 NVR box and check to see if the cable of hard drive is loose. Re-connect the HDD cable. Q:How do I reset the NVR login password? To protect your privacy, please send an Email to smonet@hotmail.com, Email subject: Request Password Reset. Q: What's the meaning of IRON on the TV/PC monitor?
- Page 19 How can I get product and technical support? US Toll Free:1-866-678-0666 (Available after 5:00 PM at Pacific Time) CA Toll Free:1-888-792-5254 (Available after 5:00 PM at Pacific Time) Email:smonet@hotmail.com Skype ID: safeskysales003 FaceTime/What’s App/Viber/Tango: +86-158-1749-7067 Wechat ID: B997520270...
- Page 20 V.7-201709...
Need help?
Do you have a question about the 2PCS and is the answer not in the manual?
Questions and answers
How do I reset my Smonet bnc sercurity camera
To reset the SMONET security camera system to factory settings, follow these steps:
1. Right-click on the home screen of your monitor.
2. Navigate to: System setup > System admin > Factory setting.
3. Click "All" and then click "OK".
4. Right-click again on the home screen and go to: Video manage.
5. Click "Refresh", then click "Auto add".
6. After all IP addresses appear, click "OK".
All video feeds should then reappear on your monitor.
This answer is automatically generated