Table of Contents
Advertisement
Advertisement
Table of Contents

Subscribe to Our Youtube Channel
Summary of Contents for OWI Salt Water Fuel Cell Engine Car kit
- Page 1 GREEN ENERGY Manual Assembly & Instruction...
-
Page 2: Table Of Contents
CONTENTS Tools You May Need P.01 Mechanical Parts List P.01 Plastic Parts P.02 Mechanical Assembly P.03 How It Works P.17 How To Play P.21 Trouble Shooting P.23... -
Page 3: Tools You May Need
This is a concept of an environmentally and friendly fuel cell engine car kit. The kit will teach children about new forms of clean energy. Be amazed that just by adding a few drops of salt water the car’s engine will start to run as if by magic. See how a V8 engine runs. -
Page 4: Plastic Parts
Gear(Red) Round Shaft Gear With Shaft Gear Shaft W/Pinions Crown Gear With Shaft Tapping Screw Magnesium Sheet Plastic dropper Air Cathode(Black) Nonwoven Fabric Magnesium sheet Magnesium Sheet (Spare parts:2pcs) (Spare part:1pc) Plastic Dropper Plastic Parts Cut the plastic parts when they are required . Do not cut them in advance. -
Page 5: Mechanical Assembly
Mechanical Assembly STEP... - Page 6 STEP...
- Page 7 STEP...
- Page 8 Black STEP Connector Module Connector Module...
- Page 9 STEP...
- Page 10 STEP Top View STEP STEP...
- Page 11 STEP STEP P11 (Nonwoven Fabric) Black Magnesium Side Up Sheet Scratch here before assembly. (Magnesium Sheet) Cut off the 2 burrs before assembly. Make sure the P10,P11,P12 placed in correct sequence and position.
- Page 12 STEP Fuel Cell Plate STEP Side View Side View...
- Page 13 STEP Black Connector Module Connector Module Fuel Cell Plate Be sure to insert fuel cell plate and connector module to the end.
- Page 14 STEP STEP...
- Page 15 STEP...
- Page 16 STEP...
- Page 17 STEP...
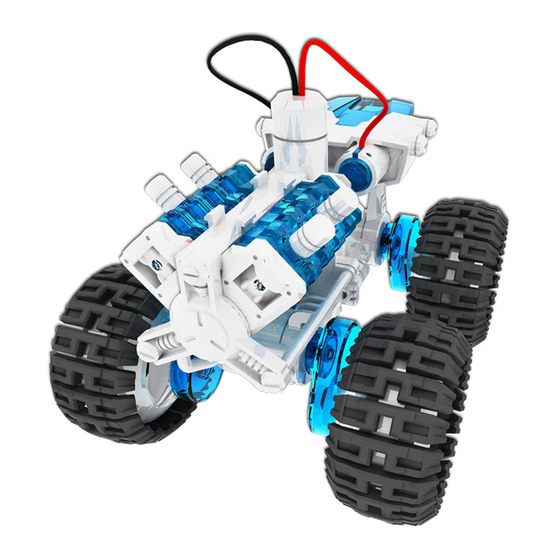
- Page 18 STEP Finished product!
-
Page 19: How It Works
How It Works After a period of time the salt water will be exhausted ( about 15 minutes ), the car will begin to get slower or stop. Add a few more drops of salt water to start it again ( as in fig Each Magnesium sheet can work for 4 hours continuously, then it will become fragmented. - Page 20 Cover Magnesium Sheet Reassemble cover and Make sure the polarity of the Insert Fuel Cell plate magnesium sheet connector dry without salt water Run your car now How to refill the salt water : When the engine car starts getting slower or stops, reapply a few drops of salt water with the applicator into the position as shown And scratch oxide from the battery connectors and also magnesium sheet by slotted screwdriver before reuse.
- Page 21 How to stop the car : Remove Fuel Cell plate to stop your car as shown below: How to maintain Fuel Cell plate : It is necessary to clean Fuel Cell plate every time when not in use. Gently rinse air cathode under tap water, don’t hand rub the surface to ensure the quality of air cathode.
- Page 22 5-3 Flush and scratch the oxidization of the magnesium sheet as shown below: Magnesium Gently rinse magnesium sheet Magnesium Sheet Scratch Here Front Side The Opposite Side Scratch the oxidization of the magnesium sheet Magnesium Gently rinse magnesium sheet and dry it...
- Page 23 How To Play <1 > Transform from Flat engine to V engine. FLAT engine V engine <2 > Adjust height of the wheels. 22.5 22.5 67.5 67.5 Note: Do not set the front wheels to '0' degree when the engine is in flat type,they may interfere with each other.
- Page 24 <3 > Lock or release the car body. Release Lock Release Lock <4 > Run the car forward or backward. Forward Backward Black Black...
-
Page 25: Trouble Shooting
Trouble Shooting Check the steps below if car doesn’t move after adding salt water. Make sure motor and gears are installed in right position. Make sure each connector must be set in right position (Ref: STEP Make sure Fuel Cell plate and connector module are inserted entirely. (Ref: STEP Replace a new magnesium sheet if it is eroded as shown below. - Page 28 4350007521A...
Need help?
Do you have a question about the Salt Water Fuel Cell Engine Car kit and is the answer not in the manual?
Questions and answers
how do you make the body it dosent tell you how?
To assemble the body of the OWI Salt Water Fuel Cell Engine Car kit, follow these steps:
1. Mechanical Assembly – Step 1: Use parts like P6 (Gear With Shaft), P3, P5 (Round Shaft), P4 (Gear), and A2. Connect these with plastic parts labeled 7, 8, and 6.
2. Mechanical Assembly – Step 2: Use parts P1 and P2 along with P4 to continue the structure.
3. Mechanical Assembly – Step 3: Use parts A3, A5, B3, and C5 to build further. Also connect P5, and ensure correct placement of black and red wires.
4. Connector Module: Insert the Connector Module (B16) properly, as shown in the instructions. Match the red and black wires correctly.
Do not cut plastic parts in advance; only cut them when needed. Proper placement of gears, shafts, and connectors is essential for correct function.
This answer is automatically generated