
Summary of Contents for Reka 82026
- Page 1 Full HD Action Camera MODEL NUMBER: 82026 USER GUIDE After Sales Support UK/N.IRELAND HELPLINE N 01270 508538 REP.IRELAND HELPLINE N 1800 995 036 WEBSITE: www.quesh.co.uk EMAIL: enquiries@quesh.co.uk...
- Page 2 Contents Welcome Section Playback Mode • Playback General Information & Safety • Photo Files Instructions • Video Files Contents & Features 16-20. Settings • Access Settings Menu General Layout • Sound • Power Frequency Micro SD Card • Power Save •...
- Page 3 Welcome Section Congratulations! You have made an excellent choice with the purchase of this quality REKA product. ® By doing so you now have the assurance and peace of mind which comes from purchasing a product that has been manufactured to the highest standards of performance and safety, supported by the high quality standards of Quesh Ltd.
-
Page 4: Safety Instructions
General Information & Safety Instructions Battery Care To get the best out of the battery, fully charge and use untll flat for the first 5-6 times. Then use until flat and fully charge at least once a month. Prolonged storage without charge may cause damage to the battery and result in poor to no charge. - Page 5 Contents & Features Contents 1 x 720P Action camera 1 x Base Clip 1 x Rechargeable Li-ion Battery 1 x Tripod Fitting 1 x Micro USB charge cable 1 x Small Extension 1 x Camera Cradle 2 x Buckle Tether 1 x Camera Case 2 x M3 Tissue Tape Pads 1 x 8GB Micro SD card...
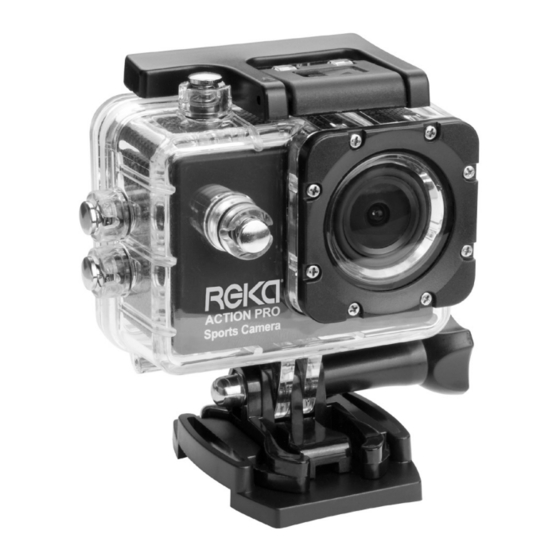
- Page 6 General Layout On/Off Mode Lens Record Shutter/Record Micro Record SD port Screen Menu Micro Charge Down port Battery Bay After Sales Support UK/N.IRELAND HELPLINE N 01270 508538 REP.IRELAND HELPLINE N 1800 995 036 WEBSITE: www.quesh.co.uk EMAIL: enquiries@quesh.co.uk...
- Page 7 Micro SD Card Inserting The Card The micro SD card will only fit one way into the camera. Insert the card square in to the slot, with the contacts facing the same side as the lens. This will prevent the card from possibly falling between the case and the reader.
- Page 8 Checking The Adaptor READ BEFORE USE Adaptor Information Before using a USB mains adaptor please check the “Output” information on the plug face label. For this device 5V/1A or 5V/1000mAh is the maximum output required to charge the battery. Using a stronger output can damage the battery and/or product and void the warranty.
- Page 9 Charging There are several methods to charge the camera all of which will take up to 3 hours to fully charge the battery. Although the camera can be charged while in use it can take longer. When the charge cycle is complete the red LED charge light will go out.
- Page 10 Turning On/Off Turning On Give the button on the front of the camera a quick press. A welcome splash screen will appear briefly and then the camera will be in video mode. Turning Off Press and hold the button on the front of the camera for about 2 seconds.
-
Page 11: Camera Modes
Camera Modes There are 3 modes available on this camera. They are ‘Video’, ‘Stills’ and ‘Playback’. You can cycle through the modes by pressing the button. Each mode is indicated as an icon at the top left corner of the screen. Video Mode Stills Mode Playback Mode... - Page 12 Video Mode Movie Size This option will allow you to change the resolution you are recording in. Press the button to highlight the option ‘Movie Size’ and press ‘OK’ to select it. Options are: 1920x1080 (Upscaled) 1280x720 640x480 Use the button to move through the options and press ‘OK’...
- Page 13 Video Mode Looping Video This option will allow you to set the camera to continuously loop the recording. This feature will record for a segment of time in minutes before recording another file until the operating space is full, then it will over write the oldest file.
- Page 14 Stills Mode Taking A Photo Press the button to change the mode from video to stills. Press the ‘OK’ to take a photo or to utilise a stills feature. Photos are taken in JPG format Stills Options To access the stills options, first make sure the camera is in stills mode then press the button to access the stills options.
- Page 15 Stills Mode Single Shot This option will set the camera to take a single photo. Press the button to highlight the option ‘Single Shot’ and press ‘OK’ to select it. Options are: Selecting ‘ON’ will automatically turn ‘Burst Photo’ to ‘OFF’. Use the button to move through the options and press ‘OK’...
- Page 16 Stills Mode Time Lapse (Timer) This option will set the camera to take a single photo after a count down delay that will be shown on the screen. Press the button to highlight the option ‘Time Lapse’ and press ‘OK’ to select it. Options are: Off OFF Use the...
- Page 17 Playback Mode Playback Press the button to change the mode from video to stills and finally to playback. Use the buttons to cycle through the available files. Press ‘OK’ to start the play back on video files. Photo Files Photos will only show as is on the screen with no zoom facility. Video Files Once a video file has been selected you can control the playback.
- Page 18 Settings Access Settings Menu Press the ‘OK’ button to start or stop recording if you are in video mode. Press the button to bring up the options then press ‘OK’ to change the tab to access the Settings menu. If you are in the video or still menu already you will need press the button until the tab icon is highlighted before pressing ‘OK’.
- Page 19 Settings Power Frequency This option will set the screens frequency. Press the button to highlight the option ‘Power Frequency’ and press ‘OK’ to select it. Options are: 50Hz 60Hz Use the button to move through the options and press ‘OK’ to select the highlighted option. Press to return to the previous menu and again to exit the settings menu.
- Page 20 Settings Panel Protect (Screen Saver) This option will allow the camera to turn the screen off after a period of time. Press the button to highlight the option ‘Panel Protect’ and press ‘OK’ to select it. Options are: 30Sec. 1min 1min.
- Page 21 Settings Language This option will change the language used on all menus. Press the button to highlight the option ‘Language’ and press ‘OK’ to select it. Options are: English, Simplified Chinese, Traditional Chinese, German, Italian, Spanish, Portuguese, Dutch, Vietnamese, French, Greek, Thai, Czech, Hungarian, Polish, Turkish, Russian, Slovakian, Romanian, Croatian, Malaysian, Japanese and Korean.
- Page 22 Settings Reset This option will allow you to restore the camera to factory settings. This option will usual resolve any glitches that may occur. Press the button to highlight the option ‘Reset’ and press ‘OK’ to select it. Options are: Use the button to move through the options and press ‘OK’...
- Page 23 Data Transfer Mass Storage Mode As long as there is a micro SD card installed in the camera and the camera is connected to a PC or laptop, the camera will automatically change to mass storage mode. Drivers will automatically be installed by the operating system. You might need internet access to complete this task.
- Page 24 PC Cam PC Camera Mode If there is no micro SD card installed in the camera and the camera is connected to a PC or laptop, the camera will automatically change into PC Cam mode. You will be able to use the camera as a basic web camera with compatible software.
- Page 25 Fitting Base Mount & Clip Slide the clip into the mount until it clicks to secure it in place To remove the clip, pinch the arms and slide out. Camera Housing Insert the camera into the housing. Partially close the door and fold the hinged clip over the catch lip on the door.
- Page 26 Assembly Options After Sales Support UK/N.IRELAND HELPLINE N 01270 508538 REP.IRELAND HELPLINE N 1800 995 036 WEBSITE: www.quesh.co.uk EMAIL: enquiries@quesh.co.uk...
- Page 27 Assembly Options After Sales Support UK/N.IRELAND HELPLINE N 01270 508538 REP.IRELAND HELPLINE N 1800 995 036 WEBSITE: www.quesh.co.uk EMAIL: enquiries@quesh.co.uk...
- Page 28 Assembly Options After Sales Support UK/N.IRELAND HELPLINE N 01270 508538 REP.IRELAND HELPLINE N 1800 995 036 WEBSITE: www.quesh.co.uk EMAIL: enquiries@quesh.co.uk...
- Page 29 Specification 720P Action Camera General Size: 59mm x 41mm x 29mm (approx) Approx Weight: Solution: Sunplus1521 Ports: Micro SD card port, Micro USB port IP Rating: IP67 (Camera Housing Only) Battery Battery Type: Internal Rechargeable Li-ion Battery Capacity: 700mAh (3.7V) Charge Time: Up to 3 hours Charging Requirements Min:...
- Page 30 Warranty Certificate Warranty This product is warranted to be free from defects in workmanship and parts for a period of 36 months from the date of purchase. Defects that occur within this warranty period, under normal use and care, will be repaired, replaced or refunded at our discretion, solely at our option with no charge for parts and labour.
- Page 31 Warranty Card Full HD Action Camera Model Number: 82026 Please keep your purchase receipt together with your warranty card Name: Address: Date of purchase: Location of purchase: Fault Description: Office Use: Repaired Replaced Other We recommend that you attach a photocopy of your receipt, showing the date of purchase, to this warranty card and keep it for your reference.
Need help?
Do you have a question about the 82026 and is the answer not in the manual?
Questions and answers