
Subscribe to Our Youtube Channel
Summary of Contents for Victory Range Hoods Victory SKY
- Page 1 Instruction Manual Ceiling type range hood Victory SKY This Installation manual only applicable to Detachable ceiling decorative board...
-
Page 2: Safety Precaution
SAFETY PRECAUTION Keep children away from the product when it is operating and do not allow them to play with or near the product. The range hood is for HOME USE only, not suitable for barbecue, roast shop and other commercial use. ... - Page 3 Controls The control inside the stainless steel panel, you can find it when open the panel 1. TIME/DELAY (2 Functions): - Time Setting: This button is used to set time when lighting and blower are not in use. Time is displayed in 24 hour cycle. To set time, press the push button (1) for 3 seconds.
- Page 4 NOTE: When blower is turned on, 100% of power level is activated during 1 to 2 seconds acting as a “kick-start”. It will then operate at the previous setting. Connecting the remote control ·A New remote control has to establish a new connection to the range hood when used for first time.
-
Page 5: Remote Control
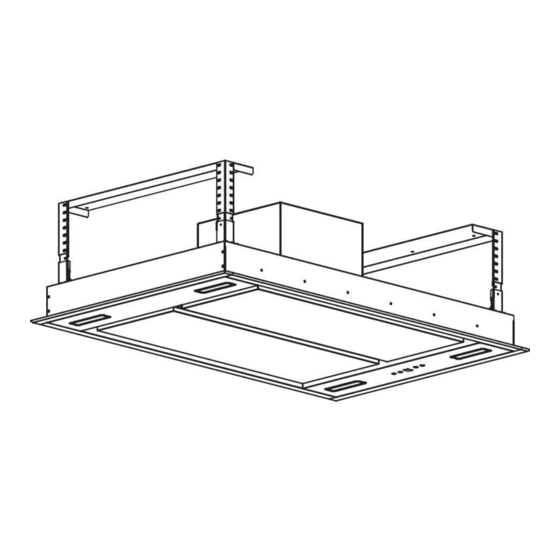
Remote control Lighting press button once, the light is on, press again, the light is off. The lighting button it is controlled separately and will not affect any other functions. Turning on/ increasing motor speed press, Low speed press, Medium 2 speed press Medium 1 speed press High speed Turning off/Decreasing motor speed... - Page 6 Installation Minimum 6” duct is required for this hood. The blower can be rotated to all 4 sides, except the top. If you need to exhaust at the top, 90 degree elbow will be required. The range hood should be placed at a distance between 28” and 36” above the gas hob for best performance.
- Page 7 expension screws( or 14pcs ST6 x40MM tapping screws and wall plugs). Refer pic 3 Calculate the length of angle bar(refer to pic 4/5), adjust the corner connector bar to the required height,then fix them with angle bar using the 10mm x M4 nut and bolts with metal washer (32pcs),the angle bar must have an overlap of at least 36mm.
- Page 8 Fix the outlet reducer to the range hood body using 4pcs ST4 X 8MM self- tap screws.Refer to pic 6.
- Page 9 You may choose the air outlet direction as the pic 7 shown( loose 8 pcs of screws which was fixed on the range hood body,turn the body around 90°/180°/270°positioning the direction of the air outlet. And then, tighten the screws(8pcs) to fix the hood body. Connect the ducting hose to the outlet reducer.Refer to pic8 Use M4 X 10MM screws(8pcs) to fix the corner connector bar (4pcs) onto the main body of the range hood .
- Page 10 When the main body of the range hood is attached to the hanging plate, if you want to set the body of the range hood in horizontal position and adjust it to the required height, you may use straight or cross screwdriver to adjust the screw on the flexible corner.
-
Page 11: Care And Cleaning
move down to the floor. The body of the range hood in horizontal position and required height are well fixed. Use the cross screwdriver tighten the fixing screw on the flexible corner. Care and Cleaning Removing the clean the grease filters 1. - Page 12 into the dishwasher with washing up liquid. Set the temperature of 50° C for water in the dishwasher. And then turn on the switch for washing function. C. The stainless steel cover plates are also removable for cleaning. Important: Before cleaning, always to disconnect your range hood form power supply.
-
Page 13: Changing A Light Bulb
Changing a light bulb Changing a lamp bulb for GU10 1. Press gently on the underside of the bulb that needs to be replaced, twist anticlockwise to release. Refer to pic 16 Important: shut off the power to the hood before changing the lamp bulb. - Page 14 Victory Range Hoods 7272 Buller Ave Burnaby BC Canada www.kitchenhoods.ca...
Need help?
Do you have a question about the Victory SKY and is the answer not in the manual?
Questions and answers