Advertisement
Available languages
Available languages
Quick Links
Advertisement

Subscribe to Our Youtube Channel
Related Manuals for Duronic HV120


Summary of Contents for Duronic HV120
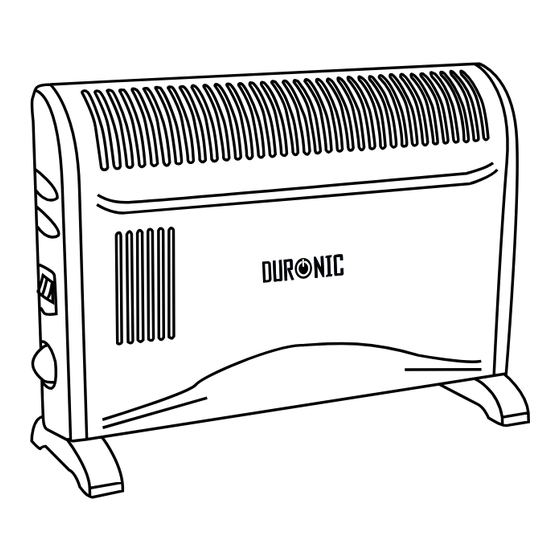
- Page 1 Creative Consumer Products Convection Heater - HV120 PLEASE READ ALL THE INSTRUCTIONS BEFORE USE...
- Page 2 Contents English Manual Manuel d’utilisation en français Gebrauchsanleitung auf Deutsch Manual de Instrucciones en Español Manuale D’istruzioni In Italiano...
- Page 3 English Manual...
- Page 4 General Safety Assembly - Do not cover, restrict the air inlet/outlet or use the appliance to dry clothes. - Carefully turn the radiator on it’s side to fit the feet - Do not use without feet attached. - Position each foot as shown in fig1. and secure using the self tapping screws - Only use in the upright position on a flat level surface.
- Page 5 Using The Turbo function Wall Mounting This is operated by means of the switch with the fan symbol beside it. The fan The heater is supplied with 4 sets of fixing brackets, screws and plastic wall will only operate with the thermostat is in the “ON” position and can be used plugs to enable it to be mounted onto a wall if required.
- Page 6 Refund or replacement is at the discretion of that company. Duronic Products are offered with a 1 year guarantee under the following conditions: 1. The product must be returned to the retailer with original proof of purchase.
- Page 7 Manuel d’utilisation en français...
- Page 8 Précautions de sécurité Assemblage Ne recouvrez pas les entrées et sorties d’air et n’utilisez pas ce produit pour Veuillez coucher le radiateur sur le côté afin d’assembler le socle. sécher des vêtements. Positionnez chaque socle comme l’illustre l’image 1 puis sécurisez ces socles N’utilisez pas ce produit sans son socle.
- Page 9 Utiliser la fonction turbo Montage mural Ce chauffage est fourni avec 4 fixations ainsi que la visserie nécessaire pour La fonction turbo permet d'expulser la chaleur produite grâce au ventilateur permettre une installation murale du ventilateur. intégré. Celui-ci fonctionne par activation de l'interrupteur avec le symbôle du Si ce produit est prévu pour une installation murale, il n’est pas nécessaire ventilateur.
- Page 10 Garantie Garantie et service après-vente 1 an de garantie de la part de Shine-Mart Ltd, propriétaire de la marque Duronic. NOTE : CES DÉCLARATIONS N’AFFECTENT EN RIEN VOTRE DROIT STATUTAIRE EN TANT QUE CONSOMMATEUR Ce produit a été produit en suivant les procédures de contrôle de qualité les plus strictes en utilisant des matériaux de qualité...
- Page 11 Gebrauchsanleitung auf Deutsch...
- Page 12 Allgemeine Sicherheitsanforderungen Montage - Decken Sie oder beschränken Sie die Lufteinlass/auslass nicht. Verwenden - Legen Sie das Gerät auf die Seite um die Füße zu befestigen. Sie die Heizung nicht Kleidungen zu trocken. -Positionieren Sie die Füße wie in Bild1 zu sehen ist. Verwenden Sie die - Verwenden Sie das Gerät ohne die Füße nicht.
- Page 13 Die Turbo-Funktion benutzen Wandmontage Diese Heizung kommt mit 4 Befestigungswinkeln, Schrauben und Dübeln, Dies wird betätigt,wenn zum Ventilatorsymbol gewechselt wird. Der Ventilator wird nur betätigt wenn das Thermostat auf „ON“ ist und wenn die und ist deshalb wandmontierbar. Heizungelemente ebenso auf „ON“ positioniert ist, um warme Luft in den Wenn Sie die Heizung an der Wand montieren möchten, sollten die Füße Raum zu blaßen.
- Page 14 Defekts durch schlechten Werkstoffe oder Verarbeitung, sollte das fehlerhafte Produkt an den ursprünglichen Kaufort zurückgegeben werden. Eine Rückerstättung oder einen Umtausch ist nach dem Ermessen der Firma. Duronic Produkte kommt mit 1 Jahr Gewährleistung unter den folgenden Bedingungen : Entsorgung Das Produkt sollte mit dem ursprünglichen Kaufnachweis zurückgegeben werden.
- Page 15 Manual De Instrucciones En Español...
- Page 16 Seguridad general Asamblea -No cubra, restringa la entrada y salida de aire o usar el aparato para secar - Girar con cuidado el radiador en su posición para colocar los pies, ropa. - Posición cada uno de los pies como se muestra en la figura 1, y fije con los -No utiliza el aparato sin las patas en su lugar.
- Page 17 Utilizando el Turbo Instalación en la pared Esto funciona mediante el interruptor con el símbolo del ventilador que Se suministra con 4 grupos de fijación, tornillos y tacos de plástico para se encuentra alado. El ventilador funciona sólo cuando el termostato que pueda montar en una pared si es necesario.
- Page 18 Reembolso o reemplazo es a discreción de la compañía. Productos Duronic se ofrecen con una garantía de 1 año bajo las siguientes condiciones: 1. El producto debe ser devuelto al vendedor con comprobante de compra original.
- Page 19 Manuale D’istruzioni In Italiano...
- Page 20 Istruzioni generali di sicurezza Assemblaggio - Non coprire, bloccare le prese d’aria o utilizzare l’apparecchio per asciugare - Capovolgere con molta attenzione la stufa elettrica per montare i piedi di vestiti. sostegno. - Non utilizzare l’apparecchio senza i piedini in gomma montati. - Posizionare ogni sostegno come mostrato in fig1.
- Page 21 Utilizzare il turbo Montaggio a muro Questa funzione è attivata dal pulsante con il simbolo della ventola sul lato La stufa è dotata di 4 assortimenti di supporti di montaggio, viti e l’occorrente della stufa. La ventola funziona solamente se il termostato è in posizione per permettere di montare la stufa elettrica al muro.
- Page 22 Inoltre, non possiamo garantire -Potenza 3: 2000W (Potenza massima) l’apparecchio se è stato modificato o riparato dall’acquirente o da terzi. 1 anno di garanzia da Shine-Mart Ltd, proprietari del marchio commerciale Duronic. NOTA: QUESTE DICHIARAZIONI NON INFLUISCONO SUI DIRITTI LEGALI DEL CONSUMATORE Questo prodotto è...
Need help?
Do you have a question about the HV120 and is the answer not in the manual?
Questions and answers