Table of Contents
Advertisement
Quick Links
Advertisement
Table of Contents

Subscribe to Our Youtube Channel
Related Manuals for ASTRO VG-876


Summary of Contents for ASTRO VG-876
- Page 1 Video Signal Generator VG-876 Instruction Manual Ver.3.40...
- Page 3 1.4.3. Names of the keys and their functions ................5 1.4.4. VG-876 rear panel ......................7 1.4.5. Names of connectors and their applications ..............7 1.4.6. Tools used to operate the VG-876 .................. 8 1.5. Concerning VM-1876 module slots ....................9 1.5.1. Overview ......................... 9 1.5.2.
- Page 4 2.4.3. Display change when Group execution ................ 29 2.5. Automatic execution ........................30 Chapter3. TIMING DATA SETTINGS ......................... 32 3.1. Horizontal timing data editing...................... 32 3.1.1. Horizontal timing data ....................32 3.1.2. Restrictions on the horizontal timing parameters ............32 3.1.3.
- Page 5 Contents 4.9.2. Option and image patterns setting ................66 4.9.3. 9-marker (OPT No.76) settings ..................67 4.9.4. 3D Image Pattern (OPT No.100) setting ............... 69 4.9.5. Setting the 3D pattern (OPT No.101)................72 4.9.6. Output setting of BMP files ................... 79 4.10.
- Page 6 6.2.1. Execution procedure ....................156 6.2.2. Screen displays during HDCP execution ..............158 6.2.3. HDCP/EDID/CEC collective display ................160 Chapter7. VG-876 SYSTEM SETTINGS (Config) .................... 164 7.1. System settings ........................164 7.1.1. Beep setting ....................... 164 7.1.2. Key lock setting ......................165 7.1.3.
- Page 7 9.6.3. Select the interface unit to version-up ................ 222 Chapter10. INTERFACE SETTINGS ........................224 10.1. VG-876 interface units ......................224 10.1.1. HDMI unit (VM-1876A-M0) ..................224 10.1.2. DisplayPort unit (VM-1876-M1) (this unit is discontinued) ........224 10.1.3. DisplayPort Unit (VM-1876A-M1) ................225 10.1.4.
- Page 8 10.2.5. Setting the aspect ratio ..................... 238 10.2.6. Setting the color depth (bit) for pattern drawing ............240 10.2.7. Selecting RGB or YPbPr and setting the color difference coefficients ...... 241 10.2.8. Setting the digital level ....................243 10.2.9. Audio sweep settings ....................245 10.2.10.
- Page 9 Contents 10.6.6. Embedded audio ...................... 389 10.7. iTMDS ............................. 390 10.7.1. Connector and pin assignment ................. 390 10.7.2. iTMDS setting method ....................391 10.7.3. Data transfer systems ....................394 10.7.4. EDID ......................... 422 10.7.5. HDCP ........................422 10.7.6. DDC/CI ........................422 10.8.
- Page 10 10.12.11. Analog Unit ......................469 10.12.12. Synchronization Unit ..................... 470 10.13. External Control ........................470 10.14. General specifications ......................470 10.15. Trademark..........................470 10.16. Connector specifications ....................... 471 10.16.1. RS232C-Connector ....................471 10.16.2. Trigger-Connector ....................471 10.16.3. S-Trigger-Connector ....................472 10.17.
- Page 11 Contents Chapter13. SCREEN SPLIT IMAGE LIST ......................519 13.1. Single clock mode Image split ....................519 13.2. Dual clock mode Image split ....................520 13.3. Quad clock mode Image split ....................522 Chapter14. Revision history ..........................525...
-
Page 12: Safety Precautions
Thank you very much for purchasing this model VG-876 video signal generator. This manual contains details on the operation procedures to be followed when the VG-876 is used, the checkpoints and precautions to be observed, and so on. Improper handling may result in malfunctioning so before using the VG- 876, please read through these instructions to ensure that you will operate the generator correctly. - Page 13 Do not start using the generator straight away: instead, turn on the power of the VG-876 and allow it to warm up for about 10 to 15 minutes before use so as to ensure that the VG-876 will operate stably.
-
Page 14: Optional Accessories
Standard accessories VG-876 main unit CD with VG-876 instruction manual (what you are now reading): 1 disc USB Memory: 1 pc SP-8870 software installation CD (for Windows): 1 pc SP-8870 instruction manual: PDF version (packed with the SP-8870 software installation CD) ... -
Page 15: Chapter1. Concerning The Vg-876
CONCERNING THE VG-876 1.1. General description The VG-876 video signal generator supports applications in every field of display test and measuring. It features a high level of expandability which is achieved by the installing video output interface units. 1.2. Features ... -
Page 16: Data Configuration
Optional patterns 200(1 to 200) User character patterns 16 (F0h to FFh) The various data can be registered in the internal memory (approx. 60 MB) of the VG-876 or in USB Memory. Number of data Program data 1000 (Program # 1 to 1000) -
Page 17: Panel Parts And Their Functions
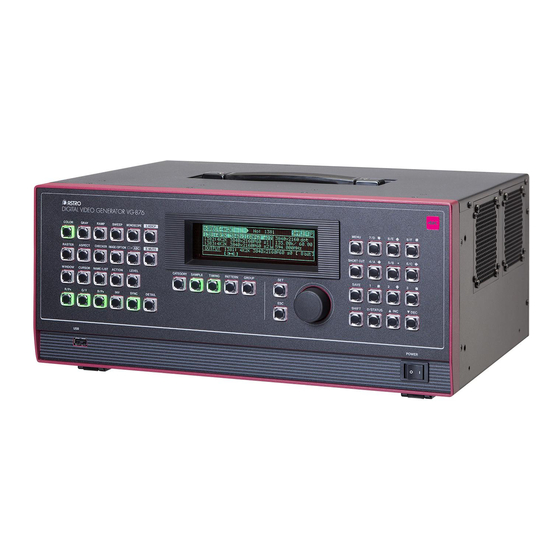
Chapter 1 CONCERNING THE VG-876 1.4. Panel parts and their functions 1.4.1. VG-876 front panel DIGITAL VIDEO GENERATOR VG-876 COLOR GRAY RAMP SWEEP MONOSCOPE HDCP MENU RASTER ASPECT CHECKER IMAGE/OPTION MUTE SHORT CUT WINDOW CURSOR NAME/LIST ACTION LEVEL CATEGORY SAMPLE... -
Page 18: Rb-1870/Rb-1871 Panel
1.4.2. RB-1870/RB-1871 panel REMOTE BOX RB-1870 COLOR RAMP SWEEP MONOSCOPE MENU CATEGORY SAMPLE GRAY □ RASTER ASPECT CHECKER IMAGE/OPT SHORT CUT GROUP WINDOW CURSOR NAME/LIST ACTION LEVEL SAVE SYNC DETAIL SHIFT STATUS RB-1870 SAMPLE LEVEL Ⅰ Ⅱ RB-1871 Some restrictions apply to operating the RB-1871. The operable items are described below. ... -
Page 19: Names Of The Keys And Their Functions
Chapter 1 CONCERNING THE VG-876 1.4.3. Names of the keys and their functions (A) Pattern keys Used to display and edit the patterns. COLOR etc. Action key Used when setting the scroll, flicker and other functions. ACTION Level key Used to set the digital video levels and audio levels. - Page 20 Set key Used to enter the setting items and parameters which have been set. Used for inserting USB Memory or accessing the memory in USB Memory. (G) Power switch Used to turn the power of the VG-876 on and off.
-
Page 21: Vg-876 Rear Panel
Any voltage from 100 V to 240 V is supported. Frame ground Connect this frame ground terminal to the frame ground terminal of the unit which is connected to the VG-876. Input Interface slot x1 One input interface unit to be installed. -
Page 22: Tools Used To Operate The Vg-876
1.4.6. Tools used to operate the VG-876 The table below lists the operation tools of this generator and the restrictions on the operation of each of these tools. Operation tool Restriction on operation Remarks VG-876 front panel These enable all the generator The controls can be used only by the functions to be operated. -
Page 23: Concerning Vm-1876 Module Slots
1.5. Concerning VM-1876 module slots 1.5.1. Overview The VM-1876 series is composed of boards making up the interface section of the VG-876. Different models are available to support each standard. This series will make it possible to adapt quickly to new versions of current standards and to new interfaces. - Page 24 CAUTION Hold 2 screws of rear side and exchange it. Be careful that the components on the VM modules not to touch the main unit of VG-876.
-
Page 25: Firmware Version Up
Chapter 1 CONCERNING THE VG-876 1.5.3. Firmware version up Firmware version up is necessary when you install new VM-1876 interface units. Please ask ASTRODESIGN about the latest firmware data. 1.5.4. Checking operation The LED of ST-BY of the rear of VM-1876 is lit as green when it works normally. -
Page 26: Menu Lists
1.6. Menu lists When [MENU] key is pressed, the menu items are displayed: Menu Contents Program Edit Program data edit Group Edit Group data edit Auto Edit Automatic execution edit DP Analysis Evaluation of DisplayPort interface Data Copy/Erase Data copying/erasing Configuration System settings Audio Flash Data Entry... - Page 27 Chapter 1 CONCERNING THE VG-876 │ │ │ └ Output ON/OFF ├ Audio │ ├ Digital Audio │ └ Audio Sweep ├ Pattern │ ├ Pattern/RGB/INV Select │ ├ Color Bar │ ├ Gray Scale │ ├ Ramp │ ├ Sweep │...
-
Page 28: Group Edit Menu List
1.6.2. Group Edit menu list Group Edit *Only the “Program” directory is shown in the ├ No Group Edit menu list. ├ Name ├ Edit Mode └ Program ├ TIM ├ PAT └ Auto IntervalAudio Edit menu list 1.6.3. Audio Edit menu list Auto Edit *Only the “Setting”... -
Page 29: Configuration Menu List
Chapter 1 CONCERNING THE VG-876 1.6.6. Configuration menu list Configuration ├ General *Only the directory names are displayed in the │ ├ RS-232C Configuration menu list. │ ├ LAN │ ├ Trigger │ ├ Image Fast Draw Mode │ └ Power-On Program ├... -
Page 31: Chapter2. Operation Procedures
OPERATION PROCEDURES 2.1. Flow of basic operations 2.1.1. Settings required for displays The timing data and pattern data must be set in order for the test patterns to be displayed from the generator. The following items are set for these data. In the case of this generator, the timing data and pattern data are collectively referred to as the “program data.”... -
Page 32: Selecting The Timing Data
2.1.2. Selecting the timing data There are two ways to select the timing data. 1) Input the timing data numbers directly. 2) Select the timing data from the categories. 1) Input the timing data numbers directly. Input the timing data number (1001 to 1999) Video timing data output SAMPLE V-SYNC... -
Page 33: Selecting The Pattern Data
Chapter 2 OPERATION PROCEDURES 2.1.3. Selecting the pattern data There are four ways to select the pattern data. 1) Input the pattern data numbers directly. 2) Select the pattern data from the categories. 3) Select the pattern data using the pattern keys. 4) Select the patterns for each program data. - Page 34 3) Selecting the pattern data using the pattern keys Select the key corresponding to the pattern, The pattern of the selected type is displayed. COLOR such as , to be displayed. COLOR COLOR Lighted: selected; off: deselected. When setting details for the pattern or changing The pattern selection screen is displayed.
- Page 35 Chapter 2 OPERATION PROCEDURES 4) Selecting the patterns for each program data MENU Select Program Edit using , and then press Select Pattern (PAT) using , and then press Select Pattern/RGB/INV Select using , and then press The selected pattern is indicated by a check mark Color Bar Check this to select the color bar pattern.
-
Page 36: Selecting The Actions
2.1.4. Selecting the actions There are two ways to select actions. 1) Select the action using the action key. 2) Select and set the action for each program data. 1) Selecting the action using the action key The action selection screen is displayed. ACTION Press the key. - Page 37 Chapter 2 OPERATION PROCEDURES Select the action using On this screen, the scroll direction and number of steps are set when the W-SCROLL action has been checked. , and then press ←, →, ↑, ↓ Select these to scroll in the directions of the arrows.
- Page 38 2) Select and set the action for each program data. MENU Select Program Edit using , and then press Select Action (PAT) using , and then press One of the following actions is selected, and the detailed settings are performed. For details on the setting procedure, refer to “ACTION Select the item using SETTINGS”...
-
Page 39: Saving The Program Data
Chapter 2 OPERATION PROCEDURES 2.2. Saving the program data Upon completion of program editing, save the data. If the power is turned off without saving the data, the status before the changes were made will be restored. SAVE The program number is set here. (0001 to 1000) Media The internal memory or USB Memory is... -
Page 40: Setting The Names
2.3. Setting the names When timing or pattern data is edited and the edited data is to be saved, the name used for the program can be changed. Select Name using and then press To decide on the positions where the The position where the character of the name is to be character changes are to be made: input changes. -
Page 41: Groups
Chapter 2 OPERATION PROCEDURES 2.4. Groups Registering programs as “group” is useful when specific programs are to be combined and used repeatedly. Examples include times on a TV set inspection process when specific timing and pattern data are combined for repeated use. -
Page 42: Setting And Saving Groups
2.4.2. Setting and saving groups The combinations of programs and patterns which are used with a high frequency can be saved. MENU Select Group Edit using , and then press The number of the desired group is set here. (01 to 99) Name Any name (consisting of up to 20 Select the items using... -
Page 43: Display Change When Group Execution
Chapter 2 OPERATION PROCEDURES Select using This completes the saving of the group data. , and then press If previous data exists, a display appears prompting the user to confirm whether it is acceptable for the existing data to be overwritten. 2.4.3. -
Page 44: Automatic Execution
2.5. Automatic execution The data in the selected groups and program numbers can be automatically output in accordance with the delay time which has been set. MENU Select Auto Edit using , and then press Selecting the Mode setting Select Program or Group using 0/STATUS 1 <When Program has been selected as the Mode setting>... - Page 45 Chapter 2 OPERATION PROCEDURES For automatic execution, select EXECUTE using , and then press To cancel automatic execution at any time, press SAVE Select Auto Data SAVE using Select the save destination (*) at Media using , and then press Internal: The data is saved on the internal memory.
-
Page 46: Chapter3. Timing Data Settings
TIMING DATA SETTINGS 3.1. Horizontal timing data editing 3.1.1. Horizontal timing data When making changes with the horizontal timing data, the parameters which can be set and the names of the parameters are indicated below. Sync Backp Disp Period HDstart HDwidth 3.1.2. - Page 47 Chapter 3 TIMING DATA SETTINGS When items are set in microseconds (μs), restrictions apply to CAUTION these settings depending on the dot clock frequency and other timing data used for drawing. The setting unit of Hdisp and Hperiod of VM-1876-M8 are 2-dot unit. The values for the blanking and frontp items are calculated automatically on the basis of the data presented above.
-
Page 48: Horizontal Timing Data Setting Procedure
3.1.3. Horizontal timing data setting procedure Described below is the procedure used to set the parameters which can be changed with the horizontal timing data <Selecting H-Timing menu> ⇒ ⇒ MENU ProgramEdit Pattern ProgramEdit Program Name H-Timing MENU GroupEdit Timing V-Timing AutoEdit Output... -
Page 49: Vertical Timing Data Editing
Chapter 3 TIMING DATA SETTINGS 3.2. Vertical timing data editing The vertical timing setting locations and names of the settings are indicated below. 3.2.1. Vertical timing data [For progressive scanning] Serration EQP-Fp EQP-Bp Backp Sync Disp Total VDstart VDline [For interlaced scanning]... -
Page 50: Restrictions On The Vertical Timing Parameters
3.2.2. Restrictions on the vertical timing parameters The table below shows the restrictions on the parameters which can be changed with the vertical timing data. <For progressive scanning> Setting item Setting range Parameter fixing function Total Time display: 0.00 to 999.999 ms ms setting fixed using SHIFT+2 Dot display: 8 to 8192 H H setting fixed using SHIFT+3... - Page 51 Chapter 3 TIMING DATA SETTINGS CAUTION The range of time display (ms) is restricted depending on the H-period and other timing data used for drawing. The values for the blanking and frontp items are calculated automatically on the basis of the data presented above.
-
Page 52: Vertical Timing Data Setting Procedure
3.2.3. Vertical timing data setting procedure Described below is the procedure used to set the parameters which can be changed with the vertical timing data. <Selecting V-Timing menu> ⇒ ⇒ MENU ProgramEdit Timing ProgramEdit Program Name H-Timing MENU GroupEdit Timing V-Timing AutoEdit Output... -
Page 53: Concerning The Scanning Modes
Chapter 3 TIMING DATA SETTINGS 3.2.4. Concerning the scanning modes The table below lists the V-Timing scan settings as well as the operations for the scanning methods supported by the settings, imaging methods and action settings. Scan mode System Pixel imaging Scroll and other actions Progressive Progressive scanning Different pixels are drawn on... -
Page 54: Concerning The Serration/Eqp
3.2.6. Concerning the Serration/EQP MENU ⇒ ProgramEdit ⇒ Timing ⇒ Program Edit Program Name H-Timing Total MENU Group Edit Timing V-Timing Disp Auto Edit Output Sync DP Analysis Audio Backp ⇒ ⇒ ⇒ ⇒ Data Copy/Erase Pattern Serration/EQP Select item using Serration and EQP can be selected on the V-Timing [MENU] screen, and various parameters can be set. - Page 55 Chapter 3 TIMING DATA SETTINGS When a setting of 0.5H has been selected for Serration Hsync Hperiod Vsync Hsync Hperiod 1/2 Hperiod CAUTION • The serration and EQP item settings are not reflected in the composite, Y/C and SCART signals. •...
-
Page 56: Concerning Eqp-Fp And Eqp-Bp
3.2.7. Concerning EQP-Fp and EQP-Bp The correspondences between the settings and operations are described using the table below. EQP-Fp/EQP-Bp setting procedure <For progressive scanning> Setting item Details of setting EQPfp This sets the equalizing pulse inside the front porch. Setting range: 0.000 to 999.999 [ms], 0 to 99 [H] EQPbp This sets the equalizing pulse inside the back porch. - Page 57 Chapter 3 TIMING DATA SETTINGS...
-
Page 58: Chapter4. Pattern Settings
PATTERN SETTINGS 4.1. Color bar patterns 4.1.1. Types of color bar patterns When color bars are selected using the pattern key, for instance, color bar patterns can be selected from the types listed below. For further details on pattern selection, refer to “2.1.3 Selecting the pattern data.” 0 CUSTOM Customized pattern 1 100/100-H... -
Page 59: Color Bar Pattern Customizing
Chapter 4 PATTERN SETTINGS 4.1.2. Color bar pattern customizing Before starting the procedure, set the pattern output to [Color Bar], referring to “2.1.3 Selecting the pattern data.” Described below is the procedure for selecting the color bar pattern types and for performing the settings when CUSTOM has been selected as the color bar pattern. - Page 60 <Table of customized color bar pattern setting items> Format (0-3) The drawing direction of the color bars is set here. 0 H Direction Horizontal direction 1 V Direction Vertical direction 2 H Direction&div.V Horizontal direction (loopback by Repeat) 3 V Direction&div.H Vertical direction (loopback by Repeat) Repeat One or more of the 1 to 16 data set by Color/Level are set here.
-
Page 61: Gray Scale Patterns
Chapter 4 PATTERN SETTINGS 4.2. Gray scale patterns 4.2.1. Types of gray scale patterns When gray scale has been selected using the pattern key, for instance, gray scale patterns can be selected from among the types listed below. For further details on pattern selection, refer to “2.1.3 Selecting the pattern data.” 0 CUSTOM Customized pattern 1 8Step-H... -
Page 62: Gray Scale Pattern Customizing
4.2.2. Gray scale pattern customizing Before starting the procedure, set the pattern output to [Gray Scale], referring to “2.1.3 Selecting the pattern data.” Described below is the procedure for selecting the types of gray scale patterns and for performing the settings when CUSTOM has been selected as the gray scale pattern. - Page 63 Chapter 4 PATTERN SETTINGS <Table of customized gray scale pattern setting items> Format (0-3) The drawing direction of the gray scale is set here. 0 H Direction Horizontal direction 1 V Direction Vertical direction 2 H Direction&div.V Horizontal direction (loopback by Repeat) 3 V Direction&div.H Vertical direction (loopback by Repeat) Repeat...
-
Page 64: Ramp Patterns
4.3. Ramp patterns 4.3.1. Types of ramp patterns When ramp is selected using the pattern key, for instance, ramp patterns can be selected from the types listed below. For further details on pattern selection, refer to “2.1.3 Selecting the pattern data.” 0 CUSTOM 1 Linear-H 2 Linear-V... -
Page 65: Ramp Pattern Type Settings And Customizing
Chapter 4 PATTERN SETTINGS 4.3.2. Ramp pattern type settings and customizing Before starting the procedure, set the pattern output to [Ramp], referring to “2.1.3 Selecting the pattern data.” Described below is the procedure for selecting the types of ramp patterns and for performing the settings when CUSTOM has been selected as the ramp pattern type. - Page 66 <Table of ramp pattern setting items> Direction (0/1) The resolution is set here. Horizontal ramp Vertical ramp H-Line Up to four ramp patterns with different levels and steps can be displayed on one screen. Range: 1 to 4 types. These types are used in sequence from line 1. Line1 to Line4 The start level, end level and step are set here.
-
Page 67: Sweep Patterns
Chapter 4 PATTERN SETTINGS 4.4. Sweep patterns 4.4.1. Types of sweep patterns When sweep is selected using the pattern key, for instance, sweep patterns can be selected from the types listed below. For further details on pattern selection, refer to “2.1.3 Selecting the pattern data.” 0 Multi-Burst 100 Multi-burst 1 Multi-Burst 50... -
Page 68: Sweep Pattern Selection
4.4.2. Sweep pattern selection Before starting the procedure, set the pattern output to [Sweep], referring to “2.1.3 Selecting the pattern data.” The types of sweep patterns can be set using the procedure below. ⇒ ⇒ MENU ProgramEdit Pattern ProgramEdit Program Name Pattern/RGB/INV Select MENU GroupEdit... -
Page 69: Monoscope Patterns
Chapter 4 PATTERN SETTINGS 4.5. Monoscope patterns 4.5.1. Types of monoscope patterns When monoscope is selected using the pattern key, for instance, monoscope patterns can be selected from the types listed below. For further details on pattern selection, refer to “2.1.3 Selecting the pattern data.” 0 SMPTE RP-133 1 SMPTE PR-133 Color 2 MONOSCOPE... -
Page 70: Monoscope Pattern Selection
4.5.2. Monoscope pattern selection Before starting the procedure, set the pattern output to [Monoscope], referring to “2.1.3 Selecting the pattern data.” The types of monoscope patterns can be set using the procedure below. ⇒ ⇒ MENU ProgramEdit Pattern ProgramEdit Program Name Color Bar MENU GroupEdit... -
Page 71: Raster Patterns
Chapter 4 PATTERN SETTINGS 4.6. Raster patterns 4.6.1. Types of raster patterns When raster is selected using the pattern key, for instance, raster patterns can be selected from the types listed below. For further details on pattern selection, refer to “2.1.3 Selecting the pattern data.” 0 CUSTOM 1 White 2 Red... - Page 72 <Detailed settings of customized patterns> Select [CUSTOM] in Step 1 of <Selecting the items>. Select [CUSTOM]. Select the items, and then press [SET] key. Select the parameters using [Rotary switch] or [INC]/[DEC] key and then press [SET] key. Alternatively, select the parameters using the number keys [0/STATUS] to [9/F], and then press [SET] key. The setting range for the above R, G, B levels differs depending on the color depth.
-
Page 73: Aspect Ratio Patterns
Chapter 4 PATTERN SETTINGS 4.7. Aspect ratio patterns 4.7.1. Types of aspect ratio patterns When aspect ratio is selected using the pattern key, for instance, aspect ratio patterns can be selected from types listed below. For further details on pattern selection, refer to “2.1.3 Selecting the pattern data.” 0 Over Scan 0 As the coded frame 1 4:3 (center) -
Page 74: Aspect Ratio Pattern Type Settings And Customizing
4.7.2. Aspect ratio pattern type settings and customizing Before starting the procedure, set the pattern output to [Aspect], referring to “2.1.3 Selecting the pattern data.” Described below is the procedure for selecting the types of aspect ratio patterns and for performing the settings when CUSTOM has been selected as the aspect ratio pattern type. - Page 75 Chapter 4 PATTERN SETTINGS <Table of AFD pattern setting items> Aspect (0/1) The aspect ratio of the screen is set here. 0 4:3 The images are displayed on the screen with a 4:3 aspect ratio. 1 16:9 The images are displayed on the screen with a 16:9 aspect ratio.
-
Page 76: Checkerboard Patterns
4.8. Checkerboard patterns 4.8.1. Types of checkerboard patterns When checkerboard is selected using the pattern keys or other keys, any of the following types of patterns can be selected. For further details on pattern selection, refer to “2.1.3 Selecting the pattern data.” 0 DOT ×... -
Page 77: Checkerboard Pattern Customizing
Chapter 4 PATTERN SETTINGS 4.8.2. Checkerboard pattern customizing Before starting the procedure, set the pattern output to [Checker], referring to “2.1.3 Selecting the pattern data.” The types of checkerboard patterns are selected and their intervals are set using the procedure below. ⇒... - Page 78 <Table of checkerboard setting items> DOTxDOT H/V <Valid only when DOT×DOT is selected as the Type setting> Set the number of horizontal (H) and vertical (V) pixels for one color. Setting range: 1 to 8 BLOCKxBLOCK H/V <Valid only when BLOCK×BLOCK is selected as the Type setting> Set the number of horizontal (H) and vertical (V) blocks.
-
Page 79: Image/Opt
Chapter 4 PATTERN SETTINGS User Color 1 R, G, B When RGB 0%/100% has Setting ranges by color depth been selected for Color 0 – 255 8BIT Select, set any color and 0 – 511 9BIT level to be indicated by 0 –... -
Page 80: Option And Image Patterns Setting
4.9.2. Option and image patterns setting Before starting the procedure, set the pattern output to [Image/OPT], referring to “2.1.3 Selecting the pattern data.” The procedure for setting optional and image patterns is described below. ⇒ ⇒ MENU ProgramEdit Pattern ProgramEdit Program Name Raster MENU... -
Page 81: Marker (Opt No.76) Settings
Chapter 4 PATTERN SETTINGS 4.9.3. 9-marker (OPT No.76) settings Sample optional pattern No.76 is a pattern which displays up to nine markers and lines at the desired positions. Marker マーカー ライン Line Before starting the procedure, set the pattern output to [Image/OPT], referring to “2.1.3 Selecting the pattern data.”... - Page 82 <Table of 9-marker setting items> Mark Shape (0/2) The shape of the markers is specified here. 0 Circle Circle 1 Square Square 2 Line Straight line Mark Fill (0/1) Whether to fill to markers is specified here (disabled when straight line has been selected as the Mark Shape setting).
-
Page 83: D Image Pattern (Opt No.100) Setting
Chapter 4 PATTERN SETTINGS 4.9.4. 3D Image Pattern (OPT No.100) setting Sample Option Pattern No.100 is 3D Image pattern. Before starting the procedure, set the pattern output to [Image/Opt], referring to “2.1.3 Selecting the pattern data.” The setting procedure is given below. Besides below setting, the setting in “HDMI ... - Page 84 <3D Image Pattern setting item list> Image Type (0-2) Select images. User Monoscope China Image No. L,R When Image Type is set as 0(User), the image number (user image) selected here is displayed. Each image is shift to left direction (minus setting), and right direction (plus setting). Left Image Gap Right Image Gap Minus value is input by Shift + number keys.
- Page 85 Chapter 4 PATTERN SETTINGS <3D Image pattern example> [0] User Different images are displayed in each right and left picture. You select Image No. to each picture. (Image should be saved beforehand.) (Example 1080@FramePacking) Left Right [1] Monoscope Right and left picture display Monoscope (refer to section 4.5) pattern. [2] China Right and left picture display China Monoscope (refer to section 4.5) pattern.
-
Page 86: Setting The 3D Pattern (Opt No.101)
4.9.5. Setting the 3D pattern (OPT No.101) Sample optional pattern No.101 is a 3D pattern. Before starting the procedure, set the pattern output to [Image/Opt], referring to “2.1.3 Selecting the pattern data.” The setting procedure is given below. In addition to what is described below, the “HDMI Vendor Specific InfoFrame” setting is referenced. For details on how to display the pattern, refer to section “4.9.2 Option and image pattern setting.”... - Page 87 Chapter 4 PATTERN SETTINGS <List of 3D pattern setting items> Type (0-A) The type of pattern is selected here. 0 Color Bar V-1 1 Color Bar V-2 2 Vertical Bar 3 Checker DOT The checker pattern settings are referenced. 4 Checker BLOCK 5 Slant Color Bar 6 Slant Gray Bar 7 Raster...
- Page 88 (10) Sub Sampling (0/1) In case of « Side by Side » and « Top & Bottom », set it either normal drawing or thin-out drawing. Normal drawing Thin-out drawing (11) Left/Right Color If you set « Use » in L, R Color, set pattern color and back color in each left and right picture.
- Page 89 Chapter 4 PATTERN SETTINGS <3D pattern details> [0] Color Bar V-1 The same vertical color bars are output at the left and right. “LEFT” and “RIGHT” are displayed for left and right, respectively. LEFT RIGHT [1] Color Bar V-2 The vertical color bar shown in the figures below are output at the left and right. LEFT RIGHT LR combination...
- Page 90 [3] Checker DOT Checkerboard dot by dot patterns are output. The colors for the pattern on the left are reversed from the colors in the pattern on the right. LEFT RIGHT [4] Checker BLOCK Checkerboard block by block patterns are output. The colors for the pattern on the left are reversed from the colors in the pattern on the right.
- Page 91 Chapter 4 PATTERN SETTINGS [8] The , , and of × ABC pattern are superimposed and output. The pattern is the same for the left and right. [9-1] Window [9-2] Circle Window / circle pattern is displayed in the designated position. The left and right frame shows the same picture, but color can be set separately.
- Page 92 * About Sub Sampling display In case of Side-by-Side and Top & Bottom, by setting Sub-sampling = OFF, ODD and EVEN line is not taken out and line seems more clear. Example : Side-by-Side If Sub Sampling is ON, the pattern is displayed according to the setting in the « 3D Extension Data » in the Vender Specific Infoframe.
-
Page 93: Output Setting Of Bmp Files
PATTERN SETTINGS 4.9.6. Output setting of BMP files In the Image Pattern, not only VGD file (original file format of ASTRO VG), Windows BMP files can be output,too. However, there are regulations written below. (1) 8bit (256 colors) or 24bit (16.77 million colors) image. - Page 94 Caution *2 The filis names can be extended. The first « bitmap » is fixed and 3 numbers 注意 from 001 to 999 are followed. After that designated name is added. maximum 80 characters can be set. 2 bytes characters can not be used. If several files has same name starting by «...
-
Page 95: Abc Patterns
Chapter 4 PATTERN SETTINGS 4.10. × ABC patterns The following patterns are available as × patterns. Select them using the key. All the patterns can be superimposed onto one another, and displayed. For further details on pattern selection, refer to “2.1.3 Selecting the pattern data.” Character Character Cross Hatch... -
Page 96: Color Settings
4.10.1. Color settings Before starting the procedure, set the pattern output to [□ × ABC], referring to “2.1.3 Selecting the pattern data.” The colors of the □ × ABC patterns themselves and their background colors can be set. ⇒ ⇒ ⇒... - Page 97 Chapter 4 PATTERN SETTINGS <Selecting the items> Select the items of Color using [Rotary switch] or [INC]/[DEC] key and then press [SET] key. Alternatively, select the items using the number keys [0/STATUS] to [9/F], and then press [SET] key. <Setting the parameters> Select the parameters using [Rotary switch] or [INC]/[DEC] key and then press [SET] key.
-
Page 98: Character Patterns
4.10.2. Character patterns Before starting the procedure, set the pattern output to [Character], referring to “2.1.3 Selecting the pattern data.” ⇒ ⇒ ⇒ □X[ABC] MENU ProgramEdit Pattern ProgramEdit Program Name Raster Color MENU GroupEdit Timing Aspect Character AutoEdit Output Checker Cross Hatch DP Analysis Audio... -
Page 99: Crosshatch Patterns
Chapter 4 PATTERN SETTINGS 4.10.3. Crosshatch patterns Before starting the procedure, set the pattern output to [Cross Hatch], referring to “2.1.3 Selecting the pattern data.” The crosshatch pattern settings are described below. ⇒ ⇒ ⇒ □X[ABC] MENU ProgramEdit Pattern ProgramEdit Program Name Raster Color... -
Page 100: Dot Patterns
4.10.4. Dot patterns Before starting the procedure, set the pattern output to [Dot], referring to “2.1.3 Selecting the pattern data.” The dot pattern settings are described below. ⇒ ⇒ ⇒ □X[ABC] MENU ProgramEdit Pattern ProgramEdit Program Name Raster Color MENU GroupEdit Timing Aspect... - Page 101 Chapter 4 PATTERN SETTINGS <Table of dot setting items> Format (0-1) The origin point of the pattern drawing is set here. 0 From Center The pattern is drawn using the screen center as the origin point. 1 From Top-Left The pattern is drawn using the top left of the screen as the origin point.
-
Page 102: Circle Patterns
4.10.5. Circle patterns Before starting the procedure, set the pattern output to [Circle], referring to “2.1.3 Selecting the pattern data.” The circle pattern settings are described below. □X[ABC] ⇒ ⇒ ⇒ MENU ProgramEdit Pattern ProgramEdit Program Name Raster Color MENU GroupEdit Timing Aspect... - Page 103 Chapter 4 PATTERN SETTINGS...
-
Page 104: Burst Patterns
4.10.6. Burst patterns In burst patterns, the line width increases gradually. Number Of Lines =5 5 Lines 5 Lines 5 Lines Width = 1 Width = 2 Width = 3 Step = 1 Before starting the procedure, set the pattern output to [Burst], referring to “2.1.3 Selecting the pattern data.”... - Page 105 Chapter 4 PATTERN SETTINGS <Table of burst setting items> Format (0-7) The origin point of the pattern drawing is set here. 0 L->R The line width increases from left to right. 1 L<-R The line width increases from right to left. 2 L<-C->R The line width increases from the center to the left edge and from the center to the right edge.
-
Page 106: Window Patterns
4.11. Window patterns Mono-color rectangles can be displayed as the window patterns. The window patterns can also be used to check moving images using the action function described later (refer to the action settings). 4.11.1. Types of window patterns When window has been selected using the pattern key, for instance, window patterns can be selected from among the types listed below. -
Page 107: Window Pattern Settings
Chapter 4 PATTERN SETTINGS 4.11.2. Window pattern settings Before starting the procedure, set the pattern output to [Window], referring to “2.1.3 Selecting the pattern data.” The types of window patterns can be selected using the procedure below. ⇒ ⇒ MENU ProgramEdit Pattern ProgramEdit... - Page 108 <Table of window setting items> Format (0-9) The window display format is set here. 0 1 Window One window is displayed at the center of the screen. 1 4 Window The screen is divided into four areas, and each of the four windows is displayed in the center of its respective area.
- Page 109 Chapter 4 PATTERN SETTINGS Position-1 Specify the coordinates of the window when format 8 (User Pos Center) or format 9 (User Pos Corner) has been selected. When Position-2 is set, the Position-2 window is displayed at the reverse mirror positions of Position-1 and Position-2.
-
Page 110: Cursor Patterns
4.12. Cursor patterns A cursor can be displayed on screens which show pattern displays. The cursor can be moved to any point, and its position on the screen can be displayed. 4.12.1. Cursor settings Before starting the procedure, set the pattern output to [Cursor], referring to “2.1.3 Selecting the pattern data.”... - Page 111 Chapter 4 PATTERN SETTINGS <Example of what is displayed> Coordinates of target cursor (#1 = cursor 1, #2 = cursor 2 when Cursor 2 is ON) #1(GATE=541 :STEP10) (R=2881 G=2882 B=2883) Cursor 1 Cursor 2 <Table of cursor setting items> Format (0-3) The shape of the cursor is set here.
- Page 112 Blink (0-7) Whether the cursor is to blink and the blink interval are set here. None The cursor does not blink. 1 to 7 1 V /2 V /4 V The cursor blinks for each 1 V (vertical sync /8 V /16 V /32 period) to 64 V and then goes off, and this is V /64 V repeated.
-
Page 113: Cursor Operations
Chapter 4 PATTERN SETTINGS 4.12.2. Cursor operations The cursor operations which can be performed include moving the cursor and changing the cursor level. Operation screen display DETAIL CURSOR Moving the cursor Select MOVE using (When Cursor 2 is ON) Select CURSOR1 or CURSOR2 using When the number keys are used 4 The cursor moves toward the left. - Page 114 Changing the cursor level These steps change the Color Cursor 1 R, G, B and Color Cursor 2 R, G, B settings. Select LEVEL using (When Cursor 2 is ON) Select CURSOR1 or CURSOR2 using (When the number keys are used) The level is decremented.
-
Page 115: Name/List
Chapter 4 PATTERN SETTINGS Changing the background color BACK-DEF Color Back R, G, B settings BACK-W White BACK-R BACK-G Green BACK-B Blue BACK-BLK Black Inverting the cursor color COL-DEF Normal COL-INV Inverted 4.13. Name/List Information such as the setting data and execution results as well as the images (number of colors restricted) are contained in the Name/List patterns, and they can be superimposed onto other patterns. -
Page 116: Name/List Display
4.13.1. Name/List display Before starting the procedure, set the pattern output to [Name/List], referring to “2.1.3 Selecting the pattern data.” The Name/List functions can be selected by the operations described below. ⇒ ⇒ MENU ProgramEdit Pattern ProgramEdit Program Name Image/OPT MENU □X[ABC] GroupEdit... -
Page 117: Name
Chapter 4 PATTERN SETTINGS 4.13.2. Name Before starting the procedure, set the pattern output to [Name/List], referring to “2.1.3 Selecting the pattern data.” The display method can be set when Name has been selected as the Type setting. ⇒ ⇒ ⇒... - Page 118 The pattern names are edited here. For details on the editing procedure, refer to “2.3 Setting the names.” Note) the output bit is displayed as below: when HDMI/DP/SDI/V-by-One HS interface unit was installed in VG-876: Color Depth Interface unit name (HDMI), output bit HDMI I/F:8bit ...
-
Page 119: Edid
Chapter 4 PATTERN SETTINGS 4.13.3. EDID The EDID of the connected display can be displayed on the screen. a) EDID display method NAME/LIST DETAIL NAME/LIST DETAIL <Displaying the EDID> The EDID is displayed as shown in the figure below. Select EDID using and then press Alternatively, select for the GUI display... - Page 120 With the GUI display format 1) Block number of EDID 2) Error display when an error has occurred 3) DDC type 4) EDID block now displayed 5) Content of EDID With the HEX display format 1) Block number of EDID 2) Error display when an error has occurred 3) Content of EDID...
-
Page 121: Ddc/Ci
Chapter 4 PATTERN SETTINGS b) Port selection method The EDID is displayed by only one video interface at a time, and it is necessary to set the video interface which is to display the EDID. NAME/LIST DETAIL NAME/LIST DETAIL Establish the state in which EDID or EDID (HEX) is selected. - Page 122 <Detailed setting: EDIT> Select EDIT using and then press 0/STATUS Alternatively, select EDIT using < Re-executing DDC/CI> NAME/LIST DETAIL NAME/LIST DETAIL Select RE-EXECUTE using , and then press Alternatively, select RE-EXECUTE using <Table of DDC/CI setting items> Port No Select the port that uses DDC/CI command. (Some parameters may not be displayed depending on the unit configuration.) HDMI...
- Page 123 Data received by the generator results 7 Result Transfer result PASS: Data was transferred successfully. Transfer failed. 8 Value (Displayed only when Get VCP Feature has been selected as the Mode setting.) Parameter value received by the VG-876 from the connection destination...
-
Page 124: Hdcp (High-Bandwidth Digital Content Protection)
4.13.5. HDCP (High-bandwidth Digital Content Protection) The HDCP authentication results can be shown on the display. (For details on the HDCP settings and execution refer to “6. HDCP SETTINGS AND EXECUTION”) <Displaying the HDCP authentication screen> NAME/LIST DETAIL NAME/LIST DETAIL <Selecting HDCP>... - Page 125 Chapter 4 PATTERN SETTINGS HDCP1.0, 1.1 or 1.2 * The type of connection underlined in (5)-3 will be "Repeater" when the device connected to the VG- 876 is a repeater, and "Receiver" when it is a receiver. Details of the information shown on the screen are given below. <HDCP authentication screen display data>...
- Page 126 In the setting of 6.1 HDCP setting, if it is “1.0”, AV Mute Mode OFF” is displayed, if it is “1.1/1.2”, “AV Mute Mode ON” is displayed. *VM-1876-M7 and VM-1876-M8 do not display this item. *1 This information is displayed only when the device connected to the VG-876 is a repeater. HDCP2.2 * The type of connection of the underlined will be "Repeater"...
- Page 127 (6)* Content Type setting and the DEPTH (number of connecting hierarchy) and COUNT (total number of connections) of the devices connected beyond the receiver that is connected to the VG-876 are shown here. *This information is displayed only when the device connected to the VG-876 is a repeater.
-
Page 128: Hdmi List
4.13.6. HDMI list The HDMI list display can be selected by pressing the NAME/LIST pattern key while the output from the HDMI connector is connected to the display. Information on the signals which are input to the display from the HDMI connector is shown on the display. -
Page 129: Timing Data List
Chapter 4 PATTERN SETTINGS 4.13.7. Timing data list The timing data list display can be selected by pressing the NAME/LIST pattern key while the generator output is connected to the display. The timing data (such as the parameters) of the signals which are input to the display from the output connector is shown on the display. -
Page 130: Image Pattern List
4.13.8. Image pattern list When the image list display is selected by pressing the NAME/LIST key while the generator output is connected to the display, the information on the image patterns registered in the internal memory or in the USB Memory is shown on the display. -
Page 131: Subtitle
Chapter 4 PATTERN SETTINGS 4.13.10. Subtitle The image patterns (*) created by the user are displayed. Scrolling is possible using the action settings. (Refer to “7.5 Subtitle scrolling.”) Subtitle Unlike the images in “4.9 Image/OPT,” the images which can be displayed here are subject to restrictions on the number of colors and other aspects. - Page 132 <Table of subtitle setting items> The number of the image pattern to be displayed is set here. Setting range: 1 to 200 Position (0-9) The position where the pattern is to be displayed is set here. 0 User Position Setting position of User Position in (3) 1 Top-Left Top left 2 Middle-Left...
-
Page 133: Scdc
Chapter 4 PATTERN SETTINGS 4.13.11. SCDC The SCDC of the connected display can be shown on the display. <Displaying SCDC screen> NAME/LIST DETAIL NAME/LIST DETAIL <Selecting SCDC> Select SCDC or SCDC(HEX) using , and then press Or, press for GUI display, Press for HEX display. - Page 134 GUI Display Selected port...
- Page 135 Chapter 4 PATTERN SETTINGS HEX Display Selected port...
-
Page 136: Video Black/White Reversal
How to select the port. Only one channels should be selected to display SCDC status. ① NAME/LIST DETAIL NAME/LIST DETAIL Select SCDC or SCDC(HEX) ② Using Select EDIT 0/STATUS Or by using , select EDIT. ③ <Port selection> PorNo Select Unit and Port that SCDC is displayed. -
Page 137: Simple Animation
Chapter 4 PATTERN SETTINGS 4.15. Simple animation Simple animation sequences can be displayed by drawing a multiple number of images in the drawing area and moving the display start coordinates. The display method is described here uses an example of a simple animation sequence consisting of 640 ×... - Page 138 CAUTION When creating simple animation images, create images whose horizontal resolution meets the following conditions. Otherwise, the image is not displayed correctly. Boundary 8bit Multiples of 256dot 10bit Multiples of 128dot 12bit Example 1) 1024x768 8-bit image 1024 3072 3072/256=12 Since the resolution can be divided by 256, the images with this resolution are output correctly.
- Page 139 Chapter 4 PATTERN SETTINGS Example 4) Images which have been pasted one on top of the other—even images which cannot be divided by 256 dots—are output correctly. 1920 1080 These images are not pasted horizontally, so they are output 3240 correctly.
- Page 140 <Frame Sequential 3D patterns> Patterns are drawn as shown in the figure below when Frame Sequential has been selected as the Output Mode setting among the 3D pattern (OPT No.101) settings in section 4.9.5. This pattern is displayed at the left and right alternatively, and the Frame Sequential operation is performed by setting H=1 and V=2 as the values for the “Repeat”...
- Page 141 Chapter 4 PATTERN SETTINGS <Dotclk Mode = Dual or Quad> When setting DotClk Mode as Dual or Quad in 10.2.4 Dot Clock Operation Mode, make the image by the same size of output timing. If image size is smaller than the output timing, fill black around the image. Here, it explains how to make 8 images of 1920x1080 resolution in 3840x2160 timing for simple animation.
-
Page 142: Simple Animation Settings
4.15.2. Simple animation settings Insert the USB Memory containing the registered images. SAMPLE At this point, check that has not been pressed. Select the program No. using , and then press <Setting Action> ACTION Select G-SCROLL using 0/STATUS and then select EDIT using Select Graphic Plane using , and then press <Selecting the items>... - Page 143 Chapter 4 PATTERN SETTINGS...
-
Page 144: Chapter5. Action Settings
ACTION SETTINGS 5.1. Concerning the planes Lower Priority Graphic plane • Color bar patterns Character plane • Gray scale • Character Higher patterns patterns • Crosshatch Window plane patterns • Window • Dot patterns ★ patterns • Circle patterns Cursor plane •... -
Page 145: Window Actions
Chapter 5 ACTION SETTINGS 5.2. Window actions 5.2.1. Scrolling For details on the action selection procedure, refer to “2.1.4 Selecting the actions.” ⇒ ⇒ ⇒ MENU ProgramEdit Action Window ProgramEdit Timing Graphic Plane Scroll MENU GroupEdit Output Character Plane Flicker AutoEdit Audio Window... - Page 146 <Table of scroll setting items> OFF/ON (0/1) On or Off is set for window scrolling here. 0 OFF Window scrolling is set to Off. 1 ON Window scrolling is set to On. Direction (0-A) The direction of scrolling is set here. 0 Left The window is scrolled toward the left.
-
Page 147: Flickering
Chapter 5 ACTION SETTINGS 5.2.2. Flickering For details on the action selection procedure, refer to “2.1.4 Selecting the actions” ⇒ ⇒ ⇒ MENU ProgramEdit Action Window ProgramEdit Timing Graphic Plane Scroll MENU GroupEdit Output Character Plane Flicker AutoEdit Audio Window Level Up/Down DP Analysis Pattern... -
Page 148: Level Up/Down Actions
5.2.3. Level up/down actions For details on the action selection procedure, refer to “2.1.4 Selecting the actions.” ⇒ ⇒ ⇒ MENU ProgramEdit Action Window ProgramEdit Timing Graphic Plane Scroll MENU GroupEdit Output Character Plane Flicker AutoEdit Audio Window Level Up/Down DP Analysis Pattern Subtitle... -
Page 149: Level Sequence Action
Chapter 5 ACTION SETTINGS 5.2.4. Level sequence action For details on the action selection procedure, refer to “2.1.4 Selecting the actions.” ⇒ ⇒ ⇒ MENU ProgramEdit Action Window ProgramEdit Timing Graphic Plane Scroll MENU GroupEdit Output Character Plane Flicker AutoEdit Audio Window Level Up/Down... - Page 150 <Table of level sequence setting items> OFF/ON (0/1) On or Off is set for level sequence here. 0 OFF Level sequence is set to Off. 1 ON Level sequence is set to On. Number The number of level sequences is set here. Setting range: 1 to 16 The sequences are repeated in order for the number of times set here.
-
Page 151: Graphic Plane Scrolling Actions
Chapter 5 ACTION SETTINGS 5.3. Graphic plane scrolling actions For details on the action selection procedure, refer to “2.1.4 Selecting the actions.” ⇒ ⇒ MENU ProgramEdit Action ProgramEdit Timing Graphic Plane MENU GroupEdit Output Character Plane AutoEdit Audio Window DP Analysis Pattern Subtitle ⇒... - Page 152 <Table of graphic plane setting items> Scroll (0/1) On or Off is set for scrolling here. 0 OFF Scrolling is set to Off. 1 ON Scrolling is set to On. Direction (0-8) The direction of scrolling is set here. 0 Left The window is scrolled toward the left.
-
Page 153: Character Plane Scrolling Actions
Chapter 5 ACTION SETTINGS 5.4. Character plane scrolling actions For details on the action selection procedure, refer to “2.1.4 Selecting the actions.” ⇒ ⇒ MENU ProgramEdit Action ProgramEdit Timing Graphic Plane MENU GroupEdit Output Character Plane AutoEdit Audio Window DP Analysis Pattern Subtitle ⇒... - Page 154 <Table of character plane setting items> Scroll (0/1) On or Off is set for scrolling here. 0 OFF Scrolling is set to Off. 1 ON Scrolling is set to On. Direction (0-7) The direction of scrolling is set here. 0 Left The window is scrolled toward the left.
-
Page 155: Subtitle Scrolling
Chapter 5 ACTION SETTINGS 5.5. Subtitle scrolling For details on the action selection procedure, refer to “2.1.4 Selecting the actions.” ⇒ ⇒ MENU ProgramEdit Action ProgramEdit Timing Graphic Plane MENU GroupEdit Output Character Plane AutoEdit Audio Window DP Analysis Pattern Subtitle ⇒... - Page 156 <Table of subtitle scroll setting items> Scroll(0/1) Scrolling is set to On or Off here. 0 OFF Scrolling is set to Off. 1 ON Scrolling is set to On. Direction(0-7) The scrolling direction is set here. 0 Left The subtitles are scrolled to the left. 1 Right The subtitles are scrolled to the right.
-
Page 157: And 0.125-Dot Scrolling Actions (Option)
1-dot increments are used for the movement amounts. In the case of the VG-876 smoother scrolling can be achieved by providing four patterns with a 0.25-dot shift in between (or two patterns with a 0.5-dot shift and 8 patterns with a 0.125-dot shift). - Page 158 CAUTION The 0.25-/0.125-dot scrolling function takes effect only for the image data created by the user. With 0.5-dot scrolling With 0.125-dot scrolling 0.5ドットスクロールの場合 0.125ドットスクロールの場合 Two patterns, with one offset by 0.5 dot from Eight patterns, with one offset by 0.125 dot 0.5dotずれたパターン2枚作成...
- Page 159 Chapter 5 ACTION SETTINGS 0.25-/0.125-dot scrolling settings For details on the action selection procedure, refer to “2.1.4 Selecting the actions.” ⇒ ⇒ MENU ProgramEdit Action ProgramEdit Timing Motion Blur MENU GroupEdit Output 0.25dot Scroll or 0.125dot Scroll AutoEdit Audio Scroll Sequence DP Analysis Pattern...
-
Page 160: Motion Blur
5.7. Motion blur Motion blur is a function for displaying up to 16 of the specified patterns described later, and moving them. The patterns to be displayed using this function can be combined with other patterns (excluding the cursor), and displayed. - Page 161 Chapter 5 ACTION SETTINGS <Table of motion blur setting items> OFF/ON (0/1) This is used to set the motion blur function to ON or OFF. 0 OFF 1 ON Direction (0-4) The direction of the pattern movement is specified here. Top left ...
- Page 162 Color InpMode (0/1) The color setting method is specified here. 0 All All the patterns are set together. 1 Separate The patterns are set individually. (10) Color The pattern colors (R/G/B levels) are set here. The colors for patterns 9 to 16 are the same as for patterns 1 to 8. The setting range differs depending on the pattern drawing bit length (Color Depth).
-
Page 163: Scroll Sequence
Chapter 5 ACTION SETTINGS 5.8. Scroll Sequence Sequence numbers for each plane can set up to 16 by scroll sequence setting. ⇒ ⇒ MENU ProgramEdit Action ProgramEdit Timing Motion Blur MENU GroupEdit Output 0.25dot Scroll or 0.125dot Scroll AutoEdit Audio Scroll Sequence DP Analysis Pattern... - Page 164 <The table of Scroll Sequence setting items> OFF/ON (0/1) On or Off is set for graphic/character/window plane here. 0 OFF 1 ON Return Mode (0/2) The mode to restore the scroll position is set here. 0 One Sequence Restore per sequence scroll position 1 All Sequence Restore entire sequence scroll positions.
-
Page 165: Lipsync
Chapter 5 ACTION SETTINGS 5.9. LipSync For details on the action selection procedure, refer to “2.1.4 Selecting the actions.” The lip sync function can be used to set a difference between the audio phase and video phase. ⇒ ⇒ MENU ProgramEdit Action ProgramEdit... - Page 166 <Table of LipSync setting items> OFF/ON(0/1) Whether to set the lip sync function on or off is set here. 0 OFF Disabled 1 ON Enabled Mode(0/1) The method used to set the delay amount (time) is set here. The delay amount of the user’s choice is set. 0 Delay 1 EDID The delay amount accords with the EDID of the...
-
Page 167: Black Insertion
Chapter 5 ACTION SETTINGS 5.10. Black insertion For details on the action selection procedure, refer to “2.1.4 Selecting the actions.” ⇒ ⇒ MENU ProgramEdit Action ProgramEdit Timing Motion Blur MENU GroupEdit Output 0.25dot Scroll or 0.125dot Scroll AutoEdit Audio Scroll Sequence DP Analysis Pattern Lip sync... -
Page 168: Hdcp Settings
HDCP SETTINGS AND EXECUTION 6.1. HDCP settings <HDCP setting procedure> ⇒ MENU Configuration GroupEdit General MENU AutoEdit HDCP DP Analysis HDMI Data Copy/Erase ⇒ ⇒ Configuration Select item using The [HDCP] screen is displayed: <Selecting the items> Select the items of HDCP using [Rotary switch] or [INC]/[DEC] key and then press [SET] key. Alternatively, select the items using the number keys [0/STATUS] to [9/F], and then press [SET] key. -
Page 169: Chapter6. Hdcp Settings And Execution
Chapter 6 HDCP SETTINGS AND EXECUTION <List of HDCP setting items> Execute Mode (0-2) The HDCP execution mode is set here. 0 Disable HDCP execution is disabled. 1 Enable HDCP execution is enabled. 2 Program HDCP execution enable/disable is set for each program. -
Page 170: Hdcp Execution
6.2. HDCP execution 6.2.1. Execution procedure One of the following three steps can be taken for HDCP execution. a) Set enable or disable using the On/Off customize key. b) Set enable or disable using Configuration. c) Set enable or disable for each program. a) Setting enable or disable using the On/Off customize key This setting is canceled when the program is changed, and b) Setting enable or disable always using Configuration and c) Setting enable or disable for each program take effect. - Page 171 Chapter 6 HDCP SETTINGS AND EXECUTION Disable HDCP execution is disabled. Enable HDCP execution is enabled. Program HDCP execution enable/disable is set for each program. Setting enable or disable for each program This setting takes effect when “Program” was selected as the HDCP mode setting in b) Setting enable or disable using Configuration.
-
Page 172: Screen Displays During Hdcp Execution
Auth version: The HDCP authentication version is set here. Auto HDCP authentication version is automatically decided. HDCP1.4 It is authenticated by HDCP1.4. HDCP2.2 It is authenticated by HDCP2.2. 6.2.2. Screen displays during HDCP execution The authentication results and other information are displayed on the screen during HDCP execution. (If other patterns are already displayed, the information will be displayed on top of the patterns.) When HDCP is selected as the Name/List pattern. - Page 173 Chapter 6 HDCP SETTINGS AND EXECUTION Details of the information shown on the screen are given below. <HDCP authentication screen (simplified version) display data> This indicates the port selected in c) Display Select of “6.2.1 Execution procedure.” The HDCP version is displayed here. (When the HDCP authentication has failed, an error message is displayed.) The HDCP authentication results are displayed here.
-
Page 174: Hdcp/Edid/Cec Collective Display
6.2.3. HDCP/EDID/CEC collective display When OFF has been selected as the List display setting, the results of the HDCP/EDID/CEC check can be displayed together with HDCP ON. OK/NG Display Mode settings ⇒ ⇒ MENU Configuration HDCP/EDID/CEC Check GroupEdit HDCP OK/NG Display Mode MENU AutoEdit... - Page 175 Chapter 6 HDCP SETTINGS AND EXECUTION Item Select settings Select [Item Select] in <Selecting the items> above. When Collective is selected as the OK/NG Display Mode setting, the Item Select item appears on the next line. Select Item Select. Select the items to be collectively displayed * The item differs depending on the optional board installed.
- Page 176 <OK or NG judgment> (1) HDCP With HDCP ON, it is checked that HDCP authentication is performed correctly. (2) EDID The EDID is read at specific intervals, and an “OK” verdict is given when: • The EDID can be read correctly. •...
- Page 177 Chapter 6 HDCP SETTINGS AND EXECUTION...
-
Page 178: System Settings
VG-876 SYSTEM SETTINGS (Config) 7.1. System settings 7.1.1. Beep setting The buzzer which sounds when any of the keys on the front panel of the VG-876 (or on the RB-1870 or RB-1871) are pressed can be turned on or off. ⇒ ⇒... -
Page 179: Key Lock Setting
Chapter 7 VG-876 SYSTEM SETTINGS 7.1.2. Key lock setting The keys on the VG-876 main unit can be locked. <Key lock setting> ⇒ ⇒ MENU Configuration General GroupEdit General Beep MENU AutoEdit HDCP Key Lock DP Analysis HDMI RS-232C Data Copy/Erase ⇒... -
Page 180: Rs-232C Settings
<Key lock release and unlock settings> After performing the key lock setting, the setting takes effect when the power of the generator is turned on. To release the key lock setting: MENU Press for about 5 seconds. Key lock is released, and MENU is opened. Save the Unlock setting by following steps (1) to (4) for the key lock setting. - Page 181 2bit 2 stop bits are set. CAUTION When you use terminal commands for VG-876 series, please set “Data Bits” as 8-bit. If you use old VG series (e.g. VG-848, VG-859C), some commands works okay with Data Bits as 7-bit.
-
Page 182: Lan Settings
7.1.4. LAN settings These settings are performed when connection to the terminal is to be established from the LAN port. ⇒ ⇒ MENU Configuration General GroupEdit General Beep MENU AutoEdit HDCP Key Lock DP Analysis HDMI RS-232C Data Copy/Erase ⇒ ⇒... -
Page 183: Inc/Dec Continuity Setting
Chapter 7 VG-876 SYSTEM SETTINGS 7.1.5. INC/DEC continuity setting The INC/DEC key continuity function enables the holding down of the INC and DEC keys to be enabled or disabled. It works only when programs are selected and executed. ⇒ ⇒... -
Page 184: Inc/Dec Interval Setting
7.1.6. INC/DEC interval setting This function enables the minimum interval for switching programs to be set using the INC and DEC key. It works only when programs are selected and executed. ⇒ ⇒ MENU Configuration General GroupEdit General MENU AutoEdit HDCP INC/DEC Continuity DP Analysis... -
Page 185: Sample Rgb/Ypbpr Setting
Chapter 7 VG-876 SYSTEM SETTINGS 7.1.8. SAMPLE RGB/YPbPr setting This setting makes it possible to specify whether the color space of the output images is to accord with the sample program data or whether it is to be fixed to RGB. -
Page 186: Trigger Mode Settings
7.1.10. Trigger mode settings ●Concerning the trigger function The trigger function outputs trigger in accordance with the patterns in order to evaluate the moving picture response speed and other factors. The following kinds of triggers are provided. (1) Window triggers (TriggerA/TriggerB) (2) VSync trigger (3) Scroll triggers (optional) (4) Simple moving image frame trigger (optional) - Page 187 Chapter 7 VG-876 SYSTEM SETTINGS Scroll triggers (optional) When a pattern is being scrolled, the trigger is output when the pattern has reached the start position. When scrolling toward the left Scroll Scroll Scroll Scroll direction direction direction direction Trigger ON...
- Page 188 ● About sync trigger Sync trigger function outputs sync signal that is equivalent to the output timing. There are following sync triggers. (1) Video trigger (DataEnable(F), DataEnable(H), DataEnable(V), DataEnable(H&V)) (2) Horizontal Timing trigger (HSync(P), HSync(N)) (3) Vertical Timing trigger (VSync(P), VSync(N)) (1) Video trigger It outputs DataEnable (video active signal) that is equivalent to the output timing.
- Page 189 Chapter 7 VG-876 SYSTEM SETTINGS (3) Vertical Timing trigger It outputs Vsync (vertical sync signal) that is equivalent to the output timing. It can be selected either positive or negative. < Vertical Timing trigger > [Progressive timing] Frame total Frame total フレーム...
- Page 190 <Setting procedure> ⇒ ⇒ MENU Configuration General GroupEdit General Trigger MENU AutoEdit HDCP Image Priority DP Analysis HDMI Image Fast Draw Mode Data Copy/Erase Image Position ⇒ ⇒ ⇒ Configuration Select item using The [Trigger] screen is displayed: <Selecting the items> Select the items of Trigger using [Rotary switch] or [INC]/[DEC] key and then press [SET] key.
- Page 191 Chapter 7 VG-876 SYSTEM SETTINGS Delay (0/1) ON or OFF for the trigger delay function is Delay selected for each output (OUT0-3). 0 OFF The triggers are not delayed. 1 ON The trigger outputs are delayed in accordance with the Delay Time.
- Page 192 HSync(N) Output negative polarity HSync. VSync(P) Output positive polarity VSync. VSync(N) Output negative polarity VSync. In case of Interlace, output the second field video. Data Enable(F) In case of Progressive, it is always set as Low. Data Enable(H&V) Output video active signal. Data Enable(H) Output horizontal active signal.
- Page 193 Chapter 7 VG-876 SYSTEM SETTINGS <Table of simple moving image frame trigger setting items> The simple moving image frame trigger is an option so it will not be displayed unless the license has been registered. Number Of Frames The number of frames for outputting the trigger is set here.
- Page 194 <Example of simple animation frame trigger settings> ●EXP.1 V-Sync ① ② ③ ④ ⑤ OUT0 (MLB) OUT1 OUT2 OUT3 (MSB) Number Of Frame : Frame No. Data ① ② ③ ④ ⑤ ●EXP.2 V-Sync ① ② ③ ④ OUT0 (MLB) OUT1 OUT2 OUT3 (MSB)
- Page 195 Chapter 7 VG-876 SYSTEM SETTINGS ●EXP.3 V-Sync ① ① ② ② ③ ③ ④ ④ OUT0 (MLB) OUT1 OUT2 OUT3 (MSB) Number Of Frame : Frame No. Data ① ② ③ ④ When “2” has been selected as the setting for the interval parameter of simple animation below ○下記の簡易動画のインターバルパラメータを2にした場合...
-
Page 196: Image - Priority Settings
Image priority settings can be performed. Data can be saved both in the internal memory of the VG-876 or in USB memory. This setting is used to set the priority when both sets of image data have been made valid. -
Page 197: Image Position Setting
Chapter 7 VG-876 SYSTEM SETTINGS 7.1.12. Image Position Setting Image Position setting can change Bitmap’s display position. Bitmap resolution can be set only when its resolution is lower than display resolution. ⇒ ⇒ MENU Configuration General GroupEdit General Trigger MENU... -
Page 198: Cursor Coordinate Setting
7.1.13. Cursor coordinate setting The position for displaying the cursor coordinates can be set. For details on the On or Off setting procedure for the coordinate display, refer to “4.12.1 Cursor settings.” ⇒ ⇒ MENU Configuration General GroupEdit General Image Priority MENU AutoEdit HDCP... -
Page 199: Digital Video Level Step Setting
When a value from 1 to 32767 has been set, the number of steps set regardless of the bit length (gray scale) is used. 7.1.16. High-speed drawing mode setting This function allows high-speed drawing to be set. With the VG-876, the high-speed drawing mode in which the specified patterns are selected at high speed can be executed. ⇒ ⇒... - Page 200 <Selecting the items> Select the items of Image Fast Draw Mode using [Rotary switch] or [INC]/[DEC] key and then press [SET] key. Alternatively, select the items using the number keys [0/STATUS] to [9/F], and then press [SET] key. <Setting the parameters> Select the parameters using [Rotary switch] or [INC]/[DEC] key and then press [SET] key.
-
Page 201: Custom Key1, 2, Rb-1871 Custom Key 1, 2
Chapter 7 VG-876 SYSTEM SETTINGS 7.1.17. CUSTOM Key1, 2, RB-1871 CUSTOM Key 1, 2 Custom Key2/RB-1871CustomKey2 ⇒ ⇒ MENU Configuration General GroupEdit General CUSTOM KEY 1 MENU AutoEdit HDCP DP Analysis HDMI RB-1871 CUSTOMKey 1 Data Copy/Erase ⇒ ⇒ ⇒... -
Page 202: Operation Mode At Power-On
7.1.18. Operation mode at power-on The program to be executed immediately after turning on the power of the VG-876 can be set. ⇒ ⇒ MENU Configuration General GroupEdit General CUSTOM KEY 1 MENU AutoEdit HDCP DP Analysis HDMI RB-1871 CUSTOMKey 1 Data Copy/Erase ⇒... -
Page 203: Usb Prg Folderno. Setting
Chapter 7 VG-876 SYSTEM SETTINGS Last Memory restrictions 1. The user program will be executed in cases where the data types differ such as when internal sample data is selected as the timing data and a user program is selected as the pattern data. (Example: When TIM=1001 and PAT=1, TIM=PAT=1 is executed.) -
Page 204: Bit Depth Display In Name Pattern Setting
7.1.20. Bit depth display in Name Pattern setting The current bit depth can be displayed in NamePattern setting. < Setting > ⇒ MENU Configuration General Group Edit General Power-On Program MENU Auto Edit HDCP USB PrgFolderNo. DP Analysis HDMI Startup USB Wait Data Copy/Erase Name Pattern Mode ⇒... - Page 205 Chapter 7 VG-876 SYSTEM SETTINGS...
-
Page 206: Chapter8. Data Copy/Delete
DATA COPY/Delete 8.1. Copy and delete data The data stored on the media (internal memory or USB Memory) can be copied or erased. CAUTION Refrain from ejecting the USB Memory or turning off the power while data is being copied or erased. Otherwise the USB Memory and its data may be damaged. - Page 207 Chapter 8 DATA COPYING/ERASING <Completing the copying> After selecting the items above, select the Execute using [Rotary switch] or [INC]/[DEC] key and then press [SET] key. <Program categories for Type> <Differences in the settings from one type of data to another>...
-
Page 208: Copying User Characters
8.1.2. Copying user characters User character pattern data can be copied. ⇒ MENU Data Copy/Erase GroupEdit COPY : Program MENU AutoEdit COPY : USER Character DP Analysis COPY : USER OPT Pattern Data Copy/Erase COPY : Image ⇒ ⇒ Configuration COPY : Subtitle Select item using The [COPY : USER Character] screen is displayed:... -
Page 209: Copying User Optional Patterns
Chapter 8 DATA COPYING/ERASING 8.1.3. Copying user optional patterns User optional pattern data can be copied. ⇒ MENU Data Copy/Erase GroupEdit COPY : Program MENU AutoEdit COPY : USER Character DP Analysis COPY : USER OPT Pattern Data Copy/Erase COPY : Image ⇒... -
Page 210: Copying Images
8.1.4. Copying images Image pattern data can be copied. ⇒ MENU Data Copy/Erase GroupEdit COPY : Program MENU AutoEdit COPY : USER Character DP Analysis COPY : USER OPT Pattern Data Copy/Erase COPY : Image ⇒ ⇒ Configuration COPY : Subtitle Select item using The [COPY : Image] screen is displayed: <Selecting the items>... -
Page 211: Copying Subtitle
Chapter 8 DATA COPYING/ERASING 8.1.5. Copying subtitle Subtitle pattern data can be copied. ⇒ MENU Data Copy/Erase GroupEdit COPY : Program MENU AutoEdit COPY : USER Character DP Analysis COPY : USER OPT Pattern Data Copy/Erase COPY : Image ⇒ ⇒... -
Page 212: Copying Groups
8.1.6. Copying groups Group data can be copied. ⇒ MENU Data Copy/Erase GroupEdit COPY : Image MENU AutoEdit COPY : Subtitle DP Analysis COPY : Group Data Copy/Erase COPY : Auto ⇒ ⇒ Configuration COPY : All Select item using The [COPY : Group] screen is displayed: <Selecting the items>... -
Page 213: Copying Auto Executions
Chapter 8 DATA COPYING/ERASING 8.1.7. Copying auto executions Auto execution data can be copied. ⇒ MENU Data Copy/Erase GroupEdit COPY : Image MENU AutoEdit COPY : Subtitle DP Analysis COPY : Group Data Copy/Erase COPY : Auto ⇒ ⇒ Configuration COPY : All Select item using The [COPY : Auto] screen is displayed:... -
Page 214: Copying All Data
8.1.8. Copying all data All the data can be copied together. The time taken to copy the data differs according to how much data is to be copied. It is not possible to cancel copying once it has been initiated. ⇒... -
Page 215: Erasing Programs
Chapter 8 DATA COPYING/ERASING 8.1.9. Erasing programs Program data can be erased. At the same time, multiple numbers of programs can be erased. ⇒ MENU Data Copy/Erase GroupEdit ERASE : Program MENU AutoEdit ERASE : USER Character DP Analysis ERASE : USER OPT Pattern Data Copy/Erase ERASE : Image ⇒... -
Page 216: Erasing User Characters
8.1.10. Erasing user characters User character pattern data can be erased. ⇒ MENU Data Copy/Erase GroupEdit ERASE : Program MENU AutoEdit ERASE : USER Character DP Analysis ERASE : USER OPT Pattern Data Copy/Erase ERASE : Image ⇒ ⇒ Configuration ERASE : Subtitle Select item using The [ERASE : USER Character] screen is displayed:... -
Page 217: Erasing User Optional Patterns
Chapter 8 DATA COPYING/ERASING 8.1.11. Erasing user optional patterns User optional pattern data can be erased. ⇒ MENU Data Copy/Erase GroupEdit ERASE : Program MENU AutoEdit ERASE : USER Character DP Analysis ERASE : USER OPT Pattern Data Copy/Erase ERASE : Image ⇒... -
Page 218: Erasing Images
8.1.12. Erasing images Image pattern data can be erased. ⇒ MENU Data Copy/Erase GroupEdit ERASE : Program MENU AutoEdit ERASE : USER Character DP Analysis ERASE : USER OPT Pattern Data Copy/Erase ERASE : Image ⇒ ⇒ Configuration ERASE : Subtitle Select item using The [ERASE : Image] screen is displayed: <Selecting the items>... -
Page 219: Erasing Subtitle
Chapter 8 DATA COPYING/ERASING 8.1.13. Erasing subtitle Subtitle pattern data can be erased. At the same time, multiple numbers of programs can be erased. ⇒ MENU Data Copy/Erase GroupEdit ERASE : Program MENU AutoEdit ERASE : USER Character DP Analysis ERASE : USER OPT Pattern Data Copy/Erase ERASE : Image... -
Page 220: Erasing Groups
8.1.14. Erasing groups Group pattern data can be erased. At the same time, multiple numbers of programs can be erased. ⇒ MENU Data Copy/Erase GroupEdit ERASE : Image MENU AutoEdit ERASE : Subtitle DP Analysis ERASE : Group Data Copy/Erase ERASE : Auto ⇒... -
Page 221: Erasing Automatic Executions
Chapter 8 DATA COPYING/ERASING 8.1.15. Erasing automatic executions Automatic execution data can be erased. ⇒ MENU Data Copy/Erase GroupEdit ERASE : Image MENU AutoEdit ERASE : Subtitle DP Analysis ERASE : Group Data Copy/Erase ERASE : Auto ⇒ ⇒ Configuration ERASE : All Select item using The [ERASE : Auto] screen is displayed:... -
Page 222: Erasing All Data
8.1.16. Erasing all data All the data can be erased together. ⇒ MENU Data Copy/Erase GroupEdit ERASE : Image MENU AutoEdit ERASE : Subtitle DP Analysis ERASE : Group Data Copy/Erase ERASE : Auto ⇒ ⇒ Configuration ERASE : All Select item using The [ERASE : All] screen is displayed: <Selecting the items>... - Page 223 Chapter 8 DATA COPYING/ERASING...
-
Page 224: Chapter9. Useful Functions
USEFUL FUNCTIONS 9.1. Short-cut keys It is possible to set up to any of 90 frequently used screens so that they can be called by pressing the short-cut keys. Display the screen which is to be registered as SAVE a short-cut, and then press In the example given here, the HDMI setting screen is registered. - Page 225 Chapter 9 USEFUL FUNCTIONS <Calling a menu screen with SHORTCUT> SHORT CUT When is pressed, the SHORTCUT screen is displayed. HDMI-1, which is the registered screen, is now current page/total registered pages registered in shortcut 7 in the first page. , or alternatively use (for page selection) and then press...
-
Page 226: Information
FORMAT : Internal Memory Select item using The [Information] screen is displayed: <Table of items displays> Example of display Description TYPE: VG-876 (0000) Product name SERIAL: 1234567 (0000000) Serial number MAC: 00 02 de 00 00 00 MAC address LICENSE: 0.25dot Scroll... -
Page 227: Data Initialization
Chapter 9 USEFUL FUNCTIONS 9.3. Data initialization Initialization restores the system settings and short-cut data to the factory settings. CAUTION Performing this operation initialized all the data stored in the internal memory. The generator must be re-started after initialization. 9.3.1. -
Page 228: Initializing The Short-Cut Data
9.3.2. Initializing the short-cut data This operation restores the short-cut data to the factory settings. ⇒ MENU Maintenance AutoEdit Information MENU DP Analysis INITIALIZE : Configuration Data Copy/Erase INITIALIZE : SHORTCUT Configuration UNMOUNT : USB ⇒ ⇒ Maintenance FORMAT : Internal Memory Select item using Press [SET] key to execute initialization. -
Page 229: Usb Unmount
Chapter 9 USEFUL FUNCTIONS 9.4. USB Unmount The procedure to remove (unmount) the USB memory is described below. ⇒ MENU Maintenance AutoEdit Information MENU DP Analysis INITIALIZE : Configuration Data Copy/Erase INITIALIZE : SHORTCUT Configuration UNMOUNT : USB ⇒ ⇒ Maintenance FORMAT : Internal Memory Select item using... -
Page 230: Formatting
9.5. Formatting 9.5.1. Internal memory formatting and data installation The procedure for formatting the internal memory is described below. CAUTION Formatting the internal memory will delete the data required for the generator’s operation so the steps for data installation and firmware version updating must be taken after the memory has been formatted. <Procedure>... - Page 231 Chapter 9 USEFUL FUNCTIONS <Formatting procedure> ⇒ MENU Maintenance AutoEdit INITIALIZE : Configuration MENU DP Analysis INITIALIZE : SHORTCUT Data Copy/Erase UNMOUNT : USB Configuration FORMAT : Internal Memory ⇒ ⇒ Maintenance INSTALL : Initial Data Select item using The following screen is displayed: Press [SET] key.
- Page 232 <Data installation procedure> Preparing the data Copy the data on the SP-8870 software installation disk (in drive A:) which is provided with the VG generator into a USB Memory (in drive B:). There is a multiple number of files on this disk. A:¥InitialData¥VG870¥...
- Page 233 Chapter 9 USEFUL FUNCTIONS <Firmware version updating procedure> Use the data which was prepared at the data installation stage. If the firmware version has been updated at some point after the generator was purchased, copy the data of the updated version into a USB Memory. Insert the USB Memory into the generator.
-
Page 234: Delete The Data Of Output Interface Unit And Select Version-Up
9.6. Delete the data of output interface unit and select version- 9.6.1. Confirm data size of each interface unit ⇒ ⇒ MENU Maintenance Entry/Delete Board Auto Edit UNMOUNT : USB Check Board Data Size MENU DP Analysis SAVE USB : CONFIG STATUS Delete Board Data Data Copy/Erase FORMAT : Internal Memory... -
Page 235: Delete The Data Of Output Interface Unit
Chapter 9 USEFUL FUNCTIONS 9.6.2. Delete the data of output interface unit. ⇒ ⇒ MENU Maintenance Entry/Delete Board Auto Edit UNMOUNT : USB Check Board Data Size MENU DP Analysis SAVE USB : CONFIG STATUS Delete Board Data Data Copy/Erase FORMAT : Internal Memory Select VersionUp Board Configuration... -
Page 236: Select The Interface Unit To Version-Up
9.6.3. Select the interface unit to version-up ⇒ ⇒ MENU Maintenance Entry/Delete Board Auto Edit UNMOUNT : USB Check Board Data Size MENU DP Analysis SAVE USB : CONFIG STATUS Delete Board Data Data Copy/Erase FORMAT : Internal Memory Select VersionUp Board Configuration INSTALL : Initial Data ⇒... - Page 237 Chapter 9 USEFUL FUNCTIONS...
-
Page 238: Chapter10. Interface Settings
INTERFACE SETTINGS 10.1. VG-876 interface units The VG-876 is constructed to allow video interface units to be installed. Video interface signals are output from these units. Up to four units can be installed. When one or more video units are to be replaced, please contact ASTRODESIGN. -
Page 239: Displayport Unit (Vm-1876A-M1)
Chapter 10 INTERFACE SETTINGS 10.1.3. DisplayPort Unit (VM-1876A-M1) CH 1 CH 2 ST-BY DisplayPort OUT VM-1876-M1 (1) (2) The same images are output simultaneously from two channels. In addition, one image is displayed by the combination of CH1 and CH2. DisplayPort output By using MST(Multi Stream Transport) mode, multiple stream (max. -
Page 240: V-By-One®Hs Unit (Vm-1876-M2)
10.1.4. V-by-One®HS unit (VM-1876-M2) V-By-One®HS output 4 lanes per connector are output. Lights up when the unit is ready to output the signal. Standby LED Lit: Normal Off: Error (module damage, wrong slot, etc.) 10.1.5. SDI IF BOARD(OUT)(VM-1876-M5) SDI output The designated format signal is output from 4 channels. -
Page 241: Hdmi 6G Unit (Vm-1876A-M6)
Chapter 10 INTERFACE SETTINGS 10.1.6. HDMI 6G Unit (VM-1876A-M6) When ARC signal is received from either CH1 or 2, audio of either COAX digital audio output CH1 or 2 is output from this COAX connector. The same images are output simultaneously from 2 channels. HDMI output (HDMI connectors) Lights up when the unit is ready to output the signal. -
Page 242: Hdmi Hdcp2.2 Unit (Vm-1876-M7)
10.1.7. HDMI HDCP2.2 Unit (VM-1876-M7) The same images are output simultaneously from 4 channels. HDMI output (HDMI connectors) Lights up when the unit is ready to output the signal. Standby LED Lit: Normal Off: Error (module damage, wrong slot, etc.) 10.1.8. -
Page 243: Itmds Unit (Vm-1876-M9)
Chapter 10 INTERFACE SETTINGS 10.1.9. iTMDS Unit (VM-1876-M9) Only digital signal is output. (iTMDS connector) iTMDS output Dual-Link supported. Lights up when the unit is ready to output the signal. Standby LED Lit: Normal Off: Error (module damage, wrong slot, etc.) 10.1.10. -
Page 244: Synchronizing Unit (Vm-1876-Mx)
10.1.11. Synchronizing Unit (VM-1876-MX) External Sync signal input To be supported in future. Connecting to other VG-876 for synchronization. Connecting to Multi-link input the output of the upper unit. (MDR 26 pin connector). Connecting to other VG-876 for synchronization. Connecting to Multi-link output the input of the lower unit. -
Page 245: Output Settings
Chapter 10 INTERFACE SETTINGS 10.2. Output settings The following items are set as settings common to multiple video and audio output interfaces. • Output interface on/off setting • Sync signal on/off and polarity setting • Level mode setting • Aspect ratio setting •... -
Page 246: Setting The Output Interfaces To On Or Off
10.2.1. Setting the output interfaces to ON or OFF “Output” (ON) or “not output” (OFF) can be selected for each output interface whether video or audio interface. It is set to ON for the internal sample timing data unless the ratings or specifications of the generator prevent this. Example: In the case of EIA 1920 ×... - Page 247 Chapter 10 INTERFACE SETTINGS <How to check the interfaces whose signals are output> On the initial screen, select [0/STATUS] key while holding down [SHIFT] key. Select [0/STATUS] key again while holding down [SHIFT] key to exit from the OUTPUT STASUS screen.
-
Page 248: Setting The Sync Signals To On Or Off And Setting The Sync Signal Polarities
10.2.2. Setting the sync signals to ON or OFF and setting the sync signal polarities In this section, the sync signals are set to ON or OFF and the sync signal polarities are set for each output connector. ⇒ ⇒ ⇒... -
Page 249: Setting The Level Mode
Chapter 10 INTERFACE SETTINGS 10.2.3. Setting the level mode Images can be output in the “limited” range of the HDMI standard. The output image range can be set for each unit. The same level setting can also be established using an interface which is not HDMI (such as DVI, LVDS, parallel or analog). -
Page 250: Setting The Dot Clock Operation Mode(Dot Clock Mode)
10.2.4. Setting the Dot clock operation mode(Dot Clock Mode) The procedure to set the dividing mode to split the 4k or 2k screen is described below. ⇒ ⇒ ⇒ MENU ProgramEdit Output All Output ProgramEdit Program Name All Output Output OFF/ON MENU GroupEdit Timing... - Page 251 Chapter 10 INTERFACE SETTINGS When dual clock mode or quad clock mode is set, the following split modes are displayed. <Parameter setting> When dual clock mode, the following split modes are displayed. MODE0 (HDiv) The output is divided horizontally in 2. MODE1 (VDiv) The output is divided vertically in 2.
-
Page 252: Setting The Aspect Ratio
10.2.5. Setting the aspect ratio In this section, the aspect ratio of the video signals is set. ⇒ ⇒ ⇒ MENU ProgramEdit Output All Output ProgramEdit Program Name All Output Sync MENU GroupEdit Timing Digital Output HDCP AutoEdit Output Level Mode DP Analysis Audio DotClk Mode... - Page 253 Chapter 10 INTERFACE SETTINGS <Setting the parameters> Select the items H and V using [Rotary switch] or [INC]/[DEC] key and then press [SET] key. Alternatively, select the parameters using the number keys [0/STATUS] to [9/F], and then press [SET] key. The aspect ratio is set in the horizontal direction.
-
Page 254: Setting The Color Depth (Bit) For Pattern Drawing
10.2.6. Setting the color depth (bit) for pattern drawing The color depth (bit) applying when drawing test patterns can be set. It can either be set either separately for each program or it can be fixed irrespective of the programs. a) The same specific color depth is designated. -
Page 255: Selecting Rgb Or Ypbpr And Setting The Color Difference Coefficients
Chapter 10 INTERFACE SETTINGS b) Setting the color depth for each program This setting takes effect when “Refer to Program” has been selected for Color Depth setting in “Designating the same specific color depth” in a) above. ⇒ ⇒ ⇒ MENU ProgramEdit Output... - Page 256 <Selecting color difference coefficients> When YPbPr was selected above, select the color difference coefficients. Select YPbPr Select using [Rotary switch] or [INC]/[DEC] key and then press [SET] key. Then, set the parameters using [Rotary switch] or [INC]/[DEC] key and then press [SET] key. SMPTE274M/296M/RP-177 The color difference coefficients of one of the standards on the left are set.
-
Page 257: Setting The Digital Level
Chapter 10 INTERFACE SETTINGS 10.2.8. Setting the digital level In this section, the digital level of the video signals is set. For further details on setting the gray scale, refer to “10.2.6 Setting the color depth (tone) for pattern drawing.” There are two ways to set the digital input level: One uses the LEVEL key screen, and the other is from Program Edit. - Page 258 <How to set the digital input level from Program Edit> ⇒ ⇒ ⇒ MENU ProgramEdit Output Digital Output ProgramEdit Timing All Output General MENU GroupEdit Output Digital Output HDMI AutoEdit Audio DP Analysis Pattern ⇒ ⇒ ⇒ ⇒ Data Copy/Erase Action V-by-One HS Select item using...
-
Page 259: Audio Sweep Settings
Chapter 10 INTERFACE SETTINGS 10.2.9. Audio sweep settings The audio output frequency can be raised or lowered at the set interval. ⇒ ⇒ MENU ProgramEdit Audio ProgramEdit Program Name Digital Audio MENU GroupEdit Timing Audio Sweep AutoEdit Output DP Analysis Audio ⇒... -
Page 260: Setting The Audio Level (Temporary Settings)
10.2.10. Setting the audio level (temporary settings) In this section, the audio output level is set. The level which was set in “10.2.9 Setting the audio level (temporary settings)” for analog audio or which was set using <Internal PCM setting parameters> in “10.3.5 Embedded audio, high bit rate audio (option)” for HDMI is 0 dB. Press [LEVEL] →... -
Page 261: Digital Level Setting Of 3D Pattern
Chapter 10 INTERFACE SETTINGS 10.2.11. Digital level setting of 3D pattern Digital level of 3D pattern is set by each left and right picture. Refer to “10.2.6 Color depth setting for pattern drawing” about level setting. There are 2 setting method; LEVEL key screen and Program Edit. <LEVEL key screen>... - Page 262 <Setting by Program Edit> ⇒ ⇒ ⇒ MENU ProgramEdit Pattern Image/OPT ProgramEdit Program Name Raster 9 Marker MENU GroupEdit Timing Aspect 3D Image AutoEdit Output Checker 3D Pattern DP Analysis Audio Image/OPT SMD Pattern ⇒ ⇒ ⇒ ⇒ □X[ABC] Data Copy/Erase Pattern Select item using The [3D Pattern] screen is displayed:...
-
Page 263: Hdmi
Chapter 10 INTERFACE SETTINGS 10.3. HDMI 10.3.1. Connectors and pin assignments HDMI Pin no. Signal TMDS DATA2+ TMDS DATA2 SHIELD TMDS DATA2- TMDS DATA1+ TMDS DATA1 SHIELD TMDS DATA1- TMDS DATA0+ TMDS DATA0 SHIELD TMDS DATA0- TMDS CLK+ TMDS CLK SHIELD TMDS CLK- RESERVE / HEAC+ DDC CLK... -
Page 264: Hdmi Data Transfer Methods
10.3.2. HDMI data transfer methods This section describes the transfer methods for the data output by HDMI units. The data transfer methods vary depending on the Dot Clock Operation mode (DotClk Mode). For more details about dividing mode setting, refer to “10.2.4 Setting the Dot Clock operation mode (DotClk Mode)” <Single Clock mode>... - Page 265 Chapter 10 INTERFACE SETTINGS <Dual Clock mode / Mode 0 or Mode 2 (divided horizontally in 2)> Mode that outputs the signal from two HDMI connectors. The data transfer mode and image are as follows. TMDS ・・・・ Pixel(0,0) Pixel(1,0) Pixel(2,0) Pi x el ( 3837,1079) Pi x el ( 3838,1079) Pi x el ( 3839,1079)
- Page 266 <Dual clock mode / Mode 1, Mode 3, Mode 8, or Mode 9 (divided vertically in 2)> Mode that outputs the signal from two HDMI connectors. The data transfer mode and image are as follows. TMDS ・・・・ Pixel(0,0) Pixel(1,0) Pixel(2,0) Pi x el ( 1917,2159) Pi x el ( 1918,2159) Pi x el ( 1919,2159)
- Page 267 Chapter 10 INTERFACE SETTINGS <Dual clock mode / Mode 4, Mode 5, Mode 6, or Mode 7 (no split)> Mode that outputs the signal from two HDMI connectors. The data transfer mode and image are as follows. TMDS ・・・・ Pixel(0,0) Pixel(2,0) Pixel(4,0) Pi x el ( 3834,2159)
- Page 268 <Quad clock mode / Mode 0, or Mode 2 (divided in 4 equal parts in a square)> Mode that outputs the signal via four HDMI connectors. The data transfer mode and screen are as follows. TMDS ・・・・ Pixel(0,0) Pixel(1,0) Pixel(2,0) Pi x el ( 1917,1079) Pi x el ( 1918,1079) Pi x el ( 1919,1079)
- Page 269 Chapter 10 INTERFACE SETTINGS <Quad clock mode / Mode 1, Mode 3, Mode 7, or Mode 8 (divided vertically in 4)> Mode that outputs the signal via four HDMI connectors. The data transfer mode and screen are as follows. TMDS ・・・・...
- Page 270 <Quad clock mode / Mode 4, Mode 5, or Mode 6 (divided vertically in 2)> Mode that outputs the signal from four HDMI connectors. The data transfer mode and image are as follows. TMDS ・・・・ Pixel(0,0) Pixel(2,0) Pixel(4,0) Pi x el ( 1914,2159) Pi x el ( 1916,2159) Pi x el ( 1918,2159) Channel...
- Page 271 Chapter 10 INTERFACE SETTINGS <Quad clock mode / Mode 9 (no split)> Mode that outputs the signal via four HDMI connectors. The data transfer mode and screen are as follows. TMDS ・・・・ Pixel(0,0) Pixel(4,0) Pixel(8,0) Pi x el ( 3828,2159) Pi x el ( 3832,2159) Pi x el ( 3836,2159) Channel...
-
Page 272: Hdmi Setting Procedure
10.3.3. HDMI setting procedure ⇒ ⇒ ⇒ MENU ProgramEdit Output Digital Output ProgramEdit Timing All Output General MENU GroupEdit Output Analog Output iTMDS AutoEdit Audio Digital Output HDMI DP Analysis Pattern VBI Function ⇒ ⇒ ⇒ ⇒ Data Copy/Erase Action Select item using The [HDMI] screen is displayed: <Selecting the items>... - Page 273 Chapter 10 INTERFACE SETTINGS <HDMI unit setting parameters> Set ON or OFF for each port here. Output OFF/ON The same settings as the ones described in “10.2.1 Setting the output Port1 to16 (0/1) interfaces to ON or OFF” can also be established. No signal output Signal output HDMI or DVI (0-2)
-
Page 274: Infoframe/Packet
10.3.4. InfoFrame/Packet InfoFrame can send the values which are optimal for the video and audio output conditions. In addition, it is possible to send InfoFrame using values differing from the output conditions to reproduce illegal operation conditions. Use one of the following operations to send InfoFrame: a) Send the optimal values automatically. - Page 275 Chapter 10 INTERFACE SETTINGS <List of automatically selected items> • If program data has been saved when Auto Select is set to ON, the values which were set by automatic selection will be saved. • A dash (“-”) denotes that the value of the original setting is used. Item Setting/reference section AVI InfoFrame...
- Page 276 b) Setting separate InfoFrame and Packet values and sending them This setting can be performed when “OFF” is selected for Auto Select in a) Sending the optimal values automatically. ⇒ ⇒ ⇒ MENU ProgramEdit Output Digital Output ProgramEdit Timing All Output General MENU GroupEdit...
- Page 277 Chapter 10 INTERFACE SETTINGS <Setting the HDMI output when making changes to InfoFrame/Packet> When making changes to InfoFrame/Packet, users can select either to turn off the synchronization of the HDMI output or establish the settings or change only the packets without turning off the synchronization. ⇒...
- Page 278 Vendor Specific InfoFrame The vendor specific information is stored in Vendor Specific InfoFrame, and sent. OFF/ON (0/1) This setting determines whether Vendor Specific InfoFrame is to be sent. 0 OFF The Vendor Specific InfoFrame is not sent. 1 ON The Vendor Specific InfoFrame is sent.
- Page 279 Chapter 10 INTERFACE SETTINGS 2-2. Video Format: 3D (Option) 2-2-(1) 3D Structure (0-7) this is the 3D Structure setting. 0 Frame Packing 1 Field Alternative *1 2 Line Alternative 3 Side-by-Side (Full) 4 L + depth 5 L + d + G + G-d (L + depth + graphics + graphics-depth) 6 Side-by-Side (Half) 7 Top &...
- Page 280 3-1. 3D Valid: Enabled 3-2-(1) 3D F Structure (0-7) This is the 3D F Structure setting. Frame Packing Field Alternative *1 Line Alternative Side-by-Side (Full) L + depth L + d + G + G-d (L + depth + graphics + graphics-depth) Side-by-Side (Half) Top &...
- Page 281 Chapter 10 INTERFACE SETTINGS 3-2-(7) Disparity Present This is the Disparity Present (enables or disables Disparity data below) (0/1) setting. 0 (Not Present) Disables Disparity data Enables Disparity data 3-2-(8) Disparity Version This is the Disparity Version setting. 0 to 3 3-2-(9) Disparity Length This is the Disparity Length (length of Disparity data) setting.
- Page 282 CAUTION The output signals differ from the ones in the standards. Currently, the DE signal is high for Vblank3 periods of the Field Alternative. CAUTION The 3D Ext Data values of 0 to 3 have all been made consistent with “Horizontal sub-sampling”...
- Page 283 Chapter 10 INTERFACE SETTINGS CAUTION If the setting value of 3D Structure is “Side-by-site (Half)”, the maximum data of 3D Metadata is 20 bytes. If you set “21” in Metadata Length, the last data (21st byte) is not sent. Please refer to the below list. Example 1: Packet data mapping except Side-by-Side(Half).
- Page 284 AVI InfoFrame “AVI InfoFrame” stands for Auxiliary Video Information InfoFrame. The information (including the color space and aspect ratio) of the transmission images is stored in it, and sent. OFF/ON (0/1) This setting determines whether the AVI InfoFrame is to be sent. 0 OFF The AVI InfoFrame is not sent.
- Page 285 Chapter 10 INTERFACE SETTINGS Picture Aspect (0-2) This is the Picture Aspect Ratio (aspect ratio of the video parts including Bar of letter box, etc.) setting. 0 No Data No Data 1 4:3 2 16:9 16:9 Scaling (0-3) (10) This is the Non-Uniform Picture Scaling (direction in which transmitted images have been scaled) setting.
- Page 286 (22) IT content Type (0-3) This is the IT Content Type setting. 0 Graphics 1 Photo 2 Cinema 3 Game SPD InfoFrame “SPD InfoFrame” stands for Source Product Description InfoFrame. The information of the transmission device is stored in it, and sent. OFF/ON (0/1) This setting determines whether the SPD InfoFrame is to be sent.
- Page 287 Chapter 10 INTERFACE SETTINGS Audio InfoFrame The transmission audio information is stored in the Audio InfoFrame, and sent. OFF/ON (0/1) This setting determines whether the Audio InfoFrame is to be sent. 0 OFF The Audio InfoFrame is not sent. 1 ON The Audio InfoFrame is sent.
- Page 288 Sample Size (0-3) This is the Sample Size setting. 0 Refer StreamHeader Refer to Stream Header 1 16 bit 2 20 bit 3 24 bit Speaker Placement This is the Channel/Speaker Allocation setting. (0-50)
- Page 289 Chapter 10 INTERFACE SETTINGS Reserved (10) Level Shift Value This is the Level Shift Value setting. 0 - 15 The decibel (dB) level is set here. This is the Down –mix Inhibit Flag setting. (11) Down-mix (0/1) 0 Permitted / No Info Permitted or no information about any assertion of this 1 Prohibited...
- Page 290 MPEG InfoFrame If the original source of the data prior to its conversion to HDMI is MPEG data, its information is stored in MPEG InfoFrame, and sent. OFF/ON (0/1) This setting determines whether the MPEG InfoFrame is to be sent. 0 OFF The MPEG InfoFrame is not sent.
- Page 291 Chapter 10 INTERFACE SETTINGS Dynamic Range and Mastering InfoFrame Dynamic Range and Maserting InfoFrame contains the information that is related to the Dynamic Range of video は、 stream, and send it out. OFF/ON(0/1) The setting determines whether HDR Metadata InfoFrame is sent or not.
- Page 292 ACP Packet “ACP Packet” stands for Audio Content Protection Packet. The copyright protection information added to DVD- Audio and Super Audio CD contents is stored in it, and sent. OFF/ON (0/1) This setting determines whether the ACP Packet is to be sent. 0 OFF The ACP Packet is not sent.
- Page 293 Chapter 10 INTERFACE SETTINGS Count_A Count_A (the number of times the Super Audio CD contents can be copied by an approved secure recorder) is set here. Prohibited 1 - 254 Allowed from 1 to 254 times No restrictions Count_S Count_S (the number of times the Super Audio CD contents can be copied by a secure recorder) is set here.
- Page 294 ISRC Packet “ISRC Packet” stands for International Standard Recording Code Packet. The sound source identification codes and other information are stored in it, and sent. OFF/ON ISRC1 (0/1) Whether to send the ISRC1 Packet is set here. 0 OFF The ISRC1 Packet is not sent.
- Page 295 Chapter 10 INTERFACE SETTINGS Gamut Metadata Packet If the transmission images have been sent by xvYCC, their color space information (range, etc.) is stored in the Gamut Metadata Packet, and sent. OFF/ON (0/1) This setting determines whether the Gamut Metadata Packet is to be sent. 0 OFF The Gamut Metadata Packet is not sent.
- Page 296 (10) Color_Space This is the GBD_Color_Space setting. When Vertices/facets (0) has been selected as the Format_Flag setting 0 ITU-R BT.709 ITU-R BT.709 (using RGB) 1 xvYCC601 xvYCC601 (IEC61966-2-4-SD) (using YCbCr) 2 xvYCC709 xvYCC709 (IEC61966-2-4-HD) (using YCbCr) 3 XYZ When Range (1) has been selected as the Format_Flag setting 0 Reserved Reserved 1 xvYCC601...
-
Page 297: Scramble
Chapter 10 INTERFACE SETTINGS 10.3.5. Scramble This item can send Scramble-processed HDMI signal. ⇒ ⇒ MENU Configuration HDMI GroupEdit General Auto Select MENU AutoEdit HDCP Packet Changing DP Analysis HDMI Scramble Data Copy/Erase SCDC Send ⇒ ⇒ ⇒ Configuration HPD Negate Select item using «Set parameters»... -
Page 298: Send Scdc (Status And Control Data Channel)
10.3.6. Send SCDC (Status and Control Data Channel) This item can set to send SCDC data. It is available when HDMI timing is changed. Note) SCDC transmission data is TMDS_Config. ⇒ ⇒ MENU Configuration HDMI GroupEdit General Auto Select MENU AutoEdit HDCP Packet Changing... -
Page 299: Cec Function
Chapter 10 INTERFACE SETTINGS 10.3.7. CEC function HDMI can send and receive the CEC commands, and display them on the screen. The CEC function has three operation modes. a) Monitor mode (Monitor) In this mode, the sending and receiving of the commands generated between the equipment connected to CEC are displayed on the screen. - Page 300 (8) to (12), the CEC commands set using items (4) to (7) are transmitted. Set here the CEC commands to be sent from the VG-876. The following items are set when Transmission or Response has been selected as the Mode setting.
-
Page 301: Edid
Chapter 10 INTERFACE SETTINGS : CEC mode : Logical address : CEC command : Command display “HDMI CEC Monitor Pattern”: CEC mode Monitor mode “HDMI CEC Transmission Pattern”: Command transmission mode “HDMI CEC Response Pattern”: Command response mode Logical Address VG logical address which has been set “CEC Command send to Device Xh”... -
Page 302: Ddc/Ci
10.3.10. DDC/CI For further details on the setting procedure, refer to “4.13.4 DDC/CI.” 10.3.11. LipSync For further details on the setting procedure, refer to “5.9 LipSync.” 10.3.12. ARC On this screen, the ARC function is executed, and the patterns of the related data are displayed. The sound received is output from the COAX digital audio output connector. - Page 303 Chapter 10 INTERFACE SETTINGS <Table of Audio Return Channel setting items> VG Logical Address This sets the logical address of the VG generator. (0 to F) Port (0-F) This sets the port used for Audio Return Channel execution. ARC is executed using the selected HDMI port. 0 toF HDMI1 to 16 Mode (0/1) This sets the operation mode.
- Page 304 CAUTION <Concerning operations when Auto (0) has been selected as the Follower: Mode setting> • In order to define the adjoining device of the generator, the connection location of the generator is checked by reading the physical address of the EDID connected to the generator.
- Page 305 Chapter 10 INTERFACE SETTINGS CAUTION Commands common to the Manual and Auto Follower: Mode settings Reception command Response command Give Device Vendor ID Device Vendor ID Give System Audio Mode Status System Audio Mode Status Request Short Audio Descriptor Report Short Audio Descriptor...
- Page 306 --- HDMI ARC (HDMI-1) --- ARC RX is Inactive. AudioType : Linear PCM SampleFreq : 96kHz ChannelStatusBit Volume 04h 05h 00h 0Ah 0Bh 7FFFFFh 04h 05h 00h 0Ah 0Bh 7FFFFFh --- HDMI CEC Monitor --- VG Logical Address = 1h 01:a C3:a [EOM] 01:a...
-
Page 307: Hpd Negate
Chapter 10 INTERFACE SETTINGS 10.3.13. HPD Negate The setting determines the status when Receiver (or Repeater) ‘s HotPlug is Negate. ⇒ ⇒ MENU Configuration HDMI Group Edit General Auto Select MENU Auto Edit HDCP Packet Changing DP Analysis HDMI Scramble Data Copy/Erase SCDC Send ⇒... -
Page 308: Displayport
10.4. DisplayPort 10.4.1. Connector and pin assignment ● Connector : Hosiden TCX3250-111387 Pin # Signal MainLink Lane0(p) MainLink Lane0(n) MainLink Lane1(p) MainLink Lane1(n) MainLink Lane2(p) MainLink Lane2(n) MainLink Lane3(p) MainLink Lane3(n) AUX CH(p) AUX CH(n) Hot Plug Detect PWR_Return (not used, OPEN) DP_PWR(+3.3V) -
Page 309: Split Setting
Chapter 10 INTERFACE SETTINGS 10.4.2. Split setting The output is changed by the setting of DotClk Mode and Split Mode. The split mode settings are shown below. As example, 3840x2160 resolution is used. * When DotClk Mode =0(Auto) is set, either of below setting is output judging by DotClk frequency. * When DotClk Mode =3(Quad) is set, this split setting is not executed. - Page 310 Note) it includes previous model’s split mode. 10.4.2.2 Dual Mode (DotClk Mode =2) By combination of CH1 and CH2, a pattern and timing is output. ODD/EVEN output (Split Mode =4,5,6,7) select either one of them. ■ Data Transfer assignment Split Image...
- Page 311 Chapter 10 INTERFACE SETTINGS ■ Vertically 2 split output (Split Mode =1,3,8,9) select either one of them. Data Transfer assignment Split Image...
- Page 312 Horizontally 2 split output (Split Mode =0,2) select either one of them. ■ Data Transfer assignment Split Image...
-
Page 313: Displayport Setting
Chapter 10 INTERFACE SETTINGS 10.4.3. DisplayPort setting ⇒ ⇒ ⇒ MENU Program Edit Output Digital Output Program Edit Timing All Output General MENU Group Edit Output Analog Output iTMDS Auto Edit Audio Digital output HDMI DP Analysis Pattern VBI Function ⇒... - Page 314 <DisplayPort unit setting parameters> This sets On or Off for each channel. Output OFF/ON The same settings as the ones described in “10.2.1 Setting the output Port1 to 8 (0/1) interfaces to ON or OFF” can also be established. No output. Output.
- Page 315 Chapter 10 INTERFACE SETTINGS Even/Odd split output Even/Odd CH1=Even CH2=Odd Left/Right split output Left/Right CH1=Left CH2=Right Left/Right split output Left/Right CH1=Left CH2=Right (5) When DotClk Mode is set as “680MHz or over”, the below setting is applied. Parameter setting range: 0-A Top/Bottom Top and bottom split output CH1=Top...
- Page 316 Top/Bottom Top and bottom split output Stream1=Top Stream2=Bottom Left/Right split output Left/Right Stream1=Left Stream2=Right Even/Odd split output Even/Odd Stream1=Even Stream2=Odd Even/Odd split output Even/Odd Stream1=Even Stream2=Odd Even/Odd split output Even/Odd Stream1=Even Stream2=Odd Even/Odd split output Even/Odd Stream1=Even Stream2=Odd Left/Right split output Left/Right Stream1=Left Stream2=Right...
- Page 317 Chapter 10 INTERFACE SETTINGS This sets ITU-R BT601. ITU601 This sets ITU-R BT709. ITU709 Link Set Mode(0/1) (10) This selects the Link Rate and Number of Lane setting method. Output accords with the DPCD of the sink Auto component. Output accords with the settings of items (8) and Manual (9).
- Page 318 Concerning the all program fixed setting This Configuration setting has priority to the “program setting”. Parameters which can be fixed setting Item Remarks Refer to “10.2.6 Setting the Color depth (gray scale) for pattern Width drawing.” Link Set Mode See below. ⇒...
- Page 319 M and N for stream Mvid This is automatically calculated from the Nvid setting value clock recovery and the dot clock. (The VG-876 is fixed to asynchronous mode, so the Mvid value varies.) The setting is followed by the DisplayPort setting “Nvid”. Nvid (VM-1876A-M1 does Refer to “<DP unit setting parameters>”...
-
Page 320: Displaying The Displayport Setting Information
10.4.4. Displaying the DisplayPort setting information The DisplayPort setting information (Link Rate, Number of Lane, Link training results, DPCD) can be displayed. DisplayPort setting display procedure NAME / LIST DETAIL NAME / LIST DETAIL <Display “DP”> DP is displayed as shown in the figure below. By using Select DP, DP(HEX) in the 2 page... - Page 321 Chapter 10 INTERFACE SETTINGS Selecting the port whose result is displayed Select the port for which the setting information is to be displayed. NAME / LIST DETAIL NAME / LIST DETAIL Select either DP or DP(HEX). By using Select DP 0 / STATUS Or, by using , select EDIT.
- Page 322 Displayed information Setting contents are displayed as below. (1) Setting display information (GUI page 1) This page displays the DisplayPort interface settings (Link Rate, Number of Lane, Main Stream Attribute) and the link training results. Details of the displayed information are as follows. This is the port for which the setting status is displayed.
- Page 323 Chapter 10 INTERFACE SETTINGS Bit Depth per Color Result of Link Training of each lane Clock Recovery The below values of DPCD Link Status Field are displayed. 00202h Bit0(LANE0_CR_DONE) 00202h Bit4(LANE1_CR_DONE) 00203h Bit0(LANE2_CR_DONE) 00203h Bit4(LANE3_CR_DONE) Channel EQ The below values of DPCD Link Status Field are displayed.
- Page 324 (2) DPCD display (GUI page 2 and onward, HEX is DPCD display only These pages display the DPCD (DisplayPort Configuration Data). The data for different addresses can be displayed by switching the page. ① = = = D P C D : R e c e i v e r C a p a b i l i t y F i e l d [ P o r t = D P 1 ] 0 0 0 0 0 D P C D _ R E V : 1 1 h D P C D _ R E V = 1 .
-
Page 325: Dp Analysis
Chapter 10 INTERFACE SETTINGS 10.4.5. DP Analysis The DP Analysis mode is used to perform the evaluation of the DisplayPort interface. Setting the port to be used Select the port to be used by DP Analysis with the device settings. ⇒... - Page 326 EDIT This enters the DisplayPort output setting menu. *3 *1 Concerning the PW_SAVE When PW_SAVE is set, VG-876 will process as below. <PW_SAVE=ON> VG writes “0x02” in the DPCD 0x00600 Bits1:0(SET_POWER) of the connected sink device, and make Main Link and AUX CH power down.
- Page 327 Therefore, non-DisplayPort output and DisplayPort output that is not selected by “a) Setting the port to be used” remain as the video output displayed thus far. * After establishing link between VG-876 and the Sink device, perform this menu. If link is not established, Training Patter is not output.
- Page 328 <Training Pattern mode setting parameters> The following settings can be made in Training Pattern mode. Pattern Select This sets the pattern. The D10.2 test pattern (Link Training (0-3) D10.2 (TP1) Pattern1) is output. The Link Training Pattern2 (Channel EQ (TP2) Equalization Sequence) is output.
-
Page 329: Embedded Audio
Chapter 10 INTERFACE SETTINGS 10.4.6. Embedded audio Embedded audio signals can be output from the DisplayPort. a) Set embedded audio to be imposed on DisplayPort enable. b) Set audio source, frequency and level. When using embedded audio by VM-1876A-M1, select ConfigurationDPSelect Function Audio. For details, refer to “10.4.10 Select execute functions”. -
Page 330: Edid
10.4.7. EDID For further details on the setting procedure, refer to “4.13.3 EDID”. 10.4.8. HDCP For further details on the setting procedure, refer to “6.1 HDCP settings”. VM-1876A-M1 does not support HDCP. Caution 10.4.9. DDC/CI For further details on the setting procedure, refer to “4.13.4 DDC/CI”. 10.4.10. - Page 331 When using this function, MST function is not supported. Function Use MST(Multi-Stream Transport) function. When using this function, Audio function is not supported. Note) After selecting the function, press SAVE key. Then, reboot VG-876. After rebooting, selected function becomes available.
-
Page 332: V-By-One®Hs
10.5. V-By-One®HS 10.5.1. Connector and pin assignment ● Connector : TCX3250-111387 made by Hosiden Corp. Pin Number Signal Lane0(p) Lane0(n) Lane1(p) Lane1(n) Lane2(p) Lane2(n) Lane3(p) Lane3(n) HTPDN LOCKN (Common spec for 1-4 connector) -
Page 333: V-By-One ®Hs Setting Procedure
Chapter 10 INTERFACE SETTINGS 10.5.2. V-by-One ®HS setting procedure ⇒ ⇒ ⇒ MENU ProgramEdit Output Digital Output ProgramEdit Timing All Output General MENU GroupEdit Output Digital Output HDMI AutoEdit Audio V-by-One HS Data Copy/Erase Pattern ⇒ ⇒ ⇒ ⇒ Configuration Action Select items by using By operating above procedures, the below “V-by-One”... - Page 334 The image is output by 8 lanes. 8 lanes The image is output by 16 lanes. 16 lanes Split(0-9) This selects the screen splitting type in the ×4 mode or 4K×2K mode which uses the frame memory on the board. Note) this setting follows the Split Mode that is set in “10.2.4 Dot Clock operation Mode setting.”...
- Page 335 Chapter 10 INTERFACE SETTINGS Forcibly sets High. High When dot clock operation mode (DotClk Mode) is set as “Auto”, number of data Caution lanes change automatically depends on dot clock. For details, refer to “10.2.4 Setting of Dot clock operation mode DotClk Mode” 注意...
-
Page 336: Data Transfer Method
10.5.3. Data transfer method <Normal MODE: 2Lane output>... - Page 337 Chapter 10 INTERFACE SETTINGS Given here as an example where the resolution is 1920 × 1080@60Hz, the dot clock frequency is 148 MHz and the output bit depth is 10 bits. ・ ・ ・ ~ ・ ・ ・ : : :...
- Page 338 <Normal MODE: 4Lane output>...
- Page 339 Chapter 10 INTERFACE SETTINGS Given here as an example where the resolution is 1920 × 1080@120Hz, the dot clock frequency is 297 MHz and the output bit depth is 10 bits. ・ ・ ・ ~ ・ ・ ・ : : :...
- Page 340 Given here as an example where the resolution is 4096 × 2160@30Hz, the dot clock frequency is 297 MHz and the output bit depth is 10 bits. ・ ・ ・ ~ ・ ・ ・ : : : : : : :...
- Page 341 Chapter 10 INTERFACE SETTINGS <Specifications of x4 (240Hz) mode output> In case “FullHD 240Hz Mode”, one image is output by combination of 8 lanes. Basically, it is same transmission method as 4K/60p. Here it explains from Mode0 (x4mode) to Mode4(x4mode). [Full HD 240Hz 8 lanes output]...
- Page 342 (1) Mode 0 (x4 mode) (8 lanes ) - Mode0 x4 mode (Non Dividing Mode) By using Lane 1 to 8, the image is output by pixel assignment described below. Given here as an example where the resolution is 1920 × 1080/240Hz, the dot clock frequency is 594 MHz and the output bit depth is 10 bits.
- Page 343 Chapter 10 INTERFACE SETTINGS (2) Mode 1 (x4 mode) ( 8 lanes ) - Normal Mode By using Lane 1 to 8, the image is output by pixel assignment described below. Given here as an example where the resolution is 1920 × 1080/240Hz, the dot clock frequency is 594 MHz and the output bit depth is 10 bits.
- Page 344 [Assignment of each lane] L a n e 1 L a n e 2 L a n e 3 L a n e 4 L a n e 5 L a n e 6 L a n e 7 L a n e 8 L a n e 1 - 2 L a n e 3 - 4 L a n e 5 - 6...
- Page 345 Chapter 10 INTERFACE SETTINGS (3) Mode 2 (x4 mode) ( 8 lanes ) - Cross Mode By using Lane 1 to 8, the image is output by pixel assignment described below. Given here as an example where the resolution is 1920 × 1080/240Hz, the dot clock frequency is 594 MHz and the output bit depth is 10 bits.
- Page 346 [Assignment of each lane] L a n e 1 L a n e 2 L a n e 3 L a n e 4 L a n e 5 L a n e 6 L a n e 7 L a n e 8 L a n e 1 - 2 L a n e 3 - 4 L a n e 5 - 6...
- Page 347 Chapter 10 INTERFACE SETTINGS (4) Mode 3 (x4 mode) ( 8 lanes ) - Dividing Normal Mode Using lanes 1 and 2 and lanes 3 and 4, the left half of the image is output in the even and odd numbers; similarly, using lanes 5 and 6 and lanes 7 and 8, the right half of the image is output in the even and odd numbers.
- Page 348 [Assignment of each lane] L a n e 1 L a n e 2 L a n e 3 L a n e 4 L a n e 5 L a n e 6 L a n e 7 L a n e 8 L a n e 1 - 2 L a n e 3 - 4 L a n e 5 - 6...
- Page 349 Chapter 10 INTERFACE SETTINGS (5) Mode 4 (x4 mode) ( 8 lanes ) - Dividing Cross Mode Using lanes 1 and 3 and lanes 2 and 4, the left half of the image is output in the even and odd numbers; similarly, using lanes 5 and 7 and lanes 6 and 8, the right half of the image is output in the even and odd numbers.
- Page 350 [Assignment of each lane] L a n e 1 L a n e 2 L a n e 3 L a n e 4 L a n e 5 L a n e 6 L a n e 7 L a n e 8 L a n e 1 - 2 L a n e 3 - 4 L a n e 5 - 6...
- Page 351 Chapter 10 INTERFACE SETTINGS <Specifications of 4K×2K mode> In case of 4Kx2K MODE, one image is output by combination of 8 lanes. [4k x2k 60Hz -8 lanes output]...
- Page 352 (1) Mode 0 ( 8 lanes ) - Normal The image is split into 4 in the form of a square divided into 4 equal parts and assigned in sequence using lanes 1 and 2 for the top left part, lanes 3 and 4 for the top right part, lanes 5 and 6 for the bottom left part and lanes 7 and 8 for the bottom right part.
- Page 353 Chapter 10 INTERFACE SETTINGS [Assignment of each lane] L a n e 1 L a n e 2 L a n e 3 L a n e 4 L a n e 5 L a n e 6 L a n e 7 L a n e 8 L a n e 1 - 2 L a n e 3 - 4...
- Page 354 (2) Mode 1 ( 8 lanes ) - 4Split The image is split horizontally into four parts and assigned in sequence from the left using lanes 1 and 2, lanes 3 and 4, lanes 5 and 6 and lanes 7 and 8. Given here as an example where the resolution is 4096 ×...
- Page 355 Chapter 10 INTERFACE SETTINGS [Assignment of each lane] L a n e 1 L a n e 2 L a n e 3 L a n e 4 L a n e 5 L a n e 6 L a n e 7 L a n e 8 L a n e 1 - 2 L a n e 3 - 4...
- Page 356 (3) Mode 2 (8 lanes ) (split horizontally into 2) Using lanes 1 and 2 and lanes 3 and 4, the top half of the image is output in the even and odd numbers; similarly, using lanes 5 and 6 and lanes 7 and 8, the bottom half of the image is output in the even and odd numbers. Given here as an example where the resolution is 4096 ×...
- Page 357 Chapter 10 INTERFACE SETTINGS [Assignment of each lane] L a n e 1 L a n e 2 L a n e 3 L a n e 4 L a n e 5 L a n e 6 L a n e 7 L a n e 8 L a n e 1 - 2 L a n e 3 - 4...
- Page 358 (4) Mode 3 (8 lane ) - (split vertically into 2) Using lanes 1 and 2 and lanes 3 and 4, the left half of the image is output in the even and odd numbers; similarly, using lanes 5 and 6 and lanes 7 and 8, the right half of the image is output in the even and odd numbers. Given here as an example where the resolution is 4096 ×...
- Page 359 Chapter 10 INTERFACE SETTINGS [Assignment of each lane] L a n e 1 L a n e 2 L a n e 3 L a n e 4 L a n e 5 L a n e 6 L a n e 7 L a n e 8 L a n e 1 - 2 L a n e 3 - 4...
- Page 360 (5) Mode 4 (8 lanes ) – No split Using lanes 1 to 4, the EVEN pixels are output, and using lanes 5 to 8, the ODD pixels are output. Given here as an example where the resolution is 4096 × 2048, the dot clock frequency is 594 MHz and the output bit depth is 10 bits.
- Page 361 Chapter 10 INTERFACE SETTINGS [Assignment of each lane] L a n e 1 L a n e 2 L a n e 3 L a n e 4 L a n e 5 L a n e 6 L a n e 7 L a n e 8 L a n e 1 - 2 L a n e 3 - 4...
- Page 362 (6) Mode 0 (x4 mode) (8 lanes ) - Mode0 x4 mode (Non Dividing Mode) Using 1-8 lanes, the image is output with the pixel assignment as below without splitting. Given here as an example where the resolution is 4096 × 2048, the dot clock frequency is 594 MHz and the output bit depth is 10 bits.
- Page 363 Chapter 10 INTERFACE SETTINGS [Assignment of each lane] L a n e 1 L a n e 2 L a n e 3 L a n e 4 L a n e 5 L a n e 6 L a n e 7 L a n e 8 L a n e 1 - 2 L a n e 3 - 4...
- Page 364 (7) Mode 1 (x4 mode) ( 8 lanes ) - Normal Mode Using 1-8 lanes, the image is output with the pixel assignment as below without splitting the screen. This example is a case where the resolution is 4096 × 2048, the dot clock frequency is 594 MHz and the output bit depth is 10 bits.
- Page 365 Chapter 10 INTERFACE SETTINGS [Assignment of each lane] L a n e 1 L a n e 2 L a n e 3 L a n e 4 L a n e 5 L a n e 6 L a n e 7 L a n e 8 L a n e 1 - 2 L a n e 3 - 4...
- Page 366 (8) Mode 2 (x4 mode) ( 8 lanes ) - Cross Mode Using 1-8 lanes, the image is output with the pixel assignment as below without splitting the screen. This example is a case where the resolution is 4096 × 2048, the dot clock frequency is 594 MHz and the output bit depth is 10 bits.
- Page 367 Chapter 10 INTERFACE SETTINGS [Assignment of each lane] L a n e 1 L a n e 2 L a n e 3 L a n e 4 L a n e 5 L a n e 6 L a n e 7 L a n e 8 L a n e 1 - 2 L a n e 3 - 4...
- Page 368 (9) Mode 3 (x4 mode) ( 8 lanes ) - Dividing Normal Mode Using lanes 1 - 2 lanes and 3- 4 lanes, the left half of the image is output in the even and odd numbers; similarly, using 5-6 lanes and 7- 8 lanes, the right half of the image is output in the even and odd numbers. This example is a case where the resolution is 1920 ×...
- Page 369 Chapter 10 INTERFACE SETTINGS [Assignment of each lane] L a n e 1 L a n e 2 L a n e 3 L a n e 4 L a n e 5 L a n e 6 L a n e 7 L a n e 8 L a n e 1 - 2 L a n e 3 - 4...
- Page 370 (10) Mode 4 (x4 mode) ( 8 lanes ) - Dividing Cross Mode Using lanes 1 -3 lanes and 2- 4 lanes, the left half of the image is output in the even and odd numbers; similarly, using 5-7 lanes and 6-8 lanes, the right half of the image is output in the even and odd numbers. This example is a case where the resolution is 1920 ×...
- Page 371 Chapter 10 INTERFACE SETTINGS [Assignment of each lane] L a n e 1 L a n e 2 L a n e 3 L a n e 4 L a n e 5 L a n e 6 L a n e 7 L a n e 8 L a n e 1 - 2 L a n e 3 - 4...
- Page 372 This mode is an output mode for 4K×2K 120 Hz testing. In the 4K×2K 120Hz Mode, 16 lanes are combined by using 4 connectors to output one image. [4K x 2K 120Hz - 16 lanes output]...
- Page 373 Chapter 10 INTERFACE SETTINGS (1) Mode 0 ( 16 lanes ) - Cross split into 4 + vertically split into 2 The screen is split it into 4 by square. Lane 1,2,5,6 are output to top-left, lane 9,10,13,14 are output to top-right, lane 3,4,7,8 are output to , and split vertically bottom-right and lane 11,12,15,16 are output to bottom-left..
- Page 374 [Assignment of each lane] Lane 1-2 Lane 5-6 Lane 9-10 Lane 13-14 Lane 3-4 Lane 7-8 Lane 11-12 Lane 15-16...
- Page 375 Chapter 10 INTERFACE SETTINGS (2) Mode 1 ( 16 lanes ) - vertically split into 4 + vertically split into 2 The screen is vertically split into 8. By using 2 lanes as one set, Lane1,2, Lane3,4, Lane5,6, Lane7,8, Lane 9,10, Lane 11,12, Lane13,14 and Lane15,16 are assigned from the left. This example is a case where the resolution is 4096 ×...
- Page 376 [Assignment of each lane]...
- Page 377 Chapter 10 INTERFACE SETTINGS (3) Mode 2 (16 lanes ) horizontally split into 2 + vertically split into 2 Using lanes 1 -4 lanes, the top-left of the image is output in the even and odd numbers; similarly, using 5-8 lanes, bottom-left image is output.
- Page 378 [Assignment of each lane] Lane 1-4 Lane 9-12 Lane 5-8 Lane 13-16...
- Page 379 Chapter 10 INTERFACE SETTINGS (4) Mode 3 (16 lanes ) - (vertically split into 2 + vertically split into 2) Using lanes 1 -4 lanes and 5-8 lanes, the left half of the image is output in the even and odd numbers; similarly, using 9-12 lanes and 13-16 lanes, right half of the image is output in the even and odd numbers.
- Page 380 [Assignment of each lane] Lane 1-4 Lane 5-8 Lane 9-12 Lane 13-16...
- Page 381 Chapter 10 INTERFACE SETTINGS (5) Mode 4 (16 lanes ) - vertically split into 2 + No split (1) By using Lane 1-8, the image is output in even and odd numbers. Similarly, by using Lane 9-16, the image is output in even and odd numbers. Each lane mapping is shown in [Assignment of each lane.] This example is a case where the resolution is 4096 ×...
- Page 382 [Assignment of each lane] Lane 1-8 Lane 9-16...
- Page 383 Chapter 10 INTERFACE SETTINGS (6) Mode 5 (16 lanes ) - vertically split into 2 + No split (2) By using Lane 1-8, the image is output in even and odd numbers. Similarly, by using Lane 9-16, the image is output in even and odd numbers. Each lane mapping is shown in [Assignment of each lane.] This example is a case where the resolution is 4096 ×...
- Page 384 [Assignment of each lane] Lane 1-8 Lane 9-16...
- Page 385 Chapter 10 INTERFACE SETTINGS (7) Mode 6 (16 lanes ) - vertically split into 2 + No split (3) By using Lane 1-8, the image is output in even and odd numbers. Similarly, by using Lane 9-16, the image is output in even and odd numbers. Each lane mapping is shown in [Assignment of each lane.] This example is a case where the resolution is 4096 ×...
- Page 386 [Assignment of each lane] Lane 1-8 Lane 9-16...
- Page 387 Chapter 10 INTERFACE SETTINGS (8) Mode 7 ( 16 lanes ) (vertically split into 2 + Split (1) Dividing Normal Mode) The screen is vertically divided into 2 as pixel assignment shown below. This example is a case where the resolution is 4096 × 2048, the dot clock frequency is 1188 MHz and the output bit depth is 10 bits.
- Page 388 [Assignment of each lane] Lane 1-4 Lane 5-8 Lane 9-12 Lane 13-16...
- Page 389 Chapter 10 INTERFACE SETTINGS (9) Mode 8 ( 16 lanes ) (vertically split into 2 + Split (2) Dividing Cross Mode) The screen is vertically divided into 2 as pixel assignment shown below. This example is a case where the resolution is 4096 × 2048, the dot clock frequency is 1188 MHz and the output bit depth is 10 bits.
- Page 390 [Assignment of each lane] Lane 1-4 Lane 5-8 Lane 9-12 Lane 13-16...
- Page 391 Chapter 10 INTERFACE SETTINGS Mode 9 ( 16 lanes ) (No split) (10) Without splitting the screen, the image is output This example is a case where the resolution is 4096 × 2048, the dot clock frequency is 1188 MHz and the output bit depth is 10 bits.
- Page 392 [Assignment of each lane] Lane 1-16...
-
Page 393: V-By-One®Hs Control
Chapter 10 INTERFACE SETTINGS 10.5.4. V-by-One®HS Control The VM-1876-M2 makes it possible to control the V-by-One® HS control signals (HTPDN and LOCKN). <Operating procedure> MENU Select V-by-One®HS Control using and then press ① ② <Control parameters> These parameters are used for channel 1 to 4 channel control. The signals from the receiver are passed straight Through through. -
Page 394: V-By-One®Hs Config Setting
10.5.5. V-by-One®HS Config setting ⇒ MENU Configuration Group Edit HDCP MENU Auto Edit HDMI DP Analysis Data Copy/Erase ⇒ ⇒ Configuration V-by-One HS Select items by using <Selecting the items> Select the items of SDI using [Rotary switch] or [INC]/[DEC] key and then press [SET] key. Alternatively, select the items using the number keys [0/STATUS] to [9/F], and then press [SET] key. -
Page 395: Sdi Output
Chapter 10 INTERFACE SETTINGS 10.6. SDI 10.6.1. SDI output SDI outputs the timing that is compliant with SMPTE standard. Refer to “10.5.3 SDI transmission” for details. 10.6.2. SDI setting ⇒ ⇒ ⇒ MENU ProgramEdit Output Digital Output ProgramEdit Timing All Output General MENU GroupEdit... - Page 396 <SDI unit parameter setting.> Output OFF/ON This sets On or Off for each channel. These are the same settings as in “10.2.1 Output interface ON/OFF Port1 to 16 (0/1) setting”. No output Output Below setting is available only for the setting “Refer Program” in SDI Payload setting- Mode. SDI Format (0-4) This sets the SDI format.
- Page 397 Chapter 10 INTERFACE SETTINGS 2-sample interleave division Audio Output(0/1) This sets embedded audio output. The embedded audio is not output. The embedded audio is output. Audio Copy Ch2(0/1) This set whether Audio after Ch2 of 3G-SDI is copied from Link1 or Audio Copy Ch3(0/1) not.
- Page 398 59.94Hz 60Hz 47.95Hz 48Hz Aspect Ratio(0/1) This sets aspect ratio. Depends on Byte1 setting, setting Bit changes accordingly. Aspect ratio 4:3 16:9 Aspect ratio 16:9 H Y-Sampling (0/1) This sets the H or Y sampling value. Sampling Struc(0-A) This sets the sampling structure (video format). 4:2:2(YCbCr) Each video format is applied.
- Page 399 Chapter 10 INTERFACE SETTINGS The below item is shown if Mode=2: HEX was selected. (14) Byte2 This sets Byte2. 00h to FFh (15) Byte3 This sets Byte3. 00h to FFh (16) Byte4 Ch1 LinkA This sets Byte4 Ch1 LinkA. 00h to FFh Byte4 Ch1 LinkB (17) This sets Byte4 Ch1 LinkB.
-
Page 400: Sdi Transfer Method
10.6.3. SDI transfer method SD-SDI and HD-SDI signal Output from BNC connector without split. SMPTE372M(DUAL LINK) From the slot of smaller number, output 1, 2 (, 3, 4) are assigned. BNC connector Signal CH 1 Output 1 (3) LINK A CH 2 Output 1 (3) LINK B CH 3... - Page 401 Chapter 10 INTERFACE SETTINGS Mode A 2-sample interleave division (2SI) 3840x2160 format that cannot be displayed by HD-SDI resolution is displayed as below. 3 4 5 7 8 9 10 2 6 1 ② ① ④ ③ e.g. case CH1output The group that is consist of 2 pixels and 2 lines (see each color area in above picture) are picked up and output.
-
Page 402: Sdi Timecode Setting
10.6.4. SDI TimeCode setting ⇒ MENU Configuration ProgramEdit General TimeCode MENU GroupEdit HDCP ClockDelay AutoEdit HDMI Data Copy/Erase ⇒ ⇒ ⇒ Configuration Select items by By operating as above, the below menu [SDI Timecode] appears. <Selecting the items> Select the items of SDI using [Rotary switch] or [INC]/[DEC] key and then press [SET] key. Alternatively, select the items using the number keys [0/STATUS] to [9/F], and then press [SET] key. -
Page 403: Sdi Clockdelay Setting
Chapter 10 INTERFACE SETTINGS 10.6.5. SDI ClockDelay setting ⇒ MENU Configuration ProgramEdit General TimeCode MENU GroupEdit HDCP ClockDelay AutoEdit HDMI Data Copy/Erase ⇒ ⇒ ⇒ Configuration Select items by By operating as above, the below menu [SDI ClockDelay] appears. <Selecting the items> Select the items of SDI using [Rotary switch] or [INC]/[DEC] key and then press [SET] key. -
Page 404: Itmds
10.7. iTMDS 10.7.1. Connector and pin assignment Pin No. Signal Pin No. Signal Pin No. Signal TMDS DATA2- TMDS DATA1- TMDS DATA0- TMDS DATA2+ TMDS DATA1+ TMDS DATA0+ TMDS DATA2/4 G TMDS DATA1/3 G TMDS DATA0/5 G TMDS DATA4- TMDS DATA3- TMDS DATA5-... -
Page 405: Itmds Setting Method
Chapter 10 INTERFACE SETTINGS 10.7.2. iTMDS setting method ⇒ ⇒ ⇒ MENU ProgramEdit Output Digital Output Program Edit Timing All Output iTMDS MENU Group Edit Output Analog Output HDMI Auto Edit Audio Digital Output DP Analysis Pattern VBI Function ⇒ ⇒... - Page 406 This sets the bit length and link format of the images to be output from Mode(0-7) iTMDS. A setting which is independent of the bit length for pattern drawing can be selected. It is also possible to select the bit length automatically. The portion by which the bit length for pattern drawing exceeds the bit length which has been set here is discarded.
- Page 407 Chapter 10 INTERFACE SETTINGS Split(0-9) Use frame memory of the interface unit. When “Quad” is set in (3)Mode, the below setting can be selected. Screen split-into-4 output in the form of a square MODE0 divided into 4 equal parts. (tile split or cross split) Screen vertically split-into-4 output MODE1 Screen horizontally split-into-2 output...
-
Page 408: Data Transfer Systems
10.7.3. Data transfer systems <DVI MODE> [ Single (8 bit) ] The same images are output to all channels 1 and 2. The output level is 8 bits. Given here as an example for explanatory purposes is a case where the resolution is 1920 × 1080p60, the dot clock frequency is 148.5 MHz with 8 bits level. - Page 409 Chapter 10 INTERFACE SETTINGS [ Dual (8 bit) ] The same images are output by a pair of EVEN and ODD. The output level is 8 bits. Given here as an example for explanatory purposes is a case where the resolution is 1920 × 1080p120, the dot clock frequency is 297 MHz with 8 bits level.
- Page 410 Single (16bit) ] The image is output by a pair of upper 8-bit and lower 8-bit. The output level is 16 bits. Given here as an example for explanatory purposes is a case where the resolution is 1920 × 1080p60, the dot clock frequency is 148.8 MHz with 16 bits level.
- Page 411 Chapter 10 INTERFACE SETTINGS Dual (16bit) DVI Mode] Upper 8-bit image is output from CH1 and lower 8-bit image is output from CH2. The output level is 16 bits. Given here as an example for explanatory purposes is a case where the resolution is 1920 × 1080p120, the dot clock frequency is 297MHz with 16 bits level.
- Page 412 iTMDS MODE> < [Dual (16bit) iTMDS Mode] The image is output by a pair of EVEN and ODD. Video 1 and 3 output EVEN signal. Video 2 and 4 output ODD signal. Given here as an example for explanatory purposes is a case where the resolution is 1920 × 1080p120, the dot clock frequency is 297 MHz with 10 bits level.
- Page 413 Chapter 10 INTERFACE SETTINGS Each mode of Quad Link By using CH1 (Dual Link) and CH2 (Dual Link), maximum 4k2k60Hz 12bit signal is output.
- Page 414 (1) MODE0 (Quad Link ) (screen cross-split-into-4 output) The screen is split into 4 equal parts using channels 1, 2, 3 and 4. Given here as an example of the resolution is 4096 × 2160, the dot clock frequency is 594 MHz with the 10 bits output.
- Page 415 Chapter 10 INTERFACE SETTINGS (2) MODE1 (QuadLink) (screen vertically split into 4) The screen is split vertically into for parts and allocated from the left in the sequence of Video 1, Video 2, Video 3 and Video 4. Given here as an example of the resolution is 4096 × 2160, the dot clock frequency is 594 MHz with the 10bits output.
- Page 416 (3) MODE2 (Quad Link ) (screen horizontally split into 2) Using video 1 and 2, the top half of the image is output in the odd and even numbers; similarly, using video 3 and 4, the bottom half of the image is output in the odd and even numbers. Given here as an example of the resolution is 4096 ×...
- Page 417 Chapter 10 INTERFACE SETTINGS (4) MODE3 (Quad Link ) (screen vertically split into 2) Using video 1 and 2, the left half of the image is output in the odd and even numbers; similarly, using video 3 and 4, the right half of the image is output in the odd and even numbers. Given here as an example of the resolution is 4096 ×...
- Page 418 (5) MODE4 (Quad Link ) (No Dividing) Using Video 1 and 2, EVEN pixels are output. Using Video 3 and 4, ODD pixels are output. Given here as an example of the resolution is 4096 × 2160, the dot clock frequency is 594 MHz with 10bits output. Video 1 Video 2 Video 3...
- Page 419 Chapter 10 INTERFACE SETTINGS Specifications for modes during ×4 mode output The X4 mode is an output mode designed for the inspection of the Full HD 240Hz 10-bit output by connecting the IA-1540 (iTMDS-LVDS converter box). The signal becomes LVDS x8 channels. Depends on the data allocation of Video 1 to 4, it still has MODE 0 to 4 settings.
- Page 420 (1) MODE0 x4 Mode (Quad Link ) (Non Dividing Mode) Using Video 1, 2, 3 and 4, the image is output under the pixel assignment given below without splitting the screen. Given here as an example of the resolution is 1920 × 1080, the dot clock frequency is 594 MHz with the 10 bits output.
- Page 421 Chapter 10 INTERFACE SETTINGS (2) MODE1 x4 Mode (Quad Link ) (Normal Mode) Using Video 1, 2, 3 and 4, the image is output under the pixel assignment given below without splitting the screen. Given here as an example of the resolution is 1920 × 1080, the dot clock frequency is 594 MHz with the 10 bits output.
- Page 422 (3) MODE2 x4 Mode (Quad Link ) (Cross Mode) Using Video 1, 2, 3 and 4, the image is output under the pixel assignment given below without splitting the screen. Given here as an example of the resolution is 1920 × 1080, the dot clock frequency is 594 MHz with the 10 bits output.
- Page 423 Chapter 10 INTERFACE SETTINGS (4) MODE3 x4 Mode (Quad Link ) (Dividing Normal Mode) Using Video 1 and 2, the right half of the image is output; similarly, using Video 3 and 4, the left half of the image is output.
- Page 424 ⑤ MODE4 x4 Mode (Quad Link ) (Dividing Cross Mode) Using Video 1 and 2, the right half of the image is output; similarly, using Video 3 and 4, the left half of the image is output. The pixel assignment is given below. Given here as an example of the resolution is 1920 ×...
- Page 425 Chapter 10 INTERFACE SETTINGS Specifications for Octal Link modes By using 2 interface units of iTMDS, maximum 4K2K 120Hz by 12-bit signal is output. Depends on the data allocation of Video 1 to 8, it still has MODE 0 to 9 settings.
- Page 426 (1) MODE0 (Octal Link ) (split into cross-split to 4 + split vertically into 2) Video 1 to 8 are used. The screen is split into 4 in the form of a square divided into 4 equal parts and output from each of the interface units, and then it is split vertically into two at each interface unit, and output.
- Page 427 Chapter 10 INTERFACE SETTINGS (2) MODE1 (Octal Link) (split vertically into 4 + split vertically into 2) Video 1 to 8 are used. The screen is split vertically into 4 and output from each output, and then it is split vertically into two at each interface unit and output.
- Page 428 (3) MODE2 (Octal Link ) (split horizontally into 2 + split vertically into 2) Video 1 to 8 are used. The screen is split horizontally into 2 and output from each output, and then it is split vertically into two at each interface unit, and output. Given here as an example of the resolution is 4096 ×...
- Page 429 Chapter 10 INTERFACE SETTINGS (4) MODE3 (Octal Link ) (split vertically into 2 + split vertically into 2) Video 1 to 8 are used. The screen is split vertically into 2 and output from each output, and then it is split vertically into two at each interface unit, and output.
- Page 430 (5) MODE4 (Octal Link ) (split vertically into 2 + no dividing in each board <1>) (Non Dividing Mode) Video 1 to 8 are used. The screen is split vertically into 2 from each output. Video1-4 outputs the left half. Video5- 8 outputs the right half with the below pixel assignment.
- Page 431 Chapter 10 INTERFACE SETTINGS (6) MODE5 (Octal Link ) (split vertically into 2 + no dividing in each board <2>) (Normal Mode) Video 1 to 8 are used. The screen is split vertically into 2 from each output. Video1-4 outputs the left half. Video 5-8 outputs the right half with the below pixel assignment.
- Page 432 (7) MODE6 (Octal Link ) (split vertically into 2 + no dividing <3>) (Cross Mode) Video 1 to 8 are used. The screen is split vertically into 2 from each output. Video1-4 outputs the left half. Video5- 8 outputs the right half with the below pixel assignment. Given here as an example of the resolution is 4096 ×...
- Page 433 Chapter 10 INTERFACE SETTINGS (8) MODE7 (Octal Link ) (split vertically into 2 + dividing <1>) (Dividing Normal Mode) Video 1 to 8 are used. The screen is split vertically into 2 from each output. Video1-4 outputs the left half. Video 5-8 outputs the right half with the below pixel assignment.
- Page 434 (9) MODE8 (Octal Link ) (split vertically into 2 + dividing <2>) (Dividing Cross Mode) Video 1 to 8 are used. The screen is split vertically into 2 from each output. Video1-4 outputs the left half. Video 5-8 outputs the right half with the below pixel assignment. Given here as an example of the resolution is 4096 ×...
- Page 435 Chapter 10 INTERFACE SETTINGS (10) MODE9 (Octal Link ) (No Dividing) Video 1 to 8 are used. The screen is not divided, and output by the below pixel assignment. Given here as an example of the resolution is 4096 × 2048, the dot clock frequency is 1188 MHz with the 10 bits output.
-
Page 436: Edid
10.7.4. EDID For further details on the setting procedure, refer to “4.13.3 EDID”. 10.7.5. HDCP For further details on the setting procedure, refer to “6.1 HDCP”. 10.7.6. DDC/CI For further details on the setting procedure, refer to “4.13.4 DDC/CI”. -
Page 437: Analog Output
Chapter 10 INTERFACE SETTINGS 10.8. Analog Output 10.8.1. Connectors and output signals ●VGA(D-SUB) Output Pin no. Signal Pin no. Signal +5 V (DDC power supply *1) DDC DATA GND (R) GND (G) DDC CLK GND (B) *1:Restrictions apply to the supply current of the DDC power supply. Refer to “10.17 Concerning the maximum current consumption of the DDC (DP_PWR) power supply.”... -
Page 438: Analog Output Setting Method
10.8.2. Analog output setting method ⇒ ⇒ MENU ProgramEdit Output Program Edit Timing All Output MENU Group Edit Output Analog Output Auto Edit Audio Digital Output DP Analysis Pattern VBI Function ⇒ ⇒ ⇒ Data Copy/Erase Action Select items by using The [Analog Output] screen is displayed: <Selecting the items>... -
Page 439: Analog Output On/Off Setting
Chapter 10 INTERFACE SETTINGS 10.8.3. Analog Output ON/OFF setting Output OFF/ON Set ON/OFF of each port. The setting with common with “10.2.1 Setting the output interfaces to ON or OFF”, both menu can VGA1(0/1) YPbPr1(0/1) be used for setting. Composite1(0/1) No output. -
Page 440: Audio Off/On Setting
10.8.5. Audio OFF/ON setting This sets ON/OFF of analog audio. Sets ON/OFF of analog audio. Audio is off. Audio is on. 10.8.6. Composite signal filter settings Filter is set to Composite signal. This setting is processed before the chrominance is added to the video signals so that the color burst is not affected. MENU ⇒... -
Page 441: Adjustment Of Video Level Of Component Output
Chapter 10 INTERFACE SETTINGS 10.8.7. Adjustment of Video Level of Component Output This setting adjusts video level of component output. Data should be saved after adjustment. ⇒ MENU Maintenance UNMOUNT : USB Auto Edit MENU FORMAT : Internal Memory DP Analysis INSTALL : Initial Data Data Copy/Erase ADJUST : VGA &... -
Page 442: Adjustment Of Video Level Of Composite Output
10.8.8. Adjustment of Video Level of Composite Output. This setting adjusts video level of composite output. Data should be saved after adjustment. ⇒ MENU Maintenance UNMOUNT : USB Auto Edit MENU FORMAT : Internal Memory DP Analysis INSTALL : Initial Data Data Copy/Erase ADJUST : VGA &... -
Page 443: Digital Audio
Chapter 10 INTERFACE SETTINGS 10.9. Digital audio 10.9.1. Digital audio The operation procedure is described below. Setting the sound source, frequency, level, etc. ⇒ ⇒ ⇒ MENU ProgramEdit Output Digital Audio ProgramEdit Timing Digital Audio Source MENU GroupEdit Output Audio Sweep Sampling Freq AutoEdit Audio (TIM) - Page 444 Setting menu display Sampling Frequency This sets the sampling frequency of digital input (L-PCM). This outputs the signals at a 32 kHz sampling (0-6) 32KHz frequency. This outputs the signals at a 44.1 kHz sampling 44.1KHz frequency. This outputs the signals at a 48 kHz sampling 48KHz frequency.
- Page 445 Chapter 10 INTERFACE SETTINGS 1 ON Output. Frequency This sets the frequency (sine wave) of the audio signals to be output. 20 - 95980 The parameter can be set up to a value that is equal to half of the sampling frequency minus 20 Hz.
-
Page 446: Audio Sweep Settings
<Int. Non L-PCM setting parameters> (option) Setting menu display Set audio data. Setting range: 1 to 99 Flash Data No. It sets the audio data that has been registered previously. Refer to “10.7.3 Flash Data Entry (option).” <Int. DSD setting parameters> (Option)> Setting menu display Output Channel This sets valid or invalid of embedded audio CH1 to CH8. -
Page 447: Aac,Ac3 Audio Data Entry
Chapter 10 INTERFACE SETTINGS 10.9.3. AAC,AC3 Audio Data Entry Save audio data of AAC and AC3 in VG-876. Preparations Audio data and a sample program are saved in the SP-8870 (CD). Audio data should be stored by below Store audio data in a USB memory, and procedures. -
Page 448: Flash Data Entry
Do not take out USB memory or turn off and then press to store the data. the power of the VG-876 until “Complete” appears on the screen. * Groups of audio data up to 64MB created by SP-8870 software can be saved in the VG-876. -
Page 449: Analog Audio
Chapter 10 INTERFACE SETTINGS 10.10. Analog Audio 10.10.1. Connectors and output signals Connector Signal Audio right (R) channel Audio left (L) channel 10.10.2. Analog audio signals Analog audio signals can be output. The operation procedure is described below. a)Set the analog audio to enable. b)Set the sound source, frequency, level, etc. - Page 450 Set the sound source, frequency, level, etc. ⇒ ⇒ MENU ProgramEdit Output Program Edit Analog Audio Timing MENU Group Edit Output Digital Audio Auto Edit Audio Audio Sweep DP Analysis Pattern ⇒ ⇒ ⇒ Data Copy/Erase Action Select items by using By operating above procedure, [Analog Audio] menu appears.
-
Page 451: Synchronization By Several Units Operation
Chapter 10 INTERFACE SETTINGS 10.11. Synchronization by several units operation 10.11.1. Outline By using VM-1876-MX Synchronization units, VG-876 can output resolution such 8Kx4K@60p by synchronizing 2 or 4 sets of VG-876. <HDMI output 8Kx4K@60p operation by using 4 sets of VG-876>... -
Page 452: Connection
10.11.2. Connection Multi-link connection is described as below. ● Connection figure of VG-876’s. Master unit and Slave units are connected by LAN (Straight cable) via HUB. Refer to “10.11.3 VM-1876-MX Setting” about the setting of each Master unit and Slave units. - Page 453 Chapter 10 INTERFACE SETTINGS ● Connection figure of VM-1876-MX’s...
-
Page 454: Vm-1876-Mx Setting
10.11.3. VM-1876-MX setting <VG Config setting> To operate synchronization of several VG units, set Configuration. All VG needs to be set. ⇒ MENU Configuration GroupEdit HDMI MENU AutoEdit DP Analysis Data Copy/Erase HDCP/EDID/CEC check ⇒ ⇒ Configuration VM-1876-MX Select item using By operating as above, the below menu [VM-1876-MX] appears. -
Page 455: Control Operation
Set drawing position of 4 VG units. Auto If DotClock is over 1320MHz, square-split is executed. If DotClock is under 1320MHz, it does not split. 2H/2VDiv Square-split is executed. 4VDiv Vertically 4 split is executed. V2Div Vertically 2 split is executed. (VG-876 x 2 units synchronization) - Page 456 Refer to “10.11.5 Split Mode Image of 4 sets synchronization” or “10.11.6 Split Mode Image of 2 sets synchronization” about output details. Caution The below restriction is applied when synchronizing several VG-876. Item Restriction “Pause” cannot be operated in all units. Only Master unit Scroll stops, and after you release “pause”, the scroll positions...
-
Page 457: Split Mode Image Of 4 Units Synchronization
Chapter 10 INTERFACE SETTINGS 10.11.5. Split Mode Image of 4 units synchronization When synchronizing 4 units of VG-876, the below split mode is supported. Refer to “10.16 Relationships between the pattern drawing bit length, the dividing mode and the dot clock frequency”. - Page 458 《 》 VM-1876-M2 ●Number of Lane = 8 lanes x 4 (8K4K 60Hz) DotClk Split Multi Multi Pattern Image Pattern Image Mode Mode VGMode VGMode Position1 Position2 Position1 Position2 Position3 Position4 1/2lane 3/4lane 1/2lane 3/4lane 1/2lane 3/4lane 1/2lane 3/4lane 1/2lane 3/4lane 1/2lane 3/4lane 5/6lane 7/8lane...
- Page 459 Chapter 10 INTERFACE SETTINGS ●Number of Lane = 16 lanes x 4 (8K4K 120Hz) Split Mode DotClk Multi Multi *Mode10 is not Pattern Image Pattern Image Mode VGMode VGMode supported. Position1 Position2 Position1 Position2 Position3 Position4 9/10 13/14 9/10 13/14 1/2lane 5/6lane 1/2lane...
- Page 460 《 》 VM-1876-M5 * Dual Clock Mode is not supported. Split Mode DotClk Multi Multi *Mode1-9 is not Pattern Image Pattern Image Mode VGMode VGMode supported. Position1 Position2 Mode0 (4Square) Position3 Position4 Note) One connector output: 1920x1080 60Hz,2048x1080 60Hz Quad H2/V2Div V4Div Position1...
-
Page 461: Split Mode Image Of 2 Units Synchronization
Chapter 10 INTERFACE SETTINGS 10.11.6. Split Mode Image of 2 units synchronization When synchronizing 2 units of VG-876, the below split mode is supported. Refer to “10.16 Relationships between the pattern drawing bit length, the dividing mode and the dot clock frequency”. - Page 462 《 》 VM-1876-M2 ●Number of Lane = 16 lanes x 2 (8K4K 60Hz) Note) Dual clock mode is not supported. Pattern Image * Mode10 is supported. Position 3, 4 cannot be set.
-
Page 463: Image Of Scanning Direction
Chapter 10 INTERFACE SETTINGS 10.11.7. Image of scanning direction The scanning direction of “Reverse Mode” in the “Config” setting is described below. The scanning direction can be set in each unit independently. The below images are the image that 4 units are set in the same mode. - Page 464 ●Reverse Mode = Top Bottom ●Reverse Mode = LR & TB...
- Page 465 Chapter 10 INTERFACE SETTINGS 《Multi VGMode = V4Div(Vertical Split)》 ●Reverse Mode = No Reverse ●Reverse Mode = Left Right...
- Page 466 ●Reverse Mode = Top Bottom ●Reverse Mode = LR & TB...
- Page 467 Chapter 10 INTERFACE SETTINGS 《Multi VGMode = V2Div(Vertically 2 split)》 ●Reverse Mode = No Reverse ●Reverse Mode = Left Right...
- Page 468 ●Reverse Mode = Top Bottom ●Reverse Mode = LR & TB...
-
Page 469: Main Specifications
Chapter 10 INTERFACE SETTINGS 10.12. Main specifications 10.12.1. Common specifications Dot clock frequencies Single Clock mode 8 - 10 bit: 0.100 - 340.000 MHz 11 - 12 bit: 0.100 - 320.000 MHz 13 - 16 bit: 0.100 - 240.000 MHz Dual Clock mode 8 - 10 bit: 0.100 - 680.000 MHz 11 - 12 bit: 0.100 - 640.000 MHz... -
Page 470: Hdmi Unit
10.12.2. HDMI unit HDMI Connectors HDMI × 4 Dock Single Clock mode <RGB/YCbCr444> 8 bit: 25 - 300 MHz (TMDSCLK 3GHz) 10 bit: 25 - 240 MHz (TMDSCLK 3GHz) 12 bit: 25 - 200 MHz (TMDSCLK 3GHz) 16 bit: 25 - 150 MHz (TMDSCLK 3GHz) <YCbCr422>... -
Page 471: Displayport Unit (Vm-1876-M1)
Chapter 10 INTERFACE SETTINGS 10.12.3. DisplayPort Unit (VM-1876-M1) This model is discontinued. Refer to the next page for the specification of the current model. Standard VESA DisplayPort Standard Ver1.2a Connector DisplayPort x 2 <RGB/YCbCr444> 6 bit : 25 - 300 MHz 8 bit: 25 - 300 MHz 10 bit: 25 - 240 MHz Single Clock mode... -
Page 472: Displayport Unit (Vm-1876A-M1)
10.12.4. DisplayPort Unit (VM-1876A-M1) Standard VESA DisplayPort Standard Ver1.2a Connector DisplayPort x 2 SST (Single Stream Transport) Transport Mode MST (Multi Stream Transport) Max. 2 streams <RGB/YCbCr444> 6 bit : 25 - 340 MHz 8 bit: 25 - 340 MHz 10 bit: 25 - 340 MHz Single Clock mode <YCbCr422>... - Page 473 ■ Timings list that has not been confirmed Among the timing (VESA/EIA/4K) that VG-876 supports, the below timings have not been confirmed in ASTRODESIGN’s testing environment. The timings can be output, but we cannot fully guarantee its signal quality until we get a appropriate testing tools.
- Page 474 86.4MHz 72MHz 1 lane 72MHz 54MHz 43.2MHz 36MHz Note) The value in this list is standard value (logical value). The pixel clock which is over VG-876’s main unit specification cannot be output. Refer to “10.17.3 DisplayPort Unit (VM-1876A-M1)” for details.
-
Page 475: V-By-One ®Hs Unit
Chapter 10 INTERFACE SETTINGS 10.12.5. V-by-One ®HS Unit Connector V-by-One®HSx4 (16Lane) Number of data lane 1lane 8 bit : 20 to 85 MHz Single clock mode 10 bit : 20 to 85 MHz 12 bit : 20 to 75 MHz Number of data lane 8 bit : 40 to 170 MHz 2lanes... - Page 476 1080Line source image format 1.485Gb/s SMPTE372M 1920 x1080 YCbCr 4:2:2 10bit HD-SDI 60p, 59.94p, 50p DUAL LINK Progressive SMPTE372M 1920 x1080 HD-SDI 60i, 59.94i, 50i YCbCr 4:2:2 12bit 30p, 29.97p, 25p, 34p, 23.98p DUAL LINK YCbCr 4:4:4 12bit 30PsF, 29.97PsF, 25PsF, 24PsF, Interlace YCbCr 4:4:4 10bit Progressive...
- Page 477 Chapter 10 INTERFACE SETTINGS 2160Line source image format DUAL LINK 1.485Gb/s SMPTE435-1M 3840 x 2160 30p, 29.97p, 25p, 24p, 23.98p YCbCr4:2:2 10bit HD-SDI 30PsF, 29.97PsF, 25PsF, 24PsF DUAL LINK Progressive 4096 x 2160 30p, 29.97p, 25p, 24p, 23.98p YCbCr 4:2:2 10bit 30PsF, 29.97PsF, 25PsF, 24PsF 2.97Gb/s SMPTE425-3M...
-
Page 478: Hdmi 6G Unit
10.12.7. HDMI 6G Unit Connector HDMI×2 <RGB/YCbCr444> 8bit : 25 - 300MHz 10bit : 25 - 240MHz Single 12bit : 25 - 200MHz Clock 16bit : 25 - 150MHz Mode <YCbCr422> 8bit : 25 - 300MHz 10bit : 25 - 300MHz 12bit : 25 - 300MHz Dot Clock *1 <RGB/YCbCr444>... -
Page 479: Hdmi Hdcp2.2 Unit
Chapter 10 INTERFACE SETTINGS 10.12.8. HDMI HDCP2.2 Unit Connector HDMI x 4 Single Clock mode <RGB/YCbCr444> 25 – 300 MHz (TMDSCLK 3GHz) 8 bit: 10 bit: 25 – 240 MHz (TMDSCLK 3GHz) 12 bit: 25 - 200 MHz (TMDSCLK 3GHz) <YCbCr422>... - Page 480 [Supported Format] 2D Video Resolution Pixel Format Color Depth Maximum (bits per pixel) Frame Rate (Hz) WVGA SVGA UXGA WUXGA QXGA WQXGA 480p/i 24, 36 YCbCr 4:4:4 YCbCr 4:2:2 16, 24 576p/i 24, 36 YCbCr 4:4:4 YCbCr 4:2:2 16, 24 720p 24, 36 50/60...
-
Page 481: Hdmi 6G Hdcp2.2 Unit
Chapter 10 INTERFACE SETTINGS 10.12.9. HDMI 6G HDCP2.2 unit Connector HDMI×2 <RGB/YCbCr444> 8bit : 25 - 300MHz 10bit : 25 - 240MHz 12bit : 25 - 200MHz 16bit : 25 - 150MHz Single Clock Mode <YCbCr422> 8bit : 25 - 300MHz 10bit :... - Page 482 [VESA format supported by HDMI 6G HDCP2.2 Unit] PrgNo Program Name PrgNo Program Name PrgNo Program Name 1602 VESA640x400@85 1628 VESA1280x800@60 1652 VESA1600x1200@65 1603 VESA720x400@85 1629 VESA1280x800@75 1653 VESA1600x1200@70 1604 VESA640x480@60 1630 VESA1280x800@85 1654 VESA1600x1200@75 1605 VESA640x480@72 1631 VESA1280x800@120CVT 1655 VESA1600x1200@85 1606 VESA640x480@75...
-
Page 483: Itmds Unit
Chapter 10 INTERFACE SETTINGS 10.12.10. iTMDS Unit DVI Connector (x2) Connector DVI MODE 8bit 25 - 165MHz (Single) 50 - 330MHz (Dual) 297 - 660MHz (Quad) 594 - 1320MHz (Octal) 10bit 25 - 165MHz (Single(16bit)) 50 - 330MHz (Dual(16bit)) 12bit 25 - 165MHz (Single(16bit)) 50 - 320MHz (Dual(16bit)) 16bit... -
Page 484: Synchronization Unit
10.12.12. Synchronization Unit REF IN Connector BNC x 1 Signal level To be supported in future Signal standard To be supported in future LINK Connector MDR-26pin connector each 1 line IN/OUT Signal level LVDS 10.13. External Control Dedicated remote controllers RB-1870, RB-1871 Serial control RS-232C... -
Page 485: Connector Specifications
Chapter 10 INTERFACE SETTINGS 10.16. Connector specifications 10.16.1. RS232C-Connector Pin no. Signal TXD (transmitted data) RXD (received data) Shorted with pin 6 FG (frame ground) Shorted with pin 4 CTS (clear to send) RTS (request to send) 10.16.2. Trigger-Connector Pin no. Signal TRIG_OUT3 TRIG_OUT2... -
Page 486: S-Trigger-Connector
10.16.3. S-Trigger-Connector Pin no. Signal STRIG_OUT0 - - STRIG_OUT1 STRIG_OUT2 STRIG_OUT3 - * This is CMOS output operated by 0V to 2.5V. -
Page 487: Relationships Between The Pattern Drawing Bit Length, The Dividing Mode And The Dot Clock Frequency
Chapter 10 INTERFACE SETTINGS 10.17. Relationships between the pattern drawing bit length, the dividing mode and the dot clock frequency There are dependence relationships between the pattern drawing bit length (color depth), the dot clock operation mode (Dotclk Mode), and the dot clock frequency. Pattern drawing bit lengths, dot clock operation modes and dot clock frequencies outside the limits of these relationships cannot be set. - Page 488 Note) Refer to the following section about each detail. 10.2.4 Setting of Dot Clock Operation Mode (DotClk Mode) 10.2.6 Setting the Color Depth (gray scale) for the pattern drawing 10.3.2 HDMI data transmission method 2) When the output video bit length (video width) is 10-bit. Dual Clock Mode When Color Depth <...
- Page 489 Chapter 10 INTERFACE SETTINGS 3) When the output video bit length (video width) is 12 bit. Single Clock Mode When Color Depth < Video Width, data “0” is added. ColorDepth 8Bit 200M 9/10Bit 200M 11/12Bit 200M 13/14/15/16Bit 200M The data is rounded off. 0.1MHz 200MHz 400MHz...
- Page 490 4) When the output video bit length (video width) is 16-bit. Single Clock Mode When Color Depth < Video Width, data “0” is added. ColorDepth 8Bit 150M 9/10Bit 150M 11/12Bit 150M 13/14/15/16Bit 150M The data is rounded off. 0.1MHz 200MHz 400MHz 600MHz 800MHz...
-
Page 491: Displayport Unit (Va-1876-M1)
Chapter 10 INTERFACE SETTINGS 10.17.2. DisplayPort Unit (VA-1876-M1) This model is discontinued. Refer to the 10.6.3 DisplayPort Unit (VM-1876A-M1) for the specification of the current model. The dot clock frequency is restricted by the pattern drawing bit length (Color Depth) and the dividing mode (Split Count) as shown in the figure below. - Page 492 2) When output Video Width is 8-bit Single Mode(Video_Width =8Bit) ColorDepth 8Bit 300M 9/10Bit 300M 11/12Bit 300M The data is rounded off. 0.1MHz 200MHz 400MHz 600MHz 800MHz 1000MHz 1200MHz 1360MHz Dual Mode(Video_Width =8Bit) ColorDepth 8Bit 600M 9/10Bit 600M 11/12Bit 600M The data is rounded off.
- Page 493 Chapter 10 INTERFACE SETTINGS 4) When output Video Width is 12-bit When Color depth < Video Width (=12 bit), Single Mode(Video_Width =12Bit) data “0” is added to lower bits. ColorDepth 8Bit 200M 9/10Bit 200M 11/12Bit 200M 0.1MHz 200MHz 400MHz 600MHz 800MHz 1000MHz 1200MHz...
-
Page 494: Displayport Unit (Vm-1876A-M1)
10.17.3. DisplayPort Unit (VM-1876A-M1) The dot clock frequency is restricted by the pattern drawing bit length (Color Depth) and the dividing mode (Split Count) as shown in the figure below. Data skipping occurs when the output video bit length (Video Width) at this time is less than the pattern drawing bit length (Color Depth). - Page 495 Chapter 10 INTERFACE SETTINGS 2) When Video Width is 8-bit.
- Page 496 3) When Video Width is 10-bit.
- Page 497 Chapter 10 INTERFACE SETTINGS 4) When Video Width is 12-bit This fugure indicates the max. value of dot clock when outputting one picture by using 2 connectors (split drawing). The max. value of dot clock when outputting one picture by one connector is: 8-bit : 600MHz, 9/10-bit : 576MHz, 11/12-bit : 480MHz...
-
Page 498: V-By-One ® Hs Unit
10.17.4. V-by-One ® HS Unit The dot clock frequency is restricted by the pattern drawing bit length (Color Depth) and the dividing mode (Split Count) as shown in the figure below. Data skipping occurs when the output video bit length (Video Width) at this time is less than the pattern drawing bit length (Color Depth). - Page 499 Chapter 10 INTERFACE SETTINGS When the data lane number is 8 Lanes. Dual Clock Mode ColorDepth 8Bit 160M 680M 9/10Bit 160M 680M 11/12Bit 160M 600M 13/14/15/16Bit 160M 480M The data is rounded off. 0.1MHz 200MHz 400MHz 600MHz 800MHz 1000MHz 1200MHz 1360MHz When the data lane number is 16 Lanes.
-
Page 500: Itmds Unit
10.17.5. iTMDS Unit The dot clock frequency is restricted by the pattern drawing bit length (Color Depth) and the Dot Clock Operation mode (DotClk Mode) as shown in the figure below. Data lane numbers are determined by Dot Clock Operation Mode (DotClk Mode). - Page 501 Chapter 10 INTERFACE SETTINGS 2) When iTMDS output...
-
Page 502: Sdi Unit
The DDC power supply incorporates an overcurrent protection device, but do not use a current which exceeds the rating. • Do NOT supply power from a connected device to the VG-876 DDC power supply. If such power is supplied, both the VG-876 and the connected device may be damaged. -
Page 503: License List
Text, data, copy prevention information and other data are superimposed in the vertical blanking interval (VBI) of the TV standard signals, such as NTSC and PAL, and transmitted as multiplexed broadcasts. The VG-876 supports the following functions. Macrovision (Option) Closed caption/V-Chip... -
Page 505: Macrovision
FUNCTIONS AVAILABLE WITH TV STANDARD SIGNALS 11.1. Macrovision 11.1.1. Description and specifications ■ What is “Macrovision”? Macrovision is a copy prevention system developed by ROVI Corporation (previously Macrovision Corporation). Widely used by video sources such as VHS and DVD-Video on the market and by satellite broadcasts, for instance, the system ensures that, by causing the automatic gain control (AGC) of the video decks to malfunction, users will not be able to record properly the video output sources which are protected by the system. -
Page 506: Setting Procedure
11.1.2. Setting procedure ⇒ ⇒ ⇒ MENU ProgramEdit Output VBI Function Program Edit Timing All Output Macrovision MENU Group Edit Output Analog Output Closed Caption Auto Edit Audio Digital Output V-Chip DP Analysis Pattern VBI Function Teletext ⇒ ⇒ ⇒ ⇒... -
Page 507: Chapter11. Functions Available With Tv Standard Signals
Chapter 11 FUNCTIONS AVAILABLE WITH TV STANDARD SIGNALS 11.2. Closed captions/V-Chip 11.2.1. Description and specifications ■ What does the closed caption (CC) function do? Closed captioning was developed in the United States, and it provides broadcasts with subtitles for the hearing impaired so that people who are deaf or hard of hearing can enjoy movies and news programs. -
Page 508: Closed Caption Settings
11.2.2. Closed caption settings ⇒ ⇒ ⇒ MENU ProgramEdit Output VBI Function Program Edit Timing All Output Macrovision MENU Group Edit Output Analog Output Closed Caption Auto Edit Audio Digital Output V-Chip DP Analysis Pattern VBI Function Teletext ⇒ ⇒ ⇒... - Page 509 Chapter 11 FUNCTIONS AVAILABLE WITH TV STANDARD SIGNALS <Table of closed caption setting items> Mode(0-9) The mode is set here. The captions are set to OFF. Closed caption mode 1 is selected here. Closed caption mode 2 is selected here. Closed caption mode 3 is selected here.
- Page 510 ■ The content of Closed caption internal data (1/3) Service Caption style, Line, Color, Character Option setting, etc CC1 to Roll-up2 ROW2 Primary Synchronous Background: black, Caption Service -- CC1 (CC1) transparence Text: white Secondary Synchronous Caption Service -- CC2 (CC2) Special Non-Synchronous Use Captions -- CC3 (CC3)
- Page 511 Chapter 11 FUNCTIONS AVAILABLE WITH TV STANDARD SIGNALS ■The content of Closed caption internal data (2/3) Service Caption style, Line, Color, Option Character setting, etc CC1 to Pop-on ROW12 indent ÁÉÓÚÜü, opening single quote, inverted exclamation mark ROW13 indent ÀÂÇÈÊËëÎÏïÔÙùÛ«» ROW14 indent ÃãÍÌìÒòÕõ{}\^_|~ ROW15 indent...
- Page 512 ■The content of Closed caption internal data (3/3) Service Caption style, Line, Color, Option Character setting, etc Third Text Service -- T3 A Text Mode may be used that consists of data formatted to fill a box which in height is not less than 7 rows and not more than 15 rows (all of which should be contiguous), and in...
-
Page 513: V-Chip Settings
Chapter 11 FUNCTIONS AVAILABLE WITH TV STANDARD SIGNALS 11.2.3. V-Chip settings ⇒ ⇒ ⇒ MENU ProgramEdit Output VBI Function Program Edit Timing All Output Macrovision MENU Group Edit Output Analog Output Closed Caption Auto Edit Audio Digital Output V-Chip DP Analysis Pattern VBI Function Teletext... - Page 514 <Table of V-Chip setting items> System(0-4) The rating system is selected here. The V-Chip is set to OFF here. MPAA is set here. MPAA U.S.TV is set here. U.S.TV Canadian English is set here. English Canadian French is set here. French The names of the rating systems and a brief description of each are presented below.
- Page 515 Chapter 11 FUNCTIONS AVAILABLE WITH TV STANDARD SIGNALS U.S.TV (0-7) These ratings which apply when U.S.TV has been selected as the System setting in (1) above are set here. “All children” is set as the U.S.TV rating. TV-Y “Directed to older children” is set as the TV-Y7 U.S.TV rating.
- Page 516 The names of the U.S. TV rating extension service ratings and a description of each are presented below. FV: Fantasy Violence Acts of fantasy violence = violence in animated features and comics. V: Violence Violence S: Sexual Situations Sexual content L: Adult Language Foul language D: Sexually Suggestive Dialog...
- Page 517 Chapter 11 FUNCTIONS AVAILABLE WITH TV STANDARD SIGNALS The names of the Canadian French ratings and a description of each are presented below. E:Exempt No age restrictions apply. G:General General programming. 8ans+:Not recommended for young children Programming unsuitable for young children 13ans+:Programming may not be suitable for children under 13 Programming unsuitable for children aged 13 and under 16ans+:Programming is not suitable for children under 16...
-
Page 518: Teletext
11.3. Teletext 11.3.1. Description and specifications ■ What is “Teletext”? Teletext is the name of a system used to send still picture program data of text and graphics after multiplexing it in the vertical sync blanking interval of the TV signals. Programs broadcast in Teletext include subtitled broadcasts, news broadcasts, weather forecasts and stock market information. -
Page 519: Setting Procedure
Chapter 11 FUNCTIONS AVAILABLE WITH TV STANDARD SIGNALS 11.3.2. Setting procedure ⇒ ⇒ ⇒ MENU ProgramEdit Output VBI Function Program Edit Timing All Output Macrovision MENU Group Edit Output Analog Output Closed Caption Auto Edit Audio Digital Output V-Chip DP Analysis Pattern VBI Function Teletext... - Page 520 <Table of teletext setting items> Mode(0-2) The Teletext operation mode is selected here. Teletext OFF. The default pages are output. Default For further details, refer to the teletext default on next pages The pages selected by page in (2) below is Page Select output here.
- Page 521 Chapter 11 FUNCTIONS AVAILABLE WITH TV STANDARD SIGNALS ■ Teletext default pages (page 1 of 2) Page Page Description Screen Description Screen Index Page Test Page Including FLASH, CONCEAL Newsflash Subtitle Character Character (English) (German) Character (Swedish Character /Finnish (Italian) /Hungarian) Character Character...
- Page 522 ■ Teletext default pages (page 2 of 2) Page Page Description Screen Description Screen Character (Czech Colors /Slovak) Clock White Flat Cracker Test Multi Page Pattern1 4 sub-pages Test Other Pattern2 pages Screen which appears for page 700...
-
Page 523: Description And Specifications
0 0 1 16:9 Letterbox 1 0 1 >16:9 Letterbox Center 0 1 1 14:9 Full format Center 1 1 1 16:9 Full format Not applicable Bit 3 is the parity bit. •Bit4-13: Other service information (not supported by the VG-876) -
Page 524: Setting Procedure
11.4.2. Setting procedure ⇒ ⇒ ⇒ MENU ProgramEdit Output VBI Function Program Edit Timing All Output Macrovision MENU Group Edit Output Analog Output Closed Caption Auto Edit Audio Digital Output V-Chip DP Analysis Pattern VBI Function Teletext ⇒ ⇒ ⇒ ⇒... - Page 525 Chapter 11 FUNCTIONS AVAILABLE WITH TV STANDARD SIGNALS <Table of WSS setting items> OFF/ON (0/1) Whether the WSS information is to be output is set here. The WSS information is not output. The WSS information is output. Aspect Ratio(0-7) The aspect ratio is set here. The aspect ratio is set to Full Format 4:3.
-
Page 526: Cgms-A/Id-1
11.5. CGMS-A/ID-1 11.5.1. Description and specifications ■ What is CGMS-A (Copy Generation Management System)? CGMS-A is a system of multiplexing the copy control information in the vertical sync blanking intervals, and sending What is ID-1? ID-1 is a system of multiplexing the aspect ratio information in the vertical sync blanking intervals, and sending it. •... -
Page 527: Setting Procedure
Copy is permitted without restriction Condition not to be used One generation of copies may be made No copying is permitted ・ Bit14-9 : Other service information (not supported by the VG-876) ・ Bit20-15 : CRC 11.5.2. Setting procedure ⇒... - Page 528 <Table of the CGMS-A and ID-1 setting items> OFF/ON Field1(0/1) Whether to output the data to line 20 of the first field is set here. The data is not output. The data is output. OFF/ON Field2(0/1) Whether to output the data to line 283 of the second field is set here. The data is not output.
-
Page 529: Chapter12. List Of Error Messages
LIST OF ERROR MESSAGES 12.1. Media-related error Code (HEX) Error message Description Flash ROM(User) Full There is not enough free space in the internal memory. No USB Memory The USB Memory has not been inserted. USB Memory Unformatted The USB Memory has not been formatted. USB Memory Full There is not enough free space on the USB Memory. - Page 530 Code (HEX) Error message Description ‘Burst’ Data Error” Error in the burst pattern data. ‘Window’ Data Error” Error in the window pattern data. ‘Color Bar’ Data Error” Error in the color bar pattern data. TERMINAL) Parameter Error Error in a parameter in the terminal mode. TERMINAL) Data Error Error in the data in the terminal mode.
- Page 531 Chapter 12 LIST OF ERROR MESSAGES Code (HEX) Error message Description ‘V-Timing EQP-Fp’ Over Limit EQP-FP in the vertical timing data is outside the setting range. ‘V-Timing EQP-Bp’ Over Limit EQP-BP in the vertical timing data is outside the setting range. ‘V-Timing’...
-
Page 532: Hdcp-Related Error
12.3. HDCP-related error Code (HEX) Error message Description KSV of the transmitter does not contain twenty ‘0’s and ‘1’s. HDCP) Transmitter KSV Error KSV of the receiver does not contain twenty ‘0’s and ‘1’s. HDCP) Receiver KSV Error During initial validation, the values did not match (R0 ≠ R0’). HDCP) Link Check Error HDCP) Encryption Error Encryption was not completed. -
Page 533: Chapter13. Screen Split Image List
SCREEN SPLIT IMAGE LIST VG-876 supports various image split mode to display4K2K and other high resolution. These image split is different according to the dot clock operation mode. Here, it explains the each image split with pictures. 13.1. Single clock mode Image split When the dot clock operation mode is single clock mode, below image split is supported. -
Page 534: Dual Clock Mode Image Split
13.2. Dual clock mode Image split When the dot clock operation mode is dual clock mode, below image split is supported. When the dot clock is under 680MHz, this is selected. VM-1876-M0 (HDMI) DotClk VM-1876-M6 (HDMI 6G) Mode VM-1876-M1 (DisplayPort) VM-1876-M2 (V-by-One®HS) VM-1876-M5 (SDI) Mode... - Page 535 Chapter 13 SCREEN SPLIT IMGAE LIST DotClk Mode VM-1876A-M1 (DisplayPort) Mode Mode0 (HDiv) Mode1 (VDiv) Mode2 (HDiv) Mode3 (VDiv) Mode4 (No Div) CH2 is same output as CH1. AUTO ※CH2は CH1と同じ出力になります Dual Mode5 CH1/2(O/E) (No Div) Mode6 CH2 is same output as CH1. (No Div) ※CH2は...
-
Page 536: Quad Clock Mode Image Split
13.3. Quad clock mode Image split When the dot clock operation mode is quad clock mode, below image split is supported. When the dot clock is under 1360MHz, this is selected. DotClk VM-1876-M0 (HDMI) VM-1876-M6 (HDMI 6G) Mode VM-1876-M2 (V-by-One®HS) VM-1876-M5 (SDI) Mode VM-1876-M7(HDCP2.2) - Page 537 Chapter 13 SCREEN SPLIT IMGAE LIST DotClk Mode VM-1876A-M1 (DisplayPort) Mode Mode0 (H2/V2Div) Mode1 (V4Div) Mode2 (H2/V2Div) Mode3 (V4Div) Mode4 (V2Div) Mode5 Quad (V2Div) Mode6 (V2Div) Mode7 (V4Div) Mode8 (V4Div) Mode9 CH1/2(O/E) (No Div) AUTO Mode10 (2SI)
-
Page 539: Chapter14. Revision History
Input audio (L-PCM) supported. 10.4.2 V-by-One ® HS setting menu and description 10.5 SDI unit 10.6 Input audio (L-PCM) 1.40 2014/3/14 Add explanation of VG-876 series 10.1.4 HDMI 6G unit 10.3.3 Scramble setting (Program data) 10.3.5 Scramble setting (Config data) 10.3.6 SCDC support 10.6... - Page 540 4.13.6 Correct list of HDMI List example. 4.13 Add SCDC to NAME/LIST. 2.10 2014/10/17 4.13.1 SCDC and SCDC(HEX) is added to Type of Name/List. 4.13.11 Add SCDC pattern. 10.6.2 Add HEX setting to SDI Payload setting. Add “VM-1876-MX” 10.1.7 10.8 Add description for operating by 4 units synchronization.
- Page 541 Chapter 14 REVISION HISTORY 10.8.6 Add split image of 2 sets synchronization. Move “Scanning direction image” to 10.8.7. 10.8.7 10.9.2 10.9.6 Delete 16-bit from 4:2:2 output of HDMI unit. 10.9.8 Add description that 64 pcs of 4K2K BMP files can be read in the caution 4.9.6 of BMP file output setting.
- Page 542 10.4.8 Add explanation that HDCP is not supported in VM-1876A-M1. 10.4.10 Add this item. 10.12.4 Add VM-1876A-M1 support. 10.17.3 Add VM-1876A-M1 support. 13.2 Add image split drawing of VM-1876A-M1. 13.3 Add image split drawing of VM-1876A-M1. 3.2.2 The description about setting unit of Dot Clock Mode that is described 10.2.4 in 3.2.2 is shift to 10.2.4.
- Page 543 VG-876 Instruction Manual Ver. 3.40 ● An incorrectly collated manual or a manual with missing pages will be replaced. ● All copyrights pertaining to this product are the property of ASTRODESIGN,Inc. ● This manual may not be copied in whole or in part without written permission.
Need help?
Do you have a question about the VG-876 and is the answer not in the manual?
Questions and answers