Table of Contents
Advertisement
Advertisement
Table of Contents

Subscribe to Our Youtube Channel
Summary of Contents for MyDean VR3
- Page 1 User Manual ...
-
Page 2: Safety Precautions
Thank you for purchasing VR3 ▪ The VR3 Owner’s Manual is for your convenience and safety when using this product. ▪ Before operating the VR3, and to take full advantage of this multi-functional navigation system, please read the manual carefully and follow its instructions. - Page 3 FCC compliance Information This device complies with part 15 of FCC Rules. Operation is subject to the following two conditions: (1) This device may not cause harmful interference, and (2) This device must accept any interference received, including interference that may cause undesired operation. Information to the user NOTE: This equipment has been tested and found to comply with the limits for a Class B digital device, pursuant to part 15 of the FCC Rules.
- Page 4 Table of Contents 1. GETTING STARTED ....................5 C ) ........5 OMPONENTS DEFAULT OPTION E VR3 .......... 6 XTERNAL PPEARANCE OF I ........9 NSTALLING EHICLE T ..........10 AKING OUT EMORY T ............10 URNING OWER ...
-
Page 5: Getting Started
1. Getting Started Components (default+option) SD MEMORY CARD VR3 MAIN BODY CRADLE SD CARD READER CIGARETTEi JACK AV IN CABLE AC-DC ADAPTER REMOCON ... -
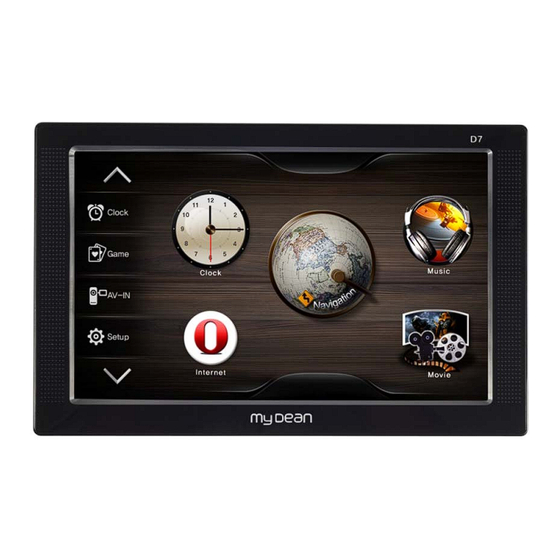
Page 6: Front View
External Appearance of VR3 (Front View) ② ① (Front side information) Operate all functions by touching the screen with the stylus Touch screen pen provided. Remote Control sensor Operate various functions with Remocon (Option) ... - Page 7 (Rear View) ① ② ③ ④ (Rear Side Information) Receives GPS signal from satellite. In order to make GPS Antenna reception efficiency better, you should maintain the antenna horizontal to the sky. External connection in order to improve reception efficiency External GPS of GPS.
- Page 8 (Side View) ① ② ③ ⑥ ④ ⑦ ⑤ ⑧ (Side Information) Connect external video and audio device. AV-OUT (option) It sends out composite video and stereo audio. Connect a rear camera. Rear-Cam It detects rear gear automatically. Refer to “using Rear-cam” for detailed information. AV-in Connect external video and audio device Earphone Jack...
-
Page 9: In Your Vehicle
When adjusting angle of the GPS receiver, make sure that it has a clear and horizontal view of the sky. If power from the cigarette jack is not connected, VR3 will not work. Owing to high number of thefts, please remove your VR3 from view when you leave you car. - Page 10 Taking out Memory Card Press Memory Card lightly. Turning Power On Connect power (cigar jack or AC adaptor) to the VR3. 1) After power is connected the LED on front panel turns on and after 2seconds the Logo Screen is displayed.
- Page 11 It supports multi-tasking, so you can listen to music while navigation is on. Navigation instructions take precedence over other sound applications. Configuration of Main Menu Screen ⑧ ① ⑨ ② ⑩ ⑪ ③④⑤⑥ ⑦ 1.Hide/show bar An icon for hiding and showing main menu Move to pre/next page of left menu bar Left Menu bar page movement key...
-
Page 12: Programs And Its Basic Operation
2. Programs and its Basic Operation Using Music Icon 1) Getting started Execute this by pressing Music icon on the Main Menu. It plays music files. ⑫ ⑧ ⑨ ⑩ ⑬ ⑪ ⑭ ① ② ③ ④ ⑤ ⑥ ⑦... -
Page 13: Icon
11. Screen - It shows file information, genre, and lyrics. 12. Main Menu Return to main menu and continue to play the music. 13. Play List Page Change play list page. 14. Progress Bar Shows the process time of the current playing file. ... - Page 14 8. Time Shows current time. 9. Close Close the viewer and return to main menu. Next Skip to the next file shows images 11. Screen (If you touch the screen it changes in full screen, and it returns to default screen once you touch again) 12.
-
Page 15: Viewer
Video conversion 1. Resolution : 640x480 2. Frame per second : 15-20 fps 3. Bit rate : 150 Kbps, (250 kbps for fast moving pictures) 4. Codec : divx4 Audio conversion 5. Bit rate : 64kbps 6. Sampling rate : 44KHz 7. - Page 16 Note: Press the Open button to select image files to display. Be sure to save the selected play list and go back to the main play screen. Using the Clock 1) Getting Started Start this by pressing the Clock icon in the Main Menu. 2) Configuration of Screen The current date and time are displayed on the entire screen.
- Page 17 ⑤ ⑥ ③ ④ ① ② File New game, Game restart, Game history, Close menus Option Select options for Menu Hide and Freecell Game New game Start new game Game start Restart game Menu hide Hide the top menu Close Close the game and return to main menu In order to move a card, select (touch) the card to move and touch a new location to place it.
- Page 18 AV Connector assignment 2) Configuration of Screen You can see the video screen and sound supplied from to AV-IN jack. If you touch the screen, current set volume, volume button, close button as shown below are displayed. These buttons disappear after 3 seconds ④...
- Page 19 Using Setup This consists of 7 icons. This can be operated by touching screen. Getting Started ⑧ ① ② ③ ④ ⑤ ⑥ ⑦ 1.Brightness Start the Back Light control settings. 2.Calibration Calibrate the touch screen control 3.Sound setting Start the Sound control settings.
- Page 20 1) How to Regulate LCD Brightness ② ① 1.Backlight Control Control the display backlight 2.Close Return to main menu screen. 2) Calibration If you feel that the touch panel is not accurate, you can calibrate it with this application. ...
- Page 21 3) Sound setting ② ① 1 Sound Select the Button sound and System Starting Sound 2 Close Return to main menu screen. 4) System setting ⑥ ① ② ③ ④ ⑤ Start Menu Select start menu – basic menu, navigation, Audio player, Video player Select screen saver –...
- Page 22 Background Update Booting image Reset Select GPS Rest, OS Upgrade, Factory Reset. Option Select TV OUT-Enable, Disable. Close Return to main menu screen. *note: GPS reset should be activated in the open sky after closing all programs. Wait for about 5minute and check the GPS signal reception in map. 5) System It shows the version information on embedded applications.
- Page 23 1 Remote Control Select Remote Control-Enable, Disable. 2 Maker Select Maker type-Hyundai, User Setting, Reset 3 Close Return to main menu screen. In case of user setting, after you select a button you have to click same button in car handle remocon within 3 seconds. If it is late “time is over” message is shown. If you see this message you have to do same procedure again.
-
Page 24: Additional Functions
1 Address Type Select Address Type-DHCP, STATIC 2 IP Info Shows IP Address, Subnet Mask, Default Gateway 3 DNS Server Shows DNS1, DNS2 4 Close Return to Setup menu. 8) Close By pressing Close button on screen you can return to Main Menu. 3. - Page 25 Screen Save The screen saver starts after 10 seconds of inaction. The Analogue clock is displayed. Touch the screen to exit the screen saver. ...
-
Page 26: Common Knowledge On Gps
Using Remocon (Optional) POWER Turn on and off screen and sound. MUTE Mute sound Confirm VOL ▲ Maximize volume VOL ▼ Minimize volume ◀◀ CH Move previous in multimedia player CH ▶▶ Move next in multimedia player NAVI Launch navigation AV IN MULTI Launch multimedia program... -
Page 27: O Ccurrence In Gps
GPS satellite C, Distance C, and positioning point Intersection point of 3 sections, Principle of GPS positioning GPS Satellite B GPS Satellite C GPS Satellite A Distance B Distance C Distance A Measuring point (Intersection point of 3 sections) [How to measure position via GPS] GPS is accompanied with about 5m~15m error even though SA does not activate during single positioning (absolute positioning, 1 point positioning) where position is measured by only one receiver, so the single positioning method is being utilized mainly for... -
Page 28: Support Guide
In C/A code, horizontal error combined with all errors is 28m when SA does not activate and 100m when SA activates. SA code means enlargement of error range so that United States may limit use by non- allowed GPS satellite users during military operation. Basically, GPS is not much affected by weather. - Page 29 Cautions during Use ① Only use the power adaptor provided with this navigation system. If other adapters are used, there is a risk of system malfunction and fire. ② Be careful that no foreign materials enter your CNS7100, as this may seriously damage the internal parts.
- Page 30 AV-out: For connecting external monitor R-cam: For connecting rear camera , Auto detect Serial Port: 2 ports Weight 360g Dimension(WxHxD) 196 mm x 120 mm x 16.5 mm OPERATING -10℃ ~ 60℃ TEMPERATURE ...
Need help?
Do you have a question about the VR3 and is the answer not in the manual?
Questions and answers
Resetting pass word
@Mr Gloslie J Francis