Table of Contents
Advertisement
Quick Links
Advertisement
Table of Contents

Subscribe to Our Youtube Channel
Related Manuals for Vivitar Camelio2


Summary of Contents for Vivitar Camelio2
- Page 1 Android Family Tablet User Manual ...
- Page 2 CONTENT FEATURES ..................... 3 1.1 About Your Camelio2™ Tablet ...................... 3 1.2 What’s Included .......................... 3 GETTING STARTED .................. 4 Tablet .................... 4 2.1 Getting to Know Your Camelio 2.2 Charging Your Tablet ........................ 5 2.3 Powering On Your Tablet ......................... 5 2.4 Locking and Unlocking Your Tablet .................... 5 INITIAL SET UP .................... 8 3.1 Choosing a Language ........................ 8 3.2 Selecting Wi‐Fi .......................... 8 3.3 Google Account Set Up ........................ 9 3.4 License Agreement ......................... 13 3.5 Tutorial ............................ 14 ...
- Page 3 TOOL BAR SHORTCUTS ................ 48 10.1 Camera ............................ 49 10.2 Photo Editor ........................... 53 10.3 Apps .............................. 56 10.4 Contacts ............................ 58 10.5 Parental Control .......................... 67 TABLET SPECIFICATIONS ................. 68 VIVITAR ONE YEAR WARRANTY .............. 69 FAQ ....................... 72 ...
-
Page 4: Features
FEATURES Thank you for purchasing the Camelio2™ Android Family Tablet by Vivitar®! About Your Camelio2™ Tablet The Vivitar® Camelio2™ Android Family Tablet is a unique Android tablet that allows you to customize and personalize your tablet with your favorite characters! Up to 5 users (and an additional parent user) can easily create their own profile and customize their account with Camelio “Theme Packs”, sold separately in the Camelio Customizer Kit. The Theme Manager allows you to add Theme Packs and includes customized wallpaper, widgets, camera and photo editor. The Camelio2™ Android Family Tablet is equipped with all of the features parents have come to expect from a family tablet: built in Wi‐Fi, Bluetooth, front and rear cameras, video, touch screen and parental controls. The Camelio2™ Android Family Tablet is the ultimate in customized functionality and fun for the entire family! What’s Included • Latest Android Operating System • Theme Manager lets you personalize your Tablet with your favorite characters adding as many as you want and changing as often as you want • Supports 5 users ‐ each with their own theme and application preferences • Separate Parental Controls for each theme • Built‐in Bluetooth • High Resolution (1024x600) 7 Inch display • Front & Rear Cameras • Built In Google Play Store lets you download hundreds of thousands of free apps and apps available for purchase • Extra Long Life Battery 3 ... -
Page 5: Getting Started
GETTING STARTED Tablet Getting to Know Your Camelio FRONT BACK 1. FRONT CAMERA: Front‐facing camera. 9. USB/CHARGE: Using the USB cable, your 2. TOUCH LCD SCREEN: Display screen that is tablet can be connected to the computer also an input device to the tablet. The and recharged. orientation of the display screen rotates with 10. MICROPHONE: Used for audio chatting the tablet as you turn it. and sound recording. 3. RESET: Resets the tablet. 11. HEADPHONE JACK: Audio output jack 4. BACK CAMERA: Rear‐facing camera. for earphone. NOTE: Speaker output is 5. SPEAKER: Exports sounds. automatically disabled when headphone is 6. VOL‐: Decreases the volume. connected to the tablet. 7. MICRO SD CARD PORT 12. POWER ON/OFF BUTTON: Press to 8. VOL+: Increases the volume. turn the tablet on, or to turn the screen on and off (standby). Press and hold to access the power off menu. 4 ... -
Page 6: Charging Your Tablet
Charging Your Tablet You need to charge the tablet for at least 3 hours; however, we suggest that you charge the tablet overnight before you use it for the first time. Tablet is supplied with a USB cable and AC Charger. To charge your The Camelio tablet, connect the USB cable to your Tablet on one end and connect the other end of the USB cable to either your computer USB Port or to the AC Charger (which is then connected to an electric outlet). Powering On Your Tablet Once your tablet is fully charged, press and hold the Power button for 2 seconds to turn on your Tablet. NOTE: ‐ In order to power off our Tablet, press and hold the Power button for 2 seconds. A window appears with mode options. Touch Poweroff, and then touch OK to confirm. ‐ When your Tablet is in Sleep Mode, simply press the Power button to re‐ activate your Tablet. Locking and Unlocking Your Tablet 2.4.1 Locking Your Tablet After your Tablet has been powered on, to lock your Tablet quick press the Power button. 2.4.2 Automatic Lock / Sleep Mode Your tablet includes an Automatic Lock. After the tablet has been inactive for a period of time it will go into Sleep Mode. This saves battery power and requires a shorter activation time. This also automatically locks your Tablet and the Tablet Lock screen appears. In order to use your tablet you will need to unlock it. 5 ... - Page 7 NOTE: The length of time your Tablet remains inactive before going into Sleep Mode can be modified. To change the length of time: • Enter the Android Settings by touching the Settings icon ‘Apps’ screen. from the Android • Touch Display to open the Tablet Display features. • Touch the Sleep feature to open the ‘Sleep’ window. This displays the list of time options. • Select a length of time you would like your Tablet to be inactive prior to going into Sleep Mode. 2.4.3 Unlocking Your Tablet To unlock your tablet and activate the Home screen, touch and hold the Lock icon. When it turns into a circle drag it towards the right, to the Unlock icon. Once unlocked, the Home screen interface is activated. NOTE: To unlock and activate the camera, touch and hold the Lock icon, and when it turns into a circle drag it towards the left, to the Camera icon. 2.4.4 Unlocking Your Tablet – When User is Locked via Parental Controls If you have set the Parental Control to ON and have locked the user, the Password must be entered to unlock your tablet once it has been in standby mode or has been powered on and you have swiped it to the unlock icon. To unlock your tablet and activate the Home screen: 6 ...
- Page 8 Touch and hold the Lock icon. When it turns into a circle drag it towards the right, to the Unlock icon. If there is more than one user, then touch the desired user name from the list. Enter the Password for the selected user then touch Next. 2.4.5 Unlocking App When Launching a Locked App When the Parental Control is set to ON and you have set up the applications that require the Parental Lock Code, these applications then require the Parental password to be entered before launching them. Enter the password and then touch Unlock to unlock and launch the application. 7 ...
-
Page 9: Initial Set Up
INITIAL SET UP When turning on for the very first time, your Camelio2™ Tablet will prompt you through a set up process with easy steps including choosing the language, selecting Wi‐Fi, viewing the license agreement, and the setting up Parental Control including Google account registration. NOTE: It is recommended to fully charge your tablet before first use. Choosing a Language Touch one of the language options on the ‘Welcome’ screen to select the on screen language for your Camelio2™ Tablet. The language options include English, Spanish (SA), French, Portuguese (BR) and German. Touch Next to continue. NOTE: You can set your tablet to other languages included in the tablet’s Settings. This will only set the language for the Android Setup menus. Selecting Wi‐Fi The ‘Select Wi‐Fi’ screen appears with a list of available networks. Touch one of the available Wi‐Fi connections listed on screen. If the Wi‐Fi connects automatically, touch Connect. If a password is required you will be prompted to first type in the Wi‐Fi password and then touch Connect. If you choose to continue the setup without connecting to a Wi‐Fi network, touch Skip. 8 ... -
Page 10: Google Account Set Up
Google Account Set Up Next, the ‘Got Google?’ screen appears. You must add a Google Account in order to use Parental Control, Gmail or other Google Apps that require an active Google Account. If you don’t have a Google Account you can create one. Once you have created a new account or registered your existing account, you can set up the Parental Controls during the Initial Set up. The Google Account Set Up can be accessed in the following ways: • During the Initial Setup before setting up Parental Controls you will be prompted to follow the instructions to add a Google Account. Follow the instructions to add your Google Account. • It can also be set manually at any time by using the Android Settings. To access the Android Settings: Touch Apps, then touch the Settings app. Under the ‘WIRELESS & NETWORKS’ setting option, make sure Wi‐Fi is ON and connected. Under the setting option ‘ACCOUNTS’, touch +Add Account and then touch Google. Follow the instructions to either sign in or create a new Google account. How to Add a Google Account once you have accessed the Google Set Up: • Touch Yes if you already have a Google Account and continue to the instructions: Sign into Your Google Account • Touch No if you do not have a Google Account and continue to the instructions: Create a New Google Account 9 ... - Page 11 3.3.1 Sign into Your Google Account If you have a Google Account and have touched Yes on the ‘Got Google?’ screen, please follow the instructions below. NOTE: A Wi‐Fi connection is required to register your Google account. If you are not connected to Wi‐Fi, you will be prompted to connect your tablet to a Wi‐Fi network. Touch Next when the connection is complete. Please see SelectingWi‐Fi for further information regarding Wi‐Fi set up. SIGN IN To sign into your account enter your Email and Password using the onscreen keyboard, and touch Next or Done to continue. Then touch OK to agree to the window that appears regarding Terms of Service, Privacy Policy, and Google Play Terms of Service. NOTE: You may be required to sign in on the web. If you are prompted to do so, touch Next to start browser sign‐in and follow the instructions. You may be prompted to join Google +. Touch Join Google + to join or continue without joining by touching Notnow. GOOGLE SERVICES: The Google services option appears. The default is the option to keep you up to date with news and offers from Google Play. If you do not want this option, then touch the box to un‐check it. Touch Next to continue. Next, you may be prompted to setup payment information. Touch Continue to continue the payment process or SKIP to continue in the Google setup. 10 ...
- Page 12 PERSONALIZATION OF TABLET: Next you will be prompted to enter your name in order to allow the tablet to personalize some apps. 3.3.2 Create a New Google Account If you do not have a Google Account and have touched No on the ‘Got Google?’ screen, please follow these instructions. GET AN ACCOUNT: The ‘Make it Google’ screen appears. To create a new Google account, touch the Get an account button. If you decide not to create a new account, touch Notnow to continue with the tablet setup. ENTER NAME: You will be prompted to enter your first and last name. Touch Next or Done once complete. 11 ...
- Page 13 CHOOSE USERNAME: Enter a username, which will be your email, then touch Next or Done. NOTE: The email entered will be checked for availability. PERSONALIZATION OF ACCOUNT: Next, the screen appears with your entered name, which will be used to personalize your tablet and Google services. CREATE PASSWORD/ PASSWORD RECOVERY OPTIONS: Type your password for your account (minimum of 8 characters) and retype to confirm your password. Touch Done when complete. Then touch Set up recovery options if you would like to use Google password recovery, or touch Notnow to continue. GOOGLE SERVICES: Next, the Google services option appears. The default is the option to keep you up to date with news and offers from Google Play and to back up your data to your Google account. If you do not want this option, then touch each box to un‐ check it. Touch Next to continue. FINISH ACCOUNT ‐ TERMS OF 12 ...
-
Page 14: License Agreement
SERVICE/AUTHENTICATE: Touch I accept to accept the Google Terms of Service, Privacy Policy and Google Play Terms of Service. Then, to authenticate your account, type the word displayed in the text field. Touch Next to finish setting up your Google account. Next, you may be prompted to setup payment information. Touch Continue to continue the payment process or SKIP to complete the Google setup. NOTE: If you were at the initial set up of the Parental Controls when you were prompted to register your Google Account, then after you finish registering your Google Account, you will automatically return to the Parental Control set up. For more information regarding Parental Control Set Up see the ‘ParentalControl’ section. License Agreement Review the End User License Agreement and then touch I Agree to continue to the Tutorial. 13 ... -
Page 15: Tutorial
Tutorial A video tutorial begins playing introducing you to the incredible world of the Tablet. Touch Skip if you would like to stop the video tutorial and Camelio continue the setup. NOTE: If you would like to watch the Camelio™ Tablet Tutorial video again, touch the Settings icon located on the Tabbed Apps Manager on the Home screen, and then touch Tutorial. Parental Control Set Up The Parental Control Set Up allows you to have full control of what your child can access on the tablet. The following options appear: • NEXT: Touch Next to continue to the Parental Control set up. See the ‘Parental Control’ section for more information about setting up your Parental Control. • SKIP: Touch Skip to continue to the Home screen without setting up Parental Control. • REMIND ME LATER: Touch Remindmelater to continue to the Home screen. Each time the tablet is powered on, a notification will be displayed on the status bar reminding you to set up the Parental Controls. NOTE: ‐ If you choose ‘Skip’ or ‘Remind me Later’ during this initial tablet set up, you can setup your Parental Control settings at any time by opening the Apps list. ParentalControl app from the ‐ Upon initial Parental Control set up (or when accessing Gmail or the Google Play Store for the first time), you will be prompted to register a Google account by either signing in to an existing one or by creating a new account. For more information regarding Parental Control Set Up see the ‘Parental Control’ section. ... -
Page 16: Home Screen
HOME SCREEN Portrait and Landscape Orientation Once you have completed the Initial Setup the Home screen appears. The orientation of the display screen rotates with the tablet as you turn it. Landscape Orientation Portrait Orientation 15 ... -
Page 17: Home Screen Interface
Home Screen Interface 3 4 5 9 10 11 12 13 14 15 16 1. Page counter Image Editor 2. Theme Switcher 10. Back 3. Wi‐Fi Connection Signal 11. Camera 4. Battery Power Level 12. Android Apps Mode 5. Time 13. -
Page 18: Home Screen Features
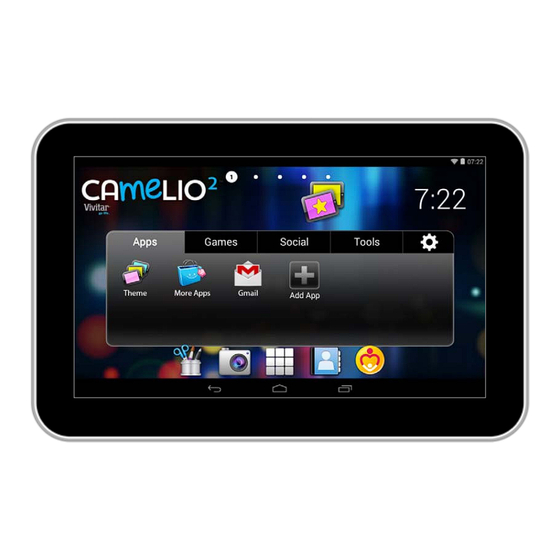
Home Screen Features The main Home screen is the main entry point to your Camelio2™ Tablet. The Tabbed Apps Manager allows you to easily organize and create shortcuts to your favorite applications. The bottom tool bar allows quick access to all the main functions on your tablet. 4.3.1 Tabbed Apps Manager Shortcuts APPS Select the Apps tab to view, add and organize app shortcuts. Select ThemeManager to switch your tablet to different purchased themes. This is included in the Apps tab. GAMES Select the Games tab to view, add and organize app shortcuts to your favorite games. SOCIAL Select the Social tab to view, add and organize app shortcuts to your favorite social apps. TOOLS Select the Tools tab to view, add and organize app shortcuts to your favorite tablet tool apps. Select Settings to Add/Remove Apps, view the online User Manual, online Help and About. See ‘Tabbed Apps Manager’ for more details. 4.3.2 Tool Bar Shortcuts Select PhotoEditor to edit photos, add frames and clipart items. Select Camera to to take pictures and record videos. Select the Appsscreen to access all the applications on your tablet. ... - Page 19 Select a tab on the Tabbed Apps Manager, and then touch the Add App icon. NOTE: • The Add App icon only appears when the selected Tabbed App has room for additional shortcuts. • Alternatively, touch the Settings icon to open the ‘Settings’ screen, then select Add/Remove apps. The list of all your applications on your tablet appears on the ‘Add application’ screen. Alternatively, you can also touch the Plus icon next to one of the tab names if accessing the list using the Settings icon. Touch an app to choose the one you would like to add. The shortcut displays in the selected tab on the Tabbed Apps Manager. To remove an App from the Tabbed Apps Manager: Touch the Settings icon and then select Add/Remove apps. In the ‘Add/Remove Apps’ screen, touch the Minus icon next to one of the listed apps to remove the shortcut from the Tabbed Apps Manager. See ‘Tabbed Apps Manager’ for more details. 4.3.4 Change Home Screen Wallpaper Touch and hold on a Home screen (not including the first Home page) until the ‘Choose wallpaper’ window appears. Touch Camelio (‘Theme Name’) Wallpapers or Gallery to open a selection of Wallpaper images. Touch an image to view the Wallpaper in the background. ...
- Page 20 Touch the Appsscreen icon on the bottom tool bar to open the ‘APPS’ screen that displays a list of your Android tablet’s applications. Choose an application you would like to add as a short cut and then long touch and drag the selected application to the desired Home screen. The application shortcut will then appear on the selected Home screen. NOTE: • Application shortcuts cannot be added to the first Home screen using the directions outlined above. Use the Tabbed Apps Manager to add shortcuts on the first Home Page. • To move a shortcut: Touch and hold on a shortcut, then drag it to a different Home screen to move it to the selected Home screen. • To remove a shortcut: Touch and hold the added shortcut until the Remove icon appears on the screen. Then drag the shortcut to the Remove icon. When the shortcut and Remove icon turn red, release your touch and the shortcut will be removed. 4.3.6 Add Widgets to the Home Screen Touch the Appsscreen icon to open the ‘APPS’ screen that displays a list of your tablet’s applications. Touch the WIDGETS tab to open the list of your tablet’s widgets. Choose a widget you would like to add and then long touch and drag the selected widget to the desired Home screen. The widget will then appear on the selected Home screen. NOTE: • Widgets cannot be added to the first Home screen. • To move a widget: Touch and hold on a widget, then drag it to a different Home screen to move it to the selected Home screen. •...
-
Page 21: Over The Air Updates (Ota)
OVER THE AIR UPDATES (OTA) The Camelio2™ Tablet Software updates are available over the air. When your Tablet is connected to Wi‐Fi, the system automatically checks for software updates. Notification of an available software update will be sent wirelessly to your Tablet. 1. DOWNLOAD THE ‘THEME MANGER’ UPDATE: A notification window appears when there is a new version of your purchased Theme is available. • If you would like to upgrade, touch Upgrade to begin the download and installation process. The download then begins and will take some time. Progress can be seen in the Notifications bar. • If you would like to exit the upgrade window without upgrading, touch Cancel to exit and return to the previous screen. 2. INSTALL THE ‘THEME MANAGER’ UPDATE: A notification window appears showing that your purchased Theme has been downloaded. Touch Install to begin installing the update. To exit without installing the application upgrade touch Cancel. 3. INSTALL CONFIRMATION: A window asking if you want to install this application appears and notifies you what the app will get access to do. Touch Install to confirm and complete the installation. To exit without installing the application upgrade touch Cancel. ... -
Page 22: Tabbed Apps Manager
TABBED APPS MANAGER The Tabbed Apps Manager allows you to easily organize and create shortcuts to your favorite apps. These apps can be added to the Home screen Tabbed Apps Manager. You can organize and manage your Apps by placing the shortcuts in the selected tab. The Tab Apps Manager includes the following tabs: Apps, Games, Social, Tools Add App Shortcut Using the Tabbed Apps Manager SELECT A TAB First touch a Tab to select it. For example, the Apps Tab is the default Tab and is selected in the image below. SELECT AN APPLICATION TO ADD Touch the AddApp icon. The Add App icon appears when the Tab has room for additional shortcuts. 21 ... - Page 23 NOTE: You can also touch the Setting icon on the Tabbed Apps Manager to add and remove App shortcuts. For more information, please refer to the section: ‘Add/Remove App Shortcut Using the App Settings’. The list of the available Apps currently on your tablet appears on the screen. Touch an App to choose the one you would like to display in the selected Tab. VIEW THE SHORTCUT View the added shortcut of your selected App on the Tabbed Apps Manager. 22 ...
-
Page 24: Add/Remove App Shortcut Using The App Settings
Add/Remove App Shortcut Using the App Settings App shortcuts can also be added from the AppSettings icon on the Tabbed Apps Manager. This also allows you to remove an App shortcut from the Tabbed Apps Manager. ACCESS THE APP SETTINGS: Touch the AppSettings Icon to open the ‘Settings’ window. ACCESS THE ‘ADD/REMOVE APPS’ OPTIONS: Touch Add/Remove Apps to open the ‘Add/Remove Apps’ screen. The current App shortcuts displayed in each Tab appears listed under the name of each Tab. 23 ... - Page 25 ACCESS THE ‘ADD APPLICATION’ LIST: Choose which Tab you would like to add an App shortcut: ‘Apps’, ‘Games’, ‘Social’, or ‘Tools’ Touch the AddApp icon (plus symbol) to the right of that Tab name. The ‘Add Application’ screen appears displaying the list of all your Tablet Apps. NOTE: The same ‘Add Application’ Apps list appears for each Tab (‘Apps’, ‘Games’, ‘Social’, ‘Tools’) when adding an App shortcut. 24 ...
- Page 26 ADD APP SHORTCUT TO SELECTED TAB: Touch one of the listed Apps to choose the one you would like to add. The App shortcut appears within the selected Tab. REMOVE APP SHORTCUT FROM SELECTED TAB: To remove an App shortcut from the Tabbed Apps Manager: • Touch the AppSettings Icon to open the ‘Settings’ window. • Touch Add/Remove Apps to open the ‘Add/Remove Apps’ screen. • The list of current App shortcuts appears for each Tab. • Touch the RemoveApp icon (minus symbol) next to one of the listed App shortcuts to automatically remove the selected App shortcut from the Tab. 25 ...
-
Page 27: More Apps
More Apps The ‘More Apps’ shortcut offers you quick access to download some of the most popular Apps from the Google Play Store. Touch the MoreApps icon to open the ‘More Apps’ screen. Touch one of the App icons displayed on the ‘More Apps’ screen to begin the selected App download and installation process. NOTE: Make sure the Tablet is connected to a Wi‐Fi network and that you have signed into your Google Account. • WI‐FI: If you are not connected to a Wi‐Fi network, a window appears and notifies you to check your connection and try again. Touch Connect to open the ‘Settings’ window. Turn Wi‐Fi ON and select an available network connection. • GOOGLE ACCOUNT: If you have not already signed into your Google account, you will be prompted to sign into an existing account or create a new one. The window displays the selected app information page. Touch Install to install the application to your Tablet. 26 ... -
Page 28: Parental Control
PARENTAL CONTROL Overview The Parental Control feature can be accessed by touching the ParentalControl AndroidApps and then icon on the first Home screen. Alternatively, touch touch ParentalControl from the Apps list. The Parental Control allows you to specify which Apps can be accessed and used by your children. Once you activate Parental Control, add your user information and set your Lock Code, you can then control for each user which Apps can be launched with/without a code as well as control the usage time for applications. Welcome to Parental Control SELECTING PARENTAL CONTROL ON/OFF: Touch ParentalControl to launch the app. When first launching the app (during initial set up) the default setting is OFF. To activate the Parental Control, touch the ‘Turn Parental Control On’ OFF option to activate it ON. 27 ... -
Page 29: Parental Control Set Up
NOTE: You will be prompted to register a Google account, if you have not already completed this. Touch Register to continue with the Google account registration. See the Google Account Set Up section for more details regarding Google Account registration. Parental Control Set up: The Parental Control can be activated to ON once you have a registered Google Account. Touch the SetUp button to continue the Parental Control set up. Touch the ? (Question Mark) buttonto view the online Help and About. NOTE: As soon as Parental Control is set to ‘ON’, the following apps are locked and require the Parent Lock Code to enter: • Parental Control App. • ‘Manage Users’ from the Theme Manager App. 28 ... - Page 30 PARENTAL CONTROL SET UP > STEP 1 USER INFORMATION: Next, you will be prompted to enter your first name, last name and email. Enter your user information then touch Next. NOTE: • Your existing Google email or the new Google account you defined during the Initial Setup will automatically appear. If you do not have a Google Account, you will be prompted to create a new account. • A notification will be sent to your email Account with your name and Parental Control Lock Code details. PARENTAL CONTROL SET UP > STEP 2 SETTING THE LOCK CODE: Enter a 4‐digit Parental Lock Code and touch Next (from the onscreen keyboard). Then re‐enter the Lock Code to confirm and touch Done (from the onscreen keyboard). Touch Next to continue. 29 ...
- Page 31 PARENTAL CONTROL SET UP > STEP 3 USER SETTINGS LIST: Each User appears with the following setting options: • Unlock: The default setting is Unlocked. This means no password is required to enter the selected user when launching the tablet or waking the tablet from Sleep Mode. Lock: To enable password protection, touch the unlock icon and it will change to the Lock icon. This means that the password, as set for the selected user, will need to be entered when launching the tablet or waking the tablet from Sleep Mode. • Set/Edit Parental Controls: Touch the Edit icon to open the ‘Select apps for safe environment’ screen. This will enable you to set the Parental Controls for the selected user. Back: Touch Back to return to the Parental Control Lock Code screen. FinishSetup: Touch FinishSetup to save the Parental information and user lock settings. A message will be sent to your email with your user information and Parental Control Lock Code. Any time you change your user information or Lock Code and then touch FinishSetup, an email will be sent with the updated information. 30 ...
- Page 32 PARENTAL CONTROL SET UP > SELECT APPS FOR SAFE ENVIRONMENT Touch the Edit icon from the Parental Control User Settings list. If you have more than one user, make sure to touch the Edit icon that is displayed by the user for whom you want to set the controls. See the Add Users section on more information about how to add users. Select apps for safe environment The ‘Select apps for safe environment’ screen opens. You can now set the Parental Controls for the selected user. 31 ...
- Page 33 To change the setting for an application: Touch ON or OFF button to the right of the App to toggle between the ON/OFF options and select the desired Parental Control lock setting for each app. Swipe your finger across the tablet to the right/left to view the continued list of Apps. The following options are available: • OFF: Indicates that the selected App will automatically launch without entering the Parental Lock Code. If you would like to quickly deactivate all Apps with the Parental Control Lock set to ‘OFF’ on all Apps, you can touch UnselectAll. • ON: Indicates that the Parental Control has been activated for the selected App and your Parental Lock Code is required to be entered in order to launch that App. When the user tries to launch the locked app, a Parental Control notification appears in the status bar. Touch the ParentalControlnotification icon to open the Unlock app screen and enter the Parental Lock Code. If you would like to quickly activate all Apps at once with the Parental Control Lock ‘ON’ you can touch SelectAll. • Select All: All apps are set to ‘ON’ • Unselect All: All apps are set to ‘OFF’ • Next: Touch Next to continue to the ‘Parental Daily Limits’ settings. • Back: Touch Back to return to the ‘Select apps for safe environment’ screen. NOTE: When opening the ‘Select apps for safe environment’ screen for the first time, all Apps are by default selected with the ‘OFF’ setting. When you have completed setting the apps you would like to be Next to continue setting your Parental Controls. locked, touch ...
- Page 34 All applications that you have not locked with the Parental Control appear in the ‘Parental Daily Limits’ screen. This setting allows you to control the amount these unlocked apps can be used on daily basis (based on 24 hours). The following options are available: OFF: The default setting is OFF. This indicates that there is no ‐ time limit. All applications can be used for an indefinite time. ‐ ON: When turned ON, each application can be set to be in use on a daily basis as per Hours: Minutes. The default time is set to 24:00. Once the application’s set daily time limit has expired, the app automatically closes and is locked for the remainder of the day. Each time the user wants to re‐launch the application for the remainder of the day, the app will need to be unlocked with the Parental Lock Code. A ParentalControl notification appears on the status bar and allows you to unlock the application. To unlock the app, touch the ParentalControlnotification icon to open the Unlock App screen and enter the Parental Lock Code. This will then unlock and launch the application. ‐ Bonus Hour: Touch Bonus Hour to add an hour to the use of all apps listed in the Parental Daily Limits list. The one hour is divided between all the applications no matter what time has been set per app. You can add more than one Bonus Hour per day. NOTE: The Bonus Hour needs to be reset on a daily basis. 33 ...
- Page 35 The next day, all settings go back to the regular settings without the additional time set by the Bonus Hour. Next: Touch Next to continue to the ‘Global Limits’ settings. Back: Touch Back to return to the ‘Select apps for safe environment’ screen. To activate Parental Daily Limits: • Activate the setting but touching the OFF button. The button then changes to the ON setting. • Touch the time to the right of an application and set the time (Hour : Minutes). • Touch Done/OK to set the daily time limits. • Swipe your finger across the tablet to the right/left to view the continued list of Apps and set as desired. When you have completed setting the apps to be locked, touch Next to continue setting your Parental Controls. PARENTAL CONTROL SET UP > GLOBAL TIME LIMITS All applications that you have not locked with the Parental Lock Code apply to the ‘Global Time Limits’ setting. These settings allow you to control how many hours each user can use the tablet per day and per week. The following options are available: 34 ...
- Page 36 ‐ OFF: The default setting is OFF. This indicates that there is no global time limit set. ‐ ON: Touch the OFF button to turn ON. When turned ON, the applications can be set to be in use as per Hours: Minutes. The default time is set to 24:00. • Time Limit Per Day: The Global Time Limits allows you to set the access to apps for a specific number of hours per day. The time is accumulated based on the use of apps. The default is 24 hours. • Time Limit Per Week: The Global Time Limits allows you to set the access for the specific number of days per week. The time is counted based on the use of applications Sunday through Sunday. The default is 168 hours. • Time Reminder: Touch the time next to the ‘Time Reminder’ to add a notification that appears before the expiration time. The time can be setting according to Hours: Minutes (up to 24 hours). Back: Touch Back to return to the ‘Parental Daily Limits’ screen. Finish Setup: Touch FinishSetup to save your Parental Control settings and return to the User Option List screen. NOTE: You must touch FinishSetup in the Global Limits screen in order to save all of the Parental Control Settings you have set for the selected user. If you exit Parental Control at any stage without touching FinishSetup on this screen, then your settings will not be saved. You will then need to re‐enter the Parental Control for that user and re‐enter your settings. FINISHING THE PARENTAL CONTROL SET UP Touch FinishSetup from the Global Time Limits screen to save the Parental Controls you have set for the selected user and then return to the User Settings List screen. From the Users Settings List, touch the FinishSetup to return to ...
-
Page 37: Theme Manager
THEME MANAGER Overview The Theme Manager is a special feature that allows your Camelio2™ Tablet to change into your favorite character with a Theme App Card (may be included or sold separately – check the packaging of your tablet). You can add as many Themes as you like from a large catalog of characters such as Hello Kitty, My Little Pony, Avengers, Teenage Mutant Ninja Turtles and many more. Avengers Theme Hello Kitty Theme Monster High Theme My Little Pony Theme Hot Wheels Theme WWE Theme 36 ... -
Page 38: Using The Theme Manager
Using the Theme Manager LAUNCHING THE THEME MANAGER: To open the Theme Manager App options, touch the Theme shortcut icon on the ‘Apps’ Tabbed Apps Manager from the first Home screen. Alternatively, touch the Apps icon and then the Theme Manager icon. The ‘Theme Manager’ screen appears. NOTE: Make sure your tablet is connected to a Wi‐Fi network. In order to see the latest online list of Themes you will need to be connected to the Internet. 37 ... - Page 39 ACCESSING THE ONLINE CATALOG: From the ‘Theme Manager’ screen, touch the Add/Change Theme button to open the online catalog of Themes. From this online list, you can choose to add and download new Themes. You can also select a purchased Theme and switch your tablet to that Theme. ADDING AND DOWNLOADING A NEW THEME: ADD: To add a new Theme, touch the ADD button by the selected Theme. The ‘Activate Theme’ screen appears. 38 ...
- Page 40 ACTIVATE NEW THEME: Enter your first name, family name, email and serial number. Touch Done (from the onscreen keyboard) once you have completed entering the information. NOTE: The serial number is shown on the Theme App Card included in the Camelio Customizer Kit. Camelio Customizer Kit sold separately. Monster High App Card with serial number (sold separately) Touch the ACTIVATE button to download and begin using your newly added Theme. Keep in mind that the download process may take several moments. Collect all your favorite characters! 39 ...
- Page 41 PURCHASED THEME: Once the download is complete the button by the new Theme changes from ADD to PURCHASED. This identifies a Theme that you have purchased and a Theme that can be applied to your Tablet at any time. SELECTING THE PURCHASED THEME: The Vivitar Theme is the default Tablet Theme and is automatically selected upon initial use. The Vivitar Theme automatically displays the SELECTED button. This indicates the current, selected Tablet Theme. Once you have purchased and added new Themes you can change the Theme at any time by touching the PURCHASED button of the Theme you want. The selected Theme will then appear with the highlighted SELECTED button and your tablet will automatically change into the Theme you have selected. NOTE: The Home screen functionality is identical on all the different themes. 40 ...
- Page 42 SWITCHING THEMES: Once you have selected a new Theme, your tablet is now personalized and activated with this Theme. To add and change Themes, follow the instructions as described in the previous steps. Remember, you can add as many Themes as you like from a large catalog of characters. NOTE: A Theme can be selected for a specific User and can be changed for each user at any time. See the ‘Add Users’ section for more details. The following illustrates an example of switching Themes: How the Tablet appears when changing from the ‘Vivitar’ Theme to the purchased ‘Monster High’ Theme (sold separately). Current Theme ‐ Vivitar: New Theme – Monster High: 41 ...
-
Page 43: Add Users
To easily change between your purchased Themes, touch the Switch Theme icon from the Home screen or from the Apps screen. The ThemeSwitcher displays all of your purchased Themes and allows you to easily scroll through them and then select the Theme you would like your 2 Camelio to transform into. To add a new purchased Theme, touch the Add New Theme button and follow the instructions as outlined in the previous steps to add your new Theme. ADD USERS Overview You can add up to five different users (and an additional parent user) on your Camelio2™ Tablet. Each user can have his/her own Theme, profile picture, application favorites displaying on the Tabbed Apps Manager and Parental Control settings. 42 ... -
Page 44: Adding A New User
Adding a New User LAUNCHING THE THEME MANAGER: To manage the users of your Tablet, touch the Theme Manager app shortcut icon on the ‘Apps’ Tabbed App Manager from the Home screen. Alternatively, touch the Apps icon and then Theme Manager icon. ACCESSING ‘MANAGE USERS’: Once the Theme Manager app is open, touch ManageUsers. 43 ... - Page 45 ADDING FIRST NEW USER: The first time you activate the ManageUsers feature, the ‘Add User’ screen appears. You will be prompted to add a Name, Profile Image, and select a Theme. Touch AddUser to add a new user. • ADDING A NAME Enter the user’s first name and last name. When complete touch Done from the onscreen keyboard. • SELECTING A PROFILE IMAGE You can change the default profile picture by touching the Profile Image itself and selecting an existing photo on your Tablet (from the Gallery, Photos or Documents). • SELECTING A THEME The current Theme for the User appears below the Profile Image. Touch ChangeTheme to open the ‘Add/Change Theme’ options. The current theme is displayed with the Selected button and check mark icon. If you have already purchased and added a new Theme, the Theme is displayed with a Purchased button. To change to a different Theme, touch a Purchased Theme button. See ‘Theme Manager’ for more information on how to add new Themes. 44 ...
-
Page 46: Adding Additional Users
NOTE: ‐ The default Theme is the ‘Vivitar’ Theme. If you have not yet purchased additional Themes, the Vivitar will be the available Theme. ‐ The ADD icon by the Theme indicates that the Theme is available for purchase. A serial number is required to add a new Theme (included in the Theme Packs ‐ sold separately). ‐ The User’s Theme can be changed at any time to one of the different Purchased Themes. Each User can select his/her own Theme. • COMPLETING THE ADDITION OF THE NEW USER Once you have entered the User first and last name (and if you have selected a Profile Picture and Theme) touch OK to create the new User. NOTE: If you have selected a different Theme, your chosen Theme automatically appears on your Tablet after you have touched OK. Adding Additional Users 45 ... - Page 47 9.3.1 Adding More Users To add more Users: Touch the Theme app shortcut icon on the ‘Apps’ Tabbed App Manager from the Home screen to open the ‘Theme Manager’ screen. Apps icon and then Theme Manager Alternatively, touch the icon to open the ‘Theme Manager’ screen. Touch ManageUsers to open the ‘Manage Users’ screen. The current User is highlighted. Touch AddUser to open the ‘Add New User’ screen. Follow the steps above (Section 10.2) to define the new user First/Last Name, Profile Image, and Theme. NOTE: You can include up to five new Users (not including the parent user). 9.3.2 Deleting a User To delete a User: Touch the Theme app shortcut icon on the ‘Apps’ Tabbed App Manager from the Home screen to open the ‘Theme Manager’ screen. Alternatively, touch the Apps icon and then Theme Manager icon to open the ‘Theme Manager’ screen. Touch ManageUsers to open the ‘Manage Users’ screen. The list of available Users is shown with the current User highlighted. Touch a User’s name from the list to select and highlight it. Touch Delete to automatically delete the selected User. NOTE: A parent user cannot be deleted, or if there is no parent user, the first added user cannot be deleted. 9.3.3 Switching User ...
-
Page 48: Multiple Users
Touch ManageUsers to open the ‘Manage Users’ screen. The list of available Users is shown with the current User highlighted. That User’s Theme is also displayed. If you have more than three users, scroll down/up to see the other users. Touch the desired User Name to select and highlight that User from the list of Users. Touch Switch to this User. Your tablet automatically changes and opens to the Home screen of the selected User’s Theme and settings. Current User (highlighted) Multiple Users If you have added multiple Users to your tablet, a User will need to be selected after the tablet has either been powered on or been in standby/sleep mode. Unlock the Tablet after powering on or waking up the Tablet. Once you have unlocked your tablet, the list of available Users appears. Touch one of the User names listed to activate your customized tablet (as per the selected User’s settings) and experience the ever changing world of the Camelio2™ Tablet! NOTE: If the selected User requires a password as set via the Parental Controls, the User will then be prompted to enter their password in order to unlock the tablet. See the Locking and Unlocking Your Tablet section for more information regarding how to unlock your tablet. 47 ... -
Page 49: Tool Bar Shortcuts
10. TOOL BAR SHORTCUTS The main Home screen is the entry point to your Camelio2™ Tablet. The bottom tool bar allows quick access to exciting functions on your Tablet. The Tabbed Apps Manager allows you to easily organize and create shortcuts to your favorite apps. The Home screen includes the following Tool Bar App shortcuts: Touch Photo Editor to edit photos, add frames and clipart items. TouchCamera to take pictures and record videos. TouchAppsto view the available apps on your tablet. TouchContacts to add and edit your contacts. TouchParental Control to specify which apps can be used by your children. NOTE: The Home screen also includes quick access to the ThemeManager and SwitchTheme. Touch Theme Manager to add, purchase and switch your tablet to different Themes. The Theme Manager also allows you to manage the users. Touch SwitchTheme toquickly and easily change to one of your themes – purchased separately. 48 ... -
Page 50: Camera
10.1 Camera Use your device’s built‐in camera to take pictures and record videos. To access your Camera: ‐ From the Home screen, touch the Camera icon. ‐ Alternatively, touch the Apps icon from the Home screen and then the ThemeCamera applicationicon. 10.1.1 Taking Pictures From the Home screen, touch Camera. Alternatively, touch Apps and then touch ThemeCamera. The default Capture Mode is set to take photos – Photo Capture Mode. If needed, touch the Camera icon to set the Tablet for Photo Capture Mode. Using the display as a viewfinder, compose your picture by aiming the lens at the subject. ‐ To Zoom: Slide your finger on the Zoom line on the screen towards the (+) Zoom In or (‐) Zoom Out to focus on the area you want. ‐ To configure settings, see ‘Camera Settings’. To take the picture, touch the Take Photo button. To view your image after taking a picture, touch the ImageViewer (the thumbnail image of your last captured photo) to view the 49 ... - Page 51 picture in the ‘Gallery’ application. NOTE: Images can be deleted from the ‘Gallery’ app. Touch Back or the Camera icon to return to the Capture Mode to take more photos or videos. Switch Camera: NOTE: ‐ Touch the SwitchCamera icon to switch between the Frontand Rear Camera. ‐ Switch to the Front Camera for Self‐Portraits. 10.1.2 Camera Settings CameraSettings icon to open the Camera Settings Touch the options. Touch one of the options to configure the camera: ‐ White Balance: Tap one of the White Balance options to choose a setting for the light source. The options include: Auto, Incandescent, Daylight, Fluorescent, Cloudy. ‐ SCN Scene mode: Tap one of the Scene Mode options to choose a setting for the scene mode to match conditions. The SCN options include: Auto, Night ‐ Camera Settings: The Camera Settings includes the following settings: Store location: Enable or disable tagging of pictures with the GPS location. The Store Location options include: Off, On Picture size: The picture size allows you to set the resolution of the photo. The Picture Size options include: 2M pixels, 1Mpixels, VGA (touch the arrows to toggle between the options) Picture quality: The Picture quality setting sets the quality of ...
- Page 52 Help: Access theOnline Camelio2™ Tablet Help. You will need to be signed into your Google account or will be prompted to create an account if needed. About: Display the Camera version. 10.1.3 Capturing Video From the Home screen, touch Camera. Alternatively, touch Apps and then touch ThemeCamera. The default Camera Mode is set to take photos – Photo Capture Mode. Touch the Video button to set the Tablet for Video Capture Mode. Using the display as a viewfinder, compose your video by aiming the lens at the subject. ‐ To Zoom: Slide your finger on the Zoom line on the screen towards the (+) Zoom In or (‐) Zoom Out to focus on the area you want. ‐ To configure settings, see ‘Camcorder Settings’. To start recording, touch the Record Video button. During recording, the red Record icon appears with the elapsed recording time. The Record Video button changes to red. To stop recording, touch the RecordVideo button again. After taking a video, touch the ImageViewer (the thumbnail image of your last captured video) to view the video in the Gallery application. Images can be deleted from the ‘Gallery’ app. NOTE: Touch Back to return to the Capture Mode to take more photos or videos. Switch Camcorder ...
- Page 53 Touch the Settings options. Touch one of the options to configure the camcorder: ‐ White Balance: Tap one of the White Balance options to choose a setting for the light source. The options include: Auto, Incandescent, Daylight, Fluorescent, Cloudy. ‐ Time Lapse Interval: Choose a value to set the time lapse: Off, 1s, 1.5s, 2s, 2.5s, 3s, 5s, 10s ‐ Camera Settings: Store location:Store location: Enable or disable tagging of pictures with the GPS location. The Store Location options include: Off, On Restore defaults: Set all Camera settings to the factory defaults. Help: Access theOnline Camelio2™ Tablet Help. You will need to be signed into your Google account or will be prompted to create an account if needed. About: Displays the Camera version. 10.1.5 Sharing Your Captured Photos Touch the Share button to open the ‘Share’ window and select how you would like to share your photos with your family and friends. Take a photo. The captured photo appears in the ‘Image Viewer’ (the thumbnail image by the Share button). Share button. The ‘Share’ window opens. Touch the Choose a sending method, then follow the prompts to share via: Facebook, Twitter, Email, Picasa, Flickr NOTE: You will be prompted to sign in to the selected social networking site. In order to share your photos using Facebook, please make sure ...
-
Page 54: Photo Editor
10.1.6 Switching to Photo Editor Touch the PhotoEditor icon to switch from the Camera app to the Photo Editor app. 10.2 Photo Editor Enhance your pictures, by adding frames and clipart to share with family and friends. To access the Photo Editor: ‐ From the Home screen, touch the Photo Editor icon. ‐ Alternatively, touch the Apps icon and then the ThemePhoto Editor icon. 10.2.1 Menu Options 53 ... - Page 55 Touch the Menu/Settings icon to view the Photo Editor Menu options: Select picture ‐ Selects a picture to edit. Save – Saves changes made using the editor. Save a copy – Saves a copy of the edited photo. Reset – Resets the photo to its original image. Help – Opens the online Help. About – Displays the device Build version, Copyrights. 10.2.2 Viewing and Saving Pictures Selecting a picture: To select pictures to edit, touch Menu and Selectpicture to view picture thumbnails. Scroll through then your pictures, and then touch a picture thumbnail to display it in the media view area. Saving changes: To save the picture after editing it, touch Menuand then Save. Saving a copy: To save a copy of a picture after editing it and without changing 54 ...
- Page 56 the original picture, touch Menu and then Save a copy. Resetting pictures: To go back to the original picture without any changes after editing it, touch Menu and then Reset. 10.2.3 Enhancing Your Image Touch the Enhance tab to auto enhance, crop or rotate your photo. AUTO ENHANCING A PICTURE Select a photo. Select the Enhance tab and then touch the AutoEnhance icon to auto improve your picture. CROPPING A PICTURE Select a photo. Crop icon to open Select the Enhance tab and then touch the the picture in the Crop mode. Touch and drag the Box outlined in orange over the area that you want to crop. To resize the box to the size you want, touch and drag the sides of the box to enlarge or reduce the size of the crop area. Touch Save to crop the picture or Cancel to return to the picture without cropping it. ROTATING A PICTURE Select a photo. Select the Enhance tab and then touch the Rotate icon to rotate the picture 90 degrees to the right. ...
-
Page 57: Apps
Select the Frames tab and then touch one of the frames that appears on the bottom of the screen to add it to the picture. Touch and drag the picture to reposition it within the frame. Pinch the picture to increase or reduce the picture size. 10.2.5 Adding Clipart Touch the Clipart tab to add fun and exciting clipart to your photo. Select a photo. Select the Clipart tab and then touch one of the clipart items that appears on the left side of the screen to add it to the picture. You can add multiple clipart items to a picture. Touch and drag the clipart to reposition it within the picture. Pinch the clipart to increase or reduce the clipart size. 10.2.6 Sharing Pictures Touch the Share tab to open the ‘Share’ your photos with your family and friends. Select a picture. Share tab. Touch the Choose a sending method, then follow the prompts to share via: Facebook, Twitter, Email, Picasa, Flickr NOTE: You will be prompted to sign in to the selected social networking site. In order to share your photos using Facebook, please make sure to first install the Facebook App on your tablet and then log in. 10.2.7 Switching to Camera Camera icon to switch from the Photo Editor app to Touch the the Camera app. 10.3 Apps ... - Page 58 From the Home screen, touch the Apps icon to access all Applications on your Camelio2™Tablet. 10.3.1 Managing Applications/Widgets Apps icon. From the Home screen, touch the The ‘APPS’ screen appears as the default and lists all applications installed on your Tablet. The ‘APPS’ tab includes multiple screens. Browse the list of Apps by sliding your finger left or right across the screen until the next screen appears. When you install new apps, additional screens may be added to display them. The ‘WIDGETS’ tab is next to the ‘APPS’ tab. Touch the WIDGETS tab to view the list of all Widgets installed on your Tablet. 10.3.2 Adding shortcuts from Apps to the Home Screen Apps icon. From the Home screen, touch the Touch and hold on an App or Widget, then drag it to a Home screen. The selected shortcut then appears on the Home screen. To remove a Shortcut, touch and hold the Shortcut until Remove appears at the bottom of the screen, then drag Remove icon. the Shortcut to the NOTE: APPS and WIDGETS shortcuts cannot be added to the first Home screen. 10.3.3 Downloading and Installing New Apps from the Google Play Store Make sure your tablet is connected to a Wi‐Fi network. Apps icon. From the Home screen, touch the Touch the ...
-
Page 59: Contacts
10.3.4 Uninstalling Apps You can uninstall the additional Apps you have downloaded and installed. NOTE: Pre‐loaded applications cannot be uninstalled. From the Home screen, touch the Apps icon. Touch the Settings icon, and then touch Apps from the Settings list. The list of your downloaded Apps appears under the ‘Downloaded’ tab. Touch an App to select it and then touch Uninstall and follow the prompts to uninstall the app. 10.4 Contacts The Contacts app allows you to create contacts that you can share, send emails, add to groups and mark as favorites. To access your Contacts: ‐ From the Home screen, touch theContacts icon. ‐ Alternatively, touch the Apps icon and then the ThemeContacts icon. ‐ Select the Contacts Tab to view all contacts. 10.4.1 Creating a New Contact 58 ... - Page 60 Touch the New Contact icon from the Contacts Main Screen to add a new contact. This opens the ‘Save contact to’ screen. From the ‘Save contact to’ screen, touch Device to save the account to your tablet Contacts only, or touch an account for synchronizing the contact (available options depend on the accounts you have set up for synchronization). After selecting where to save the contact, the ‘New Contact’ window appears. Touch the Photo Thumbnail icon to select an existing photo from the Gallery or to take a new photo that will identify the contact. Enter the contact’s First and Last name in the Name fields using the onscreen keyboard. Touch the More Information icon to enter additional name related fields such as the contact’s Middle name, Name Suffix, and more. Touch the LessInformation icon to minimize the details to view the first and last name. NOTE: You can touch the return button on the keyboard after each field is complete to move to the next field. 59 ...
- Page 61 Continue entering the contact’s information as specified ‐ including Phone, Email, IM, Groups, Postal Address and Organization. You can change the Contact Label for Phone, Email and IM by touching a current ContactLabel. A list then appears of the label options. Touch one of the options to select it and change the label according to the contact information you have entered. Touch the ‘Plus’ icon to add new fields for the contact. Touch the ‘Minus’ icon to remove a contact field. Touch the More icon below the ‘Organization’ field to view additional contact fields including Notes, Nickname, Webaddress, Events, Birthday, Anniversary, Other and Internetcall. Touch Done when you have finished entering the contact information to save the contact details and exit to the Main Contacts screen. Touch Cancel to exit without saving the new contact details. 10.4.2 Managing Your Contacts UPDATING CONTACTS To Edit a Contact: ‐ Touch a name from the Contacts list to select it. ‐ Touch the Edit button to edit the selected Contact’s information. ‐ Touch Contact fields to modify information. ‐ When you finish entering the information, touch Done. To Delete a Contact: ‐ Touch a name from the Contacts list to select it. ‐ Touch the Delete button to delete the selected Contact. ‐ At the prompt, touch OK to proceed with deleting the Contact. ‐ Touch Cancel to return to Contacts without deleting the Contact. NOTE: Deleting a contact when sync is enabled will ...
- Page 62 Touch the Menu icon to open the Contact Menu options and then touch Contacts to display to choose contacts to display. Touch to display either All Contacts, Device, one of your accounts or Customize List of contacts. NOTE: ‘Customize List’ defines a custom view. Select the options you want to restrict the view. CHOOSING HOW CONTACTS DISPLAY Touch the Menu icon to open the Contact Menu options and then scroll down to select Settings. The following options appear: Only contacts with phones, List by, Display contacts by ‐ Touch Onlycontactwithphones to display contacts that have phone numbers. ‐ Touch Listby to sort contacts by first or last name. ‐ Touch Displaycontactsby to show contacts by first or last name. EXPORTING AND IMPORTING CONTACTS To back up and restore your Contact information, you can export your contact list to another device, or import your contact list (previously exported) from another device. Touch the Menu icon to open the Contact Menu options and then touch Import/Export. The following options appear: Import from SD card, Export to SD card via ‐ Import from internal memory ‐ Export to internal memory ‐ Touch Sharenamecardvia to export the contact details using email. Please make sure your email account details have been set up. If you have not yet set up your email account you will be prompted to do so. ...
- Page 63 You can send contact namecards as vCards via the listed sharing applications. NOTE: If you have not yet set up your email, you need to set up an account from the device settings. To set up a Gmail account: Touch the Apps icon from the Main menu then touch Settings. Touch Accounts& sync to add an account and follow the instructions to complete the Gmail setup. Not all devices support transfers of multiple contacts. Please check the target device’s documentation. Touch Menu to open the Contact Menu options and then touch Share namecard via. Select contacts, then touch Send. Follow the prompts to send via your selected email account. JOINING CONTACTS You may have multiple contacts for one person. When you join contacts, all the contact’s information is displayed in one contact record. Select a Contact. Touch the Menu icon to open the Contact Menu options and then scroll down and touch Joincontact. Alternatively, touch the Connection icon from the contact details. Select the contact you want to be joined together with the previously selected contact (step #1) and then touch Join. To edit a joined Contact: ‐ Select a contact with joined information. ‐ Touch Edit then touch SelectJoinedContact. ‐ Select one contact shown in the ‘Select Contact’ list to edit the selected contact information. ‐ Touch Done once you have finished editing the contact details. To separate a joined Contact: ‐ Select a contact with joined information. ...
- Page 64 ‐ Select the contact to un‐join, and then touch OK to confirm. QUICK ACCESS TO MANAGING YOUR CONTACT INFORMATION To quickly access and manage your contact information: Touch the Contacts Tab. Select a Contact from the Contacts List. Touch and hold down on the selected Contact until a window appears with the Contact name and list of menu options. Select an option and follow the prompts to manage your Contact. 10.4.3 Groups CREATING GROUPS Touch the Groups Tab. Touch the New Group icon to add a new group. Enter a group name in the field and then touch Done. Select the new group from the list on the left and then touch the Menu icon to open the Group Menu options. ‐ Select AddGroupMember. A list of your contacts appears. ‐ Select group members by touching the box on the right of each contact to check it off. ‐ When you have finished selecting contacts to add to your group, touch OK to save and exit. The Group members you have selected for your new Group now appear to the right of the Groups list. NOTE: The selected Group is highlighted. 63 ...
- Page 65 MANAGING YOUR GROUPS Updating Groups Touch a Group to select and display the Group details. To edit the selected Group’s Name: ‐ Touch the Menu icon and then Edit Group Name. ‐ Edit the group name then touch OK to save the changes. To delete the selected Group: ‐ Touch the Menu iconand then Delete Group. ‐ At the prompt, touch OK. NOTE: New groups that you have added can be deleted. The default Groups which are part of the app cannot be deleted. Adding Group Members Touch a Group to select and display the Group details. Touch the Menu iconand then Add Group Member. Touch to check off and select group members and then touch OK to add them. NOTE: Group members can also be removed from the group by un‐checking them. Removing Group Members Touch a Group to select and display the Group details. Touch the Menu iconand then Remove Group Member. Touch to check off and select group members and then touch OK to remove them. Editing Group Members Touch a Group to select and display the Group details. Touch the Menu icon and then EditGroupMember. Touch to check off and select a group member and touch OK. 64 ...
- Page 66 Touch contact fields to modify information. When you finish entering information, touch Done. Sending a Message to Group Members Touch a Group to select and display the Group details. Touch the Menu iconand then Send Email to create a new email. Follow the prompts to compose and send the email. QUICK ACCESS TO MANAGING YOUR CONTACT INFORMATION To quickly access and manage your group information: Touch the Groups Tab. Select a Group from the Group List. Touch and hold down on the selected Group from the Group List until a window appears with the group name and list of menu options. Select an option and follow the prompts to manage the Group. 10.4.4 Favorites MARKING FAVORITES Mark your contacts with a star to identify them as Favorites. Your Favorites display in the Favorites Tab for fast viewing or messaging, and are indicated by a yellow star in the Contact list. 65 ...
- Page 67 Touch the Contacts Tab. To add your Contact as a Favorite: Touch the gray Star on the Contact to mark it. When marked, the star is yellow – indicating that it has been added to Favorites. A message appears on the screen: ‘Contact Name’ has been added to Favorites. To remove your Contact as a Favorite: Touch a yellow Star to remove the Favorites mark. The star appears gray – indicating that it is not included as a Favorite. A message appears on the screen: ‘Contact Name’ has been removed from Favorites. Alternatively, you can add or remove Favorites from the Favorites Tab using the Favorites Menu options. ‐ Touch the Favorites Tab. ‐ To add Contacts as Favorites: Touch the Menu icon to open the Favorites Menu options. Touch AddFavorites. The list of your Contacts appears. Check off the box by the contacts you would like to add as Favorites. Touch OK to save your selected Favorites. ‐ To remove contacts as Favorites: Touch the Menu icon. Touch RemoveFavorites. The list of your Contacts appears. 66 ...
-
Page 68: Parental Control
Check off the box by the contacts you would like to remove as Favorites. Touch OK to save your selection and update your Favorites list. QUICK ACCESS TO MANAGING YOUR FAVORITES LIST To quickly access and manage your Favorites list: Select the Favorites Tab. Select a Contact from the list. Touch and hold down on the selected Contact until a window appears with the Contact name and list of menu options. Select an option and follow the prompts to manage the selected Contact. 10.5 Parental Control Please refer to the ‘Parental Control’ section of this manual for details. 67 ... -
Page 69: Tablet Specifications
11. TABLET SPECIFICATIONS OS ANDROID 4.4.4 Kit Kat RAM 1GB DDR3 Storage 8GB Nand‐Flash Screen Size 7 Inch Screen Resolution 1024*600 Pixels Touch Screen Wireless Connection WI‐FI 802.11b/g/n Cameras Front Camera (0.3M Pixels CMOS) Rear Camera (2.0M Pixels CMOS) Audio Headphone jack. Speaker. Built‐in Microphone. Battery Rechargeable Built‐in Lithium Battery Power Adapter 5V/1.5A Weight 300g Dimension 191.3 *11.7 *116.5mm ... -
Page 70: Vivitar One Year Warranty
12. VIVITAR ONE YEAR WARRANTY This warranty covers the original consumer purchaser only and is not transferable. This warranty covers products that fail to function properly UNDERNORMALUSAGE, due to defects in material or workmanship. Your product will be repaired or replaced at no charge for parts or labor for a period of one year. What Is Not Covered by Warranty Damages or malfunctions not resulting from defects in material or workmanship and damages or malfunctions from other than normal use, including but limited to, repair by unauthorized parties, tampering, modification or accident. Warranty Service and Troubleshooting Information To obtain Warranty Service and Troubleshooting information: Call 1‐877‐236‐0183 in the U.S. or 0‐800‐917‐4831 in the UK or Visit our website at www.vivitar.com. To receive Warranty service along with the name and address of an authorized product service center, the original consumer purchaser must contact us for problem determination and service procedures. Proof of purchase in the form of a bill of sale or receipted invoice, evidencing that the Product is within the applicable Warranty period(s), MUST be presented in order to obtain the requested service. It is your responsibility to properly package and send any defective products along with a dated copy of proof of purchase, a written explanation of the problem, and a valid return address to the authorized service center at your expense. Do not include any other items or accessories with the defective product. Any products received by the authorized service center that are not covered by warranty will be returned unrepaired. 69 ... - Page 71 NO WARRANTIES, WHETHER EXPRESS OR IMPLIED, INCLUDING, BUT NOT LIMITED TO, ANY IMPLIED WARRANTIES OF MERCHANTABILITY OR FITNESS FOR A PARTICULAR PURPOSE, OTHER THAN THOSE EXPRESSLY DESCRIBED ABOVE SHALL APPLY. DISTRIBUTOR FURTHER DISCLAIMS ALL WARRANTIES AFTER THE EXPRESS WARRANTY PERIOD STATED ABOVE. NO OTHER EXPRESS WARRANTY OR GUARANTY GIVEN BY ANY PERSON, FIRM OR ENTITY WITH RESPECT TO THE PRODUCT SHALL BE BINDING ON DISTRIBUTOR. REPAIR, REPLACEMENT, OR REFUND OF THE ORIGINAL PURCHASE PRICE ‐ AT DISTRIBUTOR’S SOLE DISCRETION ‐ARE THE EXCLUSIVE REMEDIES OF THE CONSUMER. IN NO EVENT WILL DISTRIBUTOR, ITS MANUFACTURERS, OR SAKAR INT. BE LIABLE FOR ANY INCIDENTAL, DIRECT, INDIRECT, SPECIAL, PUNITIVE OR CONSEQUENTIAL DAMAGES (SUCH AS, BUT NOT LIMITED TO, DAMAGES FOR LOSS OF PROFITS, BUSINESS, SAVINGS, DATA OR RECORDS) CAUSED BY THE USE, MISUSE OR INABILITY TO USE THE PRODUCT. EXCEPT AS STATED HEREIN, NO OTHER WARRANTIES SHALL APPLY. NOTWITHSTANDING THE FOREGOING, CONSUMER’S RECOVERY AGAINST DISTRIBUTOR SHALL NOT EXCEED THE PURCHASE PRICE OF THE PRODUCT SOLD BY DISTRIBUTOR. THIS WARRANTY SHALL NOT EXTEND TO ANYONE OTHER THAN THE ORIGINAL CONSUMER WHO PURCHASED THE PRODUCT AND IS NOT TRANSFERABLE. Some countries, states or provinces do not allow the exclusion or limitation of incidental or consequential damages or allow limitations on warranties, so limitation or exclusions may not apply to you. This warranty gives you specific legal rights, and you may have other rights that vary from state to state or province to province. Contact your authorized retailer to determine if another warranty applies. This product is manufactured, distributed and sold by SAKAR International, Inc. All other trademarks are the property of the respective owner, who has not sponsored, endorsed or approved this product. This device complies with the part 15 of the FCC rules. Operation is subject to the following two conditions:(1) this device may not cause harmful interference , and (2) this device must accept any interference received, including interference that may cause undesired operation. Caution: changes or modifications not expressly approved by the party responsible for compliance could void the user's authority to operate the equipment. 70 ...
- Page 72 NOTE: This equipment has been tested and found to comply with the limits for a Class B digital device, pursuant to Part 15 of the FCC Rules, These limits are designed to provide reasonable protection against harmful interference in a residential installation. This equipment generates. Uses and can radiate radio frequency energy and, if not installed and used in accordance with instructions. May cause harmful interference to radio or ‐television reception, which can be determined by turning the equipment off and on, the user is encouraged to try to correct the interference by one or more of the following measures: __ Reorient or relocate the receiving antenna. __ Increase the separation between the equipment and receiver. __ Connect the equipment into an outlet on a circuit different from that to which the receiver is connected. __ Consult the dealer or experienced radio/ TV technician for help. This equipment complies with FCC radation exposure limits set forth for an uncontrolled environment. This transmitter must not be co‐located or operating in conjunction with any other antenna or transmitter. EU Compliance Statement Sakar International Inc. hereby declares that this wireless device is in compliance with the essential requirements and other relevant provisions of the R&TTE and EMF Directive. 71 ...
- Page 73 13. FAQ Q: Why isn’t my tablet turning on? A: Before using your tablet, it is necessary to charge its internal battery using the included charger. For best results, give your tablet an extended overnight charge before using it for the first time. Q: I am having difficulties connecting to the Internet. What should I do? A: In order to access the Internet using your tablet, you will need to connect to the nearest Wi‐Fi network. Note that some networks require you to enter a password. Talk to the network administrator of that Wi‐Fi network for password information. Consult the full User’s Manual of your device for precise information on connecting to Wi‐Fi. Unfortunately, if your device is out of the range of any nearby networks you will not be able to access any online features. Q: I am having issues with an app which I have downloaded. What should I do? A: For support on any third party apps, software or accessories, you will need to contact the company, the software developer or manufacturer for support. If you require further assistance, please visit www.cameliotablet.com. For phone support in the US please call 877‐236‐0183, in the UK call 0800 917 4831. If you are calling from anywhere else, please visit www.cameliotablet.comfor your local toll free number. © 2015 Sakar International, Inc. All rights reserved. Sakar USA Sakar UK 195 Carter Drive 2D, Siskin Parkway East ...
- Page 74 ©2015 Sakar International, Inc. All rights reserved. 73 ...
Need help?
Do you have a question about the Camelio2 and is the answer not in the manual?
Questions and answers