Table of Contents
Advertisement
Advertisement
Table of Contents

Subscribe to Our Youtube Channel
Summary of Contents for I&A SYSTEM Smart
- Page 1 Smart Smart Dual Card Printer User Manual...
-
Page 2: Copyright Notice
Trademarks Smart is a trademark and I&A System is a registered trademark of I&A System card printer. Windows is registered trademarks of Microsoft Corp. All other trademarks or registered trademarks are marks of their respective holders. - Page 3 TABLE OF CONTENTS 1. Introduction 1.1 Printer Outside Features ------------------------------------------------------------------------ 1.2 Printer Inside Features -------------------------------------------------------------------------- 1.3 Ribbon Cartridge Features ---------------------------------------------------------------------- 1.4 LCD Panel Display and Button Operation ------------------------------------------------- 2. Installing the Printer 2.1 Loading a Ribbon ---------------------------------------------------------------------------------- 2.2 Loading Cards -------------------------------------------------------------------------------------- 2.3 Installation the Printer Driver ------------------------------------------------------------------...
- Page 4 <Figure 23> No, not this time <Figure 24> Install the software automatically ---------------------------------------------- --------------------------------------------------------------------- <Figure 25> Continue Anyway <Figure 26> Finish --------------------------------------------------------------------------------------- ----------------------------------------------------------- <Figure 27> I&A SMART Card Printer ---------------------------------------------------------------------- <Figure 28> Printer Properties ----------------------------------------------------------------------- <Figure 29> Printer Test Page --------------------------------------------------------------------------...
- Page 5 <Figure 30> Test Print O.K <Figure 31> Ribbon Separation ---------------------------------------------------------------------- <Figure 32> Checking the Printer Properties ------------------------------------------------ ------------------------------------------------------------------------- <Figure 33> Printing Setting <Figure 34> Layout -------------------------------------------------------------------------------------- ---------------------------------------------------------------- <Figure 35> Paper/Ribbon/Quality -------------------------------------------------------------------------------- <Figure 36> Side/Media <Figure 37> Sharing Printer ------------------------------------------------------------------------- ------------------------------------------------------------------------------------------ <Figure 38>...
-
Page 6: Printer Outside Features
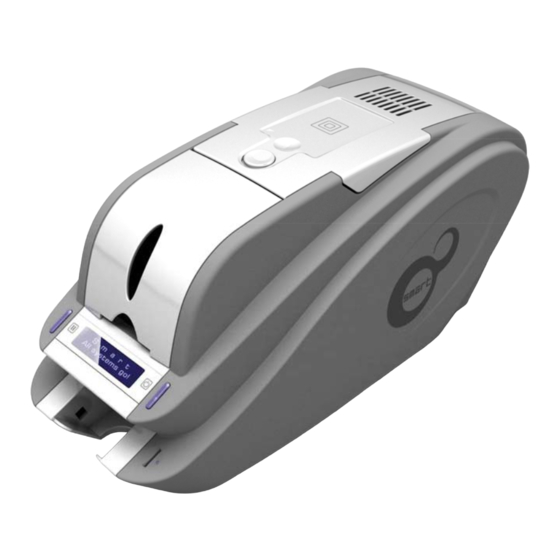
1. Introduction Thank you for choosing the I&A System Smart Card Printer. This manual helps you effectively and professionally for the start-up and operation of your new Card Printer. 1.1 Printer Outside Features This Smart Card Printer takes a power via the adaptor provided with the printer. Using USB port, it communicates with user’s PC. -
Page 7: Printer Inside Features
1.2 Printer Inside Features Smart Printer adopts a semi-permanent Ribbon cartridge. The following shows the internal functional features found on your Smart Printer. Thermal Printer Head Ribbon Cartridge Card Thickness Control lever Hopper Stacker(Output Hopper) External Contactless IC Antenna Manual Card Output Wheel <Figure 3>... -
Page 8: Ribbon Cartridge Features
1.3 Ribbon Cartridge Features Ribbon Cartridge Ribbon Disposable Cleaning Roller <Figure 4> Ribbon Cartridge 1.3.1 Ribbon Cartridge Install a Ribbon and a disposable cleaning roller provided with the Ribbon. (Important! This semi-permanent ribbon cartridge is a component of the printer. Printer does not operate if it is broken or damaged. -
Page 9: Lcd Panel Display And Button Operation
SMART Mag R/W : Reading or writing the data on Magnetic Stripe. SMART Out of Ribbon : No Ribbon in the printer or Ribbon is used all. Check the Ribbon! SMART Out of Card : No Cards in the hopper. Check the Cards on the hopper! SMART Case Open : Top Cover is open. -
Page 10: Loading A Ribbon
2. Installing the Printer 2.1 Loading a Ribbon Before print, prepare the related items such as a card, a ribbon and a cleaning roller. In this section, we invite you to know the proper method to install the Ribbon and cleaning roller to the printer. -
Page 11: Figure 8> Install The Ribbon
2.1.5. Insert the supply side of the ribbon to no.1 hole and press the opposite (no.2) until it clicks. Insert the take-up side of the ribbon same method to no.3 and no.4. And fasten the ribbon. (Caution! If the ribbon is not fastened, a rolling up error might happen.) <Figure 8>... -
Page 12: Loading Cards
<Figure 12> Close Top Cover 2.2. Loading Cards This section shows how to load plastic cards into the Smart Printer. 2.2.1. If the card hopper cover is closed, open it. 2.2.2. Adjust the card thickness with control lever. -
Page 13: Figure 14> Holding The Cards
2.2.3. Hold the cards by sides like picture (Caution! Do not bend the cards and do not touch the surface of the cards) <Figure 14> Holding the cards 2.2.4. Push the stack back and forth to an angle of about 45° vertically. (Note : Static charge makes cards stuck with significant adhesive force. -
Page 14: Figure 18> Connect The Power Cord
2.3. Installing the Printer Driver 2.3.1. Check the printer’s power OFF. 2.3.2. Connect the power cord and USB cable to the printer. <Figure 18> Connect the power cord 2.3.3. Insert CD provided with the printer. <Figure 19> CD loading 2.3.4. Click “Driver Install Guide” <Figure 20>... -
Page 15: Figure 21> Driver Installation
2.3.5. Check and follow the driver installation guide. <Figure 21> Driver Installation 2.3.6. Turn On the printer. <Figure 22> Printer Turn ON 2.3.7. Select “No, not this time” and click “ Next”. <Figure 23> No, not this time 2.3.8. Select “Install the software automatically”... -
Page 16: Figure 25> Continue Anyway
2.3.9. Click “Continue Anyway” in Hardware Installation. <Figure 25> Continue Anyway 2.3.10. Click “Finish” in Completing the Found New Hardware Wizard. <Figure 26> Finish 2.3.11. Check “I&A SMART Card Printer is generated in Printers and Faxes. <Figure 27> I&A SMART Card Printer... -
Page 17: Test Printing
2.4. Test Printing In this step, you can check whether the printer driver installation has been finished successfully. 2.4.1. In “Printer and Fax” window, click right button on ‘I&A SMART Card Printer’ icon, then select “Properties”. <Figure 28> Printer Properties 2.4.2. -
Page 18: Figure 31> Ribbon Separation
2.5. Changing a Ribbon and a Cleaning Roller When you change ribbon, you have to change cleaning roller, too. (Caution! Without changing disposable cleaning roller, the printing quality is not guaranteed.) 2.5.1. Turn off the printer power. 2.5.2. Open the top cover, and then take out the ribbon cartridge. -
Page 19: Checking The Printer Properties
3. Checking and changing the Printer Properties 3.1. Checking the Printer Properties To check the Smart Printer Properties, go to “Control Panel”, click right button on “I&A SMART Card Printer” in Printers and Faxes. Then select “Properties”. <Figure 32> Checking the Printer Properties When you select “Properties”... -
Page 20: Figure 33> Printing Setting
CR-80 type card. You need not to change default value in this option. - Ribbon You can see the type of ribbon. SMART identifies ribbon type automatically with RF Tag. You do not need select the ribbon type. <Figure 35> Paper/Ribbon/Quality... -
Page 21: Changing The Printer Properties
You can set the method to extract resin black when the printing is executed by other design programs. If you use Smart Design, you don’t need to select this option. It will be set automatically. - Quality Print quality setting - There are 2 modes, Standard and High. -
Page 22: Figure 38> Port
<Figure 39> Advanced 3.3.4 Color Management tab In “Color management” tab, you can select color management profile fit to the printer. SMART uses color profile to express optimal color. The default profile is ‘inasmart’. (It is recommended to maintain default value.) -
Page 23: Card Transfer
4. Troubleshooting In this section, you would get useful solutions about some possible problems while using printer. 4.1. Card Transfer 4.1.1. Card can’t enter into the printer from card hopper. If the card can’t get into the printer at all or insert problems occur frequently, check the followings. -
Page 24: Print Quality
4.2. Print quality 4.2.1. Small dots appear: Some parts of the card are not printed or are printed with wrong colors. When the surface of the card is stained with dirt: After checking the card, change it to another card. When the cleaning roller is stained with dirt: Check the cleaning roller. -
Page 25: Magnetic Stripe Encoder
4.2.5. The printer prints unplanned color at the edge, or the printed color is quite different from the original image. Non-standard card: Change to the standard card. Uneven or bad card surface: Change the card. When the transfer roller or printing roller is stained <Figure 45>... - Page 26 Make the USB cable connection again. Bad USB cable for printer transfer: Change the USB cable. If the selected printer is different model rather than SMART: Select SMART to print. Wrong port setting of the printer driver: Check the port setting of the printer driver whether it is USB port or not.
-
Page 27: Printer Specification
5. Printer Specification Product Specification Smart Smart Dual PVC, Polyester Cards with polished PVC finish Card Type Printing Method Dye-Sublimation / Resin Thermal Transfers / Edge - to - Edge ISO CR-80 (54mm x 86mm / 2.12" x 3.38") Card Format 0.38mm (15mil) ~ 1.0mm (40mil) - Page 28 FCC warning This equipment generates uses and can radiate radio frequency energy and, if not installed and used in accordance with the instructions, may cause harmful interference to radio communications. However, there is no guarantee that interference will not occur in a particular installation. If this equipment does cause harmful interference to radio or television reception which can be determined by turning the equipment off and on, the user is encouraged to try to correct the interference by one or more of the following...
Need help?
Do you have a question about the Smart and is the answer not in the manual?
Questions and answers