Advertisement
Quick Links
Advertisement

Summary of Contents for Moondyne Ghost Eye Tracker
- Page 1 Instruction Manual TRACKER Trail Camera...
- Page 2 Thank you for choosing a Moondyne TRACKER Trail Camera. Our cameras have been developed for Australian conditions and have been tested in some of the most demanding conditions Australia has to offer. We are confident that you will be happy with your purchase and we encourage any feedback you have that will help to continually improve our products.
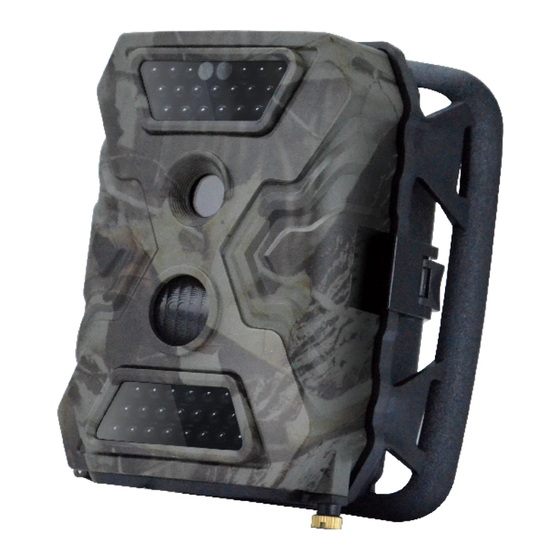
- Page 3 Getting to Know Your Camera Please take the time to get to know your camera and familiarize yourself with its features, buttons and functions. Front Light sensor Status light for Day/Night detection 19 Infrared LEDs Lens Motion Sensor 21 Infrared LEDs Screw to secure bottom cover...
- Page 4 Back Battery pack port Colour LCD screen Navigation buttons Menu OK button button ON/OFF Cellular switch (This feature switch does not function on this model) IR LED Switch Photo / Video mode switch (19 or 40) Bottom Battery compartment. (Push and release to open) 12v DC in USB Port SD Card Slot...
- Page 5 Battery Pack Battery cover latch Battery slots Connector pins Locking latches USB Cable TV Cable Adjustable Mounting Strap...
- Page 6 SD Card and Batteries Always switch off the camera before inserting or removing batteries or SD cards. Note: Do not mix batteries types. Mixing battery types in the camera may cause permanent damage, which also violates our warranty policy. To install the batteries and SD card into your camera, first remove the battery pack from the camera by releasing the locking latches.
-
Page 7: Quick Start
(If you find too much reflection or whiting out set to 19) Turning On for the First Time: • Switch the ON/OFF switch to ON and then press the OK button. The Moondyne logo will show momentarily along with the SD card capacity and available storage. press the M (The startup sound can be switched off in settings) button to enter the menu. - Page 8 Preview Mode: • Switch the ON/OFF switch to ON and then press the OK button. The Moondyne logo will show momentarily along with the SD card capacity and available storage. The camera is now in preview mode. From here you can take test photos or video, access the menu to configure settings and browse, review or delete images and videos via the playback screen.
- Page 9 Other Features Connecting to a Computer: • Using the included USB cable, you can copy videos and photos on your SD memory card from the camera to your computer. • To connect, make sure the camera is switched off, then plug one end of the USB cable into the USB port on the camera and the other end into an available USB port on your computer.
- Page 10 Menu Select ON to set 4 numbers / letters for ID of camera. Camera ID This lets you identify photos taken from a particular camera and is Default set to OFF shown on the timestamp. Select ON and camera shoots photo(s) first, then video on the same trigger event.
- Page 11 Select ON only if you want to set a specific beginning and end time for the camera to capture images. Caution: If set to ON the camera and PIR Sensor will only work during the time period set by the user. Timer Example: 15:00-18:00 The Camera will only work between 3pm and 6pm it will not take pictures or videos at any other time.
- Page 12 Imprints the time, date, temp and moon phase on your photos Stamp Default set to ON Changes the frequency as some device screens can flicker if Frequency incorrectly set. Default set to 50Hz for Australia Changes the language. Language Default set to English Set the correct date and time for the correct time stamp and correct functioning of all the features of the camera.
-
Page 13: Specifications
Specifications Image Sensor 5 Mega Pixels Color CMOS Effective Pixels 2560x1920 Day/Night Mode IR arrange IR LEDs Top: 19 LED, Bottom: 21LED SD Card Supported 8MB – 32 GB Lens F=3.0; FOV=52°; Auto IR-Cut-Remove (at night) LCD Screen 2” TFT, RGB, 262k PIR Sensitivity 3 sensitive levels: High / Normal / Low PIR distance... -
Page 14: Trouble Shooting
External DC 6~12V/1~2 Amp Stand-by Current 0.15mA Stand-by Time 6 months 8xAA Power Consumption 150mA (+650mA when whole 40 IR LEDs light up) Low battery Alert 4.8V (4.8V: alert; 4.6V: power off) Operating Temperature -20°C to 60°C Certification CE FCC RoHs Operation Humidity 5%-90% Waterproof spec... - Page 15 Please include a contact name and number, and a brief description of your issue. Postage of all Moondyne products will be at the customer’s expense. There will also be a charge for repairs not covered by the Warranty, for which you will be notified of the amount prior to any work being started.
- Page 16 Distributed by Aussie Outback Supplies Pty Ltd www.aussieoutbacksupplies.com...
Need help?
Do you have a question about the Ghost Eye Tracker and is the answer not in the manual?
Questions and answers