
Related Manuals for Cooper Wiring Devices ASPIRE RF


Summary of Contents for Cooper Wiring Devices ASPIRE RF
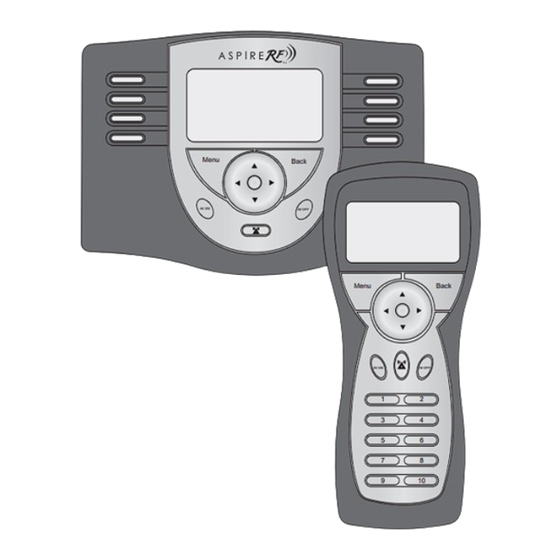
- Page 1 Wireless Control System Menu Back All ON All OFF Menu Back User Guide All OFF A Step-by-Step Guide for All ON Planning, Installing, and Operating a Complete Central Home Device Control System...
-
Page 2: Table Of Contents
Renaming a Scene ..................25 Each ASPIRE RF device functions as a repeater, using 900 MHz signals to ensure that every command is Renumbering a Scene . -
Page 3: Safety Information And Fcc Information
Quick Reference Guide Safety First (Cautions and Warnings) Follow these instructions to get started using your Aspire RF Wireless Control System right away. Getting Started Lorem ipsum dolor sit amet, consectetuer adipiscing elit. Nullam ac dui. Aliquam commodo adipiscing To use the wireless control system, first put information about lacus. - Page 4 SECTION II SECTION II Quick Reference Guide Quick Reference Guide Using the Controller Navigating Menu Screens Menu Options You can easily navigate through the menu screens on your controllers. Here are some tips to help you become familiar Devices with the system: The controllers use an easy-to-navigate menu system to provide all functionality for the wireless system.
-
Page 5: Installing And Activating Devices
SECTION II SECTION III Quick Reference Guide Installing and Activating Devices Installing a Device Creating Custom Names Several features of the wireless system give the option to create custom names. More detailed instructions The wireless control system can be programmed to direct up to 232 individual devices (Handheld/Tabletop for each of these features is included in this manual. - Page 6 (for compatible products only) (for compatible products only) (continued) All Cooper Wiring devices share common configuration options. You can select your preferred configuration for each device on your system. The configuration options available are as follows: 6. Highlight Panic Off Time and press the OK •...
-
Page 7: Checking Device Status
SECTION III SECTION III Installing and Activating Devices Installing and Activating Devices Activating Individual Devices Checking Device Status 1. Select the “Control” option from the devices 1. Select the “Device Status” option from the Devices menu. Press the OK button. Devices devices menu. -
Page 8: Activating Individual Devices
SECTION III SECTION III Installing and Activating Devices Installing and Activating Devices Activating Individual Devices (Using the Handheld Controller) Renaming a Device Each device is automatically renumbered after it is installed. You can use your handheld controller’s 1. Select the “Rename” option from the devices Devices number pad to quickly access and activate any device installed in the wireless control system. -
Page 9: Controlling Devices
SECTION III SECTION III Installing and Activating Devices Installing and Activating Devices Activating ALL ON Controlling Devices 1. Press the ALL ON button on the controller. All The control menu allows devices to be operated in a specific manner. When a device is entered into the Devices of the devices that are part of the ALL ON network, information is retrieved from the device and stored in the wireless control system. -
Page 10: Controlling The Thermostat
SECTION III SECTION III Installing and Activating Devices Installing and Activating Devices Controlling A Thermostat Customizing All Switch (for compatible devices only) A thermostat is not directly controllable with the on and off buttons because the device requires control of The All Switch feature allows you to select a multiple points. -
Page 11: Activating Panic Mode
SECTION III SECTION III Installing and Activating Devices Installing and Activating Devices Activating Panic Mode Customizing Panic Group (continued) Panic mode allows the user to trigger a group of devices to turn off and on in a pattern that attracts To add a device to the panic group, highlight attention. -
Page 12: Creating And Controlling Scenes
SECTION IV SECTION IV Creating and Controlling Scenes Creating and Controlling Scenes Creating a Scene Creating a Scene (continued) A scene is a combination of lighting or appliance devices selected by the user that can be controlled as a 3. Highlight the specific device that you Scene Scary movie group by the wireless system. -
Page 13: Activating A Scene
SECTION IV SECTION IV Creating and Controlling Scenes Creating and Controlling Scenes Creating Favorite Scenes Activating a Scene 1. Select the “Activate” option from the Scenes The tabletop controller’s main menu is a scene screen Scenes menu. Press the OK button. where eight of your favorite scenes can be accessed Favorites 1 Not Used... -
Page 14: Renaming A Scene
SECTION IV SECTION IV Creating and Controlling Scenes Creating and Controlling Scenes Renaming a Scene Renumbering a Scene This feature allows the user to reorder the scenes displayed on the selection menu. 1. Select the “Rename” option from the Scenes Scenes menu. -
Page 15: Deleting A Scene
SECTION IV SECTION IV Creating and Controlling Scenes Creating and Controlling Scenes Editing a Scene Deleting a Scene 1. Select the “Delete” option from the Scenes 1. Select the “Edit” option from the Scenes Scenes Scenes menu. Press the OK button. menu. -
Page 16: Transferring A Scene
SECTION IV SECTION V Creating and Controlling Events Creating and Controlling Scenes Transfering Scene Creating an Event 1. Select the “Transfer” option from the Scenes An event is a scheduled one-time or recurring program that automatically controls a combination of lighting Scenes menu. - Page 17 SECTION V SECTION V Creating and Controlling Events Creating and Controlling Events Creating an Event Creating an Event (continued) (continued) Using the arrow pad, enter the correct time. To select the scene, highlight “Scene” and Romantic Dinner Press the OK button to save. Romantic Dinner press the OK button.
-
Page 18: Activating Or Deactivating An Event
SECTION V SECTION V Creating and Controlling Events Creating and Controlling Events Activating or Deactivating an Event Renaming an Event 1. Select the “Activate” or “Deactivate” option 1. Select the “Rename” option from the Events Events Events from the Events menu. Press the OK button. menu. -
Page 19: Deleting An Event
SECTION V SECTION V Creating and Controlling Events Creating and Controlling Events Deleting an Event Editing an Event 1. Select the “Delete” option from the Events 1. Select the “Edit” option from the Events Events Events menu. Press the OK button. menu. -
Page 20: Editing And Controlling The Away Feature
SECTION VI SECTION VI Editing and Controlling the Away Feature Editing and Controlling the Away Feature Editing the Away Feature Editing the Away Feature (continued) The away menu allows the user to edit and control a group of devices that will be randomly controlled to 5. -
Page 21: Activating Or Deactivating The Away Feature
SECTION VI SECTION VI Editing and Controlling the Away Feature Editing and Controlling the Away Feature Editing the Away Feature Activating or Deactivating the Away Feature (continued) 10. Highlight “On Time (mins)” and press the 1. Select the “Activate” or “Deactivate” option Away Away Receptacle OK button. -
Page 22: Making Advanced Changes To Your System
Do we need this box? An association is a feature that you can program to allow a device in your system (source device) to control another device (destination device). Your Aspire RF wireless system supports up to five associations for each source device. -
Page 23: Replicating Handheld Information To A Second Receiver
SECTION VII SECTION VII Making Advanced Changes to Your System Making Advanced Changes to Your System Replicating Handheld Information to a Second Receiver Replicating Handheld Information to a Second Receiver Replication allows you to duplicate the information from one 4. When the replication is complete, windows controller (primary) to another controller (secondary). -
Page 24: Uninstalling A Device
SECTION VII SECTION VII Making Advanced Changes to Your System Making Advanced Changes to Your System Uninstalling a Device Resetting the System Before uninstalling a device, the device must be installed in the wireless system. If you receive an This function allows you to clear your handheld controller of all devices, scenes, and events. “Unknown device”... -
Page 25: Personalizing System Settings
SECTION VIII SECTION VIII Personalizing System Settings Personalizing System Settings Selecting a Language The wireless control system has several functions that can be customized to meet individual needs. After reviewing this section you will be able to perform the following functions: 1. -
Page 26: Activating Child Protection
SECTION VIII SECTION IX Personalizing System Settings Troubleshooting Guide and Maintenance Activating Child Protection You may encounter some problems while using your wireless control system. Use this section to learn about the following functions: 1. Select the “Child Protection” option from the •... -
Page 27: Retrieving Version Information About An Individual Device
SECTION IX SECTION IX Troubleshooting Guide and Maintenance Troubleshooting Guide and Maintenance Removing a Failed Device Retrieving Version Information about an Individual Device 1. Select the “Remove” option from the Devices 1. Select the “Version” option from the Devices Devices Devices menu. -
Page 28: Replacing A Failed Device
SECTION IX SECTION IX Troubleshooting Guide and Maintenance Troubleshooting Guide and Maintenance Operating Network Discovery Replacing a Failed Device Network discovery is a network management function that forces the controller to search for devices and 1. Select the “Replace” option from the Devices Devices update the network routing tables contained in the devices and in the handheld. -
Page 29: Warranty
SECTION X SECTION XI Warranty Ordering Information for Cooper Wiring Devices Page Title Page Title Lorem ipsum dolor sit amet, consectetuer adipiscing elit. Nullam ac dui. Aliquam commodo adipiscing Lorem ipsum dolor sit amet, consectetuer adipiscing elit. Nullam ac dui. Aliquam commodo adipiscing lacus. - Page 30 SECTION XI Ordering Information for Cooper Wiring Devices Page Title Lorem ipsum dolor sit amet, consectetuer adipiscing elit. Nullam ac dui. Aliquam commodo adipiscing lacus. Nunc eget erat. Sed consequat justo non leo. Integer id nisl vel nisi gravida iaculis. Proin vel sapien.
Need help?
Do you have a question about the ASPIRE RF and is the answer not in the manual?
Questions and answers