Table of Contents
Advertisement
Quick Links
Advertisement
Table of Contents

Summary of Contents for Valor DD-806W
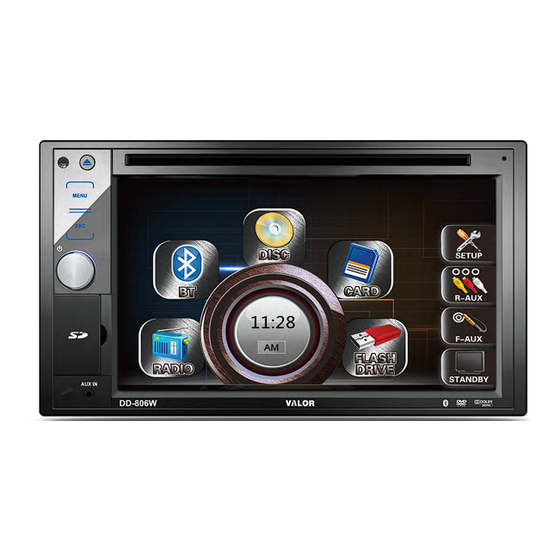
- Page 1 DD-806W...
-
Page 2: Table Of Contents
Contents Thank you for purchasing a Valor Multimedia unit. We hope you will find the instructions in this user manual clear and easy to follow. If you take a few minutes to look through it, you will learn how to use all the features of your new unit for your maximum enjoyment. - Page 3 Auto Store (AS) · · · · · · · · · · · · · · · · · · · · · · · · · · · · · · · · · · · · · · · · · · · · · · · · · · · · · · · · · · · · · · · · · · · · · · · · · · · · · · · · · · · · · · · 21 Program Scan (PS) ·...
-
Page 4: Precautions
Precautions To avoid the risk of injury or accident, read the following precautions before installing and operating the unit. On Safety Comply with your local traffic rules and regulations. While driving You must not watch or operate the monitor. It may distract you and cause an accident. Park your car in a safe place to watch and operate the unit. -
Page 6: Preparations
Preparations Please read all of the instructions below before beginning your installation. We recommend that you have your unit installed by an experienced car audio/navigation system installer. IMPORTANT NOTICE: It is very important that you read the WARNINGS and NOTES in this manual to ensure correct installation and use of your unit. - Page 7 NOTE: If the unit is to be installed in a car equipped with an on-board drive or navigation computer, do not disconnect the battery cable. If the cable is disconnected, the computer memory may be lost. Under these conditions, use extra caution during installation to avoid causing a short circuit.
-
Page 8: Controls And Indicators
Controls and Indicators Button Operation Eject Press to eject disc. Reset Menu Press to enter MAIN menu, press again to return to previous source. Source Press to change the source. Power Off/VOL Press and hold to turn off the unit. Press once to power on when the unit is turned off. -
Page 9: Key Areas For The Touch Screen
Key Areas for the Touch Screen The key areas are outlined below, for DVD, VCD playback mode and so forth. A — Return to MAIN MENU B — Select previous chapter C — Select next chapter D — Display the on-screen controls, and different mode displays different menu. E —... -
Page 10: Remote Control
Remote Control Remote Control Functions Name Ref # Signal Function Power Turn the power on/off Open Eject Disc Mute Toggle on/off audio output Select source Numeric 1.2.3.4.5. Directly access certain chapter / track / preset station in button 6.7.8.9.0 current band VOL up Increase the volume VOL down... - Page 11 Title Go back to title while playing DVD Enter the main menu of the disc Root Turn on PBC while playing DVD Repeat Repeat playback for current chapter Select the next chapter/track for playback Next Search an available radio station by increasing tuning frequency on tuner mode Select the previous chapter/track for playback Previous...
-
Page 12: Tft Monitor Operation
TFT Monitor Operation Rear Camera Mode When the vehicle is placed in "Reverse", and a rear camera is connected to the unit, the monitor will automatically switch to the camera input source. Please make sure the reverse wire is connected. Screen Adjustment ―COLOR‖... -
Page 13: Operation Instructions
Operation Instructions Power On / Off Press the POWER /VOL button to turn the unit on. You can also turn on the unit by pressing the button ( ) on the remote. Press and hold the POWER/VOL button on the front panel or press the POWER button ( on the remote to power off the unit. -
Page 14: Mute
restores the settings before it was last powered off. Mute The volume can be mute by the following: 1. Press the MUTE button ( ) on the remote to mute the volume from the unit. 2. Press the /VOL knob on the panel. 3. -
Page 15: Setup Menu
Setup Menu Main Menu There are three methods to access the SOURCE menu. · Press the MENU button on the front panel. · Press the MENU button on the remote control. A area (Top left corner) · Touch the on the touch-screen. Note: Touch screen must be used to select menu and adjust settings. -
Page 17: Date Setting
Time Setting Press the TIME icon while on the SETUP menu. Selecting a Setting for Adjustment Touch directly the options on the screen to select a setting to be adjusted. -
Page 18: Dvd Setting
DVD Setting Press the DVD icon while on the SETUP menu. Selecting a Setting for Adjustment Touch directly the options on the screen to select a setting to be adjusted. Parental Control To set the parental control the default password is 8888 you can then adjust your parental guidance. -
Page 19: System Setting
System Setting Press the SYSTEM icon while on the SETUP menu. Selecting a Setting for Adjustment Touch directly the options on the screen to select a setting to be adjusted. Steering Wheel Control Setting Press YES to enter Steering Wheel Control setting. 1. -
Page 20: Basic Settings
Basic Settings Press the BASIC icon while on the SETUP menu. Selecting a Setting for Adjustment Touch directly the options on the screen to select a setting to be adjusted. -
Page 21: Other Settings
Other Settings Press the OTHER icon while on the SETUP menu. Selecting a Setting for Adjustment Touch directly the options on the screen to select a setting to be adjusted. -
Page 23: Tuner (Am/Fm) Operation
Tuner (AM/FM) Operation Tuner Display : Press to change between FM and AM. : Press to seek down. Touch and hold for 3 seconds to scan the previous station. : Press to seek up. Touch and hold for 3 seconds to scan the next station. : Press to scan and store all stations in current band automatically. -
Page 24: Saving A Station
Using Preset Stations 12 preset buttons are used to save your favorite stations for each band. First 6 saved stations (P1-P6) for the current band appear on the screen. You can touch the arrow buttons on the screen to see the other 6 stations. Saving a Station 1. -
Page 25: Dvd Player Operation
DVD Player Operation NOTE: When properly installed, DVD video cannot be displayed on the main screen unless the parking brake is applied. If you attempt to play a DVD while the vehicle is in motion, the screen will display ―caution‖ with a blue background. Rear video output, (if used) will operate normally. Insert/Eject Disc Inserting a Disc When inserting a DVD disc, DVD mode will be enabled and disc will begin to play. -
Page 26: Controlling Playback
: Press to return to DVD main menu : Press to select Title, Chapter, and Time. : Press to enter EQ setup. Controlling Playback Stop Playback Press the stop button on the screen or press the ( ) button on the remote control to stop the DVD playback;... -
Page 27: Direct Chapter / Track Selection
VCD Track Search Time – Go to specific time in the current track Track – Go to specific track VCD Disc Search Time – Go to specific time on disc Disk Search Track – Go to specific track Time _ _ : _ _ : _ _ Track --- / --- 3. -
Page 28: Playback Information
between Left Channel, Right Channel, and Stereo. Changing Subtitle Language If you are watching a disc that contains multiple languages subtitles, press the (SUBT) button on the remote control to choose the language in which you would like the subtitles to appear. You also can touch area E, and then press the button. -
Page 29: General Disc Information
: Indicates the Current source playing. : Indicates the playback time of the current title. : Indicates the tracks on the VCD and current track that is currently playing. General Disc Information Symbol 12cm Disc Properties Max Play Time (MPEG 2 Method) Single side single layer (DVD-5) 133 minutes Single side double layer (DVD-9) -
Page 30: Cd/Mp3/Wma/Jpeg Operation
CD/MP3/WMA/JPEG Operation Instructions for Insert/Eject, Play/Pause, Stop Playback, Track Selection, Fast Forward/Fast Reverse, Scan, and Random Play are the same for DVD, CD and MP3 operation. Please see the DVD Player Operation section for information about these topics. The file naming formats listed below are compatible with this unit: •... -
Page 31: Jpeg Disc
MP3/WMA Discs This player allows you to playback MP3/WMA files recorded on CD-R, CD-RW, DVD+R/RW and DVD-R/RW. For CD-RW discs, please make sure to use a slow speed write and not the fastest speed in order to prevent improper disc writing. When recording MP3s up to the maximum disc capacity, disable additional writing. -
Page 32: Flash Drive Operation
FLASH DRIVE Operation Accessing the Flash Source 1. To switch to FLASH source, press the Menu button on the front panel and press the Flash Drive icon or press the (SRC) button on the remote control until the FLASH appears at the top of the screen. -
Page 33: Card Operation
CARD Operation Accessing CARD Source 1. To switch to CARD source, press the Menu button on the front panel and press the CARD icon or press the (SRC) button on the remote control until the CARD appears at the top of the screen. -
Page 34: Bluetooth Operation
Bluetooth Operation Before using the Bluetooth Before using the Bluetooth, it is necessary to perform the following steps. 1. Go to the Main menu and select the ―SET UP‖ icon, select the ―BASIC icon‖ option and select ―Bluetooth‖, make sure the ―On‖ option is highlighted to activate the Bluetooth feature. 2. -
Page 35: A2Dp
A2DP Pairing Access the Bluetooth ―Setup” and select ―Pair Mode‖ to ―Yes‖, then select ―Phone‖ and a ―Waiting to pair‖ will be displayed on the screen. Now you can pair a phone with the unit. This unit can pair with 5 mobile phones in all, but only one can be active at a time. The Default phone will be retained only if all other paired phones are deleted. -
Page 36: Making A Phone Call
enabled. Note: Please make sure your phone’s Bluetooth is on before turning on the unit. If your phone’s Bluetooth is turned on after the unit has been turned on you must pair the phone again in order to connect. Making a Phone Call There are three ways to make a phone call from this unit: 1. -
Page 37: Troubleshooting
Troubleshooting Problem Cause Corrective Action GENERAL Radio Fuse blown Install new fuse with correct rating Car battery fuse blown Install new fuse with correct Unit will not power on rating Illegal operation Press the RESET button located at the top left corner of the front panel Battery depleted Replace battery with new one... - Page 38 Disc rating exceeds Parental Lock Change Parental Lock settings rating limit to allow such restriction Disc region code is not compatible Use disc with proper region code with unit Disc is inserted upside down Insert disc with label side up Image blurred, Disc is illegally copied...
- Page 39 Remote control Battery is covered with Pull out the insulation tape insulation tape Remote control does not function Battery depleted Replace battery with new one Battery installed incorrectly Remove battery and install correctly 1. When using the remote for the first time, you must pull out the insulation tape. 2.
- Page 40 Install the battery Insert the battery holder NOTE: Only use one CR2025(3V) lithium battery. Danger of an explosion if battery is incorrectly replaced. Replace only with the same or equivalent type of battery. Do not recharge, disassemble, heat or dispose of the battery in fire. Keep batteries away from children to avoid the risk of accident.
-
Page 41: Specifications
Specifications CEA Power Ratings Main Amplifier Power Output: 20 watts RMS X 4 channels into 4-ohms @ < 10% THD+N Signal to Noise Ratio: 70dB below reference. (Reference: 1 watt, 4-ohms) MAX Power: 25 X 4 watts into 4-ohms, all channels driven Frequency Response: 20Hz to 20kHz, -3dB. - Page 42 • 30 degrees up • 60 degrees down General Auxiliary Input impedance: 10k Power Supply: 10.5 to 16V DC, negative ground Fuse: 10-amp, mini ATM type DIN chassis dimensions: 7" X 7" X 2" (178mm x 178mm x100mm) * Specifications subject to change without notice.
-
Page 43: Accessory List
Accessory List Description Image Micro SD card Frame USB cable Power harness GPS antenna Remote control 3.5mm-RCA cable Rear AV in cable Audio line out/Wheel key control User manual Warning card Warranty card Mounting bar/screws... - Page 44 Note: 1) Manufactured under license from Dolby Laboratories.Dolby and the double-D symbol are trademarks of Dolby Laboratories. 2) Changes or modifications to this unit not expressly approved by the party responsible for compliance could void the user's authority to operate the equipment. 3) This equipment complies with FCC RF radiation exposure limits set forth for an uncontrolled environment.
Need help?
Do you have a question about the DD-806W and is the answer not in the manual?
Questions and answers