Table of Contents

Related Manuals for Arachnid Galaxy II.5 series

Summary of Contents for Arachnid Galaxy II.5 series
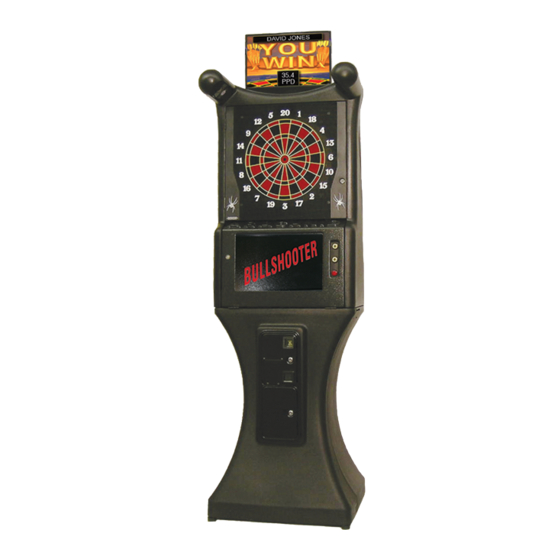
- Page 1 Series Operator’s Manual Monitor Mid Mount Position Monitor Top Mount Position 6212 Material Avenue Loves Park, Illinois 61111 815-654-0212 or 800-435-8319 www.arachnidinc.com P/N 42691 Rev. C Software Build 3421 The Originator of Electronic Darts...
- Page 2 Arachnid creates to appear on any screen display of the Product. Buyer shall cause its customers and all subsequent transferees (if any) to be bound by the provisions of this Section 2 and Sections 3, 4 and 5 of this Agreement for the benefit of Arachnid (Arachnid shall be a third party beneficiary with the right of enforcement).
- Page 3 Arachnid shall, at Arachnid’s option and without notice, become immediately due and payable. Any payment not received by Arachnid on its due date shall be subject to a late charge of 1.5% per month until paid, unless applicable law limits this charge, in which event, the applicable late charge shall be the maximum monthly charge permitted by applicable law.
-
Page 4: Table Of Contents
Table of Contents Introduction Section 1: General Description Section 2: Features of the Machine 2.1 Features 2.2 Available Games Section 3: Unpacking/Assembly 3.1 Unpacking 3.2 Assembly Section 4: Operation 4.1 Power Up 4.2 Game Play 4.3 Test/Setup Mode Section 5: Technical Description 5.1 Power Supply 5.2 Main PC Board 5.3 Video and Monitor... - Page 5 The most current version is always available on the Arachnid website at: http://www.arachnidinc.com Note: This equipment has been tested and found to comply with the limits for a Class A digital device, pursuant to part 15 of the FCC Rules. These limits are designed to provide reasonable protection against harmful interference when the equipment is operated in a commercial environment.
-
Page 6: Introduction
If you encounter a problem that is not covered in this manual, D. Happy Hour Reduced Pricing or if you have any questions, contact Arachnid at 800-435-8319 from 8 a.m. to 5 p.m. CST. Editable pricing for “Happy Hour” is available along with... -
Page 7: Available Games
Master Out: Any double, triple or the bullseye that will M. League Mode bring the players score to exactly zero must be used to “take the game out.” Completely automated league mode includes two-way communications and does not require ANY TEAM Note: Under the 501 menu there is 501 Open In/Open Out CARDS. - Page 8 Team Hammer 4 players C. Other Games Team Hammer plays like Hammer Cricket with one major Here are some other fun games to play. Each one has a dif- difference, four players compete as two seperate teams. ferent set of rules so please read their individual entries. Each player tries to get as many points as possible.
-
Page 9: Section 3: Unpacking/Assembly
BS Golf 1 to 4 Players 6. Close and secure the monitor bezel. Close the door to secure the bezel. The object of this game is to get the ball into the hole in as few “strokes” as possible. A power bar, which is always pointing towards the recommended path, is displayed on the screen. -
Page 10: Game Play
Free Play: Used to set free play on or off. 4.2 Game Play Fantasee Games: Use to access the Fantasee Game files. Upon power-up, the machine is ready for play. Players select their game and options using the on screen menus. Fantasee Game In Use: This displays which The up and down buttons are used to negotiate menus and Fantasee Game is currently running on your... - Page 11 Can be turned “ON” or “OFF” The amount to collect HotButton Menu: is determined and sent by Arachnid’s League Management Software. Create HotButton: Allows the Operator to create Player, Operator and Collector HotButtons.
- Page 12 League Cancel Button: Turns on and off the Exit Security Type: This is the security type League Play feature. When turned on, you have the for your wireless access point. You can option to exit league play before starting the next choose either WEP, WPA TKIP, WPA2 AES game.
-
Page 13: Section 5: Technical Description
Network Send Test: Tests the ability of the machine Duplicate Boot Flash (To Eprom 1): Copies the software to send data across the network. (Displays the alpha- contents of Eprom 0 to Eprom 1. See Appendix A. bet in yellow as the characters are being sent.) Used in conjunction with another machine running the Update Boot Flash (From Eprom 1): Copies the software Network Receive Test (see below) to verify network... -
Page 14: Video And Monitor
DS1746W-70: U3 - Real Time Clock C. Player Change and Up Down Buttons 128Kx8 NVSRAM W/RTC The player change and up/down push buttons are buffered MC34064P-5: U11 through ULN2003 IC's to prevent damage to the XiLinx Low Voltage Inhibit IC. The ULN2003 IC's are in sockets so they can be replaced easily should they be damaged. - Page 15 Hold the spider and segments against the backboard while 14. If alignment is correct, reinstall the catch web with the four sliding the retaining latches off the spider. Do not remove screws provided and reattach the ribbon cable to the main the two resting screws at the bottom of the spider.
-
Page 16: Technical Information
To adjust the sensitivity, connect the ground lead on your 5.6 Technical Information multimeter to a ground test point on the mainboard. Touch the plus lead to the middle of the 2 pins (see Figure 9a). Packed Weight: 150lbs The default setting is 4.75Volts. Adjust as needed for each location’s needs. -
Page 17: Section 6: Parts Listing
Set Screw - Top to Base (4) 42159 Wing Nut - Top to Base (4) The numbers listed are Arachnid part numbers. Please use the Arachnid numbers when placing an order. Some descrip- 6.3 Darthead Assembly - 41944 tions are followed by a number in parentheses. This number is the quantity used in that assembly. - Page 18 Power Supply Kit - 41965 Hinged Bezel 42747 Galaxy II.5 Operating Manual...
-
Page 19: Mainboard
39266 Crystal, 4Mhz, Cer, Resonator W/Caps 6.4 Main Board - 41784 41609 IC, 3.3V Reg, LT1086CT - 3.3 41612 Crystal, 50.000Mhz oscillator, 3.3V Part# Ref# Description 41646 IC, Audio Amplifier TDA2003H 41733 IC, boot, Program, GI/ GII, V2.0 11465 Test/Reset Button, Push Button 6mm (2) 41850 IC, Memory Flash 13653... -
Page 20: Updating Memory In The Machine A1
11. Restore power to the machine (plug in the power cord). Appendix The Machine should boot properly and run at least the BOOT FLASH CODE. If the PROGRAM FLASH (in Updating Memory in the Machine U5) is not programmed, or is corrupted, the software may need to be updated to run. - Page 21 Port-A-Flash manual that was included with the Port-A- Flash device. Configuring the Galaxy II to Work With LeagueLeader Arachnid provides you with unique ISP (Internet Service Provider) and FTP (File Transfer Protocol) settings. These must be entered into the Galaxy II modem settings. Follow the instructions below:...
- Page 22 Converting a Middle Mounted LCD Monitor to a Top Mounted LCD Monitor Arachnid has developed a way to allow you to either have an LCD monitor underneath the darthead or on top. The following instructions walk you through this simple conversion.
- Page 23 13. Insert monitor cables into the the top of the cabinet. Be sure the video and power cables correspond to Power the correct sides of the monitor. Video 14. Insert the monitor bracket into the narrow slot at the top of the cabinet.
- Page 24 21. Replace the bezel and close the darthead door. 22. Plug the Galaxy II.5.5 back into the wall. General Operation Instructions for the Monitor The below instructions come from the monitors operation manual. External Monitor Controls 1 Power Indicator 2 Power Button ...
-
Page 25: Troubleshooting
Section 7 Troubleshooting WARNING: UNPLUG POWER TO THE GALAXY II BEFORE WORKING ON THE MACHINE Problem Probable Cause Procedure Target Lamps not on a. Blown fuse for the Dimmer Board. a. Replace the fuse with a 3.15A Slo-Blo. b. If the monitor is also not on, it is possi- b. - Page 26 Problem Probable Cause Procedure Not Scoring a. A piece of foreign material or broken tip a. Clean out the foreign material or broken in the darthead holding a switch on the dart tip with pliers and/or a tip remover. matrix. Disassemble the darthead and clean the segments, matrix and rubber mat thor- oughly.
- Page 27 Galaxy II.5 Operating Manual...
Need help?
Do you have a question about the Galaxy II.5 series and is the answer not in the manual?
Questions and answers