
Summary of Contents for Arxys WSS-NAS
- Page 1 Data Appliance for ArcGIS User Guide for Windows Revision 6.0 September 2017 WWW.ARXYS.COM Page 1...
- Page 2 All trademarks and copyrights stated, mentioned, referenced or omitted are the property of their respective owners. DISCLAIMER Arxys reserves the right to periodically revise this manual without prior notice. Product features and specifications described are subject to change without notice. Page 2...
- Page 3 • Windows Storage Server 2012 September, 2014 • 3ware to LSI card upgrade November, 2015 • Upgraded 36 Bay Chassis October, 2016 • IPMI Remote Access September, 2017 • Rebranded with Arxys name, formerly Cutting Edge Networked Storage Page 3...
-
Page 4: Table Of Contents
TABLE OF CONTENTS Table of Contents ........................4 Support for the Data Appliance for ArcGIS ................6 UPPORT ............................. 6 RXYS UPPORT ............................6 Data Appliance for ArcGIS Use Restrictions ................6 Data Appliance for ArcGIS Summary ..................7 GIS C PPLIANCE FOR OMPONENTS .................. - Page 5 4U D GIS ......................30 PPLIANCE FOR Data Appliance for ArcGIS Maintenance .................. 32 Data Appliance for ArcGIS Field Replaceable Units ..............32 RIVE REPLACEMENT NSTRUCTIONS ..................33 OWER UPPLY ODULE REPLACEMENT NSTRUCTIONS ............... 34 Configuring IPMI Remote Access ................... 36 IPMI BIOS ....................
-
Page 6: Support For The Data Appliance For Arcgis
SUPPORT FOR THE DATA APPLIANCE FOR ARCGIS Support for Data Appliance for ArcGIS will be provided by both Esri and Arxys technical support teams. ESRI SUPPORT For information regarding the configuration and setup of ArcGIS services and usage, visit support.esri.com/en/contact-tech-support. -
Page 7: Data Appliance For Arcgis Summary
Windows Storage Server 2012 R2 configuration. The manual assumes that the user is familiar with the steps required to use and configure Windows networking. If at any point you encounter difficulties, please contact Arxys technical support by calling 800-257-1666 or via email support@arxys.com The system administrator password is configured by the end user during the first boot setup procedure. -
Page 8: Installation Planning
One front bezel (black) w/ keys. • One set of adjustable sliding rails w/ mounting kit If you find that you are missing any of the above items, please contact Arxys directly at support@arxys.com INSTALLATION PLANNING The proper installation of the Data Appliance for ArcGIS will require the following hardware and resources: •... -
Page 9: Ackmount Chassis Nstallation
standard computer equipment rack. The mounting kit is located within the smaller box that is packed on top of the appliance. RACKMOUNT CHASSIS INSTALLATION You should install the largest and heaviest items on the bottom of your rackmount rack. Aside from UPS systems the 4U Data Appliance for ArcGIS will be one of the heavier systems in your cabinet. -
Page 10: Data Appliance For Arcgis Rackmount Installation Instructions
1U DATA APPLIANCE FOR ARCGIS RACKMOUNT INSTALLATION INSTRUCTIONS This section provides information on installing the Esri Data Appliance for ArcGIS chassis into a rack cabinet. There are a variety of rack cabinets on the market, which may mean the assembly procedures will differ slightly. - Page 11 rack rail that secures directly to the rack itself (Figure 2). Two pairs of short brackets to be used on the front side of the outer rails are also included. INSTALLING THE OUTER RAILS TO THE RACK Figure 3 1. Attach the longer section of the outer rail to the outside of the shorter section of the outer rail.
-
Page 12: Data Appliance For Arcgis Rackmount Installation Instructions
INSTALLING THE CHASSIS IN THE RACK Figure 5 1. Confirm that chassis includes the inner rails (A) and rail extensions (B). Also, confirm that the outer rails (C) are installed on the rack (Figure 5). 2. Line chassis rails (A and B) with the front of the rack rails (C) (Figure 5). 3. - Page 13 M5 x 12mm (0.472) Flat Head Screw Washer for M5 Flat Head Screw Figure 6 IDENTIFYING THE SECTIONS OF THE RACK RAILS Figure 7 The chassis package includes two rail assemblies in the rack mounting kit. Each assembly consists of three sections: An inner chassis rail which secures directly to the chassis, an outer rail that secures to the rack, and a middle rail which extends from the outer rail.
- Page 14 RELEASING THE INNER RAIL FROM THE OUTER RAIL Figure 8 1. Identify the left and right outer rail assemblies as described above. 2. Pull the inner rail out of the outer rail until it is fully extended as illustrated above. 3.
- Page 15 2. Place the inner rail firmly against the side of the chassis, aligning the hooks on the side of the chassis with the holes in the inner rail. 3. Slide the inner rail forward toward the front of the chassis until the rail clicks into the locked position, which secures the inner rail to the chassis.
-
Page 16: Data Set Installation (4U Only)
INSTALLING THE CHASSIS IN THE RACK Figure 12 1. Confirm that the inner rails are properly installed on the chassis. 2. Confirm that the outer rails are correctly installed on the rack. 3. Pull the middle rail out from the front of the outer rail and make sure that the ball- bearing shuttle is at the front locking position of the middle rail. - Page 17 Install all of the data collections purchased, making sure that all drives from the data collections are installed in the Data Appliance for ArcGIS. If you find that a drive is missing, immediately stop the installation procedure and contact Arxys technical support. Figure 13 The Data Appliance for ArcGIS chassis features a label listing the arrangement of its hard disk drive slots (Figure 13).
-
Page 18: Powering On The Data Appliance For Arcgis
POWERING ON THE DATA APPLIANCE FOR ARCGIS Powering on the Data Appliance for ArcGIS requires the push of the power button. The power button on all configurations of the Data Appliance for ArcGIS can be accessed from the front of the computer equipment rack. - Page 19 Figure 17 When the Data Appliance for ArcGIS is first powered the Microsoft® Windows Storage Server 2012 R2 will begin booting (Figure 17). Please do not interrupt or power off the Data Appliance for ArcGIS during this process. The Data Appliance for ArcGIS may automatically reboot as the final configuration is applied to the system.
- Page 20 Figure 19 2. Enter the product key that is on the Microsoft COA label attached to the system. The COA label is attached on the top front left corner of the system. Click on the “next” button to continue. (Figure 19) Figure 20 3.
- Page 21 Figure 21 4. Set the administrator account password. Do not lose this password. This password will be needed to log into the system in order to continue the configuration of the server. Type in the password twice as indicated on the screen and click on the “finish” button to continue.
-
Page 22: Configuring Network Settings
Figure 23 6. Click on the account named “Administrator.” (Figure 23). Enter the Administrator account password that was set in step 4. The system will load the Windows desktop CONFIGURING NETWORK SETTINGS Your network administrator should be able to provide you with the information required to configure the network on the Data Appliance for ArcGIS. - Page 23 2. The system will load the Server Manager Dashboard. Select the Local Server from the menu on the right-hand side. (Figure 24) Figure 25 3. Locate the Ethernet connection links. Click on the link to the first Ethernet connection. The network connections list will be displayed. (Figure 25) Figure 26 4.
-
Page 24: Verify Data Collection
Figure 27 5. From the Ethernet Properties window double click on the “Internet Protocol Version 4 (TCP/IPv4)” entry (Figure 27) Figure 28 6. Enter the network information that was given to you by your network administrator in the appropriate sections. Click OK when you are done. (Figure 28) 7. - Page 25 1. Log in to the Data Appliance for ArcGIS as “administrator” (using the password that was configured during first boot) Figure 29 2. From the desktop or start menu locate the MegaRAID Storage Manager shortcut. (Figure Figure 30 3. Double–click the shortcut to start the utility. Allow the utility to auto discover the data appliance.
-
Page 26: Activating Windows Without Internet Access
5. The Properties information is located in the top right corner. The status should display “Optimal.” If the status is displays anything other than “Optimal” immediately stop and contact Arxys technical support. (Figure 32) 6. Background operations are also displayed on the right-hand side. If “Check Consistency”... - Page 27 Figure 33 2. From the Start Screen, Type ‘slui 4’ click on the icon to run the wizard. (Figure 33) Figure 34 3. Select the nearest location from the drop-down menu and click “Next” (Figure 34) Page 27...
- Page 28 Figure 35 4. Call the phone number displayed and follow the promptings. You will have to provide the “Installation ID” and will receive a “Confirmation ID” (Figure 35) Figure 36 5. Click “Next” and follow the onscreen instructions to continue and complete the activation process.
-
Page 29: Data Appliance For Arcgis Reference
DATA APPLIANCE FOR ARCGIS REFERENCE 1U DATA APPLIANCE FOR ARCGIS FRONT VIEW – 1U DATA APPLIANCE FOR ARCGIS Figure 37 FRONT PANEL LEDS Reset: The reset button is used to manually reboot the Power: The main power switch is used to apply or Data Appliance for ArcGIS. -
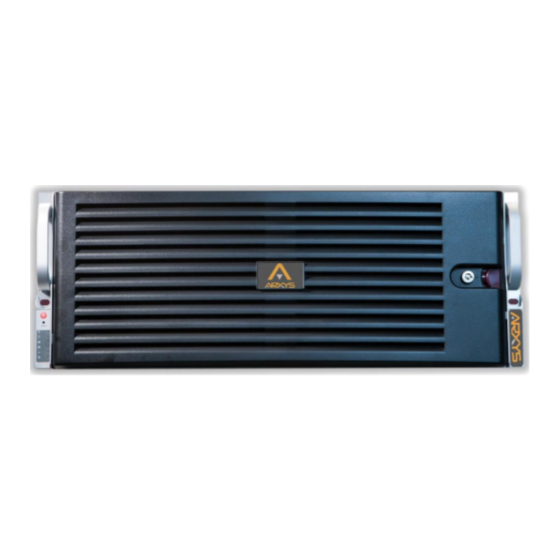
Page 30: Data Appliance For Arcgis
REAR VIEW – 1U DATA APPLIANCE FOR ARCGIS Figure 38 4U DATA APPLIANCE FOR ARCGIS FRONT VIEW – 4U DATA APPLIANCE FOR ARCGIS Figure 39 Page 30... - Page 31 FRONT PANEL INDICATOR LEDS Figure 40 Power: The main power switch is used to apply Overheat/Fan Fail: When this LED flashes, it indicates or remove power from the power supply to the a fan failure. When continuously on (not flashing) it Data Appliance for ArcGIS.
-
Page 32: Data Appliance For Arcgis Maintenance
Data Appliance for ArcGIS can only be serviced by Arxys trained technicians. Any warranted system that experiences a hardware failure in the field that is not a hot-swappable component such as a power supply module or hard drive will be replaced by Arxys as per the warranty attached to the system. -
Page 33: Hard Drive Fru Replacement Instructions
Replacement hard drives with carriers will ship directly from Arxys. Do not remove any hard drives while the unit is powered on without express instruction from a Arxys technical support engineer. -
Page 34: Power Supply Module Fru Replacement Instructions
(Figure 45). Replacement power supply modules will ship directly from Arxys. The power supply units have a hot-swap capability, meaning you can replace the failed unit without powering down the system. - Page 35 REMOVING A POWER SUPPLY MODULE After identifying the failed power supply, remove the failed power supply. For the 1U Data Appliance for ArcGIS see figure 37. For the 4U Data Appliance for ArcGIS see figure 39. Figure 46 Figure 47 1.
-
Page 36: Configuring Ipmi Remote Access
INSTALLING A POWER SUPPLY MODULE Replacement power supply modules will ship directly from Arxys. After removing the failed power supply module, install the replacement power supply module. For 1U Data Appliance for ArcGIS see figure 48. For 4U Data Appliance for ArcGIS see figure 49. -
Page 37: Configuring Ipmi Settings In The Bios
Serial over LAN (SOL) Media Redirection • Simultaneous floppy and CD/ DVD redirection • Efficient USB 2.0-based CD/DVD redirection, with typical speed greater than 15xCD • Support for USB key CONFIGURING IPMI SETTINGS IN THE BIOS 1. Plug in a network cable into IPMI port on the server. It is the single network port above the USB ports (see Figure 38 and/or Figure 41). - Page 38 4. Once in the BIOS navigate to the IPMI menu, Select “BMC Network Configuration” and press <enter> (see Figure 51) Figure 52 5. Change the “Update IPMI LAN Configuration” option to yes by selecting it and pressing <enter> then selecting “yes” from the menu and pressing <enter> again. Page 38...
- Page 39 Figure 52 6. Change the “Configuration Address Source” option to ‘static’ by selecting it and pressing <enter> then selecting “Static” from the menu and pressing <enter> again. Figure 53 7. Use the keyboard and arrow keys to setup an IP address, subnet mask, and gateway that is accessible on the network.
-
Page 40: Remotely Accessing The Server
Figure 54 8. Press escape and navigate to the “Save & Exit” menu. Select “Save Changes and Reset” and press <enter>. The system will reboot. REMOTELY ACCESSING THE SERVER 1. Utilize a web browser to browse to the IP address set listed in the IPMI section of the BIOS (see step 7 of the previous section and Figure 53) Page 40... - Page 41 Figure 55 2. A log in prompt will be presented. 3. IPMI is now configured and accessible. Note: The default credentials are username ADMIN and password ADMIN (Credentials are case-sensitive). Page 41...
-
Page 42: Data Appliance For Arc Gis Enviromental Information
APPENDIX A DATA APPLIANCE FOR ARCGIS ENVIRONMENTAL INFORMATION SIZE AND WEIGHT Data Appliance for Weight Dimensions ArcGIS ArcGIS 1U DA with 4 Drives Up to 40 lbs 25.5” x 17” x 1.75” ArcGIS 4U DA with 33 Drives Up to 150 lbs 27.5”... -
Page 43: United States Warranty Definition And Support Plan
Pacific time, or the next business day for problems diagnosed after 12:00 p.m. Pacific time. Return freight is prepaid by Arxys. A fifteen-day grace period is allowed for the return of failed components or servers prior to charges to the customer’s credit card. - Page 44 Department of Defense. In the event of a disk drive failure Arxys will ship a complete replacement disk drive in a drive carrier. The Customer removes the magnetic hard drive platters from the failed disk drive and returns only the drive carrier, drive casing and the top cover of the disk drive which includes the drive label and serial number.
-
Page 45: Support Plan
Pacific time, or the next business day for problems diagnosed after 12:00 p.m. Pacific time. Return freight is prepaid by Arxys. A fifteen-day grace period is allowed for the return of failed components or servers prior to charges to the customer’s credit card. - Page 46 Department of Defense. In the event of a disk drive failure Arxys will ship a complete replacement disk drive in a drive carrier. The Customer/contractor removes the magnetic hard drive platters from the failed disk drive and returns only the drive carrier, drive casing and the top cover of the disk drive which includes the drive label and serial number.
-
Page 47: Basic Provisions Of All Arxys Warranty Programs
It is the Customer's responsibility to back up data on the Customer's system. While every attempt has been made to provide redundancy in the hardware, Arxys shall not be held responsible for loss of or damage to data or loss of use of any computer or network systems. - Page 48 EVEN IF A PARTY HAS BEEN ADVISED OF THE POSSIBILITY OF SUCH DAMAGES. EXCEPT FOR CLAIMS THAT THE SERVICES CAUSED BODILY INJURY (INCLUDING DEATH), ARXYS’ TOTAL LIABILITY ARISING OUT OF, OR IN CONNECTION WITH, ANY EVENT OR SERIES OF CONNECTED EVENTS OCCURRING IN CONNECTION WITH THE SERVICES THAT ARE THE SUBJECT OF THE CLAIM SHALL NOT EXCEED THE AMOUNT OF FEES PAID UNDER THIS AGREEMENT FOR THE SPECIFIC SERVICE DURING THE PRIOR YEAR.
Need help?
Do you have a question about the WSS-NAS and is the answer not in the manual?
Questions and answers