Table of Contents
Advertisement
Advertisement
Table of Contents

Subscribe to Our Youtube Channel
Summary of Contents for STOVES S7 E450BCMAUTO
- Page 1 S7 - E450BCMAUTO 450mm Automatic Built In Coffee Maker Handbook...
- Page 2 THIS APPLIANCE IS MARKED ACCORDING TO THE EUROPEAN DIRECTIVE 2002/96/EC ON WASTE ELECTRICAL AND ELECTRONIC EQUIPMENT (WEEE). By ensuring this product is disposed of correctly, you will help prevent potential negative consequences for the environment and human health, which could otherwise be caused by inappropriate waste handling of this product.
-
Page 3: Table Of Contents
Contents ABOUT YOUR COFFEE MAKER 1 Description ..........4 2 Safety warnings . -
Page 4: About Your Coffee Maker
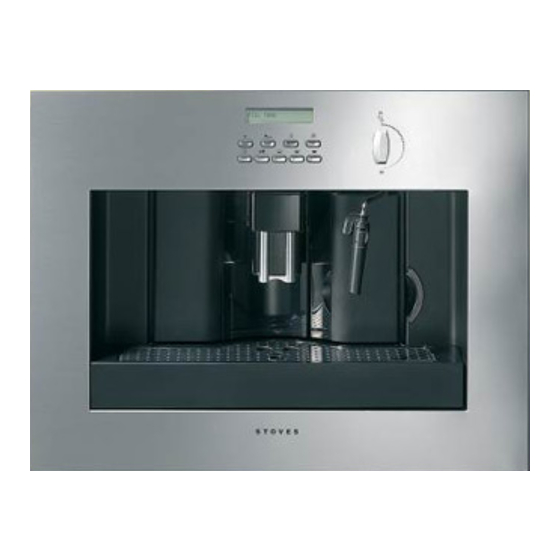
About Your Coffee Maker 1 DESCRIPTION Appliance - next page Control Panel A. Main ON/OFF switch 1. Display; B. Lights 2. Appliance ON/OFF button; C. Steam spout 3. Coffee taste selection button; D. Water tank (removable) 4. One or two cups short coffee button; E. - Page 5 About Your Coffee Maker...
-
Page 6: Safety Warnings
Safety 2 SAFETY WARNINGS READ THESE INSTRUCTIONS CAREFULLY AND KEEP FOR FUTURE CONSULTATION! • This appliance is designed to "make espresso coffee" and "heat drinks". Use with care to avoid scalds from the water and steam jets. • This appliance is intended for domestic use only. Any other use is considered improper and thus dangerous. -
Page 7: Using Your Coffee Maker
Using Your Coffee Maker 3 BEFORE FIRST USE • After unpacking, make sure the appliance is complete and undamaged. If in doubt, do not use. Contact the your retailer, or the Customer Care Centre. • Installation must be performed by a qualified professional in compliance with local legis- lation in force in the country of installation. -
Page 8: Using For The First Time
Using Your Coffee Maker 4 USING FOR THE FIRST TIME The first time you switch on the appliance and every time that it is plugged in, when you press the main ON/OFF switch ( A ), the appliance makes a SELF-DIAGNOSIS and then switches off;... -
Page 9: Preparing Coffee (Using Coffee Beans)
Using Your Coffee Maker 5 PREPARING COFFEE (USING COFFEE BEANS) 1. The appliance is factory set to “Standard”. You can also choose coffee with an extra-mild, mild, strong or extra-strong taste. To choose the required taste, press the button (fig. 5): the selected coffee taste will be displayed. - Page 10 Using Your Coffee Maker - Notes NOTE 1: If the coffee is delivered a drop at a time or not at all, turn the grinding coarse- ness regulator (fig. 15) one click clockwise (see section 7). Turn one click at a time until the coffee is delivered to your satisfaction. NOTE 2: If the coffee is delivered too fast and is not creamy enough, turn the grinding coarseness regulator (fig.
-
Page 11: Changing The Quantity Of Coffee In The Cup
Using Your Coffee Maker 6 CHANGING THE QUANTITY OF COFFEE IN THE CUP The appliance is factory preset to automatically deliver the following quantities of coffee: short (when the button is pressed); standard (when the button is pressed); long (when the button is pressed);... -
Page 12: Preparing Espresso Coffee (Using Ground Coffee Instead Of Beans)
Using Your Coffee Maker 8 PREPARING ESPRESSO COFFEE USING GROUND COFFEE (INSTEAD OF BEANS) • Press the (fig. 14) button to select the ground coffee function. This disables the coffee mill function. The appliance displays: READY PRE-GROUND • Extract the appliance by pulling it towards you using the special handles (fig. -
Page 13: Preparing Cappucinos (Using Steam)
Using Your Coffee Maker 10 PREPARING CAPPUCINOS (USING STEAM) • Move the Cappucino maker outwards (fig. 2). • Place an empty container under the Cappucino maker. Start the steam/hot water delivery by turning the control knob counterclockwise to the ‘On’ position. The appliance displays: STEAM •... -
Page 14: Care And Cleaning
Care and Cleaning 11 CLEANING AND MAINTENANCE Before cleaning, leave the appliance to cool down, switch off the main ‘On / Off’ switch and unplug from the mains supply socket. Never immerse the coffee maker in water. It is an electrical appliance. Do not use solvents or abrasive cleaning products to clean the appliance. - Page 15 Cleaning the Infuser Infuser Push the PUSH symbol fully in until it clicks into place. After having heard the click, check that the red buttons have snapped out. Bottom pipe on the infuser. The pin must be inserted into the bot- tom pipe on the infuser.
-
Page 16: Personalising Your Coffee Maker
Personalising Your Coffee Maker 12 CHANGING AND SETTING THE MENU PARAMETERS The following menu parameters and functions can be changed by the user: • Clock • Auto-start time • Descaling process • Coffee temperature • Length of time the appliance remains on •... -
Page 17: Descaling
Personalising Your Coffee Maker 12.3 Descaling Over time, the continuous heating up of the water used to make the coffee leads to lime scale building up in the inner circuits of the appliance. When the appliance displays the message: DESCALE you should perform the descale cycle. -
Page 18: Changing The Coffee Temperature
Personalising Your Coffee Maker 12.4 Changing coffee temperature To change the temperature of the coffee, proceed as follows: • Press the button (the light over the button comes on) then press the but- ton repeatedly until the appliance displays: TEMPERATURE MEDIUM •... -
Page 19: Troubleshooting
Troubleshooting 13 CHANGING THE LANGUAGE To change the language, proceed as follows: • Press the button for at least 5 seconds until the appliance displays: PRESS OK TO INSTALL ENGLISH and press the button for at least 3 seconds to confirm. The appliance then displays the setting message in English. - Page 20 Troubleshooting - Table MESSAGE MEANING WHAT TO DO • The water tank is empty or is • Fill the water tank as described in FILL TANK positioned incorrectly. section 5, note 6 and insert it • The tank is dirty or encrusted fully.
- Page 21 Troubleshooting - Table PROBLEM CAUSE SOLUTION The coffee is not hot • The cups have not been • Heat the cups by rinsing them in hot water pre-heated. • Heat the infuser by pressing the • The infuser is too cold button before making the coffee The coffee is not creamy •...
-
Page 22: Installation
Installation 16 BUILDING-IN Please check the dimensions of your cabinetry aperture against the dimensions required (see diagram below) to ensure you have enough space to install the appliance. The coffee maker must be installed into a col- umn unit and the column unit must be firmly fixed to the wall. - Page 23 Installation Offer the runner to the interior sides of the cabinet. The plastic spacers provided (see dia- gram 4 below) may be used between the runner side plates and the cabi- netry to adjust any difference between Place the appliance onto the runners the runner, and the cabinetry.
-
Page 24: Connecting To The Electricity Supply
Connecting to the Electricity Supply 17 CONNECTING TO THE ELECTRIC SUPPLY WARNING - THIS APPLIANCE MUST BE EARTHED The flexible mains lead is supplied connected to a BS 1363 fused plug, having a fuse of 13 amp capacity. The wires in the mains lead are coloured in accordance with the following code: Green and yellow = Earth, Blue = Neutral,... -
Page 25: Customer Care
Customer Care Model Number Serial Number Date of purchase Installer stamp / Printed name Date of installation Place of purchase: Date Part(s) replaced Engineers Stamp/ Printed Name Should you need to contact us, please call our Customer Care Centre on: 0871 22 22 502. -
Page 26: Figures
Figures... - Page 27 Figures OPEN CLOSE...
- Page 28 Built in coffee maker Stoney Lane, Prescot, Merseyside L35 2XW Tel: Customer Care 0871 222 2502 Trade Support 0871 222 2625 Customer Support Line 0871 222 2635 Fax: 0871 222 2645 Stoves is a member of Glen Dimplex Home Appliances www.stoves.co.uk...
Need help?
Do you have a question about the S7 E450BCMAUTO and is the answer not in the manual?
Questions and answers