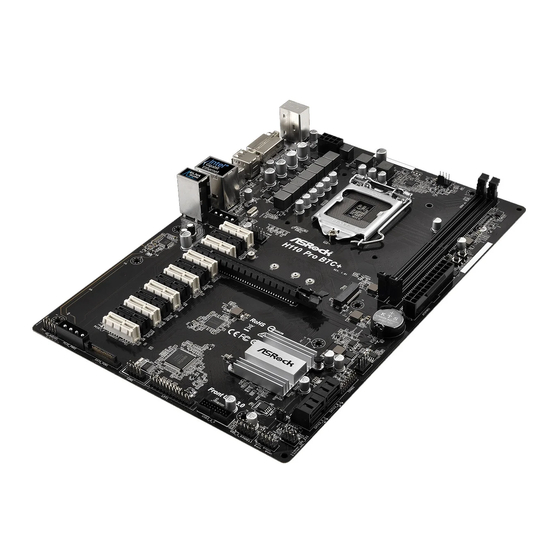
ASROCK H110 Pro BTC+ Installation Manual
Asrock h110 pro btc+ mining system installation guide
Hide thumbs
Also See for H110 Pro BTC+:
- Specifications & instructions (148 pages) ,
- User manual (73 pages)
Advertisement
ASRock H110 Pro BTC+ mining system Installation Guide
Configuration:
1. ASRock H110 Pro BTC+ motherboard
2. 13 x PCIe riser kit
3. 13 x AMD / 8 x AMD + 5 x NVIDIA graphic cards.
4. Dedicated frame for 13 graphics cards and additional components
5. SSD boot drive
6. Minimum 4GB RAM (8GB is recommended)
7. Adapter for dual power supply (Optional)
8. Total power supply at least 2400W (Depends on system configuration)
*We suggest users to visit the official website of the graphics card vendor to check the graphics card TDP. Please refer to
the following example.
Nvidia GTX1060: It requires 120W power for each card.
Link:
https://www.nvidia.com/en-us/geforce/products/10series/geforce-gtx-1060/
AMD RX470: It requires 120W power for each card.
Link:
http://www.amd.com/en-gb/products/graphics/radeon-rx-series/radeon-rx-470
If the system uses eight RX470 and five GTX1060, the total sum including other components is 1810W. Accounting for
power conversion efficiency, the recommended power supply for this example is at least 2400W.
H110 Pro BTC+ with
CPU + memory + SSD
250W
Please refer to the following link for an installation video on our Youtube channel:
https://www.youtube.com/watch?time_continue=3&v=c2EDN7xyjZ4
RX470 x Qty
GTX1060 x Qty
120W x 8
120W x 5
Page 1
*
Total
1810W
Advertisement
Table of Contents

Summary of Contents for ASROCK H110 Pro BTC+
- Page 1 ASRock H110 Pro BTC+ mining system Installation Guide Configuration: 1. ASRock H110 Pro BTC+ motherboard 2. 13 x PCIe riser kit 3. 13 x AMD / 8 x AMD + 5 x NVIDIA graphic cards. 4. Dedicated frame for 13 graphics cards and additional components 5.
- Page 2 Pre-installation: 1. Choose reliable PCIe riser kits with a USB connection and additional power input. 2. Always connect a power supply to the power connector of PCIe riser card. 3. If a secondary power supply is used, please use a dual power supply adapter in order to start up both power supplies simultaneously.
- Page 3 The steps to install the system: Step 1. Please install the Skylake or Kaby Lake CPU and DDR4 memory on the H110 Pro BTC+. Step 2. Plug the graphics card into the PCIe riser card and make sure the latch is locked properly. Step 3.
- Page 4 Step 4. The first mining kit (PCIe riser + graphics card + power connections) should be installed on slot PCIE2. That is the x16 slot. Step 5. Connect the main power supply to the PCIE PWR and SATA PWR headers, and to the standard 24-pin ATX connector and 4/8-pin 12V connector.
- Page 5 Step 11. Install the other mining kits on the other PCIe x1 slots, from top to bottom. Install one kit at a time and repeat steps 3, 4, 8 and 9 every time. Step 12. After installing the 13 mining kits, graphics driver(s) and software, the system is ready for mining.
- Page 6 Note: 1. Because of high temperatures from the graphics cards please set all graphics card fans to full speed. 2. If you want to use integrated graphics as main output, please set: BIOS Advanced Chipset Configuration IGPU Multi-Monitor Enabled BIOS ...


Need help?
Do you have a question about the H110 Pro BTC+ and is the answer not in the manual?
Questions and answers