Table of Contents
Advertisement
Quick Links
Advertisement
Table of Contents

Summary of Contents for Stengel Minikitchen
- Page 1 Minikitchen Operating Instructions...
- Page 2 Download Bedienungsanleitung / manual / manual de instrucciones / mode d‘emploi: www.stengel-steelconcept.de/download...
-
Page 3: Table Of Contents
Safety .................... 4 Notes for built-in appliances ..............5 Notes for the environment ..............5 Unpacking ..................5 Lifting the minikitchen ............... 5 Assembly, installation and connection of the minikitchen ......6 ................6 Main connection ............7 Water and wastewater connections Hotplates .................. -
Page 4: Warning Notes
3 mm or a circuit breaker. Always disconnect the minikitchen. Please read these Operating minikitchen from the mains prior to any Instructions carefully to ensure that the kitchen is installed correctly and used in repair. -
Page 5: Notes For Built-In Appliances
Always work in a team of two. Always lift ging the minikitchen at its bottom side. Do not lift the entire unit at the pantry top as Please take note of the according this may result in damage. -
Page 6: Assembly, Installation And Connection Of The Minikitchen
If the mains cable of this appliance is Do not install the minikitchen in a cabi- damaged, arrange for its replacement by net. Ensure that the heated air at the rear the manufacturer or its customer service... -
Page 7: Water And Wastewater Connections
Wasser- und Abwasseranschluss specific dimensions as the connections are individually installed by the electrician or, The connections for cold and hot water in most cases, have already been fitted. are arranged in the area of the lower The delivery scope includes a drain and metal cabinet underneath the sink. - Page 8 • Top-Pantrytop 100 - 120cm drain and overflow fittin for single-sink drain and overflow fittin for 8x4 sink • Top-Pantrytop 150 - 170cm • Toppantrytop with sink above a dra- with additional drain and overflow set for wer or appliance small spaces...
-
Page 9: Hotplates
Hotplates Prior to first use of the hot plates, the protective coating on the plate surface must be hardened. For this, switch on the rear hotplate first without a pot placed on top for a minimum of 4 minutes (the front plate remains switched off). -
Page 10: Appliance Description - Hotplates
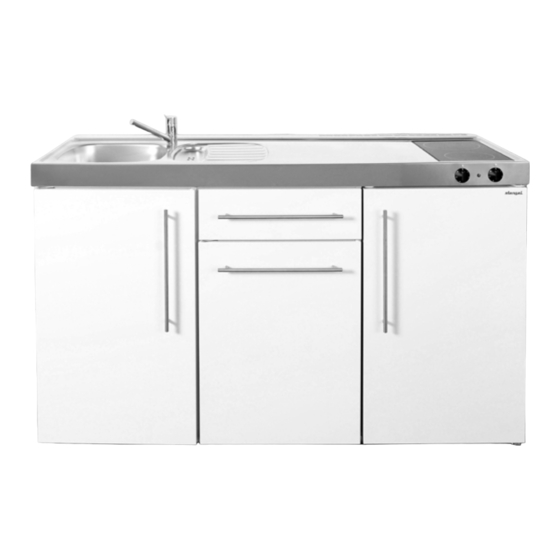
Gerätebeschreibung Kochpatten (Standard-Pantryabdeckung) Switch for hotplate Ventilation slots Switch for hotplate Hotplate ø 180 mm Indicatoe light Hotplate ø 145 mm Switch for the timer (optional) Scraps basin Opening for water fitting Sink Mounting holes Designation PGK-2200 Connection value 2200 W Nominal voltage 230 V / 50 HZ, 16 A Connection... -
Page 11: Glass Ceramic Hob
Glass ceramic hob The glass ceramic surface is very robust and much stronger than glass. However, please observe the following: • Never step on the glass ceramic plate. • Make sure to avoid dropping of heavy objects onto the glass ceramic plate. •... -
Page 12: Appliance Description - Glass Ceramic Hob
removed with vinegar or lemon. (Standard-pantrytops) Appliance description — glass ceramic hob Switch for hotplate Ventilation slots Switch for hotplate Hotplate ø 180 mm Indicatoe light Hotplate ø 145 mm Switch for the timer Scraps basin Opening for water fitting Sink Mounting holes Designation... -
Page 13: Timer Option
Timer option • Corrosion might be generated under- neath deposits. A mechanical timer (1) with a max. run- • Remove traces of use and cleaning ning time of 30 minutes is optionally agent residues immediately. available as additional safety device that ensures that the hotplates are switched •... -
Page 14: Cleaning Recommendation For Powder-Coated Surfaces
• Is the rotary switch turned on? Always use a soft dry cloth first when attempting to clean powder-coated surfa- • Is the minikitchen connected correctly? ces. • (2 plugs, one for the hotplates and one In case the dirt cannot be removed, wet for the fridge). -
Page 15: Connection Diagramm - Recommendation
Connection diagramm - recommendation standard minikitchen metal Standardküche Metall 900 - 1700 connection Anschluss ø 40 (water) (Wasser) 50 50 200/250/300 (je nach (has to be in the middle of the base Spülenunterbau unit) mittig zu legen) fixing height for Installations-Höhe... - Page 16 Download Bedienungsanleitung / manual / manual de instrucciones / mode d‘emploi: www.stengel-steelconcept.de/download Stengel Steel Concept GmbH Wilhelm-Maybach-Str. 1-3 D-73479 Ellwangen telephon: +49 (0) 7961 / 91 21 400 telefax: +49 (0) 7961 / 91 21 5400 email: office@stengel-steelconcept.de visit us in the internet:...
Need help?
Do you have a question about the Minikitchen and is the answer not in the manual?
Questions and answers