Table of Contents
Advertisement
Advertisement
Table of Contents

Related Manuals for ISLA Instruments KORDBOT


Summary of Contents for ISLA Instruments KORDBOT
- Page 1 KORDBOT USERS GUIDE...
-
Page 2: Table Of Contents
INSTANT GRATIFICATION PLAY MODES KEY + MOD DIATONIC MODE DIATONIC STRUM POLYPHONIC KEYS COMMON FUNCTIONS PUSH/TURN CHANGES SETTINGS MIDI SETUP MOD KEYS/NOTE KEYS/MEM KEYS FOOT CONTROLLER CONFIGURATION EXPRESSION PEDAL/FOOT SWITCH ARPEGGIO BUILDER PATTERNS SCALE BUILDER DIATONIC PROGRESSION EDITING DIATONIC THEORY SCALES CHORDS DIATONIC PROGRESSIONS... -
Page 4: Instant Gratification
It’s always nice to be able to check something out without needing to read a manual, or struggle at all so here is a quick start guide for jumping right into the KordBot in order to check it out right away and get a basic sense of what... - Page 5 It takes a moment to boot, so don’t panic. It’s not broken. Connect a midi cable out of the KordBot into the synth you’d like to play, or if you’re using software in a DAW then just boot your machine and load up your software.
-
Page 6: Play Modes
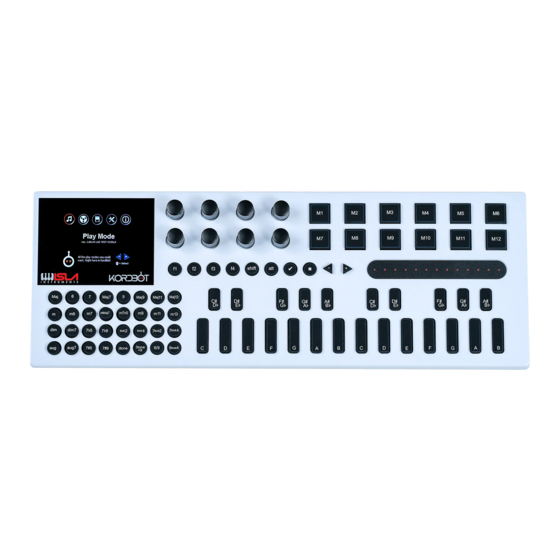
POWER UP When powering up the KordBot the home screen is presented. Here the operation mode is selected. Choose which section you would like to use by either scrolling Encoder A, or using the left and right arrow keys. Select the section by pressing Encoder A. -
Page 7: Key + Mod
(see “Parts Of The KordBot on page X-Y). Pressing and holding a NOTE key (for example C) sets the “root” note. Then, pressing a chord modifier key (for example m7) will cause the KordBot to emit a chord known as a Cm7 or C minor seventh chord. -
Page 8: Diatonic Mode
MOD keys alone generate chords. The NOTE keys allow the user to play along with the chords, providing 6-note polyphony. The default key and scale rows on the KordBot are C Major, G Yo (not a typo, the Yo scale is a traditional folk scale see here: https://en.wikipedia.org/wiki/Yo_scale), C Natural Minor (Aeolian mode) and Ab Blues. The default progression for each row is also the default for that scale type. - Page 9 Progression Editing” for more advanced features. Also, since all the encoder functions are shared by each play mode, you might want to look at the section “KordBot Common Built In Functions”. In the top row, the chords are laid out in standard diatonic progression for a Major scale in the key of C.
-
Page 10: Diatonic Strum
Music theory also has a concept that, in every diatonic progression there are “allowed” movements to other chords. This set of rules has been broken more often than not, but KordBot has included this feature because it can stimulate all sorts of creativity. In future versions of the firmware, the user will be able to create their own map of suggestions to mate up with any user scales and user chords. - Page 11 The storing of MEM key chords is a bit different in this mode. Essentially, you will be “recording” up to 16 notes that are stored in KordBot chord format. Therefore, the process is: 1. Press SHIFT and the MEM key you want to store the chord to. Note - the MEM key will remain lit.
-
Page 12: Common Functions
COMMON FUNCTIONS There are 2 types of built in functions available in the KordBot. The ‘turn’ functions are used for the rotary encoders and have a value which is selected by turning the knob. Most often these are linear values in some range. The other functions are assignable to the ‘push’... -
Page 13: Push/Turn Changes
The assignment of functions to the encoders is done in the Play mode screens. All modes operate the same way. By pressing the SHIFT key, the rotary function may be changed. Pressing the ALT key allows selection of a push function. - Page 14 When you choose the MIDI CC function, another screen pops up to allow selection of the MIDI CC you wish to assign. Note that this is a limited list of MIDI CC functions – ones that are only digital (on or off) in nature. Here, also, you may assign a number for any or all of the MIDI outputs.
-
Page 15: Settings
SETTINGS The Settings menu allows the user to configure much of the KordBot to tailor the system as desired. MIDI Input/ Output routing and channel set ups for individual keys, banks or segments of banks is available here. Setup for the functions of the foot switch and the expression pedal, along with their MIDI channel settings is also available in this menu. -
Page 16: Foot Controller Configuration
FOOT CONTROLLER CONFIGURATION The two pedal inputs at the rear of the KordBot are configured with this screen. The input labeled “F.SWITCH” is for a mechanical switch type pedal. The “PEDAL” input is for a passive resistor based ‘volume’ or ‘expression’ pedal. Care must be taken to connect these devices correctly. -
Page 17: Arpeggio Builder
A C Maj chord would be C-E-G. Therefore the note position 0 of the arpeggiator note pattern 0 would be “C”. Position 1 would contain the “E” and position 2 the “G”. Internally, the KordBot adds the octave to the top of the chord, so position 3 has the C an octave higher than the position 0 note. - Page 18 section of the Common Built In Functions, allows you to change this behavior by making all chords play the same number of positions (adjustable with the Chord spread function). These diagrams represent a single cycle of the arpeggiator. In the simple case of the “U” style and pattern 0, once the cycle is complete, the arpeggiator goes back to the beginning.
- Page 19 The red shaded rectangle shows the length of the currently chosen chord. The dark yellow rectangle indicates the effect of extending the chord by way of the chord spread function. The total length that this chord will play at is the length of the red box plus the length of the yellow box.
- Page 20 So if you ‘push’ note position 3 to the left by one eighth note, the KordBot does the math automatically and adds an eighth note on the other side.
-
Page 21: Scale Builder
Use the octave up and down keys to move to any of the 12 note slots. Press a NOTE key to enter a note in that position. Alternatively, you can pick a starting point and just press NOTE keys, and the KordBot will advance to the next slot (wrapping back to the start, if necessary). -
Page 22: Diatonic Progression Editing
DIATONIC PROGRESSION EDITING The Diatonic Mode (along with the Diatonic Strum mode) is a great wonderland of magical music exploration. There are 59 diatonic banks to experiment with, including 10 programmable slots. For those, you can alter the scale (through the Scale builder) and then modify the flavor of each of the 7 chords in those banks. A future version of the firmware will include a diatonic rule composer, as well, so you will be able to make your own Progression Suggestion charts. -
Page 23: Diatonic Theory
Frankenstein monster… There are a number of scales available in the KordBot. 48 to be exact, with another 10 slots available for advanced scale building. But to understand this diatonic thing, we’ll use the simple example of a Major scale. This scale has been around a really long time. - Page 24 A NATURAL MINOR SCALE While we’ve only shown 8 note scales, KordBot also has scales built on 5 notes (pentatonic scales) and other, even weirder, scales types. But the same basic rules apply: scales are built by using a series of intervals .
-
Page 25: Chords
. Now we have enough information to create Diatonic Progressions, as in the KordBot Diatonic mode. Our example will be in C Major just to make things a bit easier. The basic rule says that we will form a list of chords from the scale notes only. - Page 26 For instance some scales have more or less than 7 notes. The Pentatonic variants all have only 5 notes in their scale. The KordBot handles this by ‘faking’ a progression for exotic chords. Future firmware may include an alternate mode that allows even more variation, but for now, you can use the Progression editor to set up all sorts of ways to explore this music territory .
-
Page 27: File Manager
MOUNTING AND UN MOUNTING Before data can be written to or read from the SD card, the KordBot needs to know about the SD card. Mounting is a term that basically means the system opens the card and reads its configuration information so it knows how to perform operations with the media. -
Page 28: Save / Load System Data
Initially after creating a system disk there is a blank category with one project: CATEGRY0/PROJECT0. It is advisable to save the default KordBot settings in this slot. When it comes time to save your own projects, you can create new slots to save named projects in. There is enough room for 100 categories each with 100 projects – a total of 1,000 slots to store your projects in! To start, click on the File Manager’s Save System Data menu. -
Page 29: Midi Cc Values
MIDI CC VALUES...
Need help?
Do you have a question about the KORDBOT and is the answer not in the manual?
Questions and answers