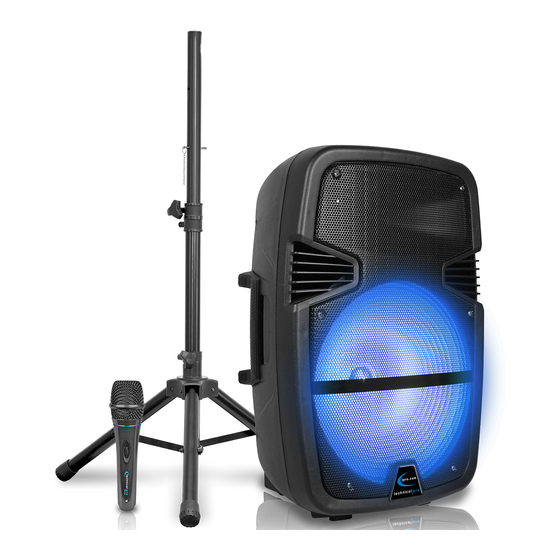
Summary of Contents for Technical Pro PW1610PKG
-
Page 1: User Manual
User Manual ABS Molded Powered Speaker MODEL: PW1610PKG QUESTIONS / COMMENTS CALL 888-842-6277 or email info@tpro.com... - Page 2 If you've spent any time at all in professional audio, you know the name Technical Pro and what it stands for — incredible performance & sound, and the ultimate in reliability under harsh conditions. And now, Technical Pro offers the same...
-
Page 3: Rear Panel
PW1610PKG Rear Panel: PW1610PKG Use with 6-8 Ohm ONLY ON & Flashing LED Woofer... - Page 4 Power LED fails to light up when the unit is powered on and the does not respond to the power being turned on the unit’s fuse as probably blown. For fuse replacement instructions contact Technical Pro via the contact information on the front cover of this manual.
- Page 5 The PW1610PKG is a powered speaker which means it has the built in amplifier. The PW1610PKG’s speakon output allows you to connect a passive speaker directly to the PW1610PKG and receive its power from there. To connect the power cord to the powered speaker simply plug female side of the power cord into the power cord input which is on the rear of the unit.
-
Page 6: Audio Input Connections
PW1610PKG Audio Input Connections LINE RCA (Red and White) & 1/8” Inputs Connecting a Signal Source (DVD / MIXER / MP3) The speaker has RCA & 1/8” (AUX) input jacks on the rear of the unit which is designed to receive the signal directly from your CD, mixer, MP3 player or any of your other audio sources. - Page 7 PW1610PKG Connecting USB Flash Drive & SD Card Inputs There are input jacks for a USB flash drive and SD card on the rear panel of the speaker. Simply connect the USB flash drive or SD card into their respective input jacks and use the input mode selector button and Mode button to choose the corresponding input.
-
Page 8: Compatible Device
Connecting a Compatible Device The PW1610PKG is Bluetooth compatible. To connect a Bluetooth device (ie smart phone) to the speaker follow the steps listed below. Be sure that the volume knobs on the powered speaker are turned down at first and then slowly raise the volume to prevent damage the speakers or any of your other equipment. - Page 9 PW1610PKG Playing Audio from the USB /SD / Inputs After following the steps above to connect a USB / SD / Bluetooth see the details below for tips on using these inputs. Volume Control: The first volume control is the previous / next track number. Press and hold the previous or next track buttons to either decrease or increase the volume.
- Page 10 PW1610PKG Playing Audio from the USB /SD / Bluetooth Inputs When playing audio from the USB / SD / Bluetooth inputs press use the play/pause, previous and next track buttons to control the audio. When using the Bluetooth inputs you will also be able to control these features from the Bluetooth device.
- Page 11 Connecting the PW1610PKG to a Passive Speaker Using the Speakon Output The PW1610PKG comes with a powered speakon output which will provide the power to produce sound from both the powered and passive speakers. Using the speakon speaker cable connect the Speaker OUTPUT on the powered speaker to the Input on the passive speaker.
- Page 12 PW1610PKG Disconnecting the Speakon Cable When the speakon cable is properly installed it will be locked into place. To disconnect the speakon cable from the speakers pull on the metal portion of the connector to unlock the connector, and while pulling this metal piece turn the connector to left (counter-clockwise).
-
Page 13: Remote Sensor
11. Repeat Mode Selector: Press this button to choose the repeating mode. Repeat current track (R1), Repeat ALL tracks (RA) and Repeat off (RO). 12. Mute Remote Sensor: The remote sensor is located only the front on the PW1610PKG. Point the remote directly at this sensor. P-12... -
Page 14: Setting Up The Tripod
PW1610PKG Setting Up the Tripod: When opening the tripod, pull the three legs apart to properly stand the tripod. It is recommended the tripod is opened to the maximum angle. Once the tripod is opened turn the BOTTOM tightening knob to lock the angle into place. -
Page 15: Troubleshooting
Exposure Guidelines in Supplement C to OET65. The equipment has very low levels of RF energy that it is deemed to comply without testing of specific absorption ratio (SAR). The Bluetooth word mark and logos are registered trademarks owned by SIG, Inc. and any use of such marks by Technical Pro is under license. Other trademarks and trade name are those of their respective owners.


Need help?
Do you have a question about the PW1610PKG and is the answer not in the manual?
Questions and answers