Table of Contents
Advertisement
MOBILE CALL
GSM Alarm System
USER'S MANUAL
Profile
For a better understanding of this product, please read this user manual thoroughly before
using it.
Chapter 1.features
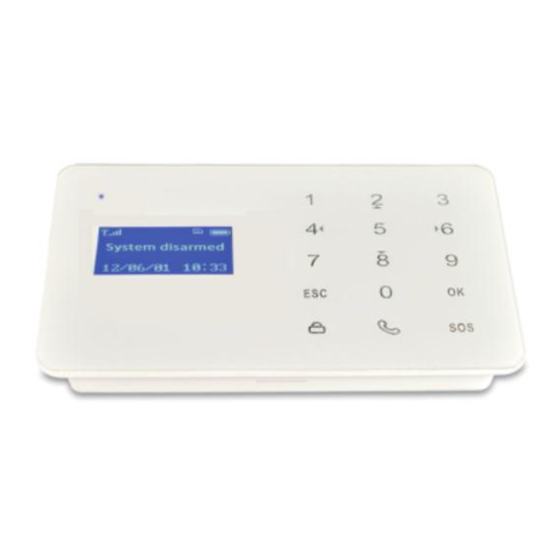
★ Elegant and advanced touch keypad for easy operation;
★ 128*64 lattice LCD screen with clock display;
★ 2 wired and 10 wireless defense zones; each wireless zone supports maximum 10 sensors;
★ Support maximum 50 remote controllers;
★ With built-in alarm, doorbell function(optional);
★ Built-in high—volume speaker, and artificial intelligent digital voice announcer;
★ Built-in artificial intelligent English message;
Can preset 5 phone number, when alarming, system will make audio call to these numbers
★
automatically;
★ can preset 5 SMS numbers: when alarming, system will send SMS;
★ Timely arm and disarm;
★ Can be used as a wireless telephone by using keypad to make calls;
★ One-key-control: out arm, home arm, arm by remote controller or phone call;
★ SOS, fire, gas, door, hall, window, balcony, and boundary places alarm;
★ Real-time,delay,24 hours zones programming function;
Advertisement
Table of Contents

Related Manuals for Sunsky YA-700-GSM-2

Summary of Contents for Sunsky YA-700-GSM-2
-
Page 1: Chapter 1.Features
MOBILE CALL GSM Alarm System USER’S MANUAL Profile For a better understanding of this product, please read this user manual thoroughly before using it. Chapter 1.features ★ Elegant and advanced touch keypad for easy operation; ★ 128*64 lattice LCD screen with clock display; ★... -
Page 2: Chapter2.Alarm Host Introduction
★ Wireless learning code: easy to add additional wireless accessories; ★ Remote control the device to arm, disarm, monitor, and intercom by phone; ★ Record checking: the device can store 200 alarm records; ★ Different arm status: out arm, home arm, delay arm and timely arm; ★... -
Page 3: Chapter3.Initialization
1. Fixation insallation area 2. Wired Interface: Z1 Z2 GND: Wired zone. AMP+ AMP-: Wired siren. 3. Microphone area 4. Switch for Spare battery 5. Wired siren. 6. Protection switch(Pressing for 10 seconds) 7. DC IN 8. Speaker Chapter3.Initialization Correct initiation of the main panel is important to its normal working and lifespan. 1. -
Page 4: Add Remote Controller
2. Add Remote Controller This device supports maximum 50 remote controllers. Extra remote controllers have to be coded to the host in order to perform normally. Their code cannot be empty or the same with the saved code in the host. Method: enter remote controller setting menu, press “4”or “6”... -
Page 5: Delete Defense Zone
4. Coding of Defense Zone This alarm system has 10 wireless defense zones, each of which supports up to 10 wireless detector, Extra sensors not in the standard package have to be coded to the host in order to perform normally. Their code cannot be empty or the same with the saved code in the host. -
Page 6: Siren Setting For Alarm
Fig4: (this example) Before setting, the alarm SMS for zone 1 is: 01 zone fire alarm; After setting, it is: 01 zone gas alarm. The format of alarm SMS: [01-10] zone [place] alarm. For example, you set the place of zone 4 as “window”. The alarm SMS you receive is;... -
Page 7: Alarm Number Setting
Fig4: (this example) Before setting, the panel makes alarm and the siren rings immediately when zone 1 is triggered. After setting, alarm will be after the preset time. (set the delay time under system setting). 11. Alarm Number Setting This system can store 5 alarm phone numbers. When alarming, it will make alarm call to these numbers in order for three times automatically until someone gets through the call. -
Page 8: Sms Number Setting
13. SMS Number Setting The system can store 5 SMS receiving phone numbers. When alarming, it will send SMS to these numbers. Method: enter SMS number setting, press “4” or “6” to choose serial number and then press “ok”. Input the number you want to set, then press “ok” to confirm. Operation figures: Fig1: enter SMS number setting Fig2: choose serial number and Fig3: input SMS receiving number Press “ok’... -
Page 9: System Time Setting
Method: enter “Time” menu, and then choose “Date”. Input the exact date you want to set and press “ok” to confirm. Operation figures: Fig1: enter time setting menu Fig2: choose date setting menu Fig3: input the date Fig4: press “ok” to save 16. -
Page 10: Timely Disarm Setting
18. Timely Disarm Setting After this setting, the alarm system will disarm automatically at the preset time. Method: enter “Time” menu, you will see “Date” menu, then press “6” to choose “Timely disarm”. Input the exact time you want to set and press “ok” to confirm. Operation figures: Fig1: enter time setting menu Fig2: you’ll see date setting menu Fig3: press“6”to choose... -
Page 11: Change Operate Password
Fig1: input 4 numbers randomly Fig5: press “ok” to save 21. Change Operate Password Operate password is used for daily use (disarm or remote control).System default is 1234 Method to change this password: enter “settings” menu, and then “operate password”. Input the 4-digit password you want to set, and save it. -
Page 12: Voice Prompt Function
23Arm Delay Time Setting After this setting, the system will enter out arm status after the preset time. Delay time ranges from 01-99 seconds. The system default time is 60 seconds Method: enter “settings” menu, then you’ll see “operate password”. Press “6” to choose “delay arm”. -
Page 13: Siren Prompt For Remote Controller
needs. Method: enter “settings” menu, then you’ll see “operate password”. Press “6” to choose “voice prompt” and choose “enable” or “disable”. Operation figures: Fig1: enter setting menu Fig2: you’ll see “operate Fig3: press “6” to choose password” menu “voice prompt” Fig4: choose enable/disable 26.Siren Prompt for Remote Controller Turn on this function, the siren will sound a short beep each time you press the remote controller. -
Page 14: Factory Reset
Fig4: choose enable/disable 28.SMS Replay for Arm/Disarm When the user arm or disarm the system, other users may not know it. Enable this function, the panel will send SMS notification to all SMS numbers, so that users could know the status or the system in time SMS content. -
Page 15: Chapter 5.Operation Instruction
Fig4: Press “ok” to confirm Chapter 5.Operation Instruction 1. Out Arm Out arm means all the defense zones are in arm status. When there’s nobody at home, it is required to set all the detectors working. Any detection source (such as thief, fire, or gas leakage) trigger the detector, the alarm system will make alarm. -
Page 16: Chapter6. Technical Parameters
Press[2]:Main unit stops alarming and Disarm; it stops calling users. Press[3]:Siren off and monitors the scene for 30 seconds; for continued monitoring, press [3] again to monitor for another 30 seconds Press[4]:Main unit starts a 30-second two-way intercom It cannot be controlled the mobile during the time of intercom 5. - Page 17 PIR sensor Door sensor Power adapter User manual Siren...
Need help?
Do you have a question about the YA-700-GSM-2 and is the answer not in the manual?
Questions and answers