Table of Contents
Advertisement
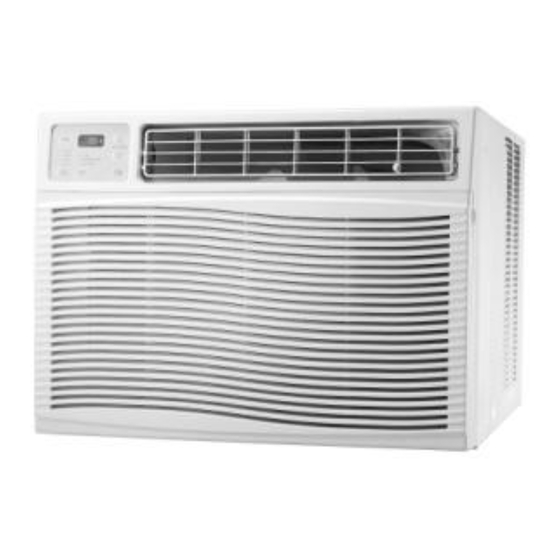
WINDOW AIR CONDITONER
MODEL: AR14WI
USER INSTRUCTION MANUAL
PLEASE READ AND SAVE THESE INSTRUCTIONS
Thank you for choosing our product. For proper and correct operation, please
always read and follow this manual carefully before you operate your air
conditioner. If you lost the instruction manual, please contact the local agent or
licienced engineer for help.
Pictures within this manual are for reference only. Please refer to the actual
product for the appearance.
WARNING:PERSONAL INJURY, DEATH, OR PROPERTY DAMAGE HAZARD
Failure to follow this warning could result in personal injury, death, or property
damage. Read and follow all instructions and warnings, including labels shipped
with or attached to unit before perating your new air conditioner.
Advertisement
Table of Contents

Summary of Contents for Artica AR14WI
- Page 1 WINDOW AIR CONDITONER MODEL: AR14WI USER INSTRUCTION MANUAL PLEASE READ AND SAVE THESE INSTRUCTIONS Thank you for choosing our product. For proper and correct operation, please always read and follow this manual carefully before you operate your air conditioner. If you lost the instruction manual, please contact the local agent or licienced engineer for help.
-
Page 2: Table Of Contents
Contents Operation and Maintenance Installation Operation Notices Installation Notice Installation and Maintenance..17 Safety Precautions ......1 Preparation before installation..19 recautions........4 Window Types and Requirements...20 Parts Name........5 Operation Guide Installation Function and Control.......6 Installation procedure....21 Introduction of remote controller ..9 Instruction for fan direction adjusting........12 Maintenance Clean and Maintenance....13... - Page 3 This appliance is not intended for use by persons (including children) with reduc- ed physical, sensory or mental capabilities or lack of experience and knowledge, unless they have been given supervision or instruction concerning use of the ap- pliance by a person responsible for their safety. Children should be supervised to ensure they are away from the appliance.
-
Page 4: Operation And Maintenance Operation Notices Safety Precautions
To prevent injury to the user or other people and property damage, the following instructions must be followed. Incorrect operation due to ignoring of instructions may cause harm or damage. The seriousness is classified by the following indications. WARNING This symbol indicates the possibility of death or serious injury. CAUTION This symbol indicates the possibility of injury or damage to property. - Page 5 CAUTION When the air filter is to be Do not clean the air conditioner Ventilate the room well when used removed, do not touch the metal with water. together with a stove, etc. parts ofthe unit. It may cause an injury. Water may enter the unit and degrade An oxygen shortage may occur.
-
Page 6: Operation Of Current Device
CAUTION “ ” Operation of Current Device NOTICE: Please contact Customer Service. with a new cord - please contact Customer Service. -
Page 7: Precautions
Precautions Warning ● Air Conditioner should be properly grounded. Incorrect grounding may cause electric shock. ● Do not connect air conditioner to multipurpose socket. Otherwise, it may cause ● Do install the air switch. If not, it maycause malfunction. ● Do not spill water on the remote controller, otherwise the remote controller may be broken. -
Page 8: Parts Name
Parts Name Air outlet frame Control Fan direction panel adjusting rod Air-in panel Power cord NOTE:Panel outlook picture,just for reference,please take the real unit as standard. -
Page 9: Function And Control
Function and Control ● After putting through the power, air conditioner will give out a sound and indic- ators on control panel will be on. After that, you operate the air conditioner through remote controller or control panel. Light indicates the unit is in the temperature or delay time Set mode. -
Page 10: Power Button
Power button Press this button can turn on or turn of f air conditioner. NOTE:Press this button to turn on air conditioner, the unit will operate in Energy Save mode; if the unit is energized after power failure, the unit will still operate according to the status before power failure. - Page 11 Filter check button After fan rotates for 250h totally, lamp of cleaning filter is on to remind customer clean it. Note: When user cleaned the filter, press Filter check button to clear the opera- tion time. Meanwhile, the warning indicator will turn off. △...
-
Page 12: Introduction Of Remote Controller
Introduction of remote controller Note: This is a general use remote controller, it could be used for the air conditioners with multifunction; For some function, which the model dosen’t have, if press the corresponding button on the remote controller that the unit will keep the original running status. -
Page 13: Fan Button
MODE button Each time you press the button, a mode is selected in a sequence that goes from AUTO, COOL, SAVE, FAN and DRY, as the following: AUTO COOL SAVE - / + button Under timer setting status, after each pressing of “+” or “-” button, time will increase or decrease 0.5h or 1h. -
Page 14: Sleep Button
SLEEP button Press this button to go into the SLEEP operation mode. Press it again to cancel this function. This function is available in COOL, HEAT (Only for models with heating function) or DRY mode to maintain the most comfortable temperature for you. -
Page 15: Instruction For Fan Direction Adjusting
Instruction for fan direction adjusting ● You can adjust the fan direction adjusting rod to select left&right air outlet dire- ction according to your requirement. Fan direction adjusting rod ● You can adjust the air outlet frame to select up&down air outlet direction acc- ording to your requirement. -
Page 16: Clean And Maintenance
Clean and Maintenance Warning ■ Turn off the air conditioner and disconnect the power before cleaning the air conditioner to avoid electric shock. ■ Do not wash the air conditioner with water to avoid electric shock. ■ Do not use volatile liquid to clean the air conditioner. 1. -
Page 17: Malfunction Analysis
Malfunction analysis General phenomenon analysis Please check below items before asking for maintenance. If the problem still can't be solved, please contact dealer or professional person. Phenomenon Troubleshooting Solution ● Power failure? ● Wait after power recovery. ● Is plug loose? ●... -
Page 18: Conditioner
● Whether air outlet or air inlet is ● Eliminate the obstacles. blocked? ● Under heating mode, whether ● The unit will stop blowing fan indoor temperature is reached No fan blowed after reaching to set temperature. to set temperature? out from air conditioner ●... -
Page 19: Conditioner
Note: EP malfunction code is only applicable for cooling only unit. F1/F2/F4/FJ malfunction codes are only applicable for electric heating model. Warning ● If there's below phenomenon, please turn off the air conditioner and disconnect the power immediately. After that, please contact dealer at once. →Power cord is overheating or damaged. -
Page 20: Installation And Maintenance
Installation and Maintenance Warning ● Observe all governing codes and ordinances. ● Do not use damaged or non-standard power cord. ● Be caution during installation and maintenance. Prohibit incorrect operation to prevent electric shock, casualty and other accidents. Selection of Installation Location Basic requirement Installing the unit in the following places may cause malfunction. -
Page 21: Safety Precautions
Requirements for Electric Connection Safety precaution 1. Must follow the electric safety regulations when installing the unit. and air switch. 3. Make sure the power supply matches with the requirement of air conditioner. hazard or malfunction. 4. Please make sure the power supply complies with the requirement of air conditioner. -
Page 22: Preparation Before Installation
Preparation before installation Phillips screwdriver Screwdriver Level bar Scissors Pencil Measuring tape Window type unit Sealing strip ( without adhesive) Upper guide rail Sealing strip ( with adhesive) Sponge Left tripod (1) Right tripod (1) Supporter (2) Fixing bracket for window (2) Type A screw (10) Type B screw (2) Type C screw (4) -
Page 23: Window Types And Requirements
Window types and requirements Note: ● The description for below installation is for the standard window. If it’s other types of window, you may need to adjust the window. ● If you need to install the air conditioner at the small window, you may not need for details. -
Page 24: Installation Procedure
Installation procedure Step 1: Remove outer case 1. Hold the clasps at the two sides of panel; pull out the panel to a certain degree along the arrow direction and then lift the panel upwards to remove it. Note: For some types of panel, pull out the bottom to a certain degree and then lift the panel upwards to remove it. - Page 25 screw at the two sides of outer case, and then pull out the main unit from the outer case. (It is advised that two persons handle this operation, one person holding the outer case and the other person holding the clasp of main unit and pulling out the main unit from outer case.) outer case...
- Page 26 rails. A: Tighten screws from inside to B: Tighten screws from outside outside of outer case. to inside of outer case.
- Page 27 Step 4: Stick sealing strip Stick the sealing strip (with adhesive) at the bottom of window frame. sealing strip (with adhesive) Step 5: Install outer case 1. Put the outer case at the windowsill, and the lower guide rail should be stuck to the windowsill.
- Page 28 2. Install the supporter to the tripod with screw; clamp the supporter at the and outer case with screw. left tripod supporter right tripod type F screw outer case type E screw supporter 3. Adjust the position of screw connecting the tripod and supporter into order (Note: The outer case should be placed horizontally or inclined outwards slightly.) horizontal or inclined about 3°...
- Page 29 screw plastic window wooden window Step 7: Plug sealing strip Plug the sealing strip (without adhesive) in the window.
- Page 30 Step 8: Install main unit 1. Ask two persons to push the main unit slowly into the outer case. l cover with screw. screw screw grounding screw case at the top of outer case, and then push the bottom of front case)
- Page 32 You should keep the original sales receipt. Proof of purchase is required to obtain warranty performance. ARTICA dealers, service centers, or retail stores selling ARTICA products do not have the right to alter, modify or any way change the terms and conditions of this warranty.
- Page 33 MICHAEL & MORRIS ENTERPRICES INC ARTICA IS A REGISTER TRADEMARK OF MICHAEL & MORRIS ENTERPRICES INC. 1801 E 41PL. ST. LOS ANGELES CA. 90058 TEL. (323)234-6801 FAX(323)510-7072 Email:NBC2600@GMAIL.COM WWW.ARTICAUSA.COM ...
Need help?
Do you have a question about the AR14WI and is the answer not in the manual?
Questions and answers