Table of Contents
Advertisement
Advertisement
Table of Contents

Subscribe to Our Youtube Channel
Related Manuals for Nvidia DGX-1


Summary of Contents for Nvidia DGX-1
- Page 1 NVIDIA DGX-1 DU-08033-001 _v13.1 | December 2017 User Guide...
-
Page 2: Table Of Contents
2.11. Post Setup Instructions for DGX OS Server Software Version 2.x and Earlier....18 Chapter 3. Preparing for Using Docker Containers............20 3.1. Installing Docker and NVIDIA Docker on DGX OS Server Software 2.x or Earlier....20 3.2. Configuring Docker IP Addresses..............21 3.2.1. Configuring Docker IP Addresses for DGX OS Server Software Version 2.x and Earlier ...22 3.2.2. Configuring Docker IP Addresses for DGX OS Server Software Version 3.1.1 and Later .. - Page 3 Chapter 5. Maintaining and Servicing the NVIDIA DGX-1..........42 5.1. Problem Resolution and Customer Care............. 42 5.2. Restoring the DGX-1 Software Image..............42 5.2.1. Obtaining the DGX-1 Software ISO Image and Checksum File......43 5.2.2. Re-Imaging the System Remotely............... 43 5.2.3. Creating a Bootable Installation Medium............46 5.2.3.1. Creating a Bootable USB Flash Drive by Using the dd Command......46...
- Page 4 6.2. Installing Docker Containers................. 100 Chapter 7. Customer Support for the NVIDIA DGX-1..........102 Chapter 8. Safety..................... 103 8.1. Safety Warnings and Cautions............... 103 8.2. Intended Application Uses................104 8.3. Site Selection................... 104 8.4. Equipment Handling Practices............... 105 8.5. Electrical Precautions................. 105 8.6. System Access Warnings................106 8.7. ...
-
Page 5: Chapter 1. Introduction To The Nvidia Dgx-1 Deep Learning System
NVIDIA-optimized deep learning framework applications packaged in Docker containers. You can use your own scheduling and management software to run jobs, and also build and run your own applications on the DGX-1. www.nvidia.com NVIDIA DGX-1... -
Page 6: Hardware Specifications
Introduction to the NVIDIA DGX-1 Deep Learning System 1.2. Hardware Specifications 1.2.1. Components Component Description ® ® Base Server Dual Intel Xeon CPU motherboard with x2 9.6 GT/s QPI, 8 Channel ® with 2 DPC DDR4, Intel X99 Chipset, AST2400 BMC GPU Baseboard supporting 8 SXM2 modules (Cube Mesh) and 4 PCIE x16 slots for InfiniBand NICs Chassis with 3+1 1600W Power supply and support for up to five 2.5... -
Page 7: Power Requirements
Introduction to the NVIDIA DGX-1 Deep Learning System Feature Description Depth 34.1" (86.6 cm) Gross Weight 134 lbs (61 kg) 1.2.3. Power Requirements Specification for Input Each Power Supply Comments 200-240 V (ac) 3500 W max. 1600 W @ 200-240 V, The DGX-1 contains four load-balancing power supplies, with 3+1 redundancy. -
Page 8: Rear Panel Power Controls
Introduction to the NVIDIA DGX-1 Deep Learning System Type Qty Description InfiniBand QSFP28 port; Mellanox ConnectX-4 VPI MCX455A-ECAT, EDR IB (100Gb), x16 PCIe USB 3.0 ports are available to connect a keyboard. The VGA port connects to a VGA capable monitor for local viewing of the DGX-1 setup console or base OS. -
Page 9: Lan Leds
Introduction to the NVIDIA DGX-1 Deep Learning System 1.2.6. LAN LEDs LEDs next to each Ethernet port indicate the connection status as described in the table below: Status Description Amber (steady) LAN link Amber (blinking) LAN access (off when there is traffic) -
Page 10: Hard Disk Indicators
Introduction to the NVIDIA DGX-1 Deep Learning System Link Activity Description Green (steady) Green (blinking) 100M active link Green (blinking) 10M active link 1.2.8. Hard Disk Indicators Feature Description Button and release lever for removing the HDD Blue (Steady): Drive present... - Page 11 Introduction to the NVIDIA DGX-1 Deep Learning System Activity Description Green Normal operation Amber (blinking) Power off; Fault Green (blinking) Power on; Standby mode www.nvidia.com NVIDIA DGX-1 DU-08033-001 _v13.1 | 7...
-
Page 12: Chapter 2. Installation And Setup
This chapter provides the basic instructions for installing and setting up the NVIDIA DGX-1. 2.1. Registering Your DGX-1 Be sure to register your DGX-1 with NVIDIA as soon as you receive your purchase confirmation e-mail. Registration enables your hardware warranty and allows you to set up an NVIDIA DGX Container Registry account. -
Page 13: Choosing A Setup Location / Site Preparation
Refer to the DGX OS Server Software Release Notes for instructions on how to perform a software update. 2.3. Choosing a Setup Location / Site Preparation Decide on a suitable location for setting up and operating the DGX-1. The location should be clean, dust-free, and well ventilated. General Conditions ‣... -
Page 14: Unpacking The Dgx-1
NVIDIA recommends that customers follow best security practices for BMC management (IPMI port). These include, but are not limited to, such measures as: ‣ Restricting the DGX-1 IPMI port to an isolated, dedicated, management network ‣ Using a separate, firewalled subnet ‣... -
Page 15: What's In The Box
• The DGX-1 should be mounted at the bottom of the rack if it is the only unit in the rack. • When mounting the DGX-1 in a partially filled rack, load the rack from the bottom to the top with the heaviest component at the bottom of the rack. -
Page 16: Installing The Rails
• DO NOT use the handles at the front of the DGX-1 to lift the unit. The handles are designed for sliding the unit out of a rack, and not for carrying the full weight of the DGX-1. -
Page 17: Attaching The Bezel
Installation and Setup CAUTION: The DGX-1 weighs approximately 134 lbs, so an equipment lift is required to safely lift the unit and then accurately align the chassis rails with the rack rails. a) Align the inner chassis rails with the front of the outer rack rails. -
Page 18: Connecting The Power Cables
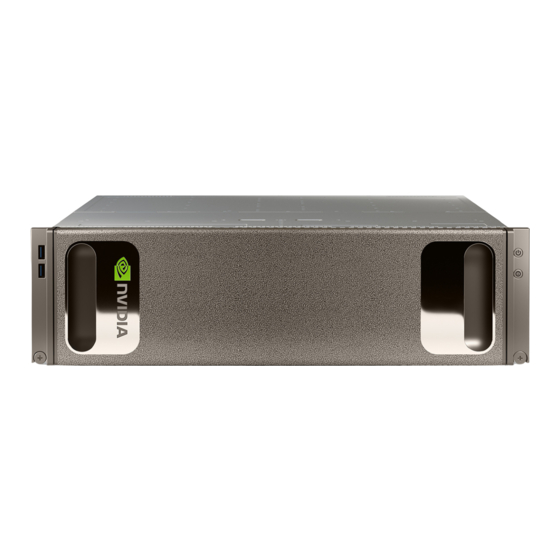
With the bezel positioned so that the NVIDIA logo is visible from the front and is on the left hand side, line up the pins near the corners of the DGX-1 with the holes in back of the bezel, then gently press the bezel against the DGX-1. -
Page 19: Connecting The Network Cables
Installation and Setup a) Secure each cable to the DGX-1, using the power cable retention clips attached to the power plugs. b) Connect each cable to the PDU. Ensure that the cables are distributed over at least two circuits and, if using 3- phase PDUs, they are balanced across all phases as much as possible. -
Page 20: Setting Up The Dgx-1
Using an Ethernet cable, connect the IPMI (BMC) port to your LAN for remote access to the base management controllerr (BMC). Vefiy that all network cables are firmly inserted into the DGX-1 and the associated network switch. 2.10. Setting Up the DGX-1 These instructions describe the setup process that occurs the first time the DGX-1 is powered on after delivery. - Page 21 Create a user account with your name, username, and password. You will need these credentials to log in to the DGX-1 as well as to log in to the BMC remotely. When logging in to the BMC, enter your username for both the User ID as well as the password.
-
Page 22: Post Setup Instructions For Dgx Os Server Software Version 2.X And Earlier
2.11. Post Setup Instructions for DGX OS Server Software Version 2.x and Earlier These instructions apply if your DGX-1 is installed with software version 2.x or earlier. To determine the DGX OS Server software version on your system, enter the following command. - Page 23 Repeat step 1 to confirm that /etc/resolv.conf is a link to /run/resolvconf/ resolv.conf. Make sure that the nvidia-peer-memory module is installed. $ lsmod | grep nv_peer_mem If the following output appears, then your DGX-1 setup is complete and you do not need to perform the next steps. nv_peer_mem 16384...
-
Page 24: Chapter 3. Preparing For Using Docker Containers
NVIDIA driver and the GPUs into the Docker container at launch. As of DGX OS Server software version 3.1.1 and later, Docker and nvidia-docker are part of the base software installation and you do not need to perform the steps in this section. -
Page 25: Configuring Docker Ip Addresses
$ sudo dpkg -i /tmp/nvidia-docker*.deb && rm /tmp/nvidia-docker*.deb 3.2. Configuring Docker IP Addresses To ensure that the DGX-1 can access the network interfaces for nvidia-docker containers, the nvidia-docker containers should be configured to use a subnet distinct from other network resources used by the DGX-1. -
Page 26: Configuring Docker Ip Addresses For Dgx Os Server Software Version 2.X And Earlier
Preparing for Using Docker Containers If you don't know the Base OS software version installed on the DGX-1, then enter the following and inspect the VERSION entry. $ cat /etc/dgx-release DGX_NAME="DGX Server" DGX_PRETTY_NAME="NVIDIA DGX Server" DGX_SWBUILD_DATE="2017-08-02" DGX_SWBUILD_VERSION="3.1.1" DGX_COMMIT_ID="0a0a8ec9e08836c5e99144dd19ae61690f2d9484" DGX_SERIAL_NUMBER=QTFCOU7080017 Follow the instructions in the section appropriate for the software version installed. -
Page 27: Letting Users Issue Docker Commands
To prevent the docker daemon from running without protection against escalation of privileges, the NVIDIA Docker software requires sudo privileges to run containers. You can grant the required privileges to users who will run containers on the DGX-1 in one of the following ways: ‣... -
Page 28: Checking If A User Is In The Docker Group
$ sudo usermod -a -G docker username 3.4. Configuring a System Proxy If you will be using the DGX-1 in base OS mode, and your network requires use of a proxy, then edit the file /etc/apt/apt.conf.d/proxy.conf and make sure the following lines are present, using the parameters that apply to your network: Acquire::http::proxy "http://<username>:<password>@<host>:<port>/";... -
Page 29: Configuring Nfs Mount And Cache
NFS using the DGX-1 SSDs for improved performance. Make sure your DGX-1 is set up in Base OS mode, that you have an NFS server with one or more exports with data to be accessed by the DGX-1, and that there is network access between the DGX-1 and the NFS server. - Page 30 /mnt is the example mount point used in step 7. Verify caching is enabled. cat /proc/fs/nfsfs/volumes Look for the text FSC=yes in the output. Upon rebooting, the NFS should be mounted and cached on the DGX-1. www.nvidia.com NVIDIA DGX-1 DU-08033-001 _v13.1 | 26...
-
Page 31: Chapter 4. Configuring And Managing The Dgx-1
4.1. Using the BMC The DGX-1 includes a baseboard management controller (BMC) that lets you manage and monitor the DGX-1 independently of the CPU or operating system. You can access the BMC remotely through the Ethernet connection to the IPMI port. -
Page 32: Creating A Unique Bmc Password For Remote Access
4.1.1. Creating a Unique BMC Password for Remote Access When you set up the DGX-1 upon powering it on for the first time, you set up a username and password for the system. These credentials are also used to log in to the BMC remotely, except that the BMC password is the username. -
Page 33: Viewing System Information
Make sure that Text is selected at Format of Download Event Logs. Click Save Event Logs to download the event logs. 4.1.4. Determining Total Power Consumption You can use the BMC dashboard to determine total power consumption of the DGX-1 as follows: www.nvidia.com NVIDIA DGX-1 DU-08033-001 _v13.1 | 29... -
Page 34: Accessing The Dgx-1 Console
If you have opened the Java Viewer (Remote Control->Console Redirection) to view the console window, then you can power cycle, reset, or shutdown the DGX-1 as follows: From the JViewer top menu, click Power and then select from the available options, depending on what you want to do. -
Page 35: Configuring A Static Ip Address For The Bmc
This section describes how to set a static IP address for the BMC from the Ubuntu command line. If you cannot access the DGX-1 remotely, then connect a display (1024x768 or lower resolution) and keyboard directly to the DGX-1. To view the current settings, enter the following command. -
Page 36: Configuring A Bmc Static Ip Address Using The System Bios
DGX-1 remotely. This process involves setting the BMC IP address during system boot. Connect a keyboard and display (1024x768 or lower resolution) to the DGX-1, then turn on the DGX-1. When you see the NVIDIA logo, press Del to enter the BIOS Utility Setup Screen. www.nvidia.com NVIDIA DGX-1 DU-08033-001 _v13.1 | 32... - Page 37 Configuring and Managing the DGX-1 At the BIOS Setup Utility screen, navigate to the Server Mgmt tab on the top menu, then scroll to BMC network configuration and press Enter. www.nvidia.com NVIDIA DGX-1 DU-08033-001 _v13.1 | 33...
- Page 38 Configuring and Managing the DGX-1 Scroll to Configuration Address Source and press Enter , then at the Configuration Address source pop-up, select Static on next reset and then press Enter. www.nvidia.com NVIDIA DGX-1 DU-08033-001 _v13.1 | 34...
- Page 39 Configuring and Managing the DGX-1 Set the addresses for the Station IP address, Subnet mask, and Router IP address as needed by performing the following for each: a) Scroll to the specific item and press Enter. b) Enter the appropriate information at the pop-up, then press Enter.
-
Page 40: Configuring A Bmc Static Ip Address Using The Bmc Dashboard
Configuring and Managing the DGX-1 When finished making all your changes, press F10 to Save & Reset, then select Yes at the confirmation pop-up and press Enter. You can now access the BMC over the network. 4.2.3. Configuring a BMC Static IP Address Using the... -
Page 41: Configuring Static Ip Addresses For The Network Ports
4.3. Configuring Static IP Addresses for the Network Ports During the initial boot setup process for the DGX-1, you had an opportunity to configure static IP addresses for the network ports. If you did not set this up at that time, you can configure the static IP addresses from the Ubuntu command line according to the following instructions. -
Page 42: Obtaining Mac Addresses
Configuring and Managing the DGX-1 Use the following port designations according to the DGX-1 Base OS software version installed on the DGX-1: Port Designation: Base OS Port Designation: Base OS Ethernet Port Position Software 2.x and earlier Software 3.x and later... - Page 43 Connect a display (1024x768 or lower resolution) and keyboard to the DGX-1. Turn the DGX-1 on or reboot. At the NVIDIA logo boot screen, press [F2] or [Del] to enter the BIOS setup screen. Select the Advanced tab from the top menu, then scroll down to view the two Quanta Dual Port 10G BASE-T Mezzanine items.
- Page 44 Configuring and Managing the DGX-1 The first item shows the MAC address for ethernet port em1, and the second item shows the MAC address for em2. Navigate to and select Server Mgmt from the top menu, then scroll down to and select BMC network configuration.
- Page 45 Configuring and Managing the DGX-1 This shows the MAC address for the BMC. www.nvidia.com NVIDIA DGX-1 DU-08033-001 _v13.1 | 41...
-
Page 46: Chapter 5. Maintaining And Servicing The Nvidia Dgx-1
5.2. Restoring the DGX-1 Software Image If the DGX-1 software image becomes corrupted or the OS SSD was replaced after a failure, restore the DGX-1 software image to its original factory condition from a pristine copy of the image. -
Page 47: Obtaining The Dgx-1 Software Iso Image And Checksum File
5.2.1. Obtaining the DGX-1 Software ISO Image and Checksum File To ensure that you restore the current version of the DGX-1 software image, obtain the correct ISO image file from NVIDIA Support Enterprise Services. A checksum file is provided for the image to enable you to verify the bootable installation medium that you create from the image file. - Page 48 Maintaining and Servicing the NVIDIA DGX-1 Set up the ISO image as virtual media. a) From the top menu, click Remote Control and select Console Redirection. b) Click Java Console to open the remote JViewer window. Make sure pop-up blockers are disabled for this site.
- Page 49 Click Yes and then OK at the Power Control dialogs, then wait for the system to power down and then come back online. c) At the boot selection screen, select Install DGX-1 OS and then press [Enter]. If you are an advanced user who is not using the RAID disks as cache and want to keep data on the RAID disks, then select Install DGX Server without www.nvidia.com...
-
Page 50: Creating A Bootable Installation Medium
Retaining the RAID Partition While Installing the OS for more information. The DGX-1 will reboot from CDROM0 1.00, and proceed to install the image. This can take approximately 15 minutes. The Mellanox InfiniBand driver installation may take up to 10 minutes. -
Page 51: Creating A Bootable Usb Flash Drive By Using Akeo Rufus
You can identify the USB flash drive from its size, which is much smaller than the size of the SSDs in the DGX-1, and from the mount points of any partitions on the drive, which are under /media. In the following example, the device name of the USB flash drive is sde . - Page 52 Select the Create a bootable disk using option and from the dropdown menu, select ISO image. Click the optical drive icon and open the DGX-1 software ISO image. Click Start. Because the image is a hybrid ISO file, you are prompted to select whether to write the image in ISO Image (file copy) mode or DD Image (disk image) mode.
-
Page 53: Re-Imaging The System From A Usb Flash Drive
Retaining the RAID Partition While Installing the OS for more information. The DGX-1 will reboot and proceed to install the image. This can take more than 15 minutes. The Mellanox InfiniBand driver installation may take up to 10 minutes. After the installation is completed, the system then reboots into the OS. -
Page 54: Updating The System Bios
Maintaining and Servicing the NVIDIA DGX-1 Since the RAID array on the DGX-1 is intended to be used as a cache and not for long- term data storage, this should not be disruptive. However, if you are an advanced user... - Page 55 At the Power Control and Status screen, select the Power Off Server - Orderly Shutdown option, then click Perform Action. You can verify that the DGX-1 is shut down by noting that all the Power Control and Status options are grayed out except for the Power On Server option.
- Page 56 Maintaining and Servicing the NVIDIA DGX-1 d) Be sure all the check boxes under Select Preserve Configuration are cleared. This ensures that the BIOS reverts to its fail-safe default settings for a reliable update. e) Click Upload Firmware to start the process of installing the updated BIOS.
-
Page 57: Updating The Bmc
Obtain the BMC image. a) Log on to NVIDIA Enterprise Services (https://nvid.nvidia.com/enterpriselogin/) and click the Announcements tab to locate the DGX-1 software image archive. b) Download the image file. Open a Java-enabled web browser within your LAN and go to http://<IPMI IP address>/, then log in to the BMC. - Page 58 Maintaining and Servicing the NVIDIA DGX-1 Be sure to set IPMI to Preserve in order to preserve your BMC login credentials. If you fail to do this, the BMC username/password will be set to qct.admin/ qct.admin. If this happens, then be sure to enter the BMC dashboard and go to Configuration->Users to add a new user account and disable the qct.admin...
-
Page 59: Replacing The System And Components
At the Select Based Firmware Update prompt. select Full Flash and then click Proceed. IMPORTANT: Do not shut off power to the DGX-1 while updating the BMC. If the BMC update fails, keep the DGX-1 powered on and booted, and then contact NVIDIA Enterprise Support. -
Page 60: Replacing The System
Be sure to include the bezel when returning the system. 5.5.2. Replacing an SSD Access the SSDs from the front of the DGX-1. You can hot swap the SSDs as follows: If not already removed, remove the bezel by grasping the bezel by the side handles and then pulling the bezel straight off the front of the DGX-1. -
Page 61: Recreating The Virtual Drives
With the bezel positioned so that the NVIDIA logo is visible from the front and is on the left-hand side, line up the pins near the corners of the DGX-1 with the holes in back of the bezel, then gently press the bezel against the DGX-1. The bezel is held in place magnetically. -
Page 62: Megaraid Configuration Utility
Maintaining and Servicing the NVIDIA DGX-1 At the NVIDIA logo boot screen, press [F2] or [Del] to enter the BIOS setup screen. Select the Advanced tab from the top menu and then Scroll down and select the MegaRAID Configuration Utility. - Page 63 Maintaining and Servicing the NVIDIA DGX-1 The RAID Configuration menu appears. www.nvidia.com NVIDIA DGX-1 DU-08033-001 _v13.1 | 59...
-
Page 64: Clear The Drive Group Configuration
Maintaining and Servicing the NVIDIA DGX-1 If you replaced the OS drive, follow the instructions in the section Clear the Drive Group Configuration 5.5.3.2. Clear the Drive Group Configuration These instructions apply when you have replaced the OS drive. Select Main Menu, then select Configuration Management. - Page 65 Maintaining and Servicing the NVIDIA DGX-1 Select Clear Configuration. www.nvidia.com NVIDIA DGX-1 DU-08033-001 _v13.1 | 61...
- Page 66 Maintaining and Servicing the NVIDIA DGX-1 Select Confirm [Disabled] and then select Enabled at the confirmation popup. www.nvidia.com NVIDIA DGX-1 DU-08033-001 _v13.1 | 62...
- Page 67 Maintaining and Servicing the NVIDIA DGX-1 Select Yes, then select OK at the success screen. www.nvidia.com NVIDIA DGX-1 DU-08033-001 _v13.1 | 63...
-
Page 68: Recreate The Os Virtual Drive
Maintaining and Servicing the NVIDIA DGX-1 Follow the instructions in the sections Recreate the OS Virtual Drive and then Recreate the RAID0 Virtual Drive 5.5.3.3. Recreate the OS Virtual Drive These instructions apply when you have replaced the OS drive. Be sure to first complete... - Page 69 Maintaining and Servicing the NVIDIA DGX-1 Select Create Virtual Drive, then select Select Drives at the next screen. Leave all other options at their default settings as shown below. www.nvidia.com NVIDIA DGX-1 DU-08033-001 _v13.1 | 65...
- Page 70 Maintaining and Servicing the NVIDIA DGX-1 The list of drives under CHOOSE UNCONFIGURED DRIVES will initially be empty. To view the available drives, select Select Media Type [HDD], then change to [SSD]. www.nvidia.com NVIDIA DGX-1 DU-08033-001 _v13.1 | 66...
- Page 71 Maintaining and Servicing the NVIDIA DGX-1 Under CHOOSE UNCONFIGURED DRIVES, select the 446 GB drive, then change to [Enabled] at the pop-up dialog. www.nvidia.com NVIDIA DGX-1 DU-08033-001 _v13.1 | 67...
- Page 72 Maintaining and Servicing the NVIDIA DGX-1 Confirm that only the first drive at Drive Port 0 - 3:01:00 displays as [Enabled]. www.nvidia.com NVIDIA DGX-1 DU-08033-001 _v13.1 | 68...
- Page 73 Maintaining and Servicing the NVIDIA DGX-1 Scroll up and select Apply Changes. www.nvidia.com NVIDIA DGX-1 DU-08033-001 _v13.1 | 69...
- Page 74 Maintaining and Servicing the NVIDIA DGX-1 Select OK at the success screen. www.nvidia.com NVIDIA DGX-1 DU-08033-001 _v13.1 | 70...
- Page 75 Maintaining and Servicing the NVIDIA DGX-1 The virtual drive creation page now displays a summary of your selection. The Virtual Drive Size should be approximately 446 GB. Select Save Configuration at the top of the menu. Change the Confirm [Disabled] field to [Enabled] and then select [Yes].
-
Page 76: Recreate The Raid0 Virtual Drive
Maintaining and Servicing the NVIDIA DGX-1 Select [OK] at the success screen. You have successfully re-created Virtual Drive 0, where the OS will be installed. Follow the instructions in the section Recreate the RAID0 Virtual Drive 5.5.3.4. Recreate the RAID0 Virtual Drive These instructions apply when you have replaced the OS drive and cleared the drive group configuration. - Page 77 Maintaining and Servicing the NVIDIA DGX-1 Select Create Virtual Drive. www.nvidia.com NVIDIA DGX-1 DU-08033-001 _v13.1 | 73...
- Page 78 Maintaining and Servicing the NVIDIA DGX-1 Scroll to Select RAID Level and switch to [RAID0], if not already set. www.nvidia.com NVIDIA DGX-1 DU-08033-001 _v13.1 | 74...
- Page 79 Maintaining and Servicing the NVIDIA DGX-1 Scroll to Select Media Type and switch to [SSD]. www.nvidia.com NVIDIA DGX-1 DU-08033-001 _v13.1 | 75...
- Page 80 Maintaining and Servicing the NVIDIA DGX-1 Select Select Drives. www.nvidia.com NVIDIA DGX-1 DU-08033-001 _v13.1 | 76...
- Page 81 Maintaining and Servicing the NVIDIA DGX-1 Switch all unconfigured 1TB drives to [Enabled]. www.nvidia.com NVIDIA DGX-1 DU-08033-001 _v13.1 | 77...
- Page 82 Maintaining and Servicing the NVIDIA DGX-1 Select Apply Changes. www.nvidia.com NVIDIA DGX-1 DU-08033-001 _v13.1 | 78...
- Page 83 Maintaining and Servicing the NVIDIA DGX-1 Change Confirm to [Enabled], then select Yes. Select OK at the success screen. The Create Virtual Drive screen displays a summary of your selection. Verify that the summary matches your selection, then select Save Configuration.
- Page 84 Maintaining and Servicing the NVIDIA DGX-1 Make sure Confirm is set to [Enabled], then select Yes to confirm the change. www.nvidia.com NVIDIA DGX-1 DU-08033-001 _v13.1 | 80...
- Page 85 Maintaining and Servicing the NVIDIA DGX-1 Select OK at the success screen. Confirm and exit. a) Select View Drive Group Properties to confirm the configuration. www.nvidia.com NVIDIA DGX-1 DU-08033-001 _v13.1 | 81...
- Page 86 Maintaining and Servicing the NVIDIA DGX-1 b) Verify that your configuration screen shows that you have two virtual drives with the following properties: Virtual Drive 0 of size 446 GB (or very similar) Virtual Drive 1 of size 7 TB (or very similar).
- Page 87 Maintaining and Servicing the NVIDIA DGX-1 c) If your Drive Groups match the above, press [F10] to save these settings and reset the system. d) Select Save Changes and Reset, then select Yes at the confirmation prompt. www.nvidia.com NVIDIA DGX-1...
-
Page 88: Recreating The Raid 0 Array
BIOS screen alerting you that the RAID array needs to be configured. Press C (or whichever key allows you to continue) to complete the boot process. You will be able to do this only if you are operating the DGX-1 through a direct display and keyboard connection. -
Page 89: Replacing The Power Supplies
Reattach the bezel. With the bezel positioned so that the NVIDIA logo is visible from the front and is on the left-hand side, line up the pins near the corners of the DGX-1 with the holes in www.nvidia.com NVIDIA DGX-1... -
Page 90: Replacing The Fan Module
Maintaining and Servicing the NVIDIA DGX-1 back of the bezel, then gently press the bezel against the DGX-1. The bezel is held in place magnetically. CAUTION: Be careful not to accidentally press the power button that is on the right edge of the DGX-1 when removing or installing the bezel. - Page 91 Turn off the DGX-1 and disconnect all network and power cabling. Remove the motherboard tray. a) Locate the locking levers for the motherboard tray at the rear of the DGX-1. There are two sets of locking levers. The locking levers for the motherboard are the bottom set.
- Page 92 Maintaining and Servicing the NVIDIA DGX-1 d) Set the motherboard tray on a clean work surface, and position it so that the locking levers are at the top as you look down on the tray. The DIMMs are on a printed circuit board on the left side of the tray.
- Page 93 Maintaining and Servicing the NVIDIA DGX-1 Remove the DIMM. www.nvidia.com NVIDIA DGX-1 DU-08033-001 _v13.1 | 89...
- Page 94 Maintaining and Servicing the NVIDIA DGX-1 a) Press down on the side latches at both ends of the DIMM socket to push them away from the DIMM. This should unseat the DIMM from the socket. b) Pull the DIMM straight up to remove it from the socket.
-
Page 95: Replacing The Infiniband Cards
The InfiniBand cards are located on the GPU tray which is accessible from the rear of the DGX-1. Be sure you have identified the faulty InfiniBand card needing to be replaced. The slots are identified as indicated in the following image. - Page 96 Turn off the DGX-1 and disconnect all network and power cabling. Remove the GPU tray. a) Locate the locking levers for the GPU tray at the rear of the DGX-1. There are two sets of locking levers. The locking levers for the GPU tray are the top set.
- Page 97 Maintaining and Servicing the NVIDIA DGX-1 c) Swing the locking levers out and then use then to pull the GPU tray out of the unit. Do not pull the unit by the blue retention clasps; they may break. Set the GPU tray on a clean work surface.
- Page 98 Maintaining and Servicing the NVIDIA DGX-1 Firmly grasp the InfiniBand card and lift it straight up out of the PCIe slot. Position the replacement InfiniBand card over the empty PCIe slot and insert it into the slot. Swing the retention clasp over the bracket to secure the bracket in place.
-
Page 99: Setting Up The Infiniband Cards
This section describes the steps needed to verify that the InfiniBand card has been replaced correctly. With the DGX-1 turned on, verify that the card was installed correctly and is recognized by the system. $ lspci | grep -i mellanox The output should show all four InfiniBand cards. - Page 100 Whether errors are reported in /var/log/syslog. If these steps do not indicate a problem and yet the services still do not start, contact NVIDIA Enterprise Support and obtain an RMA for the card. Verify the firmware version. $ cat /sys/class/infiniband/mlx5*/fw_ver Example output: www.nvidia.com...
- Page 101 12.17.1010 12.17.1010 12.17.1010 The latest InfiniBand firmware version supported on DGX-1 OS release 1.0 is 12.16.1020, and the latest supported on release 2.0 is 12.17.1010. If you need to update the firmware, follow these steps: a) Initiate the firmware update.
- Page 102 Maintaining and Servicing the NVIDIA DGX-1 Physical state: LinkUp Rate: 100 Base lid: 65535 LMC: 0 SM lid: 0 Capability mask: 0x2651e848 Port GUID: 0x248a0703000de26c Link layer: InfiniBand CA 'mlx5_2' CA type: MT4115 Number of ports: 1 Firmware version: 12.17.1010...
-
Page 103: Chapter 6. Installing Software On Air-Gapped Nvidia Dgx-1 Systems
WARNING:This process destroys all data and software customizations that you have made on the DGX-1. Be sure to back up any data that you want to preserve, and push any Docker images that you want to keep to a trusted registry. -
Page 104: Creating A Local Mirror Of The Nvidia And Canonical Repositories
Perform the update from the private repository, starting with Get the new package list step (sudo apt-get update) of the instructions found in the DGX-1 Software Release Notes and Upgrade Guide, which you can obtain from the Enterprise Support site. - Page 105 Installing Software on Air-Gapped NVIDIA DGX-1 Systems Verify the image is on your system. $ docker images www.nvidia.com NVIDIA DGX-1 DU-08033-001 _v13.1 | 101...
-
Page 106: Chapter 7. Customer Support For The Nvidia Dgx-1
Chapter 7. CUSTOMER SUPPORT FOR THE NVIDIA DGX-1 There are several options for contacting NVIDIA Customer Support for assistance reporting, troubleshooting, or diagnosing problems with your DGX-1. NVIDIA Enterprise Support Portal The best way to file an incident is to log on to NVIDIA Enterprise Services (https://nvid.nvidia.com/enterpriselogin/). -
Page 107: Chapter 8. Safety
Indicates the presence of a hazard that may result in serious personal injury if the WARNING is ignored. Indicates potential hazard if indicated information is ignored. Indicates shock hazards that result in serious injury or death if safety instructions are not followed www.nvidia.com NVIDIA DGX-1 DU-08033-001 _v13.1 | 103... -
Page 108: Intended Application Uses
‣ Provided with a properly grounded wall outlet. ‣ Provided with sufficient space to access the power supply cord(s), because they serve as the product's main power disconnect. www.nvidia.com NVIDIA DGX-1 DU-08033-001 _v13.1 | 104... -
Page 109: Equipment Handling Practices
Caution: To avoid electrical shock or fire, check the power cord(s) that will be used with the product as follows: ‣ The power cord must have an electrical rating that is greater than that of the electrical current rating marked on the product. www.nvidia.com NVIDIA DGX-1 DU-08033-001 _v13.1 | 105... -
Page 110: System Access Warnings
The equipment rack must be anchored to an unmovable support to prevent it from tipping when a server or piece of equipment is extended from it. The equipment rack must be installed according to the rack manufacturer's instructions. www.nvidia.com NVIDIA DGX-1 DU-08033-001 _v13.1 | 106... -
Page 111: Electrostatic Discharge
After removing a board from its protective wrapper or from the server, place the board component side up on a grounded, static free surface. Use a conductive foam pad if available but not the board wrapper. Do not slide board over any surface. www.nvidia.com NVIDIA DGX-1 DU-08033-001 _v13.1 | 107... -
Page 112: Other Hazards
NICKEL NVIDIA Bezel: The bezel’s decorative metal foam contains some nickel. The metal foam is not intended for direct and prolonged skin contact. Please use the handles to remove, attach or carry the bezel. While nickel exposure is unlikely to be a problem, you should be aware of the possibility in case you’re susceptible to nickel-related reactions. - Page 113 Safety ‣ Attach the covers to the chassis according to the product instructions. www.nvidia.com NVIDIA DGX-1 DU-08033-001 _v13.1 | 109...
-
Page 114: Chapter 9. Compliance
Chapter 9. COMPLIANCE The NVIDIA DGX-1 is compliant with the regulations listed in this section. 9.1. United States Federal Communications Commission (FCC) FCC Marking (Class A) This device complies with part 15 of the FCC Rules. Operation is subject to the following... -
Page 115: Canada
RoHS Directive (2011/65/EU) for hazardous substances. ‣ ErP Directive (2009/125/EC) for European Ecodesign. A copy of the Declaration of Conformity to the essential requirements may be obtained directly from NVIDIA GmbH (Floessergasse 2, 81369 Munich, Germany). 9.5. Japan VCCI www.nvidia.com NVIDIA DGX-1... -
Page 116: Australia
Compliance This is a Class A product. In a domestic environment this product may cause radio interference, in which case the user may be required to take corrective actions. VCCI-A 9.6. Australia 9.7. China RoHS Material Content www.nvidia.com NVIDIA DGX-1 DU-08033-001 _v13.1 | 112... - Page 117 Compliance www.nvidia.com NVIDIA DGX-1 DU-08033-001 _v13.1 | 113...
-
Page 118: Israel
Compliance 9.8. Israel 9.9. South Korea Class A Equipment (Industrial Broadcasting & Communication Equipment). This equipment Industrial (Class A) electromagnetic wave suitability equipment and seller www.nvidia.com NVIDIA DGX-1 DU-08033-001 _v13.1 | 114... -
Page 119: India
Compliance or user should take notice of it, and this equipment is to be used in the places except for home. 9.10. India www.nvidia.com NVIDIA DGX-1 DU-08033-001 _v13.1 | 115... - Page 120 LIFE CRITICAL APPLICATION). NVIDIA EXPRESSLY DISCLAIMS ANY EXPRESS OR IMPLIED WARRANTY OF FITNESS FOR SUCH HIGH RISK USES. NVIDIA SHALL NOT BE LIABLE TO CUSTOMER OR ANY THIRD PARTY, IN WHOLE OR IN PART, FOR ANY CLAIMS OR DAMAGES ARISING FROM SUCH HIGH RISK USES.
Need help?
Do you have a question about the DGX-1 and is the answer not in the manual?
Questions and answers