Table of Contents
Advertisement
Advertisement
Table of Contents

Related Manuals for Bristol 621


Summary of Contents for Bristol 621
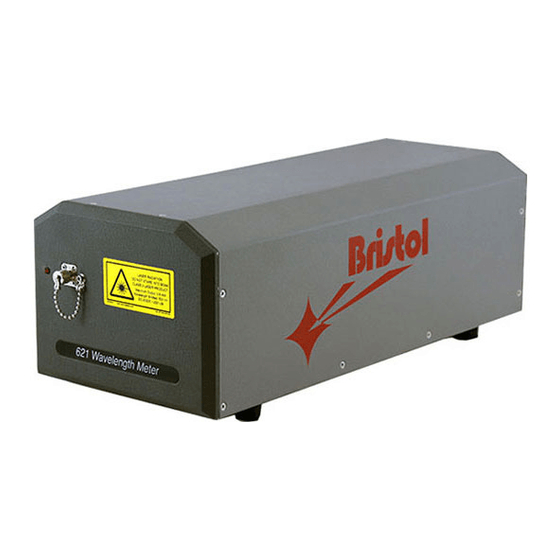
- Page 1 ODEL ASER AVELENGTH ETER Version 4.7 USER’S MANUAL...
- Page 2 The information contained in this publication is subject to change without notice. 2015 Bristol Instruments, Inc.
-
Page 3: Table Of Contents
CONTENTS INTRODUCTION ........................4 Welcome ............................ 4 Safety Notices..........................4 General Safety Considerations....................5 Inspection ..........................6 INITIAL INSTRUMENT SETUP ....................7 General ............................7 Power Supply Connections ....................... 7 Signal Output Connections ......................8 Software Installation ........................9 LASER INPUT – VIS AND NIR VERSIONS ................10 Fiber-Optic Laser Input ...................... -
Page 4: Introduction
If you have any questions about the operation of your 621 system, please do not hesitate to call Bristol Instruments at (585) 924-2620. Or, you can contact us at service@bristol-inst.com. -
Page 5: General Safety Considerations
(VIS and NIR) or the input aperture (IR and MIR) on the front panel of the model 621. If this instrument is not used as specified, the protection provided by the equipment could be impaired. -
Page 6: Inspection
Inspection The 621 Laser Wavelength Meter is packed in a carton designed to give maximum protection during shipment. If the outside of the shipping carton is damaged, notify your shipping department immediately. Your shipping department may want to notify the carrier. -
Page 7: Initial Instrument Setup
The Class 2 warning label, shown here, is located next to the fiber-optic input coupler (VIS and NIR) or the input aperture (IR and MIR) on the front panel of the model 621. Place the 621 Laser Wavelength Meter on a firm horizontal surface. -
Page 8: Signal Output Connections
Connect the other end of the line-power cord to the power receptacle. Figure 2.1: Back Panel Signal Output Connections The 621 Laser Wavelength Meter has the following connections for signal output and communications. These connections are located on the instrument’s back panel (Figure 2.1). -
Page 9: Software Installation
Start Menu (or Application Menu) of the PC. Click on this icon to open the application. Navigate to the “Help” menu and select “Manual” to open a PDF file of the 621 User’s Manual (this file). This User’s Manual will describe installation and operation of the 621 system. -
Page 10: Laser Input - Vis And Nir Versions
The Class 2 warning label, shown here, is located next to the fiber-optic input coupler (VIS and NIR) or the input aperture (IR and MIR) on the front panel of the model 621. Never inspect or clean a fiber-optic cable without first disconnecting the entire cable assembly from the optical source. -
Page 11: Free-Beam Laser Input
Model 621 User’s Manual LASER INPUT – VIS AND NIR VERSIONS Ensure that all fiber-optic connectors are clean and dry. The 621 system is shipped with a fiber cleaning kit consisting of a package of connector cleaning sticks, clean wipes, and fiber-optic splice & connector cleaner spray. See Appendix E for cleaning instructions. - Page 12 If the laser under test has a free space beam, it must be launched into a fiber-optic patchcord for entry into the 621 Laser Wavelength Meter. The LC-1 Fiber-Optic Input Coupler offered by Bristol Instruments is a convenient method of doing this.
-
Page 13: Laser Input - Ir And Mir Versions
LASER INPUT – IR AND MIR VERSIONS Installation of Adjustment Feet The IR and MIR versions of the 621 Laser Wavelength Meter are supplied with three leg/feet assemblies (Figure 4.1) that are used to precisely align the instrument’s Michelson interferometer to the laser under test. -
Page 14: Alignment Of Laser Under Test
Maximum safe input is 10 mW of optical power. Laser input power in excess of 10 mW can result in damage to the instrument. The laser under test enters the IR and MIR versions of the 621 system through an input aperture on the front panel of the instrument (Figure 4.2). - Page 15 With appropriate mirrors, adjust the laser under test to be parallel to the optical table at a height of approximately 5 ½ inches (140 mm). Total travel of the 621 adjustment feet is ½ inch (13 mm). It is not advisable to have the instrument too close to the top of the adjustment range.
-
Page 16: Using The Laser Wavelength Meter
USING THE LASER WAVELENGTH METER Operation Instructions Turn on the power switch of the 621 Laser Wavelength Meter located on the back panel of the instrument. Make sure the supplied USB cable is connected to the USB connector on the back panel of the 621 system and to a USB port on the PC. -
Page 17: Wavelength Screen
Model 621 User’s Manual USING THE LASER WAVELENGTH METER Wavelength Screen The Wavelength Screen of the NuView Software displays the absolute wavelength, wavenumber, or frequency of the laser under test. Once the application is connected to the instrument, the Wavelength display will update continuously until the connection is terminated. -
Page 18: Trend Screen
Model 621 User’s Manual USING THE LASER WAVELENGTH METER Intensity Meter Graphically displays the relative intensity of the laser under test. Status Bar The Status bar is located at the bottom of the Wavelength Screen and the Trend Screen. It provides information about the current state of the instrument as described below (from left to right). - Page 19 Model 621 User’s Manual USING THE LASER WAVELENGTH METER Measure/Pause Selecting the Measure button (left) initiates data collection. After the Measure button is selected, it changes its appearance to the Pause button (middle). The Trend Graph and Data Table are updated continuously until the Pause button is selected.
-
Page 20: Menu Function Descriptions
Model 621 User’s Manual USING THE LASER WAVELENGTH METER Menu Function Descriptions File Menu Start Data Logging – The wavelength measurements can be logged in a comma separated value (*.csv) file format for use in other graphing programs. If “Stop after measurements”... - Page 21 NOTE: In other scientific publications, the units of nanometers, micrometers, and wavenumbers may refer to the values in an air, standard air, or vacuum environment. The 621 Laser Wavelength Meter provides measurements as values in a vacuum environment, and units that are dependent on environment are given a “-vac”...
- Page 22 COM port is unknown, click “Scan for Instruments” to locate the instruments that are connected to the PC. Double click on the desired instrument from the list to populate the COM port field, and click “Connect.” Disconnect – Used to disconnect the 621 system from the PC. Bristol Instruments, Inc.
- Page 23 Help Menu Manual - Opens a PDF file of the 621 User’s Manual. About - Displays the NuView Software version, the embedded software versions, and information about the 621 system.
-
Page 24: Application Programming Interface (Api)
In this configure window, click on Browse and find the path to the CLDevIface.dll. This file is found on the NuView Software CD in the Bristol Wavelength Meter folder. Click on the drop-down arrow next to Function Name to choose the function call needed. - Page 25 Figure 6.2: Sample getWavelength_v80.vi. The sample .vi located in the LabVIEW Example II folder, BristolExample.vi, demonstrates how to interface LabVIEW directly to the 621 Laser Wavelength Meter without using the Windows dll. Because the communications functions that are contained in the dll are replicated in the .vi, the .vi is considerably more complex than the sample described above, which accesses the 621 Laser Wavelength Meter via the dll.
-
Page 26: Custom Program Interface - Windows .Dll Function Calls
Once the com port is selected, click on “Open.” When the port is opened, the indicator to the right of the port list will change to a bright green. Within the .vi, there are two modes of communication available with the 621 Laser Wavelength Meter. - Page 27 Model 621 User’s Manual APPLICATION PROGRAMMING INTERFACE (API) DECLSPEC int __cdecl CLCloseDevice(int DeviceHandle) Function: Closes the device using a USB Serial Port Interface. This command must be called at the end of the program to properly release the port. Parameters: DeviceHandle: the device handle returned by the call to the CLOpenUSBSerialDevice function.
-
Page 28: Custom Program Interface - Direct Communication
Remote communication directly between a custom program and the 621 Laser Wavelength Meter, without using the Windows dll, is described in this section. The 621 Laser Wavelength Meter uses a Silicon Labs CP2101 USB to UART bridge controller. The drivers, provided on the NuView Software CD, must be installed before remote communication can occur. - Page 29 Model 621 User’s Manual APPLICATION PROGRAMMING INTERFACE (API) 0x7E XOR 0x20 = 0x5E escaping an ST 0x5E XOR 0x20 = 0x7E un-escaping an ST 0x7D XOR 0x20 = 0x5D escaping an ET 0x5D XOR 0x20 = 0x7D un-escaping an ET...
- Page 30 Model 621 User’s Manual APPLICATION PROGRAMMING INTERFACE (API) Communication Message Set The message ID values are segmented as follows: Range Description 0x00 – 0x1F Reserved 0x20 – 0x5F APC to instrument message Ids 0x60 – 0x9F Instrument to APC message Ids 0xA0 –...
- Page 31 Model 621 User’s Manual APPLICATION PROGRAMMING INTERFACE (API) Detailed examples Note that byte offset and byte value fields are represented in hexadecimal values. Request Wavelength (Read Back Lambda 1): Direction: APC DSPB Byte Byte Byte Name Byte Description Offset...
-
Page 32: Appendix A - Specifications
Model 621 User’s Manual APPENDIX A - SPECIFICATIONS APPENDIX A – SPECIFICATIONS 6 2 1 A 6 2 1 B L A S E R T Y P E CW and quasi-CW (repetition rate >10 MHz) W A V E L E N G T H... -
Page 33: Appendix B - Warranty & Service
Bristol Instruments. If you have any questions about the operation of your 621 system or need to have your 621 system serviced, please call Bristol Instruments at (585) 924-2620. Or, you can contact us at service@bristol-inst.com. -
Page 34: Appendix C - Code Updates
PC. Process 1) Connect the PC to the 621 system using the provided USB cable and turn the instrument 2) Copy the utility Bristol621Update.bat to a folder on your PC. 3) Copy the update files to the same folder as Bristol621Update.bat. Any 1, 2 or all 3 can be updated at once: a. -
Page 35: Appendix D - Monitor Port
APPENDIX D – MONITOR PORT APPENDIX D – MONITOR PORT The Monitor Port on the rear panel of the 621 Laser Wavelength Meter provides a combination of analog and digital signals for observing the interference fringe signals and measurement timing signals using an oscilloscope. The Monitor Port uses a 9-pin, female, D-sub style connector shown in Figure D-1 and with a pinout described in the table below. -
Page 36: Appendix E - Troubleshooting
Model 621 User’s Manual APPENDIX E – TROUBLESHOOTING APPENDIX E – TROUBLESHOOTING The 621 Laser Wavelength Meter continually checks the quality of the signal it is analyzing and alerts the user to unusual conditions that might affect the precision of the wavelength measurement. -
Page 37: Appendix F - Fiber-Optic Cleaning Instructions
APPENDIX F – FIBER-OPTIC CLEANING INSTRUCTIONS General Information Ensure that all fiber-optic connectors are clean and dry. The 621 Laser Wavelength Meter is shipped with a fiber-optic cleaning kit consisting of a package of connector cleaning sticks, clean wipes, and fiber-optic splice & connector cleaner spray. -
Page 38: Declaration Of Conformity
50 Victor Heights Parkway Victor, NY 14564 USA declares this product: Product Name: Wavelength Meters Model Number(s): 621-VIS, 621-NIR, 621-IR, 621-MIR conforms to the following directives: 73/23/EEC 89/336/EMC as a result of having been tested satisfactorily to the following standards: Safety:... - Page 40 Bristol Instruments, Inc. 50 Victor Heights Parkway Victor, NY 14564 Tel: (585) 924-2620 Fax: (585) 924-2623 Email: service@bristol-inst.com...
Need help?
Do you have a question about the 621 and is the answer not in the manual?
Questions and answers