Advertisement
Quick Links
Advertisement

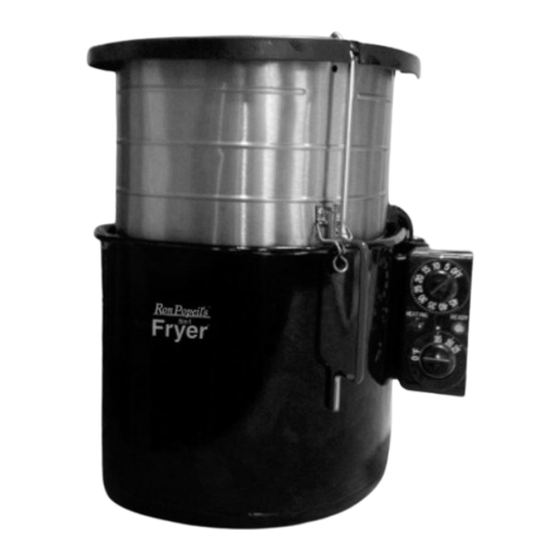
Summary of Contents for Ron Popeil 5in1 Fryer
- Page 1 IMPORTANT SAFEGUARDS READ AND SAVE THESE INSTRUCTIONS...
-
Page 2: Important Safeguards
IMPORTANT SAFEGUARDS When using electrical appliances, basic safety precautions should always be followed, including the following: • Read all instructions. • Keep away from children. Use extreme caution when operating near • The appliance becomes hot during young children, pets and people with use! Do not touch hot surfaces without disabilities. - Page 3 • Ensure that the appliance, including feet, frying. handles and associated parts, does not • Use extreme caution when lowering extend beyond the edge of a table or Wire Basket into hot oil counter during use. Keep appliance at to avoid over ow. least 6 inches away from counter and •...
- Page 4 Important: • The heating element uses • When steaming, use protective gloves 1735 watts of electricity and may to lift Lid’s rear handle. Pull lid up and trip your circuit breaker. To prevent towards yourself to avoid rising hot these occurrences, unplug additional steam.
- Page 5 Parts Description (Images are not to scale) Oval Inner Cooking Container Snorkel Cutout Oval Outer Container Oval Inner Frying Container (bowl) nestles Safety Extension Sleeve (back view) Wire Basket with Two Colored inside the Oval Outer Container is stored between both Containers Removable Safety Handles Two Wire Lids/Partition with Carving Stand Base with...
- Page 6 Parts Description (Images are not to scale) Snorkel Reset Button Timer Dial Temperature Hands-free Collapsible Funnel with Dial 3 non-washable Oil Filters (about a 90-day supply) Control Box with Heating Element Fryer Lid with Charcoal Cartridge with Timer Dial turns Fryer On! One non-washable Charcoal Filter, plus 2 Additional non-washable Charcoal Filters (about a 90-day supply)
- Page 7 Frying Safely fry big foods like a turkey up to 15 lbs and fry large quantities of small foods! Fry up to 4 full pounds of fried chicken at one time—in only 13 minutes. You can also fry up to two full pounds of delicious french fries, an 8 lbs leg of lamb, fry two small slabs of baby back ribs in only 10 minutes, and so much more! Steaming...
- Page 8 ™ Assembling & Cleaning Your 5in1 Fryer 1. Carefully remove all parts from box. Locate the hidden Safety Extension Sleeve (SES) by lifting up the Outer Container then slide the SES off the outer shell of the Inner Cooking Bowl. Check test on outer container.
- Page 9 Inserting & Attaching The Safety Extension Sleeve (SES) IMPORTANT: Do NOT attach the SES until you have added oil or water to the Fryer’s Inner Cooking Bowl. A. Line up the cut-out in the SES B. SES partially down but not all directly above the snorkel in the the way down.
- Page 10 Frying Foods Under 5 lbs IMPORTANT: Always cover battered food with bread crumbs or dry coating to prevent foods from sticking to the basket. 1. Add Oil. Place Fryer on a at, sturdy surface and add oil. Pour the desired amount of oil for frying (e.g.
- Page 11 5. Attaching Basket Handles. Place the Wire Basket with the horizontal round cylinder facing you. Rest the colored portion of the Wire Basket Handle on the at surface in front of the basket. The handle should be perpendicular to the basket. Then, insert the small bent tip at the bottom of the basket’s handle from left to right into the matching round cylinder’s hole.
- Page 12 9. Set Thermostat Dial to desired oil temperature and Timer Dial to the appropriate frying time. If your recipe requires less than 5 minutes of frying time, you can also use a digital Timer for better accuracy. When the Timer bell rings and the light turns off, frying is complete and the machine turns off.
- Page 13 Using Your Turkey “Big Sheet” & Chart WARNING: Turkeys with a price tag weight of 15.01 lbs or more should not be fried in this machine. • IMPORTANT: Watch the instructional DVD before frying a turkey for the rst time. Refer to the separate “Big Sheet” instructions and turkey frying chart for information on frying a 9-15 lb.
- Page 14 Frying Chicken When frying chicken pieces, place the larger pieces on the bottom of the basket. Then, insert lid/partition just above your bottom layer, making sure that it doesn’t touch the food below it. Place the remaining chicken pieces on top of lid/partition. Note: Oil Spray Bottom of Wire Basket &...
- Page 15 Small Food Frying Times Never use more than 3½ Qts. of oil for small foods, unless noted below. Type Food Temp, Time Prep/Use Your Own of Food and Directions Seasonings (lbs) (Qts.) Crispy or extra 1½ Heat oil to 385°F and fry Peeled, cut into ¼”...
- Page 16 Type Food Temp, Time Prep/Use Your Own of Food and Directions Seasonings (lbs) (Qts.) Cauli ower 3½ Heat oil to 385°F and fry All purpose our, whole Use lid/partition full for 5 min. egg wash, Italian bread basket crumbs Avocado 3½...
- Page 17 Type Food Temp, Time Prep/Use Your Own of Food and Directions Seasonings (lbs) (Qts.) Frozen Chicken 1½ 3½ Heat oil to 385°F and fry Tenders/Nuggets for 4 min. Fried Chicken 1½ 3½ Place largest pieces Same procedure as 2 lbs Use lid/partition of coated chicken on the bottom of the...
- Page 18 Type Food Temp, Time Prep/Use Your Own of Food and Directions Seasonings (lbs) (Qts.) Doughnuts 3½ Heat oil to 350°F and fry Cut a hole in the middle of Biscuits ™ Pillsbury for 2 min. the biscuit. store brand - refrigerated round biscuits Use lid/partition Beef Short Ribs...
- Page 19 Food Steaming Instructions (for optional or included Steaming Attachment) Always wear protective gloves when steaming or preparing hot food. 1. Place Fryer on a fl at, sturdy surface and add water. Pour exactly 3½ Qts. of water into the Inner Cooking Bowl. Once Heating Element is completely submerged in water, plug Power Cord into wall outlet, but do not turn the Control Box Timer to on.
- Page 20 Food Steaming Times (3½ Qts of water including boiling time.) Vegetables Time Seafood Time (whole, or small pieces) (mins) (mins) Asparagus Lobster Tail – Raw Beets Lobster Tail - Frozen Broccoli Fresh King Crab Legs Brussels Sprouts Frozen King Crab Legs Carrots Fresh Shrimp Corn...
- Page 21 ™ ™ Preparing to SteamBake or SteamFry When SteamBaking ™ or SteamFrying ™ without the food Steaming Attachment, you must insert the included plastic SteamBlocking Sheet with tab into the Filter Cartridge in place of and after removing the Charcoal Filter. The SteamBlocking Sheet blocks the metal venting grate and creates hotter steam.
- Page 22 7. Place Fryer Lid (with the SteamBlocking Sheet inside the cartridge) on the top ™ of the 5in1 Cooking System 8. Turn the Thermostat Dial all the way to 385°F and set Timer for 45 minutes. After 45 minutes, the bell will ring and the Fryer (and its light) will turn off. 9.
- Page 23 ™ SteamBaking Cakes Follow the recipe of any store-bought cake mix. Or, make your own! One box of cake ™ mix SteamBakes perfectly inside your (included) 8-cup High Heat Rectangular container. Directions: 1. First remove the Charcoal Filter from the Fryer lid’s Filter Cartridge and replace it the ™...
- Page 24 2. Pour 5 Qts. of water into the Inner Cooking Bowl. To measure your water to 5 Qts. , use the embossed line on the vertical Heating Element or use your own measuring container. 3. Place the Fryer Lid on top of your 5in1 Fryer ™...
- Page 25 Ron’s Basic Bread Recipe – Be creative! Loaf (8-cup) Ingredients: 4 cups bread or wheat our 2 cups warm water 2 tsp dry active yeast 2 tsp sugar 1 tsp salt 4 cups different food ingredients (like fresh or dried fruit, nuts, or chopped ham, grated (up to) cheese, cut up tomatoes etc…) 5 tbsp...
- Page 26 Directions: In a large bowl, combine the our, salt and if you like, add any combination of additional Be creative! ingredients and spices. For example, you can add fresh or dried fruits and nuts, cinnamon, chocolate chips etc… Or, chopped ham and cheese with your favorite herbs like oregano, rosemary thyme etc…...
- Page 27 Ron’s Pizza Bread 8-cup Container Ingredients: Coffee Can Ingredients: 4 cups bread or wheat our 2 cups bread or wheat our 2 cups warm water 1 cup warm water 2 tsp dry active yeast ¾ tsp dry active yeast 2 tsp sugar ¾...
- Page 28 3. After the 5 minutes, give it a quick mix again before pouring into the large bowl with the our and mixed ingredients. Use the tablespoon or spatula to thoroughly blend the dough mixture (about 3 minutes). 4. With both hands, lift up the dough mixture and place it into the oil-sprayed container. Then, with the back of your hand, evenly compress the dough down as far as it will 5.
- Page 29 ™ SteamFrying - First you Steam with avored Steam. Then you Fry to sear your meats and poultry and lock the avor and juices in. You must use the SES IMPORTANT: During the steaming process, water condensation will drip down onto your countertop.
- Page 30 ™ Frying (when SteamFrying A whole chicken is only 5 minutes, a roast is about 10 minutes. Whole Turkeys cannot be SteamFried ™ 1. Remove the food- lled basket and set it aside on an absorbent cloth or some paper towels.
- Page 31 Boiling Spaghetti or Other Pasta in Your 5in1 ™ Cooking System You can use up to 1 full pound of dried spaghetti. 1. Lower the Wire Basket into the Fryer’s Inner Cooking Bowl so that it is resting on the Heating Element. 2.
-
Page 32: Troubleshooting
Troubleshooting Problem Cause Possible Solution Fryer not operating • Liquid was not in the Fryer • Always have liquid in the machine (Timer or Temperature when the Control Box was before the Control Box is turned on. Light does not come turned on. - Page 33 Problem Cause Possible Solution Handles in basket • Basket Handle tip is at the don’t go in easily wrong angle for insertion into basket • Place the basket in front of you like the picture • The handle should be in a low, horizontal position with the colored insulated handle resting on your at counter top before you slide the...
- Page 34 Problem Cause Possible Solution Unfried skin around the • Turkey was standing on an • Make sure that both Tied ends of middle of the nished angle and not straight up the Turkey Legs are touching the fried turkey in basket Flat Metal Base.
- Page 35 This warranty gives you speci c legal rights and you may have other rights, which may vary from state to state. Thank you, CustomerService@5in1Fryer.com. RON POPEIL’S™ 5IN1 FRYER™ 7850 Ruffner Ave. Van Nuys, CA 91406 Do not return to retailer or seller for missing or damaged parts.
- Page 36 Product Registration To register ownership by mail, cut the page along the dotted line, ll out completely and send to: Ron Popeil’s 5in1 Fryer 7850 Ruffner Ave. Van Nuys, CA 91406 Note: If you do not register your purchase online or by mail, your warranty will not be activated.
Need help?
Do you have a question about the 5in1 Fryer and is the answer not in the manual?
Questions and answers