Table of Contents
Advertisement
Advertisement
Table of Contents

Summary of Contents for ALDI OC 500
- Page 1 User Manual 2 IN 1 OFFICE CUTTER...
-
Page 2: Table Of Contents
Contents Product contents / device parts ......... 3 General information ............4 Reading and storing the user manual .........4 Explanation of symbols ............4 Safety ................. 5 Proper use................5 Safety notes ................5 First use ................7 Checking the office cutter and product contents ....7 Connecting, diconnecting and storing ....... -
Page 3: Product Contents / Device Parts
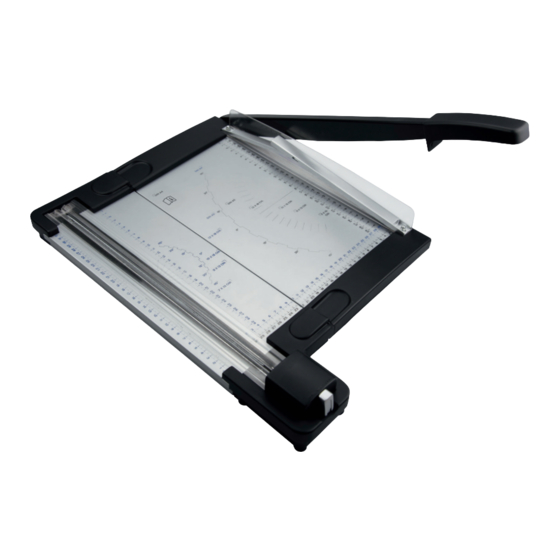
Product contents / device parts Connecting components for the cutting unit Rotary trimming unit Cutter bar Cutting head guide rail Blade head in starting position Control knob for adjusting the rotary blades Guillotine with handle Paper clamp with blade guard Guillotine locking device Markings for standard formats and cutting angles... -
Page 4: General Information
General information General information Reading and storing the user manual This user manual accompanies this 2 in 1 office cutter. It contains import- ant information on start-up and handling. For improved readability, the 2 in 1 office cutter will be referred to only as the “office cutter”... -
Page 5: Safety
Safety Safety Proper use The office cutter is only designed for cutting paper and card. It is only intended for private use and not suitable for commercial purposes. Only use the office cutter as described in this user manual. Any other use is deemed improper and may result in damage to property or even personal injury. - Page 6 Safety - Do not cut more than the specified quantities of paper (with other materials or thicker paper and card, always run a test with just 1 piece). - Do not cut textiles, food or similar materials. WARNING! Risk of crushing! While the rotary cutter is being unfolded into its operating state,there is a risk of crushing! WARNING!
-
Page 7: First Use
First use First use Checking the office cutter and product contents NOTICE! Risk of damage! If you are not cautious when opening the packaging with a sharp knife or other pointy object, you may quickly damage the office cutter. - Therefore, be very careful when opening. 1. -
Page 8: Disconnecting The Cutting Units
Operation Disconnecting the cutting units - To disconnect the cutting units, lift the rotary cutter until it is vertical (at 90°) to the guillotine (Fig. 1, page 10) and remove the unit from theconnecting components. Note: The cutting units may only be disconnected or connected at an angle of 90°. -
Page 9: How To Cut With The Rotary Cutter
Operation WARNING! Risk of injury! Your hands should not be between the blade guard and the guillotine! How to cut with the rotary cutter 1. The rotary cutter is located on the left-hand side of the unit. 2. Push the blade head into the starting position. -
Page 10: Changing The Cutter Bar
Operation Attention: Changing your desired cutting mode is only possible if the blade head is located in starting position. Changing the cutter bar - After frequent use of the rotary cutter, the cutter bar may wear out. In this case you can rotate the cutter bar - To do this, firstly move the blade head back into the starting position. -
Page 11: Cleaning
Cleaning Cleaning NOTICE! Risk of damage! Improper handling of the office cutter may result in damage to the office cutter. - Do not use any aggressive cleaners, brushes with metal or nylon bristles, sharp or metallic cleaning utensils such as knives, metal sponges and the like. -
Page 12: Technical Data
4. The rotary cutter‘s guide rail should always be engaged after use and for transportation. 5. To store and transport the office cutter, you may fold it down to save space and for safe transportation in the original packaging. Technical data Model: OC 500 Article number: 40421 Weight: 2.2 kg Cut length: max. -
Page 13: Warranty Details
2 in 1 office cutter Warranty Details The product is guaranteed to be free from defects in workmanship and parts for a period of 36 months from the date of purchase. Defects that occur within this warranty period, under normal use and care, will be repaired, replaced or refunded at our discretion. -
Page 14: Repair And Refurbished Goods Or Parts Notice
Please be assured though, refurbished parts or replacements are only used where they meet ALDI’s stringent quality specifications. If at any time you feel your repair is being handled unsatisfactorily, you may escalate your complaint. - Page 16 If you are not entirely satisfied with this product, please return it to the nearest ALDI store within 60 days from the date of pur- chase, for a full refund or replacement, or take advantage of our after sales support by calling the supplier´s Customer Service Hotline.
Need help?
Do you have a question about the OC 500 and is the answer not in the manual?
Questions and answers