Advertisement
Table of Contents
- 1 Table of Contents
- 2 Audio Source Selection
- 3 Dab / Dab
- 4 FM Radio
- 5 Bluetooth Music Streaming
- 6 Bluetooth Hands Free Mobile Phone
- 7 Auxiliary Input
- 8 Usb
- 9 Ipod Mode
- 10 Installation
- 11 Mounting the Radio
- 12 Diagnostics
- 13 Diagnostics
- 14 Wiring Diagram
- 15 Dimensioned Drawing
- 16 Electrical Connections
- Download this manual
Advertisement
Table of Contents

Summary of Contents for Classic Car Stereo CR017 Classic 200
- Page 1 DAB DAB+ FM RDS USB Bluetooth hands free & streaming Aux in radio Part no. CR017 Classic 200 Please read this manual before use...
-
Page 2: Table Of Contents
Contents Audio Source selection DAB / DAB+ FM Radio Bluetooth music streaming Bluetooth hands free mobile phone Auxiliary input IPod mode Installation 8-11 Mounting the radio Diagnostics 12-13 Wiring diagram Dimensioned drawing Electrical connections... -
Page 3: Audio Source Selection
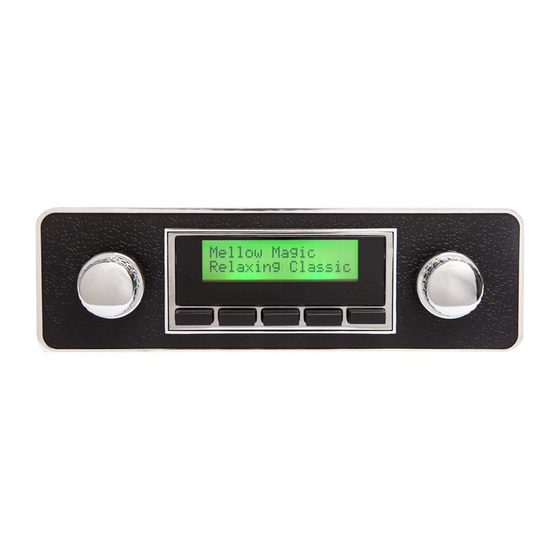
Audio Source selection To turn the unit on press button number 1 To turn the unit off press button number 1 for 2 seconds To adjust the volume (00 to 46) turn button number 1 clockwise to increase and anti clockwise to decrease the volume. -
Page 4: Dab / Dab
DAB / DAB+ Please note the clock is only displayed for 5 seconds after pressing button number 1. To select the mode, press button number 7 to scroll between dab/fm/bt music (USB or I Pod if connected) and auxiliary input. Dab /DAB +radio operation To tune in the dab radio press button number 6, the display will show full scan then press and hold button number 6 for 2 seconds to start the station search. -
Page 5: Fm Radio
FM Radio then turning button 7 scrolls between yes and no. Select yes then hold button 6 for 2 seconds, the relevant stations will now be removed from the memory. System, to perform a factory reset, press button 6 then turn button 7 until the display shows System, turn button 7 until the display shows factory reset. -
Page 6: Bluetooth Music Streaming
Bluetooth music streaming Two seconds after releasing button 7, the display will show “auto” and revert back to pre set selection mode. If the station that you are listening to supports radio text, the transmitted information will scroll across the display at the bottom whilst showing the station name and pre set number across the top. -
Page 7: Bluetooth Hands Free Mobile Phone
Bluetooth hands free mobile phone Mobile phone operation To answer an incoming call press button number 3. Pressing button number 3 during a call will switch between hands free and handset. Pressing again will revert back to hands free. To end a call press button number 2. Pressing button number 3 will dial the last number ( last number redial). -
Page 8: Ipod Mode
I Pod mode Intro scan, press button number 3 for intro scan, this will play the first 10 seconds of each track until you press it again. The display will show INT in the display to show that this function has been selected. Repeat, Pressing button number 4 will turn on the Repeat function. -
Page 9: Installation
Installation within the oval cut out in the radio to the appropriate distance apart then re-tighten the spindle nuts. Please note that you should only loosen the nuts to adjust the spindle spacing and not as part of the mounting process. The fascia has pre cut holes for the spindles and would need to be modified for the new spindle spacing. - Page 10 Installation ISO Connector B Purple Right rear speaker positive Purple/black Right rear speaker negative Grey Right front speaker positive Grey/black Right front speaker negative White Left front speaker positive White/black Left front speaker negative Green Left rear speaker positive Green/black Left rear speaker negative If you have only two speakers then the un used speaker wires must be insulated and not connected.
-
Page 11: Mounting The Radio
Mounting the radio The cable should then be connected to the fly lead on the rear of the radio labelled “MIC” The optional sponge wind muff should be fitted it the microphone if is fitted where it could be affected by draughts / wind. Typical scenarios would be in a soft top vehicle or near a heater vent / window opening. -
Page 12: Diagnostics
Diagnostics Diagnostics Radio will not power up. Check that there is 12 volts positive power on both the yellow and red wires (pins A4 and A7) and that there is a good earth (ground/chassis) connection on pin A8. Check that there is sufficient power in the vehicle battery. Check for loose/corroded connections in both the power and earth connections. -
Page 13: Diagnostics
Diagnostics Reception is often better outside and away from buildings. DAB reception can be affected by some radio transmitters/masts and power lines, fluorescent and led lighting etc. Try re tuning the radio. Try a Factory Reset then re tune. USB size/format If your Classic 200 is not able to read your memory stick, please make sure that the files are in either Mp3 or WMA format, also, make sure that there are no other “non music”... -
Page 14: Wiring Diagram
Wiring diagram Dimensions 192mm 56mm 104mm 50mm 27mm 27mm... -
Page 15: Electrical Connections
Electrical Connections This radio has been produced for use in cars with NEGATIVE EARTH ELECTRICAL SYSTEMS – please make sure your car is negative earth before installation. If your car is positive earth you will need a positive earth adaptor (our part no. - Page 16 NAVCA BV Veldegge 39a 7468 DJ Enter Tel: +31 85 877 07 09 Email: info@navca.nl Website: www.navca.nl...
Need help?
Do you have a question about the CR017 Classic 200 and is the answer not in the manual?
Questions and answers