Table of Contents
Advertisement
Quick Links
For Sales & Service Contact
Pb200i User Guide
2650 E. 40th Ave. • Denver, CO 80205
3/14/17
Phone 303-320-4764 • Fax 303-322-7242
User's Guide USA
1-800-833-7958
Revision 10.0.1
www.geotechenv.com
Before operating the Pb200i, be sure to read this entire User's
Guide. We strongly recommend that you store this User's Guide
with the instrument in its carrying case.
1
Advertisement
Table of Contents

Related Manuals for Heuresis Pb200i

Summary of Contents for Heuresis Pb200i
- Page 1 Phone 303-320-4764 • Fax 303-322-7242 User’s Guide USA 1-800-833-7958 Revision 10.0.1 www.geotechenv.com Before operating the Pb200i, be sure to read this entire User’s Guide. We strongly recommend that you store this User’s Guide with the instrument in its carrying case.
-
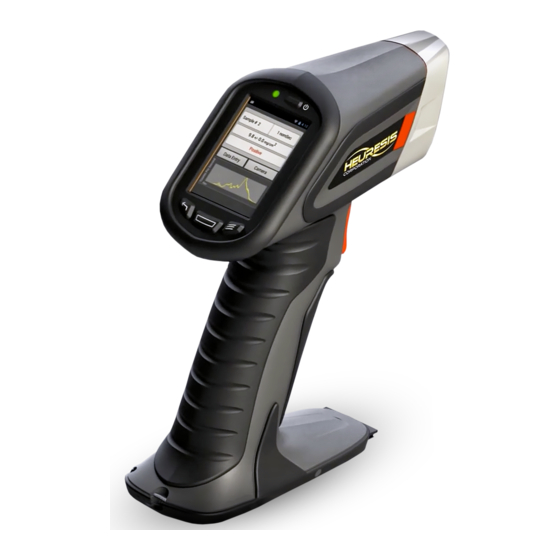
Page 2: Pb200I Features
Pb200i Features Trigger LED indicator (warning lights) Active Measurement Area (for sample) Proximity button Snout protector label Instrument label (includes serial numbers) Foot stabilizer Camera Lanyard... - Page 3 Power On/Off button LED/Proximity button indicator Power indicator Pb200i Widget/App Back (Return) button Center button Menu button Battery door opening CE mark Battery wedge Caution: removing the Battery wedge may cause the battery pack not to fit correctly. Mini USB port...
-
Page 4: Charging The Batteries
4. Once the batteries are fully charged they are ready for use in the Pb200i. 5. Caution : Do not mix different manufacturer’s batteries in the Pb200i battery holder. This may cause a reduction in your battery life. -
Page 5: Installing The Batteries
Figure 2 Figure 3 Remove the battery door on the bottom of the Pb200i. Slide the battery wedge to the side. Insert the battery holder with the arrow facing the front of the instrument (Figure4). Apply slight upward force to seat the battery holder properly;... -
Page 6: Powering On And Initializing The Pb Application Software
Powering On and Initializing the Pb Application Software 1) To power on the instrument, press and hold the Power ON/Off Button until the instrument turns on. Caution: The instrument will go to “sleep” after 10 minutes of inactivity. Press any button to reactivate the instrument. -
Page 7: Taking A Measurement
Pb200i measurement window to x-rays and gamma-rays produced by the sealed radioisotope source in the instrument.. The safety shutter can only be opened by pulling the trigger of the instrument when the proximity button at the top of snout of the Pb200i is fully depressed against a surface. -
Page 8: Testing The Accuracy And Precision Of The Pb200I
The Pb200i should be tested for Quality Control (QC) before each inspection, every 4 hours, and when the inspection is complete. 1. Start by placing the wooden block on top of the Pb200i case. Hold the device with the proximity button against the wooden reference block, with the snout of the instrument centered on the paint film nearest 1.0 mg/cm... - Page 9 . The results shown in the examples shown in Figure 15, 16, and 17 are based on an action level of 1.0 mg/cm Caution: The Action Level can be changed on the Pb200i by a user with administrative rights, but the Pb200i’s Performance Characteristic Sheet (PCS) only pertains to doing HUD-based lead inspections with an Action Level of 1.0 mg/cm...
- Page 10 “Positive” – lead present. Result at or above the selected Action Level. Figure 15 “Negative” – lead below selected Action Level. Figure 16...
-
Page 11: Downloading Data
“Null” – Reading was terminated before the instrument had made a Positive or Negative reading. NULL readings are not valid. Figure 17 Downloading Data To download data, begin at the “Main Screen” (Figure 18). You can work your way back to the main screen from any other screen by pressing the “Back (Return) button”... - Page 12 b) Next, select “Export Readings.” (Figure 19) Figure 19 You can export all the readings, or you can choose a range of readings to download. Select the readings you wish to download, then hit “Export”” (Figure 20). Once the download is complete you will receive a confirmation (Figure 21);...
-
Page 13: Transferring The Data
Transferring the Data You can transfer data to your computer via the supplied mini USB cable or using Wi-Fi. Using the USB Cable To use the mini USB cable, start by removing the battery door. Insert the USB cable, making sure the battery wedge remains in place (Figure 22). - Page 14 Once you click on the readings file you will see a .csv file (Figure 25), as well as image files for any photos taken with your Pb200i that were associated with readings. The .csv file contains your readings, while the image files are named to associate them with individual readings. Drag the file(s) to your desktop (or any other location) and double click on the file(s) to open.
- Page 15 Check to make sure all the requested data is included in the download. If it is not, unplug the analyzer from the PC, and repeat the steps above. *Caution – You may also use Heuresis HDMS software to export data and create reports. Please see the HDMS manual for instructions, located on the analyzer in the “HDMS” folder.
-
Page 16: Using Wi-Fi Connectivity
Using Wi-Fi Connectivity You can also use Wi-Fi to download your data. To enable Wi-Fi usage: a) Select the “settings” icon. Figure 28 b) Enable Wi-Fi by swiping right; the “Wi-Fi” icon will appear. Figure 29... - Page 17 Exit out using the left arrow. Shut the “settings” app off by holding the center button down until it appears, then swipe left. Caution: Turning on Wi-Fi will decrease the battery life of the Pb200i. It is generally a good idea to leave the Wi-Fi feature off when it is not being used.
- Page 18 e) Select and open the FTP Server app. Figure 32 To enable the FTP server, click on the icon and swipe from off to on. Caution: The FTP server feature will default to the “off” position for security reasons every time the instrument is turned on. Figure 33...
- Page 19 g) Place the number circled below in your web browser. The example shown here is ftp://10.1.10.13:2121. Figure 34 You will be prompted to enter a user name and password. They are the same for both — the lowercase letters ftp. Select “Log on”...
- Page 20 i) Your screen should look like Figure 36. Be sure to bookmark this page in your browser. Caution: The ID number you inserted in your browser should come up each time you enable the FTP app. In the event that it does not, simply erase the number that does and repeat steps g and h. Select the “readings”...
-
Page 21: Enabling Bluetooth™ Connectivity
Enabling Bluetooth™ Connectivity The Pb200i is equipped with a Bluetooth™ radio. You can use this feature to pair the instrument to an external keyboard or other Bluetooth™ device. Caution: there are multiple Bluetooth™-equipped devices on the market, but they are not all compatible with the Pb200i. - Page 22 A list of available devices will populate on the screen; click on the Pb200i. This makes the instrument visible to other devices. Figure 40 Figure 41 d) Pair with desired device. Turning On the GPS The Pb200i is equipped with an on-board GPS. Follow these steps to turn on the GPS.
- Page 23 b) Scroll down to “Location Access” and select. Figure 43 c) Enable “Access to my location.” Figure 44...
- Page 24 d) This icon in Figure 45 below will appear, indicating that GPS is enabled. Figure 45 To check the status of you GPS, go to the following screens. Figure 46 Figure 47 Figure 48...
-
Page 25: Creating An Administrator
Creating an Administrator When first logging on to the Pb200i, you will need to create a user & password. Start by using the factory default password: 371945. (This password is also included on the Pb200i packing list). You will then be prompted to create a user. This person will be a super user/administrator, and can administer rights to other users as needed. -
Page 26: Changing Passwords/User Name
As an administrator, you can turn on/off any of the available options. To save, select the back arrow on the analyzer and exit the menu. (Figure 57 and 58) Figure 57 Figure 58 Changing passwords/user name Follow these steps to change your password or user name. From the main menu select setup, then users, then change password or change user name (Figure 59 to 63). -
Page 27: Creating A User/Supervisor
To create supervisor ID on the Pb200i, start at the main menu. Select setup, then users, then create user. Select “supervisor” and create a new password. Caution: Only an administrator can set up these rights. -
Page 28: Modifying Permissions
To create a user ID on the Pb200i, start at the main menu. Select setup, then users, then create user. Select “user” and create a new password. Caution: Only an administrator can set up these rights. (Figure 69 to 73) -
Page 29: Default Setting
Default setting Figure 78 Figure 79 Figure 80 Back out using the left arrow to save, then go to “settings” and select “user.” (Figure 81 to 83) Figure 81 Figure 82 Figure 83 Turn the “delete data” toggle to the “off” position and back out with the left arrow. (Figure 84 to 86) Figure 84 Figure 85 Figure 86... -
Page 30: Changing The Action Level In Action Level Mode
Figure 87 Figure 88 Changing the Action Level in Action Level Mode In some instances, the user will want to change the action level to accommodate a certain threshold other than the default of 1.0 mg/cm . In order to change the action level, start at the main menu, select setup, then mode. -
Page 31: Extended Reading Mode
When the action level is set to 1.0 mg/cm2, the instrument will display results as shown in Figures 96 to Figure 96 Figure 97 Figure 98 When the action level is set to anything but 1.0 mg/cm2, the instrument will display as “NEG” (for negative) and “POS”... -
Page 32: Stop At Set Level
Stop at Set Level Stop at Set Level mode allows the user to set up the instrument with three variables: action level, number of standard deviations above the action level, and number of standard deviations below the action level. Once these preset thresholds have been reached, the instrument will stop taking a reading and display the result. -
Page 33: Unlimited Time
Unlimited Time Unlimited Time mode allows the user to simply pull the trigger until they are satisfied with the result for a given reading up to a maximum reading time of 300 seconds (5 minutes). Releasing the trigger will prompt the instrument to display the result. To setup the Unlimited Time mode, start at the main menu. -
Page 34: Additional Features
Additional Features Data Entry Smart Fields The data entry fields are completely customizable on the Pb200i. You may contact your sales representative for further information, or Heuresis customer service. To use data entry: Writable field Figure 111 Figure 112 Figure 113... -
Page 35: Custom Exporting
Custom Exporting With the Pb200i you also have the ability to tailor your download to selectable fields. You may select any of the options shown here by following the prompts. The user may also may elect to download the spectrum by checking the option shown by the arrow below. - Page 36 After exporting your readings, your pictures will show up in the “readings” folder on the analyzer, along with your data: Figure 124 The picture will be tagged with the reading it is associated with. You can drag and drop or copy and paste from the readings folder to anywhere you wish and edit them if desired.
-
Page 37: Enlarging Text On The Pb200I
Enlarging Text on the Pb200i New Pb200i instruments are shipped with large fonts enabled on the instrument. For customers in the field: Figure 126 Figure 127 Figure 128 Figure 129 Swipe to View Readings from Test Screen The user may swipe left or right from the "Ready to Test" screen to view readings. The user may use the search function to go to any desired reading. - Page 38 Figure 133 Test Screen Display Functionality The user may tailor the test screen with any number of combinations, selectable by on/off toggles. Figure 134 Figure 135 Figure 136...
-
Page 39: Radiation Safety
During testing, a strong beam of radiation (gamma-rays and x-rays) is continuously emitted through the aluminum faceplate at the front of the Pb200i. Some radiation is produced at the front and top-front of the instrument. There is also negligible radiation where your hand holds the instrument. - Page 40 Typical dose rates (5 milliCurie [185 MBq] source) with the shutter closed, in milliREM/hr., are as follows: 5 cm 30 cm 100 cm Left 0.75 0.03 <0.01 Right 0.48 0.025 <0.01 0.25 0.025 <0.01 Bottom 0.55 0.025 <0.01 Front 0.035 <0.01 Rear 0.05...
- Page 41 RSO. To take a reading with the Pb200i, the instrument must be held against a surface. (The shutter will not open unless the proximity switch is activated. The shutter will close as soon as the Heuresis Pb200i is no longer pressed against a surface.
-
Page 42: Radiation Dosimetry
Radiation Dosimetry Radiation dosimetry is worn to monitor radiation levels. It should be worn when required by your regulatory jurisdiction, company safety policy, or RSO. Typically several rounds of dosimetry are used, along with exposure time and use estimates to determine whether dosimetry should be discontinued. If no dosimetry is used, a written justification must be kept on file. -
Page 43: Leak Testing
Leak Testing A leak test must be performed at least every 12 months on the Heuresis Pb200i, as specified in the Registry of Radioactive Sealed Sources and Devices, Safety Evaluation of Device, No: MA-1397-D-101- B. Certain regulatory jurisdictions, especially States requiring a Specific License, may require leak tests every six months. - Page 44 Figure 137...
-
Page 45: Lost Or Stolen Instrument
Emergency Procedures CAUTION: This page contains important information that should be available to the Pb200i user AT ALL TIMES. Lost or Stolen Instrument If this instrument is lost or stolen, notify your Radiation Safety Officer (RSO) or the equivalent responsible individual at your organization. -
Page 46: Emergency Numbers
__________________________ _____________________________________ __________________________ Your organization contact information (in case the Pb200i is lost and somebody finds it and is trying to return it to you): Caution: these contacts should be kept on the operator’s person and with the instrument. If you encounter any issues or have questions related to the safe operation of the device, call the... -
Page 47: Warranty
Warranty Seller warrants that the Products will operate or perform substantially in conformance with Seller's published specifications and be free from defects in material and workmanship, when subjected to normal, proper and intended usage by properly trained personnel, for the period of time set forth in the product documentation, published specifications or package inserts. - Page 48 Battery charger and battery packs are warrantied for twelve (12) months Standard instrument accessories are warrantied for twelve (12) months Parts or spare parts sold, installed or supplied outside of the product warranty period are warrantied for twelve (12) months...
Need help?
Do you have a question about the Pb200i and is the answer not in the manual?
Questions and answers