Table of Contents
Advertisement
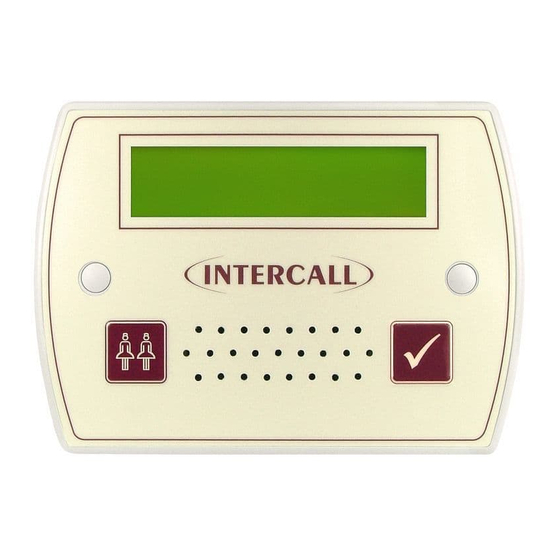
Intercall 600 & Intercall 700
Installation & Operation Guide
Documentation Issue 4.27
www.intercall.co.uk
No part of this leaflet may be reproduced without prior written consent and while every effort is made to ensure the information contained within this guide is
correct, no liability will be accepted for errors or omissions. This version supersedes all previous editions, latest editions may be downloaded from our
website www.intercall.co.uk - Intercall is a registered trademark of Intercall Nursecall Systems Limited © 2005 all rights reserved.
Advertisement
Table of Contents

Related Manuals for Intercall 600

Summary of Contents for Intercall 600
- Page 1 This version supersedes all previous editions, latest editions may be downloaded from our website www.intercall.co.uk - Intercall is a registered trademark of Intercall Nursecall Systems Limited © 2005 all rights reserved.
-
Page 2: Table Of Contents
L722 Call Point…..……………………………………………..………….. 45 L634 Network Input/Output Module….………………………..………….. 45 L752 Audio Call Point…………………………………………..…………. 47 L762 Audio Call/Display Unit…..……………………………...………….. 48 L768 Room Communicator Unit..……………………………...………….. 49 CMS Lite Call Management Software for Windows……………………….50 Intercall 600/700 Installation & Operation Guide Issue 4.27 Page 1 of 78... - Page 3 Fault Finding Guide Call Point Faults……..……..…..………………………………………..….74 Display Unit Faults……………..……………………………………..…… 75 Power Supply Faults…………………………………………………..…… 76 L747 Interface Faults………………………..…………………………..…. 77 Network Faults: Data corruption / Volt Drop / Audio Faults……………..78 Intercall 600/700 Installation & Operation Guide Issue 4.27 Page 2 of 78...
-
Page 4: Introduction To Intercall
Indeed the Intercall 600 system is the best selling nursecall system within the UK Since the introduction of Intercall in 1988, we have made people aware that there can be a more flexible, more efficient, more effective way of using nursecall than ever before This leaflet covers our two most advanced addressable call systems, the Intercall 600 and the Intercall 700. -
Page 5: Guide To Intercall 600
The INTERCALL 600 is our most popular addressable call system, coupling flexibility with ease of use, it provides a complete solution that out performs practically all other systems available today. Being an addressable system, it requires only one two core connection to network devices and operates at 12voltsDC. The room descriptions may be programmed using a PC compatible laptop computer or similar which can be programmed on or off site as required. -
Page 6: Guide To Intercall 700
The INTERCALL 700 is the latest innovation in the Intercall range of advanced call systems. The system boasts all the features of the Intercall 600 system together with hands free two way speech facilities between all audio units. All room call points have an integral infra red receiver which allows a call to be generated away from the call point without the need for trailing wires. - Page 7 All INTERCALL systems can be enhanced with the use of accessories which allows the system to be used by patients with virtually any level of disability. The following list details a few of the most popular accessories with their application and part numbers. In addition to the standard range of accessories, we also manufacture bespoke accessories to suit a particular requirement, please contact your supplier for more information.
-
Page 8: Ordering Information
NOTES: 1 – SPECIAL PROGRAMMING REQUIRED – PLEASE CONTACT THE SALES OFFICE FOR MORE INFORMATION, 2 – SPECIAL ORDER NON STOCK ITEM – PLEASE CONTACT THE SALES OFFICE FOR AVAILABILITY, 3 – REQUIRES INTERCALL BB1 BACKBOX FOR SURFACE MOUNTING – FLUSH MOUNTS INTO STANDARD DOUBLE GANG BACKBOX. ©1999 Lismore Instruments Limited Intercall 600/700 Installation &... -
Page 9: Specials Order Codes And Obsolete Order Codes
Export Department Telephone +44 1403 713240 Fax +44 (0)1403 713141 Or visit: www.intercall.co.uk This manual is updated regularly and copies may be downloaded in Adobe® Acrobat® format from the website shown above. Intercall 600/700 Installation & Operation Guide Issue 4.27 Page 8 of 78... -
Page 10: Intercall 600 Call Points
Only standard calls and assistance calls can be accepted. * Features highlighted in this way, may be disabled by the commissioning engineer. Intercall 600/700 Installation & Operation Guide Issue 4.27 Page 9 of 78... -
Page 11: Intercall 600 Display Unit
‘P’ and a member of staff has accepted and is visiting the call from the Lounge, indicated by the small ‘V’. Numbering of ‘Visit’ and ‘Nurse Present’ events is the same as standard and assistance calls. Intercall 600/700 Installation & Operation Guide Issue 4.27 Page 10 of 78... -
Page 12: Intercall 700 Audio Call Point
Paging other members of staff*. Locating and communicating with other members of staff is simplicity with the Intercall 700 system. Simply press and hold the Reset button and you can page to all other Displays and Call points in Staff Present mode. -
Page 13: Intercall 700 Audio Display Unit
‘reset’ trigger or using a Guardian display unit. When an ATTACK or EMERGENCY call is active, all other calls are held in memory but only displayed when the emergency call is reset. Intercall 600/700 Installation & Operation Guide Issue 4.27 Page 12 of 78... - Page 14 This is only possible when no calls are active on the system and is not possible when ‘Speech Busy’ is displayed on the lower line of the LCD. Intercall 600/700 Installation & Operation Guide Issue 4.27 Page 13 of 78...
- Page 15 User ID on the Intercall 700 System. How the displays show who is calling*. With the Intercall 700 system, it is possible to display the residents name, was well as their location when calling. We call this feature ‘User ID’. In order to register their name on the system, the resident must trigger the call point with an infra red trigger assigned to their name.
-
Page 16: Intercall 768 Audio Room Communicator
Now make the announcement and release the TALK button. It is not possible for the rooms to speak back to the Room Controller in this mode. While the rooms are being contacted, the call point buttons are inactive. Intercall 600/700 Installation & Operation Guide Issue 4.27 Page 15 of 78... -
Page 17: Intercall 700 Call / Display Unit, Overdoor Lights & Other Devices
Pear Leads. Pear leads are used to trigger the any Intercall call point. They are available in 2metre and 4metre lengths terminated with a 90 degree jack plug. There is a clip which may be used to secure the lead to bedding or residents clothing. The unit features a wipe clean, soft touch switch which is easy activated with light finger pressure. -
Page 18: Installation Guide
The system may be configured using a PC or Laptop Computer which connects to the L717 Power Supply. As can be seen on page 3, several Intercall 600 and Intercall 700 network devices may be used on either systems. In... -
Page 19: Planning An Installation
Eg 40% of the units calling at any one time, max cable run 30 metres or maximum 12 current units per spur. Intercall 600/700 Installation & Operation Guide Issue 4.27 Page 18 of 78... - Page 20 Replacing an existing System – using the existing wiring. The INTERCALL system is ideally suited for the replacement of existing hard wired nursecall system, using the existing cabling but please note the following considerations. • Study and make notes about the existing system.
-
Page 21: Using The Fjb To Split The Load
Speech: Belden 8723 0.32mm Cable Spine cable to booster Power Supply Spurs with a maximum of 25 current input or input of another FJB2 units per spur from FJB2 Intercall 600/700 Installation & Operation Guide Issue 4.27 Page 20 of 78... -
Page 22: First Fix
RFTX Scope Transmitter Kit (Allow 200mm Access around all sides) Surface mounting only - Requires no backbox CS1 Ceiling Pull Switch Desk Mounted – Requires no fixed installation DPU414 Thermal Printer Intercall 600/700 Installation & Operation Guide Issue 4.27 Page 21 of 78... - Page 23 • When first fix is completed ensure INTERCALL parts are stored safely and the back-boxes and any bare wires are protected from paint, nails and plaster!. Intercall 600/700 Installation & Operation Guide Issue 4.27 Page 22 of 78...
-
Page 24: Second Fix
• When power is applied to the display units, the display will show the software version (e.g. V2.01) followed by the default standing text. The factory default standing text is INTERCALL 600 or INTERCALL 700 depending on the system. •... -
Page 25: System Tests
Press the RESET area on the call point to reset. Basic System Test - Nurse Present & Location. (Intercall 600/700) With no call active and the display showing the default text (INTERCALL 600 or 700), test the following: • Press the RESET area on the call point and the green LED will light continuously. - Page 26 System Test Using the L747 ‘Network Scan’ feature. The L747 has a built in function that scans the entire Intercall 600 and/or Intercall 700 system and gives you a timed and dated printout of all programmed text in the system (Address Text and Caller ID*), list of addresses with active devices, pre-programmed pager address and the number of network devices (Call Points) on the system.
-
Page 27: L747 Installation Procedures
SW3 ON – Guardian Visit mode (Prints ‘Visit’ if reset trigger button pressed) SW4 OFF – Print in condensed mode for Intercall 700 (Small Characters on one line) SW4 ON – Print in normal mode for Intercall 700 (Larger characters on two lines) - Page 28 SW3 ON – Don’t Page when a call point is accepted. SW4 OFF – Page when a call point is reset. SW4 ON – Don’t Page when a call point is reset. Intercall 600/700 Installation & Operation Guide Issue 4.27 Page 27 of 78...
- Page 29 Insert the battery pack with the label showing. • Replace the battery compartment cover. • Connect the mains charger and switch on for 24 hours to fully charge the battery. Intercall 600/700 Installation & Operation Guide Issue 4.27 Page 28 of 78...
-
Page 30: L617 And L717 Power Supply Controller
& when this is customised, it will need to be downloaded to any new display, call logger or pager interface installed on the system at a later date. When using with an Intercall 700 with Intercom, the (A) and (B) cables do not connect to this unit. -
Page 31: L7717 Large Power Supply Controller
When using with an Intercall 700 with Intercom, the (A) and (B) cables do not connect to this unit. *The L7717 may be used with Intercall 600 devices manufactured after August 2003 only. -
Page 32: L622 Intercall 600 Standard Call Point
L622 Standard Call Point. The L622 is the standard call point for the Intercall 600 non audio system. It can generate up to 6 independent levels of call which are indicated by the integral twin colour re-assurance LED. There is a ‘call follower’ sounder which sounds when the call point is in ‘staff present’... -
Page 33: L622An310 Intercall 600 Call Point With Extended Inputs & Outputs
Re-assurance LED Network Terminals: Connect to the Intercall 600 (2 wire) Network. [+, –] OBSERVE POLARITY X Terminal: Connect external normally open contacts between here and Network –ve to trigger the call point into standard call. -
Page 34: L733 Door Monitoring & Access Control Point
L733 Door Monitoring & Access Control Point. The L733 replaces the L722DK as the Door Monitoring Point for the Intercall 600 and Intercall 700 systems. It is used to protect fire doors, entrance & exit doors or other sensitive areas. The door is fitted with a magnetic contact (not supplied), which is used to trigger the call point and activate the call system. -
Page 35: L737 Booster Power Supply
R e v e r s e C o n n e c t i o n o f b a t t e r y w i l l d e s t r o y u n i t . Output terminals (+&-): Three pairs provided for convenience, connect to network devices. For Intercall 700, the A & B cables are simply joined input to output. Input Terminal: Connect to output circuit of master power supply. -
Page 36: L628 600 Series Lcd Display
All displays are identical but can be configured on site to operate independently. Network Terminals: Connect to the Intercall 600 (2 wire) Network. [+, –] OBSERVE POLARITY Z0, Z1, Z2: Connect to zone switch or wire link (See ‘Zone Switch Connection’ Below) OC Output Terminal: Open collector output active continuously when the alarm is sounding. -
Page 37: L748 Large Corridor Led Display
The unit is compatible with the INTERCALL 700 protocol only and shows the same text as the LCD display units. The unit can either operate as the only type of display on the system or can be used in conjunction with the standard LCD units. -
Page 38: L746 Overdoor Light
Network Terminals: Connect to the Intercall 600 or 700 (2 wire) Network. [+, –] OBSERVE POLARITY OC Output Terminal: Open collector output active continuously when the alarm is sounding. Note: Rating 12vDC 100mA. Minimum [ON] resistance = 100 Ohms. -
Page 39: L747 Universal Interface
Note 1: SW7 Controls RS232 Baud Rate Off = 1200 Baud On = 2400 Baud. Network Terminals: Connect to the Intercall 600 or 700 (2 wire) Network. [+, –] OBSERVE POLARITY I/O Connections: 25way D female with both parallel or serial connections available. Pin out as above. -
Page 40: Alphanumeric Paging
By using the Intercall 700 PC based call management software, it is possible to route the calls from individual callers to specific members of staff. The PC interface to the Intercall system is via the L747. -
Page 41: Rb1 Relay Board
L622/L722 Network Terminals: Connect to the Intercall 600 or 700 (2 wire) Network. [+, –] OBSERVE POLARITY T Terminal: 12volt DC output which may be used to drive external equipment which requires a DC supply. MAXIMUM OUTPUT LOAD: 12VOLTS 10mA. -
Page 42: L714 Remote Sounder With Relay
The unit may be configured to respond to all call levels or emergency and attack calls only. There is an on-board relay with normally open and normally closed ‘dry’ contacts. Network Terminals: Connect to the Intercall 600 or 700 (2 wire) Network. [+, –] OBSERVE POLARITY C Terminal: Common terminal for relay contacts. -
Page 43: Dpu414 Thermal Printer
When the paper has loaded successfully, Press the ON LINE button so that the Green ‘ON LINE’ LED is lit. Close the paper roll cover and pull it towards the front of the printer to lock it. Intercall 600/700 Installation & Operation Guide Issue 4.27 Page 42 of 78... -
Page 44: Fjb2 Fused Junction Board
Continuous Red – Fuse Failure. (Remove unit to investigate further) Installation: Flush mount into ‘double gang’ electrical back-box. Surface mount using BB1. Size & Weights: 160 x 115 x 20 mm, 70g Intercall 600/700 Installation & Operation Guide Issue 4.27 Page 43 of 78... -
Page 45: L758 Audio Lcd Display
The unit flush mounts into a standard double gang backbox or may be surface mounted using the Intercall BB1. Network Terminals: Connect to the Intercall 700 (4 wire) Network. [+, –,A,B] Additional terminals are provided for the Belden screen drain wire termination – Observe Polarity ! Z0, Z1, Z2: Connect to zone switch or wire link (See ‘Zone Switch Connection’... -
Page 46: L722 Call Point
The L722 Infra Red Call Point is similar to the L622 button reset unit, with the additional facilities of an infra red receiver & extra terminals for connection to slave call point(s). The unit may be used as part of an Intercall 600 or 700 system and the infra red receiver gives the system true portability with the use of the TIR and STC range of triggers and Pendants. -
Page 47: L634 Network Input/Output Module
Shown on the left is the L634 in use signalling between two independent Intercall systems, on the right is the L634 in use with the TA1 Telephone Ring Detector to trigger a call on the system when the telephone is ringing. -
Page 48: L752 Audio Call Point
The unit flush mounts into a standard double gang backbox or may be surface mounted using the Intercall BB1. Please refer to the information contained on page 22 for more information regarding installation and performance of the Infra Red receiver. -
Page 49: L762 Audio Call/Display Unit
The unit flush mounts into a standard double gang backbox or may be surface mounted using the Intercall BB1. The integral LCD display unit may be configured to operate in one of three modes: Normal Display where all calls are shown & sound regardless of the call point mode. -
Page 50: L768 Room Communicator Unit
The L768 Room Communicator allows the intercom speech path to be initiated to a room without the room having called first, extending the capabilities of the Intercall 700 system into warden controlled establishments. The unit is very simple to use with the desired room selected using the rotary control on the front panel. In addition, general announcements (such as lunch times etc) can be made from the unit and these are sent into all bedrooms. -
Page 51: Cms Lite Call Management Software For Windows
There is a ‘Page Staff’ facility, which allows a text message to be sent to any or all staff . The main screen can be configured for Intercall 600 where the date & time, call type and calling room are shown or Intercall 700 where the calling resident may also be shown. -
Page 52: Tir4 Infra Red Trigger
TIR4 Infra Red Pendant Trigger. The infra red trigger is worn by residents and allows access to the call system at all times. It will trigger any Intercall 700 series call point within range and can be configured to generate different levels of call. Each trigger is assigned a unique number which may be programmed into the system to identify the calling resident by name. -
Page 53: Limkit System Configuration Kit (Including Software)
(See page 29) Once downloaded, the information is also stored in the displays, printer interface and alphanumeric pager interface. Intercall 600/700 Installation & Operation Guide Issue 4.27 Page 52 of 78... -
Page 54: Scp Slave Call Point
This socket can accept input from pear leads, pressure mats, radio triggers etc. Installation: Flush or surface mount in standard ‘single size’ electrical backbox. Size & Weights: 80 x 80 x 40 mm, 60g Intercall 600/700 Installation & Operation Guide Issue 4.27 Page 53 of 78... -
Page 55: Srp Slave Reset / Present Point
Green Led operates with green re-assurance LED in L732 Call Point Installation: Flush or surface mount in standard ‘single size’ electrical backbox. Size & Weights: 80 x 80 x 40 mm, 60g Intercall 600/700 Installation & Operation Guide Issue 4.27 Page 54 of 78... -
Page 56: Cs1 Ceiling Pull Switch
3 metres orange with easy to operate ‘G’ pull in orange. Installation: Surface mount in self contained enclosure. Size & Weights: Diameter 80mm x depth 30mm weight 50g Intercall 600/700 Installation & Operation Guide Issue 4.27 Page 55 of 78... -
Page 57: Pir1 Passive Infra Red Detector (For Bed Monitoring)
As the PIR1 will continually call for 10 minutes after power up – ensure the units are isolated at time of system power up. Installation: Surface mount in standard single gang backbox. Size & Weights: 80mm x 80mm x depth 25mm weight 50g Intercall 600/700 Installation & Operation Guide Issue 4.27 Page 56 of 78... -
Page 58: Configuration Guide
Configuration Guide. These pages are intended to give the reader an overview of the possibilities using Intercall 600 and Intercall 700 systems for specific configurations. Detailed information on the individual components can be found from page 29. Below we list the parameters that can be configured with the Intercall 600 & 700 •... -
Page 59: System Configuration
We have chosen to show the zoning configuration by giving typical examples of zoning requirements that we have encountered using the Intercall system. Intercall 600 and 700 displays feature the zoning menu described in page 61 and the Intercall 700 zoning capabilities will be extended in the future. -
Page 60: Display Menu Settings
Emergency and Attack calls in all zones on the system. “Own Zone Only” will not show or sound for Emergencies or Attack calls from ALL ZONES ALL ZONES other zones. Intercall 600/700 Installation & Operation Guide Issue 4.27 Page 59 of 78... - Page 61 Emergency and Attack calls in all zones on the system. “Own Zone Only” will not show or sound for Emergencies or Attack ALL ZONES ALL ZONES calls on other zones. Intercall 600/700 Installation & Operation Guide Issue 4.27 Page 60 of 78...
- Page 62 “INTERCALL”. Select “OFF” to clear the display in EMERGENCY CALLS: quiescent mode. A single red led will continue to flash indicating OWN ZONE ONLY unit operational. Intercall 600/700 Installation & Operation Guide Issue 4.27 Page 61 of 78...
- Page 63 “INTERCALL”. Select “OFF” to clear the display in DEFAULT TEXT: OFF ON / OFF quiescent mode. A single red led will continue to flash indicating unit operational. Intercall 600/700 Installation & Operation Guide Issue 4.27 Page 62 of 78...
-
Page 64: Zoning Configuration
With the INTERCALL system, the zoning is configured and controlled by the display units. They have terminals for the zone switch and built in menu functions, which are used to configure the zone requirements. When a system is zoned, we must concentrate on the call point addresses and disregard the text that is associated to that address as this will need to be re-programmed when the system is commissioned. - Page 65 By using the Call Management Software, it is possible to zone individual alphanumeric pagers to any number of zones and using it with the Intercall 700 system, it is possible to ‘route’ specific call types, locations or users to specific alphanumeric pagers.
-
Page 66: Zoning Examples
If you set the all display menus to EMERGENCY CALLS = ALL ZONES, Then ‘Emergency’ or ‘Attack’ calls from either zone 1 or zone 2 will be shown on all LCD display units. Intercall 600/700 Installation & Operation Guide Issue 4.27 Page 65 of 78... - Page 67 35 Emergency calls from both zone 1 & zone 2 can sound, if required, by setting EMERGENCY CALLS = ALL ZONES Intercall 600/700 Installation & Operation Guide Issue 4.27 Page 66 of 78...
- Page 68 If you do not wish to switch the zone setting but you wish to use Remote Sounders, fit links to the master displays in zone 1 and zone 2 to permanently select ‘Address window A’ and enter the settings into the master displays. Intercall 600/700 Installation & Operation Guide Issue 4.27 Page 67 of 78...
- Page 69 (at address 215) so when using the ‘Zone C’ setting, the displays will not respond to any call. Zoning example 4 continues on the next page….. Intercall 600/700 Installation & Operation Guide Issue 4.27 Page 68 of 78...
- Page 70 We hope that the examples have given an insight into some of the possibilities with the Intercall system of zoning. But if you wish to discuss your zoning requirements, please contact your supplier or the factory technical support department.
- Page 71 IMPORTANT EVERY CALL POINT MUST BE SET TO A UNIQUE ADDRESS Intercall 600/700 Installation & Operation Guide Issue 4.27 Page 70 of 78...
-
Page 72: Factory Text & Call Point Address Setting
Turn call point upside down, with terminals at the bottom and read as follows: u = Switch up (towards ON) D = Switch down (away from ON) VERY IMPORTANT: EACH CALL POINT MUST HAVE A UNIQUE ADDRESS SETTING Intercall 600/700 Installation & Operation Guide Issue 4.27 Page 71 of 78... - Page 73 Turn call point upside down, with terminals at the bottom and read as follows: u = Switch up (towards ON) D = Switch down (away from ON) VERY IMPORTANT: EACH CALL POINT MUST HAVE A UNIQUE ADDRESS SETTING Intercall 600/700 Installation & Operation Guide Issue 4.27 Page 72 of 78...
-
Page 74: L617 / L717 System Configuration Switch Setting
Pin 6+8 Pin 25 Signal Ground Pin 5 YOU WILL NEED TO USE THE SOFTWARE IF CHANGING THE PAGER ADDRESS OR L747 DATE AND TIME See Page 38 Intercall 600/700 Installation & Operation Guide Issue 4.27 Page 73 of 78... -
Page 75: Fault Finding Guide
Damaged wiring on “X” connection Check Wiring.. Damaged pear lead or plug Remove or replace pear lead Excessive electrical ‘noise’ or static on site Check site or contact supplier for filter units. Intercall 600/700 Installation & Operation Guide Issue 4.27 Page 74 of 78... -
Page 76: Display Unit Faults
Second Tone setting active Disabled in display menu See page 59 Cannot gain access to address windows within menus Display not in master mode See pages 35,44 & 61 Intercall 600/700 Installation & Operation Guide Issue 4.27 Page 75 of 78... -
Page 77: Power Supply Faults
Network Device connections reversed PSU Output Power Transistor Damaged F25. Display text corrupted after download Text corrupted within power supply. Connect to computer and re-program. Battery must be connected when downloading Intercall 600/700 Installation & Operation Guide Issue 4.27 Page 76 of 78... -
Page 78: L747 Interface Faults
Use L747SL RS232 Scope data lead (supplied by Intercall) to connect Scope kit to L747 Use L747 – Null Modem data lead (see page 73) Intercall 600/700 Installation & Operation Guide Issue 4.27 Page 77 of 78... -
Page 79: Intercall 600/700 Installation & Operation Guide Issue
Buzzing on audio channel when open Connection between Digital [+/-] and Audio [a/b] Belden cable not used as recommended Cable damage Damp or wet Network Cable Faulty Audio Unit Poor Connection. Intercall 600/700 Installation & Operation Guide Issue 4.27 Page 78 of 78...
Need help?
Do you have a question about the 600 and is the answer not in the manual?
Questions and answers
How to reprogram address dip switchs on call point L722 system
To reprogram the address DIP switches on an Intercall 600 call point L722 system:
1. Locate the DIP Switches – The DIP switches are on the call point and are used to set the device address.
2. Check the Current Address – If the wrong address is displayed, verify the current DIP switch settings.
3. Adjust the DIP Switches – Set the switches according to the required address following the programming sheet.
4. Verify Settings – Ensure the new address does not conflict with other devices.
5. Test the Call Point – Activate the call point and check if the correct address appears on the display.
6. Download Text from PSU (if needed) – If no text appears for the address, download the text from the power supply unit.
7. Check for Faults – If the issue persists, inspect for faulty DIP switches or wiring issues.
If the call point still does not function correctly, consider replacing the faulty components.
This answer is automatically generated