
Related Manuals for Outlaw 976

Summary of Contents for Outlaw 976
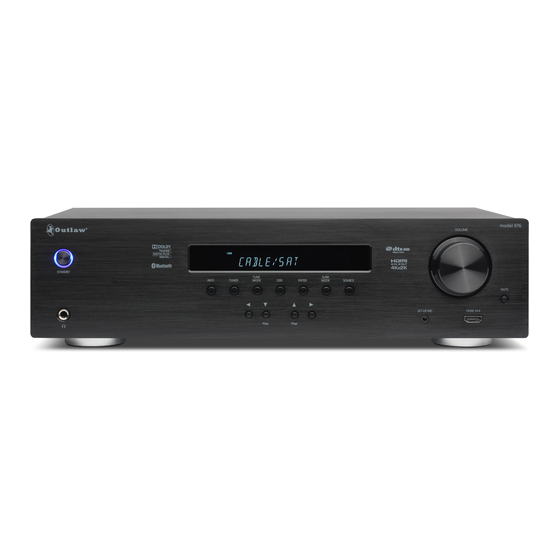
- Page 1 Model 976 7.1 Channel/4K HDR Preamp Processor Owner’s Manual model 976 VOLUME 6 IN 2 OUT STANDBY 4Kx2K TUNE SURR INFO TUNER MODE ENTER MODE SOURCE HDMI IN 6 SET-UP MIC PSet PSet...
-
Page 2: Please Read First
The exclamation point within an equilateral triangle is follow the manufacturer’s instructions, and should use a mounting acces- • If the Model 976 has been dropped or damaged in intended to alert the user to the presence of important op- sory recommended by the manufacturer. -
Page 3: Precautions
Do Not Open The Cabinet Safe Antenna and Cable Connection Your new Model 976 has been factory confi gured for 120 (+/-3%) volt There are no user serviceable components inside this AC lines. Connecting the unit to a line voltage other than that for which product. -
Page 4: Unpacking
Outlaw Audio and the Outlaw Audio logo are registered trade- the rear panel and the controls on the front panel marks of Outlaw Audio, Inc. “Dolby, ” “Pro Logic, ” “TrueHD” and the can be damaged by minor impacts. double-D symbol are trademarks of Dolby Laboratories. -
Page 5: Table Of Contents
Unpacking Create Memory Presets System Setup Select a Preset Station Input Setup Chapter 1 Tune Stations Directly Speaker Setup Model 976 7.1 Channel Preamp/ Select FM Mono EQ Adjust Processor Audio Setup Model 976 Features Chapter 6 Chapter 4 Accessories... -
Page 6: Model 976 7.1 Channel Preamp/Processor
In order to get maximum performance from your Chapter 1 Contents a high-performance audio device, designed to Model 976, please take a few minutes to read this work with practically any of the wide variety manual. It tells you everything you ned to know of amplifers adn source devices on the market to connect this product. -
Page 7: Accessories
HDMI connectivity 5.1 and 7.1 digital surround formats 2-channel to 5.1 / 2.0 or 5.1 to 7.1 surround sound After you unpack the Model 976, please check to • 192 kHz 24-bit DAC’s for all channels • Balanced XLR Output(s) make sure the following accessories are in the box: For high performance audio quality. -
Page 8: Model 976 Front Panel
Before you connect any audio or video components SURR MODE button (see pages 34-35) Cursor Arrows (see pages 23, 26, 37, 39, and 40) to the Model 976, it’s important to understand Press this button repeatedly to activate matrix These buttons provide navigation control. The Up... -
Page 9: Model 976 Rear Panel
NORMAL position. 1 ARC can also carry audio back from your TV set into the 976. HDMI OUT 1 is the primary output Digital Optical & Coax Input jacks (see pages 17-18) and is 4K/HDR/Dolby Vision/ARC compatible. -
Page 10: Remote Control
Power On (Page 33) of pressing the button, key in a broadcast fre- Menu (Pages 23) Press this button to bring the Model 976 out of quency using the numeric pad (E). Press this button to access the Model 976’s setup standby mode. - Page 11 Access Controls Loading Batteries Tuner Mode (Page 41) The bottom end cap of the Model 976 remote is a hinged This button selects either the “FM Stereo” or “FM lid on the battery compartment. Slide this end cap toward Mono” tuner mode.
-
Page 12: Front Panel Display
For full access to setup and all functions, you will have to either the AM (kHz) or FM (MHz) band is selected. use the on-screen display (OSD), which can only be seen on a video monitor connected to the Model 976 through Channel Icons HDMI Out 1. -
Page 13: Audio Formats And Listening Modes
Dolby Atmos, the Model 976 supports almost any original data into a smaller size, allowing the way by the Model 976. The fi rst is analog stereo audio format out there. These include lossy and lossless audio tracks to use much less space than would... - Page 14 DTS-HD HR supports 7.1 channels, may be in- pulse-density modulation. SACD players with an chose to include in the Model 976, and we in- HDMI v1.2 or higher output may output a native cluded on both Blu-ray and HD-DVD, and can only cluded it for a very good reason: It’s the perfect...
-
Page 15: Speaker Setup Tips
Speaker Placement Front left, center and right speakers The best speaker placement for your particular Before we explain how to confi gure your Model 976 room will depend on its size, furnishings, seating • These speakers should be placed at the for your speaker system, let’s make sure your speak-... - Page 16 You can place the subwoofers in the cor- ners of the room, of in the middle of the walls. You can use Y-adapters to connect each of the Model 976’s subwoofer outputs to multiple subwoofers if more than 2 subs are needed.
-
Page 17: Connecting Your Model
• Do not plug the power cord into your Model 976 as outlined below. This will reduce the Connecting Audio Model 976 until all other connections have chance that a misconnection or other error will pro- Connecting Video been made. - Page 18 Later, you cal digital audio. will confi gure the Model 976 to use the specifi c Multichannel Analog Audio input that you have chosen. For now, note which Stereo Analog digital input you connected to on your system chart.
-
Page 19: Connecting Video
HDMI inputs on the rear panel of the Model 976 HDMI Jacks The Model 976 has fi ve rear HDMI input jacks and one front HDMI input jack for connecting to the video and audio outputs of your video devices. Note that inputs HDMI1 through HDMI4 support 4K UHD video and HDR/ Dolby Vision. -
Page 20: Accessory And Antenna Connections
Model 976. Install this optional adapter to If you use the same antenna for FM and TV signals, 976, be sure that the input in the TV is rated for allow streaming of audio from a smartphone or be sure to install a splitter to separate the two HDMI 2.0 and HDCP 2.2. -
Page 21: External Amplifi Er Connections
The 7.2 CH Balanced Outputs provide XLR nect the subwoofer speaker itself to the amplifi er. the Model 976 is turned off . If the amplifi er has a balanced outputs for the front left, front right, main power switch (often on the back), the power center, left and right surround, left and right rear surround, and two subwoofer speakers. -
Page 22: Power Connection
AC wall outlet, confi rm that all connections to the Model 976 have been made correctly. WARNING: Never disconnect the power cord from the Model 976 while the other end is plugged into an AC outlet. Doing so may cause an electric shock. Always connect power by plugging into the AC outlet last and disconnect by unplugging from the AC outlet fi rst. -
Page 23: System Setup
Before you begin, make certain that the AC power Make sure the Model 976, amplifi er(s), and display cord supplied with the Model 976 is fi rmly inserted are turned on. Set the display to the HDMI input Chapter 3 Contents that is connected to HDMI Out 1;... -
Page 24: Main Menu
System Setup: Confi gure general system op- tions such as front panel brightness and default start-up volume. Input Setup: Confi gure each of the Model 976’s inputs. Speaker Setup: Confi gure the speakers that are connected to your Model 976. -
Page 25: System Setup
System Setup The System Setup menu contains menu options for general confi guration of the Model 976. The System Setup menu contains menu options for general configuration of the Model 976. Volume Default: Panel Light: HDMI Pass Through: Set to “Default” to automatically start the Model 976 Set this value to control brightness of the front Set to “On”... -
Page 26: Input Setup
Input Setup The Input Setup menu menu allows custom Video Input: adjustments to each of the Model 976’s inputs. Select from HDMI inputs HDMI1 through HDMI6. Most of these inputs are “software” inputs that can be assigned to the various digital and Note: This option is disabled for the TV input. -
Page 27: Speaker Setup
30 Adjust the amount of audio delay applied to the what speakers are connected to the Model 976, set input to synchronize audio and video. This can be trim and distance values for each speaker, confi gure... - Page 28 You may choose to skip this step if you plan to use Speaker Confi guration menu has a separate for the front left speaker. the auto setup feature, as the Model 976 will set the crossover setting that can be adjusted in this speaker distances. Some users may prefer to double- menu.
- Page 29 Use the down arrow key to move the test noise to formats and processing modes. There’s no “proper” Set your Model 976’s volume control to -20dB on the Center, and use the left and right arrow keys to set front panel display. Hit MENU, hit the down arrow the level so it matches the level of the front left setting, so whatever sounds good to you is correct.
- Page 30 Default value is 0dB. The avail- able choices are: The Model 976 will prompt you to verify that the -5dB → -4dB → -3dB → -2dB → -1dB → setup microphone is plugged in and placed in the 0dB →...
-
Page 31: Eq Adjust
EQ Adjust The Model 976 off ers an adjustable equalizer for Enter again and use the up and down navigation but- each speaker. Users may choose to manually adjust tons to highlight additional shelves or bands. the equalizer channels for each speaker, or they may... -
Page 32: Audio Setup
Of these, two can be turned “On” to defeat any surround process- confi gurations are supported by the Model 976’s 7.1 Center Width: Set from 0 to 7 (default of 3) to con- ing modes. The available choices are: channel output. -
Page 33: Operation
To turn the Model 976 on and off : The Model 976 lets you select from as many as nine sources, which are labeled Cable/Sat, Disc, To turn the unit on, press the STANDBY... -
Page 34: Volume Control
(pages 13 and 15). Press either MUTE button again to re- Minimum volume setting is -90 dB. The If the Model 976 is receiving a stereo (2-channel) store the volume to its previous level. maximum volume setting may vary signal and you are using a 5.1 or 7.1 speaker setup,... -
Page 35: Switching To Stereo
Music front panel. low-frequency eff ects (LFE) channel. If the Model 976 is receiving a 6.1 or 7.1 signal and Press the SURR MODE button again to you have a speaker system using back surround change the surround mode. -
Page 36: Adjusting Tone Controls
Front Panel Display Front Panel Display If you notice a lip sync problem with a movie or The Model 976 has bass and treble controls that Night mode aff ects soundtracks produced in TV show you’re watching, it’s because the audio can boost or cut in 2dB steps, to a maximum Dolby Digital, Dolby Digital Plus or Dolby TrueHD. -
Page 37: Adjusting Channel Levels
SPL meter app. Repeat the process for the remaining channels. To adjust channel levels using the internal The Model 976 allows you to easily adjust The test tone will stop when you cycle through test tone generator: channel levels two ways: while listening to... -
Page 38: Engaging Eq
To engage EQ during playback: IMPORTANT NOTE: We strongly recommend you reduce Press the the remote control’s “Sleep” the Model 976’s volume to a low setting of -30 to -40 dB Press the EQ button on the remote. button. before you play any material through your headphones, The front panel will show “EQ ON”... -
Page 39: Tuner Operation
Tuner Operation The AM/FM tuner built into the Model 976 can be tuned to any of 20 AM and FM stations that you set into memory. It can also be tuned manually. Radio reception requires that appropriate AM and FM an- tennas be connected to the Model 976’s... -
Page 40: Create Memory Presets
Selecting a memory preset Tuning a frequency directly To select a preset station directly: The Model 976 off ers 20 station presets that can The Model 976 allows you to select radio stations be used for both AM and FM stations. -
Page 41: Select Fm Mono
So switch back to stereo, press the T.MODE button on the remote or TUNE MODE on the front panel again. The front panel display will indicate that you are back in FM stereo mode. Model 976 7.1 Channel Preamp/Processor... -
Page 42: Care And Maintenance
Care and Maintenance If you will not be using your home theater system When the Model 976 becomes dirty, wipe it with a Chapter 6 Contents for an extended period of time, it is always a clean, soft, dry cloth. For tougher dirt or stains, fi rst... -
Page 43: System Reset
In most cases it is easy to solve this problem by sim- This will take about fi ve seconds. ply unplugging the Model 976 from its AC power source for about 5 minutes. After waiting, recon- Release the buttons and wait a few more nect the power cord and turn the unit on. -
Page 44: Troubleshooting
► ► Speaker setup in Model 976 not properly Check the settings in the Model 976’s Speaker Setup menu to make confi gured sure the subwoofer output is activated. ►... -
Page 45: Specifi Cations
70 dB Stereo 67 dB Distortion Mono 0.2% Stereo 0.3% Stereo Separation 40 dB typ. Adjacent Channel Selectivity 70 dB ±400 KHz IF Rejection Ratio 120 dB Frequency Response 20 Hz to 15 KHz ±1.5 dB Model 976 7.1 Channel Preamp/Processor... -
Page 46: Model 976 Connection Record Chart
Use this chart to record the CABLE/SAT DISC GAME MEDIA components connected to Device Device Device Device your Model 976, as well as which type of input (HDMI, Video Audio Video Audio Video Audio Video Audio analog, coaxial, etc.) is used. -
Page 47: Outlaw Audio Limited Warranty
► Damage from failure to follow instructions protected. contained in this Owner’s Manual In the event that you wish to return your Outlaw ► Damage from the performance of repairs by If you decide to return the preamp/processor, Product back to us, for any reason, please call to...
Need help?
Do you have a question about the 976 and is the answer not in the manual?
Questions and answers