Table of Contents
Advertisement
Available languages
Available languages
Advertisement
Table of Contents

Related Manuals for Clevo N850HP6


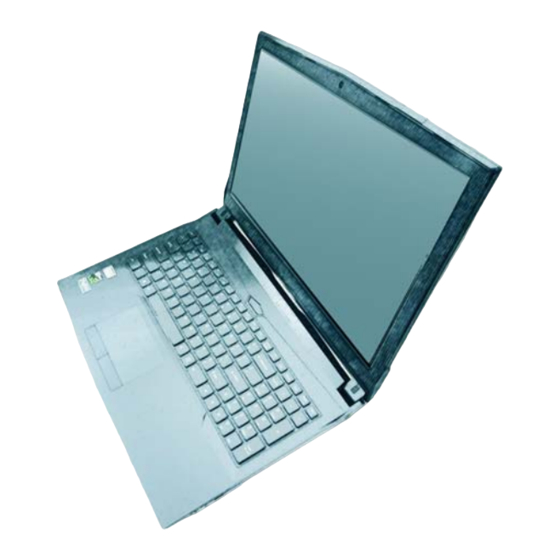
Summary of Contents for Clevo N850HP6
-
Page 2: Table Of Contents
Contents Inhalt About this Concise User Guide ............1 Über das Ausführliche Benutzerhandbuch ........33 System Startup ..................4 Schnellstart ..................36 System Map: Front View with LCD Panel Open ......5 Systemübersicht: Ansicht von vorne mit geöffnetem LED Indicators ..................6 LCD-Bildschirm ................37 Keyboard ...................7 LED-Anzeigen ................38 Function Keys &... - Page 3 Sommaire Contenidos A propos de ce Guide Utilisateur Concis ........65 Acerca de esta Guía del Usuario Concisa ........97 Guide de démarrage rapide .............68 Guía rápida para empezar ..............100 Carte du système: Vue de face avec l’écran LCD ouvert ....69 Mapa del sistema: Vista frontal con panel LCD abierto ....101 Indicateurs LED ................70 Indicadores LED ................102 Clavier .....................71...
- Page 4 Sommario Informazioni su questa guida rapida ..........129 Guida di avvio rapido ..............132 Descrizione del sistema: Vista anteriore con pannello LCD aperto .................133 Indicatori LED ................134 Tastiera ..................135 Tasti funzione e indicatori visivi ...........136 Descrizione del sistema: Vista anteriore, posteriore e inferiore ...139 Descrizione del sistema: Vista sinistra e destra ......140 Control Center ................141 Supporto di overclock di memoria ..........143...
-
Page 5: About This Concise User Guide
About this Concise User Guide This quick guide is a brief introduction to getting your system started. This is a supplement, and not a substitute for the expanded English language User’s Manual in Adobe Acrobat format on the Device Drivers & Utilities + User’s Manual disc supplied with your computer. - Page 6 Instructions for Care and Opera- • The AC/DC adapter may have either a 2-prong or a 3-prong grounded plug. The third prong is an important safety feature; do tion not defeat its purpose. If you do not have access to a compatible outlet, have a qualified electrician install one.
- Page 7 Polymer Battery Precautions Cleaning Note the following information which is specific to poly- • Use a soft clean cloth to clean the computer, but do not apply cleaner directly to the computer. mer batteries only, and where applicable, this overrides •...
-
Page 8: System Startup
System Startup 130 ° 1. Remove all packing materials. 2. Place the computer on a stable surface. 3. Insert the battery and make sure it is locked in position. 4. Securely attach any peripherals you want to use with the computer (e.g. keyboard and mouse) to their ports. -
Page 9: System Map: Front View With Lcd Panel Open
System Map: Front View with LCD Panel Open Figure 2 Front View with LCD Panel Open 1. PC Camera Wireless Device 2. *PC Camera LED Operation Aboard *When the PC camera is in Aircraft use, the LED will be illuminated. -
Page 10: Led Indicators
LED Indicators The LED indicators on the computer display helpful information about the current status of the computer. Icon Color Description Orange The AC/DC Adapter is Plugged In Green The Computer is On Blinking Green The Computer is in Sleep Mode Orange The Battery is Charging Green... -
Page 11: Keyboard
Keyboard The keyboard, white-LED illuminated keyboard or full color illuminated keyboard (Factory Option), includes a nu- meric keypad (on the right side of the keyboard) for easy numeric data input. Pressing Num Lk turns on/off the numeric keypad. It also features function keys to allow you to change operational features instantly. White-LED Illuminated Keyboard The keyboard illumination level may be adjusted, or turned off/on, by using the Fn + F4 keys. -
Page 12: Function Keys & Visual Indicators
Function Keys & Visual Indicators The function keys (F1 - F12 etc.) will act as hot keys when pressed while the Fn key is held down. In addition to the basic function key combinations, some visual indicators are available when the Control Center driver is installed. Keys Function/Visual Indicators Keys... - Page 13 Colored Keyboard Backlight LED Keyboard Backlight Application The Keyboard Backlight application can be accessed by (For Illuminated Colored Keyboards Only) pressing the Fn plus key. Press Fn plus the key to toggle the keyboard LED on/ off. The keyboard LED may be configured using the Fn + key combination outlined in the table below.
- Page 14 Brightness Preview Click on any of the numbers (0 - 3) on the brightness bar The bottom left section of the application allows you to to set the brightness level of the keyboard backlight. preview setting changes made to colors on the keyboard. Color Swatch Figure 6 The color swatch in the top right of the screen allows you...
-
Page 15: System Map: Front, Rear & Bottom Views
System Map: Bottom Views Front, Rear & Figure 8 Front Front, Rear & Bottom Views 1. LED Indicator 2. Vent 3. Battery Rear 4. Speakers Overheating To prevent your computer from overheating make sure nothing blocks any vent while the com- puter is in use. -
Page 16: System Map: Left & Right Views
System Map: Left & Right Views Figure 9 Left Left & Right Views 1. DC-In Jack 2. RJ-45 LAN Jack 3. Mini DisplayPort 1.2 Right 4. Mini DisplayPort 1.3 5. HDMI-Out Port 6. USB 3.0 (USB 3.1 Gen 1) Type-C Port ... -
Page 17: Control Center
Control Center Power Modes Brightness The Brightness icon will show the You can set a Power Mode by click- Press the Fn + Esc key combination, current screen brightness level. You ing the appropriate icon at the top of or double-click the icon in the no- can use the slider to adjust the screen the Control Center. - Page 18 Fan Speed Desktop Background Flexikey® The fan speed will adjust itself auto- Clicking the Desktop Background Click the button to access matically to control the heat of the button will allow you to change the the Flexikey® application. CPU. However you can adjust the set- desktop background picture.
-
Page 19: Memory Overclocking Support
Memory Overclocking Support You can enable overclocking support for systems with a compatible CPU (contact your distributor/supplier for details) and memory (note that your system must have 2 DIMMs installed to support memory overclocking). This can be done in the BIOS or by using the Control Center utility (make sure you have installed the Control Center AP). You can access the CPU Memory Overclocking utility from the Control Center or taskbar notification area. - Page 20 Memory Overclocking 1. Click the Memory tab at the bottom right of the screen and the Memory overclocking tab will pop out to allow adjustments to be made. 2. Click Custom to adjust any settings from the drop-down menus. 3. Click Save to retain the settings. 4.
-
Page 21: Flexikey® Application
Flexikey® Application Profiles The menus on the left side of the application relate to Pro- The Flexikey® application is a quick hotkey configura- files. You can Add or Delete profiles (you can maintain tion application, which allows you to assign a single key 12 active Profiles), Export and Import profiles from the to launch multiple key combinations, or to launch pro- menus. - Page 22 Keyboard Settings by clicking in the Name box, and click in Tool Tips to type in a note to remind you of the action’s function. The keyboard settings allow you to configure actions for any single key (or a combination of keys). Click the key and then select the Action Type (Express Key, Launch App, Express Text or Disable) from the menu at the bot- tom of the page.
- Page 23 Keyboard Settings - Express Key Keyboard Settings - Launch App To configure a single key to send multiple key combina- You can configure keys to launch any application or pro- tions, or to create more useful shortcut keys, use Express gram as follows: Key.
- Page 24 Keyboard Settings - Express Text Keyboard Settings - Disable A single key can be set to send a string of text within any You can use the program to disable any keys not required. application using Express Text. 1. Enable and select the keyboard under your chosen profile, click to select a key to disable, and then click to select Disable 1.
-
Page 25: Windows 10 Start Menu, Context Menu, Taskbar, Control Panel And Settings
Windows 10 Start Menu, Context Menu, Taskbar, Control Panel and Settings Most of the apps, control panels, utilities and programs within Windows 10 can be accessed from the Start Menu by clicking the icon in the taskbar in the lower left corner of the screen (or by pressing the Windows Logo Key on the key- board). -
Page 26: Video Features
Video Features The system features both an Intel’s Integrated GPU (for To access the Display control panel in Windows: 1. Go to the Control Panel. power-saving) and an NVIDIA’s discrete GPU (for per- 2. Click Display (icon) - in the Appearances and formance). -
Page 27: Display Devices
Display Devices To configure the displays using the Display control pan- Note that you can use external displays connected to the 1. Attach your external display(s) to the appropriate port, and turn HDMI-Out port and/or Mini DisplayPort. See your dis- it(them) on. -
Page 28: Audio Features
Audio Features Sound Blaster Cinema 3 Install the Sound Blaster Cinema 3 application to allow You can configure the audio options on your computer you to configure the audio settings to your requirements from the Sound control panel in Windows, or from the for the best performance in games, music and movies. -
Page 29: Power Options
Power Options The Power Options (Hardware and Sound menu) control panel icon in Windows allows you to configure power man- agement features for your computer. You can conserve power by means of power plans and configure the options for the power button, sleep button (Fn + F12), computer lid (when closed), display and sleep mode (the default power saving state) from the left menu. -
Page 30: Driver Installation
Driver Installation The Device Drivers & Utilities + User’s Manual disc contains the drivers and utilities necessary for the proper operation of the computer. This setup will probably have al- Driver Installation General Guidelines ready been done for you. If this is not the case, insert the disc and click Install Drivers (button), or Option Drivers (button) to access the Optional driver menu. -
Page 31: Tpm (Option)
(Option) 4. The TPM Management window allows you to configure the TPM within Windows. As TPM is usually administered within Before setting up the TPM (Trusted Platform Module) large enterprises and organizations, your system administrator will need to assist you in managing the information here. functions you must initialize the security platform. -
Page 32: 4G Module (Option)
(Option) 3G/4G Module If you have included an optional 3G/4G module in your purchase option, follow the instructions below to install the USIM card (which will be provided by your service provider). USIM Card Insertion 1. Turn off the computer, and turn it over and remove the battery (slide the latches in the direction indicated below and slide the bat- tery out). -
Page 33: Troubleshooting
Troubleshooting Problem Possible Cause - Solution Wireless LAN/Bluetooth The modules are off as the computer is in Airplane Mode. Check the LED indicator to see if it is in Airplane Mode (see Table 1 on page 6). Use the Fn + F11 key modules cannot be detected. -
Page 34: Specifications
Specifications Core Logic Security Intel® HM175 Chipset Security (Kensington® Type) Lock Slot BIOS Password BIOS Intel PTT for systems without hardware 64Mb SPI Flash ROM Latest Specification Information AMI BIOS The specifications listed in this sec- (Factory Option) TPM v 2.0 Memory tion are correct at the time of going to Keyboard... - Page 35 Interface Card Reader Environmental Spec One USB 2.0 Port Embedded Multi-In-1 Card Reader Temperature ° ° One USB 3.0 (USB 3.1 Gen 1) Type-A Port MMC (MultiMedia Card)/RS MMC Operating: 5 C - 35 SD (Secure Digital)/Mini SD/SDHC/ Non-Operating: -20°C - 60°C One USB 3.0 (USB 3.1 Gen 1) Type-A Port SDXC Relative Humidity...
-
Page 37: Über Das Ausführliche Benutzerhandbuch
Über das Ausführliche Benutzerhandbuch Diese Kurzanleitung soll einen Überblick über die Schritte geben, die dazu notwendig sind, das System zu starten. Dieses ist nur eine Ergänzung und kein Ersatz für das erweiterte englischsprachige Benutzerhandbuch, das auf der mitgelieferten Disc Device Drivers & Utilities + User's Manual im Adobe-Acrobat-Format vorliegt. Diese Disc enthält auch die Treiber und Utility-Programme, die für einen einwandfreien Betrieb des Computers notwendig sind (Hinweis: Das Unternehmen behält sich das Recht vor, diese Publikation ohne Vorankündigung zu überarbeiten und den Inhalt zu verändern). -
Page 38: Hinweise Zu Pflege Und Betrieb
Hinweise zu Pflege und Betrieb chene Stromversorgung. Wenn Sie sich über Ihre lokalen Stromspezifikationen nicht im klaren sind, wenden Sie sich an Ihren Der Computer ist zwar sehr stabil, kann aber dennoch be- Servicevertreter oder Ihre lokale Stromgellschaft. schädigt werden. Damit es nicht dazu kommt, sollten Sie die •... - Page 39 Polymer Akku Sicherheitshinweise Reinigung Beachten Sie die folgenden Hinweise, die sich speziell auf • Reinigen Sie den Computer mit einem weichen, sauberen Tuch. Tragen Sie das Reinigungsmittel nicht direkt auf den Computer auf. Polymer Akkus beziehen. Diese Hinweise haben zudem Vor- •...
-
Page 40: Schnellstart
Schnellstart 130 ° 1. Entfernen Sie das gesamte Verpackungsmaterial. 2. Legen Sie den Computer auf eine stabile Unterlage. 3. Setzen Sie den Akku ein, und stellen Sie sicher, dass sie fest sitzt. 4. Schließen Sie alle Peripheriegeräte, die Sie mit dem Computer verwenden wollen (z. -
Page 41: Systemübersicht: Ansicht Von Vorne Mit Geöffnetem Lcd-Bildschirm
Systemübersicht: Ansicht von vorne mit geöffnetem LCD-Bild- schirm Abb. 2 Ansicht von vorne mit ge- öffnetem LCD-Bildschirm Die Benutzung drahtlos 1. PC-Kamera angeschlossener 2. *LED der PC-Kamera Geräte in Flugzeugen *Wenn die PC-Kamera In der Regel ist die Be- verwendet wird, leuchtet nutzung jeglicher... -
Page 42: Led-Anzeigen
LED-Anzeigen Die LED-Anzeigen auf dem Computer zeigen wichtige Informationen über den aktuellen Status des Computers. Symbol Farbe Beschreibung Orange Der AC/DC-Adapter ist angeschlossen Grün Der Computer ist angeschaltet Lampe blinkt grün Das System ist im konfigurierten Energiesparmodus Orange Der Akku wird geladen Grün Der Akku ist voll geladen Lampe blinkt orange... -
Page 43: Tastatur
Tastatur Die Tastatur, mit weißen LED beleuchtete Tastatur oder vollfarbig beleuchtete Tastatur (Werkseitige Option), umfasst eine Nummerntastatur (an der rechten Seite der Tastatur) für die Eingabe von Zahlen. Durch Drükken auf Num wird die Nummerntastatur ein- und ausgeschaltet. Zusätzlich gibt es Funktionstasten, über die Sie direkt zwischen den Funktionen umschalten können. -
Page 44: Funktionstasten & Visuelle Anzeigen
Funktionstasten & visuelle Anzeigen Wenn die Funktionstasten (F1 - F12) gleichzeitig mit der Fn-Taste gedrückt werden, funktionieren sie wie Hotkeys. Neben den Tastenkombinationen für die Grundfunktionen gibt es einige visuelle Anzeigen, wenn der Control Center-Treiber in- stalliert ist. Tasten Funktion/ Visuelle Anzeigen Tasten Funktion/ Visuelle Anzeigen Flugzeugmodus ein-... - Page 45 Farbige Tastatur Hintergrundlicht-LED Tastatur-Hintergrundlichtanwendung Die Tastatur-Hintergrundlichtanwendung kann durch Drü- (Nur für beleuchtet farbige Tastaturen) kken von Fn und der -Taste. Drücken Sie auf die Fn- und die -Taste, um die Tastatur- LED ein-/auszuschalten. Die Tastatur-LED kann mit einer Tastenkombination aus Fn + beliebiger Taste wie unten be- Abb.
- Page 46 Helligkeits Vorschau Klicken Sie auf eine der Zahlen (0 - 3) auf der Helligkeits- Im Bereich unten links der Anwendung wird eine Vorschau der leiste, um die Helligkeitsstufe der Hintergrundbeleuchtung gemachten Änderungen an den Farben der Tastatur. einzustellen. Abb. 6 Farbmuster Vorschau Über das Farbmuster oben rechts können Sie eine Reihe von...
-
Page 47: Systemübersicht: Ansicht Vorne, Hinten & Unten
Systemübersicht: Ansicht vorne, hinten & unten Abb. 8 Ansicht vorne, hinten & unten Vorderseite 1. LED-Anzeigen 2. Luftungsoffnung 3. Akku Hinterseite 4. Lautsprecher Überhitzung Zum Schutz vor Überhitzung Ihres Computers dürfen die Luftungsoff- nung(en) nicht während Notebook in Betrieb ist verdeckt werden. -
Page 48: Systemübersicht: Ansicht Von Links & Rechts
Systemübersicht: Ansicht von links & rechts Abb. 9 Linke Seite Ansicht von links & rechts 1. DC-Eingangsbuchse 2. RJ-45 LAN-Buchse 3. Mini DisplayPort 1.2 Rechte Seite Anschluss 4. Mini DisplayPort 1.3 Anschluss 5. HDMI-Ausgangsanschluss 6. USB 3.0 (USB 3.1 Gen 1) Typ-C Anschluss Mini DisplayPort Anschlüsse / HDMI-Ausgangsanschluss Oder... -
Page 49: Control Center
Control Center Energiemodi Energiestatus Das Energiestatus-Symbol zeigt an, ob Sie können einen Energiemodus ein- Drükken Sie auf die Tastenkombination die Stromversorgung aktuell über den stellen, indem Sie im Control Center Fn + Esc, oder doppelklicken Sie auf das Akku oder über das an das Stromnetz auf das entsprechende Symbol klicken. - Page 50 Strom sparen Schalter Touchpad/PC-Kamera Klicken Sie entweder auf die Schaltflä- Klicken Sie auf eine dieser che Ruhezustand oder Schlaf, um den Tasten, um das Touchpad oder das Dieses System unterstützt die Energy Computer der ausgewählten Stromspar- Kamera-Modul ein- oder auszuschalten. Star-Stromsparfunktionen, die Compu- modus aufrufen zu lassen.
-
Page 51: Unterstützung Für Speicher-Übertaktung
Unterstützung für Speicher-Übertaktung Sie können die Unterstützung zur Übertaktung von System mit kompatiblen CPUs (hierzu setzen Sie sich mit Ihrem Groß- händler/Lieferanten in Verbindung) und Speicher aktivieren (beachten Sie, dass 2 DIMMs in Ihrem System installiert sein müssen, damit die Speicherübertaktung funktioniert). Diese Einstellungen können entweder direkt im BIOS oder im Control Center Assistenten (vergewissern Sie sich, dass das Control Center auch bereits installiert ist) vorgenommen werden. - Page 52 Speicher-Übertaktung 1. Klicken Sie auf den Speicher Reiter am rechten unteren Rand des Bildschirms, das Memory overclocking (Speicher-Übertaktungs)-Infofeld, indem Sie die Einstellungen vornehmen können, öffnet sich dann. 2. Klicken Sie auf Benutzerd, um Einstellungen vom Aufklappmenü anzupassen. 3. Klicken Sie auf Speichern, um die Einstellungen zu übernehmen. 4.
-
Page 53: Flexikey® Anwendung
Flexikey® Anwendung Profile Die Menüs auf der linken Seite der Anwendung gelten für “Flexikey®” eine Direkttasten-Konfigurationsan- Profile. Sie können Profile in den Menüs Hinzufügen oder wendung, mit der Sie eine Einzeltaste für das Ausführen Löschen (Sie können 12 aktive Profile speichern), Expor- mehrerer Tastenkombinationen zuweisen können, oder tieren und Importieren. - Page 54 Tastatureinstellungen Infos klicken, um eine Notiz zu tippen, die Sie an die Funk- tion der Aktion erinnert. Die Tastatureinstellungen erlauben die Konfiguration von Aktionen für jede einzelne Taste (oder einer Kombination von Tasten). Klicken Sie auf die Taste und wählen Sie an- schließend Aktionstyp (Express-Taste, APP ausführen, Express-Text oder Deaktivieren) aus dem Menü...
- Page 55 Tastatureinstellungen - Express-Taste 8. Wenn Sie eine einzelne Taste entfernen möchten, klicken Sie zur Auswahl auf die Taste, und klicken Sie auf Löschen. Wenn Sie eine einzelne Taste für das Senden mehrerer 9. Wenn Sie sämtliche Einstellungen löschen möchten, klicken Sie Tastenkombinationen konfigurieren möchten, oder um nütz- auf Wiederherstellen, um zu den Standard Tasteneinstellungen lichere Tastenkürzel zu erstellen, verwenden Sie Express-...
- Page 56 4. Die Taste wird jetzt zum Öffnen der ausgewählten Anwendung in einer Textnachricht z.B. wird die Enter-Taste dafür am häufigsten Ihrem ausgewählten Profil konfiguriert und die Taste in Grün verwendet, oder Sie können dies auch frei lassen. angezeigt. 5. Die Taste wird jetzt zum Senden von Textnachrichten im 5.
-
Page 57: Start-Menü, Kontextmenü, Taskleiste, Systemsteuerung Und Einstellungen Von Windows 10
Start-Menü, Kontextmenü, Taskleiste, System- steuerung und Einstellungen von Windows 10 Auf die meisten Apps, Control Panels, Utilities und Programme in Windows 10 können Sie über das Start-Menü gelangen. Klicken Sie dazu auf das Symbol in der Taskleiste in der linken unteren Ecke des Bildschirms (oder drücken Sie auf die Windows-Logo-Taste der Tastatur). -
Page 58: Grafikfunktionen
Grafikfunktionen Dieses System verfügt sowohl über eine integrierte GPU So öffnen Sie in Windows das Einstellfenster Anzeige: von Intel (zum Energie sparen) und eine diskrete GPU von 1. Rufen Sie die Systemsteuerung auf. NVIDIA (für die Leistung). Wenn die Videotreiber in- 2. - Page 59 Anzeigegeräte Einstellfenster Anzeige: 1. Schließen Sie Ihre externe(n) Anzeige(n) an den ent- Beachten Sie, dass Sie externe Anzeigen nutzen können, die sprechenden Port an und schalten Sie sie anschließend ein. an den HDMI-Ausgangsanschluss und/oder an den Mini 2. Rufen Sie die Systemsteuerung auf. DisplayPort Anschluss angeschlossen sind.
-
Page 60: Audiofunktionen
Audiofunktionen Sound Blaster Cinema 3 Mit der Anwendung Sound Blaster Cinema 3 können Sie Die Audioeinstellungen können Sie bei Windows durch An- die Audioeinstellungen nach Ihren Anforderungen konfigu- klicken des Soundsymbols oder des Realtek HD Audio rieren, um eine bestmögliche Audioleistung bei Spielen und Manager -Symbols im Infobereich/in der System- der Wiedergabe von Musik und Videos zu erreichen. -
Page 61: Energieoptionen
Energieoptionen Die Energieoptionen von Windows ermöglichen Ihnen die Konfiguration der Optionen für das Energiemanagement des Com- puters. Sie können Strom sparen, indem Sie Energiesparpläne erstellen und im linken Menü können Sie die Optionen für den Netzschalter, die Energiespartasten (Fn + F12) und Zuklappeinstellung (beim Schließen des Dekkels), den Bild- schirm und den Energiesparmodus (die Standardeinstellung Energie sparen) konfigurieren. -
Page 62: Installation Der Treiber
Installation der Treiber Die Disc Device Drivers & Utilities + User's Manual enthält die Treiber und Hilfspro- gramme, die für das einwandfreie Funktionieren des Computers notwendig sind. Möglicher- Allgemeine Hinweise zur Treiberinstallation weise wurden diese bereits vorinstalliert. Ist das nicht der Fall, legen Sie die Disc ein, und klikken Sie auf Install Drivers (Schaltfläche) oder Option Drivers (Schaltfläche), um das Wenn Sie keine fortge- schrittenen... -
Page 63: Tpm (Option)
TPM (Option) 4. Im Fenster TPM-Verwaltung können Sie TPM unter Windows verwalten. Da ein TPM normalerweise in großen Unternehmen Bevor Sie die TPM (Trusted Platform Module)-Funktionen und Organisationen verwaltet wird, benötigen Sie bei der Verwaltung der hiesigen Informationen die Hilfe Ihres einrichten, müssen Sie die Sicherheitsplattform initialisie- Systemadministrators. -
Page 64: 4G-Modul (Option)
3G/4G-Modul (Option) Wenn Ihr Modell das optionale 3G/4G-Modul enthält, folgen Sie den nachfolgenden Anweisungen, um die USIM-Karte zu installieren (Sie erhalten sie von Ihrem Dienstanbieter). Einsetzen der USIM-Karte 1. Schalten Sie den Computer aus, drehen Sie es herum, und nehmen Sie den Akku heraus (schieben Sie die Riegel in die unten angezeigte Richtung, und ziehen Sie den Akku heraus). -
Page 65: Fehlerbehebung
Fehlerbehebung Problem Mögliche Ursache - Lösung Die Module Wireless-LAN/ Im Flugzeugmodus sind die Module ausgeschaltet. Prüfen Sie der LED-Anzeige , ob der Bluetooth können nicht erkannt Computer im Flugzeugmodus ist (siehe Tabelle 1 auf Seite 38). Mit der Tastenkombination werden. Fn + F11 können Sie den Flugzeugmodus ein- oder ausschalten (siehe Tabelle 2 auf Seite 40). -
Page 66: Technische Daten
Technische Daten Core Logic Audio Intel® HM175 Chipsatz High-Definition-Audio-kompatible Schnittstelle BIOS 2 eingebaute Lautsprecher Aktualität der technischen Daten AMI BIOS (64Mb SPI Flash-ROM) Eingebautes Array-Mikrofon Speicher Die in diesem Teil aufgeführten techni- Sound Blaster™ Cinema 3 schen Daten sind zum Zeitpunkt der Zwei 260-Pin SODIMM-Sockel, Sicherheit Druckstellung... - Page 67 Schnittstellen Kartenleser Umgebungsbedingungen Ein USB 2.0-Anschluss Festes Multi-in-1 Kartenleser-Modul Temperatur Ein USB 3.0 (USB 3.1 Gen 1) Typ-A MMC (MultiMedia Card)/RS MMC In Betrieb: 5ºC – 35ºC Anschluss Bei Aufbewahrung: -20ºC – 60ºC SD (Secure Digital)/Mini SD/SDHC/ SDXC Relative Luftfeuchtigkeit Ein USB 3.0 (USB 3.1 Gen 1) Typ-A In Betrieb: 20 –...
-
Page 69: A Propos De Ce Guide Utilisateur Concis
A propos de ce Guide Utilisateur Concis Ce guide rapide est une brève introduction à la mise en route de votre système. Il s’agit d’un supplément, et non pas d’une alternative au Manuel de l’Utilisateur en Anglais complet au format Adobe Acrobat sur le disque Device Drivers & Utilities + User's Manual fourni avec votre ordinateur. - Page 70 Instructions d’entretien et d’utilisation électrique local, consultez notre représentant de service ou la compagnie électrique locale. L’ordinateur est robuste, mais il peut toutefois être endomma- • L’adaptateur AC/DC que vous utilisez, peut être à 2 broches ou à 3 gé. Afin d’éviter ceci, veuillez suivre ces recommandations : broches, comprenant une prise de terre.
- Page 71 Précautions concernant les batteries polymères Nettoyage Notez les informations suivantes spécifiques aux batteries po- • Utilisez un chiffon propre et doux pour nettoyer l'ordinateur, mais n'appliquez pas d'agent de nettoyage directement sur l'ordinateur. lymères, et le cas échéant, celles-ci remplacent les informa- •...
-
Page 72: Guide De Démarrage Rapide
Guide de démarrage rapide 130 ° 1. Enlevez tous les memballages. 2. Posez l’ordinateur sur une surface stable. 3. Installez la batterie et assurez-vous qu’elle correcte- ment positionnée. 4. Connectez fermement les périphériques que vous souhaitez utiliser avec votre ordinateur (par ex. cla- vier et souris) à... -
Page 73: Carte Du Système: Vue De Face Avec L'écran Lcd Ouvert
Carte du système: Vue de face avec l’écran LCD ouvert Figure 2 Vue de face avec l’écran LCD ouvert Utilisation des 1. Caméra PC appareils sans fil à 2. *Indicateur LED de caméra bord d'un avion *Quand la caméra PC est L'utilisation de tout ap- pareil électronique de en cours d'utilisation le... -
Page 74: Indicateurs Led
Indicateurs LED Les indicateurs LED sur votre ordinateur affichent des informations utiles sur l’état actuel de votre ordinateur. Icône Couleur Description Orange L'adaptateur AC/DC est branché Vert L’ordinateur est allumé Vert clignotant Le système est dans le mode de Veille configuré Orange La batterie est en charge Vert... -
Page 75: Clavier
Clavier Le clavier, clavier LED blanc illuminé ou clavier illuminé pleine couleur (Option d’usine), comporte un pavé numérique (sur le côté droit du clavier) permettant une entrée facile de données numériques. Le fait d'appuyer sur Verr Num active ou désactive le pavé numérique. Il est également doté de touches fonction pour vous permettre de changer instantanément de mode opérationnel. -
Page 76: Touches De Fonctions & Indicateurs Visuels
Touches de fonctions & indicateurs visuels Les touches de fonctions (F1 - F12 etc.) agiront comme touches de raccourci quand pressée en maintenant la touche Fn ap- puyée. En plus des combinaisons des touches de fonction de base, des indicateurs visuels sont disponibles quand le pilote Control Center est installé. - Page 77 LED colorée de rétro-éclairage de clavier Application de rétroéclairage du clavier L'application de rétroéclairage du clavier est accessible en (Pour les claviers de couleur éclairés seulement) appuyant sur Fn plus la touche Appuyez sur Fn plus sur la touche pour allumer/éteindre la LED du clavier.
- Page 78 Luminosité Aperçu Cliquez sur l'un des chiffres (0 - 3) sur la barre de luminosité La section inférieure gauche de l'application vous permet de pour régler le niveau de luminosité du rétroéclairage du cla- prévisualiser les changements de réglages effectués sur les vier.
-
Page 79: Carte Du Système: Vues De Face, Arrière Et Dessous
Carte du système: Vues de face, arrière et dessous Figure 8 Vues de face, arrière et dessous Face 1. Indicateurs LED 2. Ventilation 3. Batterie Arrière 4. Haut-parleurs Surchauffe Afin de ne pas causer une sur- chauffe de votre ordinateur, veri- fiez que rien ne bouche la (les) ventilation(s) quand le systeme est allumé. -
Page 80: Carte Du Système: Vues De Gauche Et Droite
Carte du système: Vues de gauche et droite Figure 9 Gauche Vues de gauche et droite 1. Prise d’entrée DC 2. Prise réseau RJ-45 3. Mini DisplayPort 1.2 Droit 4. Mini DisplayPort 1.3 5. Prise de sortie HDMI 6. Port USB 3.0 (USB 3.1 Gen 1) Type-C ... -
Page 81: Control Center
Control Center Modes d’alimentation État d'alimentation L'icône État d'alimentation indique si Vous pouvez définir un Mode d’ali- Appuyez sur la combinaison de touches vous êtes actuellement alimenté par la mentation en cliquant sur l'icône appro- Fn + Échap ou double-cliquez sur batterie, ou par l'adaptateur AC/DC priée au dessus du Control Center. - Page 82 Économie d'énergie Permutation d’affichage Touche Windows gauche Ce système prend en charge les fonc- Cliquez sur le bouton Permutation tionnalités de gestion d’alimentation d’affichage pour accéder au menu (ou Cliquez sur Désactiver pour désactiver Energy Star qui placent les ordinateurs utilisez la combinaison de touches la touche Windows sur le côté...
-
Page 83: Prise En Charge Du Surfréquençage De La Mémoire
Prise en charge du surfréquençage de la mémoire Vous pouvez activer la prise en charge du surfréquençage pour les systèmes dotés d'un processeur et de la mémoire compa- tibles (contactez votre distributeur/fournisseur pour les détails). Notez que votre système doit être équipé de 2 modules DIMM pour prendre en charge le surfréquençage de la mémoire. - Page 84 Surfréquençage de la mémoire 1. Cliquez sur l'onglet Mémoire en bas à droite de l'écran et l'onglet Surfréquençage de la mémoire apparaîtra pour permettre d'effectuer les réglages. 2. Cliquez sur Personnalisé pour régler les paramètres dans les menus déroulants. 3. Cliquez sur Enregistrer pour conserver les paramètres. 4.
-
Page 85: Application Flexikey
Application Flexikey® Profils Les menus sur le côté gauche de l'application portent sur les « Flexikey® » est une application de configuration de Profils. Vous pouvez Ajouter ou Supprimer des Profils touches de raccourci rapide, qui vous permet d'attribuer une (vous pouvez conserver 12 profils actifs), Exporter et Im- touche unique aux combinaisons de plusieurs touches de porter des profils dans les menus. - Page 86 Paramètres du clavier zone Nom, puis cliquez dans les Info-Bulles pour taper dans une note pour vous rappeler la fonction de l'action. Les paramètres du clavier vous permettent de configurer des actions pour toute touche unique (ou une combinaison de touches).
- Page 87 Paramètres du clavier - Touche Express 8. Si vous voulez retirer une touche individuelle cliquez pour la sélectionner, puis cliquez sur Supprimer. Pour configurer une touche unique pour envoyer plusieurs 9. Si vous voulez effacer tous les paramètres, cliquez sur Restau- combinaisons de touches, ou pour créer les touches de rac- rer pour revenir au paramétrage de touche par défaut.
- Page 88 5. Si vous voulez retirer une touche Lancer APP, sélectionnez-la et envoyer un message texte, par exemple la touche Entrée serait cliquez sur Restaurer. la plus couramment utilisée), ou vous pouvez la laisser vide si vous préférez. 6. Cliquez sur Sauvegarder pour enregistrer les paramètres de votre profil choisi.
-
Page 89: Menu Démarrer, Menu Contextuel, Barre Des Tâches, Panneau De Configuration Et Paramètres De Windows 10
Menu Démarrer, Menu contextuel, Barre des tâches, Panneau de Configuration et Paramètres de Windows 10 La plupart des applications, panneaux de configuration, utilitaires et programmes dans Windows 10 sont accessibles depuis le Menu Démarrer en cliquant sur l'icône dans la barre des tâches dans le coin inférieur gauche de l'écran (ou en appuyant sur la Touche du logo Windows sur le clavier). -
Page 90: Caractéristiques Vidéo
Caractéristiques vidéo Le système comporte à la fois un GPU intégré Intel (pour Pour accéder au panneau de contrôle Affichage: l’économie d’énergie) et un GPU discret NVIDIA (pour les 1. Allez au Panneau de Configuration. performances). Vous pouvez changer de périphérique d’affi- 2. - Page 91 Périphériques d’affichage Pour configurer les affichages en utilisant le panneau de contrôle Affichage: Vous pouvez utiliser des écrans externes connectés à la prise 1. Connectez votre (vos) écran(s) externe(s) au port approprié, de sortie HDMI et/ou au Mini DisplayPort. Consultez le ma- puis allumez-le(s).
-
Page 92: Caractéristiques Audio
Caractéristiques audio Sound Blaster Cinema 3 Installez l'application Sound Blaster Cinema 3 afin de Vous pouvez configurer les options audio sur votre ordinateur pouvoir configurer les paramètres audio adéquats permettant à partir du panneau de configuration de Sons dan Windows, d’obtenir les meilleures performances de jeux, de musique et ou à... -
Page 93: Options D'alimentation
Options d’alimentation Le panneau de configuration Options d'alimentation de Windows vous permet de configurer la gestion d'alimentation de votre ordinateur. Vous pouvez économiser de l'énergie à l'aide de modes de gestion de l'alimentation et configurer les op- tions pour le bouton d'alimentation, bouton de veille (Fn + F12), couvercle de l'ordinateur (lorsqu'il est fermé), écran et mode Veille (l'état d'économie d'énergie par défaut) dans le menu de gauche. -
Page 94: Installation Du Pilote
Installation du pilote Le disque Device Drivers & Utilities + User’s Manual contient les pilotes et les utilitaires nécessaires pour un bon fonctionnement de votre ordinateur. Cette installation aura proba- Directives générales pour l'installation du pilote blement déjà été faite pour vous. Si ce n'est pas le cas, insérez le disque et cliquez sur Install Drivers (bouton), ou Option Drivers (bouton) pour accéder au menu des pilotes Option- D'une manière... -
Page 95: Tpm (Option)
TPM (Option) 4. La fenêtre de gestion du TPM vous permet de configurer le TPM dans Windows. Comme le TPM est généralement administré au Avant de paramétrer les fonctions TPM (Module de plate- sein de larges enterprises et organisations, votre administrateur système devra vous assister pour la gestion des données. -
Page 96: Module 3G/4G (Option)
Module 3G/4G (Option) Si votre option d'achat comporte un module 3G/4G optionnel, suivez les instructions ci-dessous pour installer la carte USIM (qui vous sera fournie par votre fournisseur de service). Insérer la carte USIM 1. Eteignez l'ordinateur, retournez-le et retirez la batterie (faites glisser le loquet dans la direction indiquée en dessous et sortez la bat- terie). -
Page 97: Dépannage
Dépannage Problème Cause possible - résolution modules sans fil/ Les modules sont désactivés quand l'ordinateur est en Mode Avion. Vérifiez l'indicateur LED Bluetooth ne peuvent pas être pour voir si l'ordinateur est en Mode Avion (voir le Tableau 1 à la page 70). -
Page 98: Spécifications
Spécifications Core logic Sécurité Chipset Intel® HM175 Fente de verrouillage de sécurité (type Kensington) BIOS Mot de Passe du BIOS AMI BIOS (SPI Flash ROM de 64Mb) Dernières informations de Intel PTT pour les systèmes sans TPM Mémoire spécification matériel Deux emplacements SODIMM 260 broches, Les spécifications énumérées dans cette... - Page 99 Interface Lecteur de carte Spécifications environnementales Un port USB 2.0 Lecteur de carte multi-en-1 Température ° ° Un port USB 3.0 (USB 3.1 Gen 1) Type-A MMC (MultiMedia Card)/RS MMC En fonction : 5 C- 35 ° ° SD (Secure Digital)/Mini SD/SDHC/SDXC Eteint : -20 C - 60 Un port USB 3.0 (USB 3.1 Gen 1) Type-A et...
-
Page 101: Acerca De Esta Guía Del Usuario Concisa
Acerca de esta Guía del Usuario Concisa Esta guía rápida es una breve introducción para poner su sistema en funcionamiento. Es un suplemento y no un sustituto del Manual del usuario completo en inglés en formato Adobe Acrobat del disco Device Drivers & Utilities + User's Manual suministrado con el ordenador. -
Page 102: Instrucciones Para El Cuidado Y Funcionamiento
Instrucciones para el cuidado y internacionales, pero puede que necesite una fuente de alimentación continuada. Si no está seguro de las especificaciones de alimentación funcionamiento locales, consulte con el servicio de asistencia o compañía de electricidad del lugar. El ordenador es muy robusto, pero puede dañarse. Para evitar •... - Page 103 Precauciones para baterías de polímero Limpieza Tenga en cuenta la información siguiente específica para • Utilice un trapo limpio y suave para limpiar el ordenador, pero no aplique limpiador directamente en el ordenador. baterías de polímero; además, donde corresponda, invalida •...
-
Page 104: Guía Rápida Para Empezar
Guía rápida para empezar 130 ° 1. Quite todos los materiales del embalaje. 2. Coloque el ordenador en una superficie estable. 3. Inserte la batería y asegúrese de que quede bloqueada en su posición. 4. Conecte en los puertos correspondientes los periféricos que desee utilizar con el ordenador (p. -
Page 105: Mapa Del Sistema: Vista Frontal Con Panel Lcd Abierto
Mapa del sistema: Vista frontal con panel LCD abierto Figura 2 Vista frontal con panel LCD abierto 1. Cámara PC Uso de dispositivos 2. *LED de cámara PC inalámbricos a *Cuando la cámara PC esté bordo en uso, el LED se iluminará. El uso de dispositi- 3. -
Page 106: Indicadores Led
Indicadores LED Los indicadores LED en su ordenador muestran una valiosa información sobre el estado actual del ordenador. Icono Color Descripción Naranja El adaptador AC/DC está conectado Verde El ordenador está encendido Verde El ordenador está en modo Suspensión parpadeante Naranja La batería se está... -
Page 107: Teclado
Teclado El teclado, teclado iluminado con LED blanco o teclado con iluminación a todo color (Opción de fábrica), incluye un teclado numérico (en la parte derecha del teclado) para una entrada fácil de datos numéricos. Al presionar Bloq Num el teclado numérico se habilita o inhabilita. -
Page 108: Teclas De Función & Indicadores Visuales
Teclas de función & indicadores visuales Las teclas de función (F1 - F12 etc.) actuarán como teclas directas (Hot-Key) cuando se pulsan junto con la tecla Fn. Además de las combinaciones de teclas de función básicas algunos indicadores visuales están disponibles cuando el controlador de Control Center está... - Page 109 LED de retroiluminación de teclado en Aplicación Retroiluminación de teclado La aplicación Retroiluminación de teclado puede accederse color presionando Fn y la tecla (Sólo para teclados en color iluminados) Presione Fn y la tecla para encender o apagar el LED del teclado.
- Page 110 Brillo Vista previa Haga clic en uno de los números (0 - 3) en la barra de brillo La sección inferior izquierda de la aplicación le permite tener para ajustar el nivel del brillo de la luz del teclado. una vista previa de los cambios realizados en la configuración de los colores del teclado.
-
Page 111: Mapa Del Sistema: Vistas Frontal, Posterior E Inferior
Mapa del sistema: Vistas frontal, posterior e inferior Figura 8 Parte frontal Vistas frontal, posterior e in- ferior 1. Indicadores LED 2. Rejilla Parte posterior 3. Batería 4. Altavoces incorporados Recalentamiento Para evitar que su ordenador se recaliente compruebe que nada bloquea la(s) rejilla(s) con el equi- po encendido. -
Page 112: Mapa Del Sistema: Vistas Izquierda Y Derecha
Mapa del sistema: Vistas izquierda y derecha Figura 9 Lateral izquierdo Vistas izquierda y derecha 1. Conector de entrada DC 2. Conector LAN RJ-45 Lateral derecho 3. Puerto Mini DisplayPort 1.2 4. Puerto Mini DisplayPort 1.3 5. Puerto de salida de HDMI 6. -
Page 113: Control Center
Control Center Modos de energía Estado de energía El icono Estado de energía mostrará si Puede ajustar el Modo de energía Presione la combinación de teclas Fn + la alimentación actual viene dada por la haciendo clic en el icono apropiado en la Esc o haga doble clic en el icono batería o por el adaptador AC/DC parte superior del Control Center. - Page 114 Ahorro de energía Cambiar pantalla Tecla de Windows izquierda Este sistema soporta las características de Haga clic en el botón Cambiar pantalla administración de energía Energy Star para acceder al menú (o utilice la Haga clic Deshabilitar para que hace que los equipos (CPU, disco combinación de teclas + P) y deshabilitar la Tecla del logotipo de...
-
Page 115: Soporte De Overclocking De Memoria
Soporte de Overclocking de Memoria Puede habilitar el soporte para overclocking en sistemas con CPU y memoria compatibles (contacte con su distribuidor o proveedor para más detalles). Tenga en cuenta que su sistema debe tener 2 módulos DIMM instalados para admitir overclocking de memoria. - Page 116 Overclocking de memoria 1. Haga clic en la pestaña Memoria en la esquina inferior derecha de la pantalla y aparecerá la ficha Memory overclocking para hacer los ajustes. 2. Haga clic en Personalizar para ajustar la configuración en los menús desplegables. 3.
-
Page 117: Aplicación Flexikey
Aplicación Flexikey® Perfiles Los menús de la izquierda de la aplicación indican los “Flexikey®” es una aplicación de configuración de teclas Perfiles. Puede Añadir o Eliminar perfiles (puede directas rápidas, que le permite asignar una única tecla para mantener hasta 12 perfiles activos), Exportar o Importar lanzar varias combinaciones de teclas o abrir programas perfiles de los menús. - Page 118 Configuración del teclado haciendo clic en Consejos de herramientas en una nota para recordarle la función de la acción. La configuración del teclado le permite configurar acciones para una única tecla (o una combinación de teclas). Haga clic en la tecla y seleccione el Tipo de acción (Tecla express, Figura 16 Abrir APP, Texto Express o Deshabilitar) en el menú...
- Page 119 Configuración del teclado - Tecla express 9. Si desea borrar toda la configuración, haga clic en Restaurar para volver a la configuración de teclas predeterminada. Para configurar una única tecla para enviar varias 10. Las Teclas Express aparecerán en naranja. combinaciones de teclas, o para crear más teclas de acceso directo útiles, use la Tecla express.
- Page 120 6. Haga clic en Guardar para guardar la configuración dentro del 5. La tecla estará configurada para enviar el mensaje de texto al perfil elegido. programa destinado bajo el perfil elegido, y la tecla aparecerá en azul. 6. Si desea quitar una tecla Texto Express, selecciónela y haga Configuración del teclado - Texto Express clic en Restaurar.
-
Page 121: Menú Inicio, Menú Contextual, Barra De Tareas, Panel De Control Y Configuración De Windows 10
Menú Inicio, Menú contextual, Barra de tareas, Panel de Control y Configuración de Windows Se puede acceder a la mayoría de las apps, paneles de control, utilidades y programas en Windows 10 desde el Menú Inicio haciendo clic en el icono de la barra de tareas en la esquina inferior izquierda de la pantalla (o pulsando la Tecla del logotipo de Windows... -
Page 122: Parámetros De Vídeo
Parámetros de vídeo El sistema incluye una GPU integrada de Intel (para el Para acceder al panel de control Pantalla: ahorro de energía) y una GPU discreta NVIDIA (para 1. Vaya al Panel de Control. mayor rendimiento). Puede cambiar los dispositivos de 2. - Page 123 Dispositivos de pantalla Configurar las pantallas usando el panel de control Pantalla: Tenga en cuenta que puede usar pantallas externas 1. Conecte la(s) pantalla(s) externa(s) al puerto apropiado y conectadas al puerto de salida de HDMI y/o al puerto Mini enciéndala(s).
-
Page 124: Opciones De Energía
Opciones de energía El panel de control de las opciones de energía (menú Hardware y sonido) de Windows permite configurar las funciones de administración de energía del ordenador. Puede ahorrar energía con los planes de energía y configurar las opciones para el botón de encendido, botón de suspensión (Fn + F12), tapa del ordenador (al cerrarla), pantalla y modo de suspensión (el estado de ahorro de energía predeterminado) en el menú... -
Page 125: Características De Audio
Características de audio Sound Blaster Cinema 3 Instale la aplicación Sound Blaster Cinema 3 para poder Puede configurar las opciones de audio de su ordenador en el ajustar la configuración de audio según sus necesidades para panel de control de Sonido , o desde el icono de obtener el mejor rendimiento en juegos, música y películas. -
Page 126: Instalación De Controladores
Instalación de controladores El disco Device Drivers & Utilities + User’s Manual contiene los controladores y utilitarios necesarios para utilizar el ordenador correctamente. Inserte el disco y haga clic en Install Directrices generales para la instalación del Drivers (botón), u Option Drivers (botón) para acceder al menú de controladores opcional. controlador Instale los controladores en el orden indicado en la Figura... -
Page 127: Tpm (Opción)
TPM (Opción) 4. La ventana Administración del TPM le permite configurar el TPM desde Windows. Como la TPM normalmente es administrada Antes de configurar las funciones del TPM (Módulo de en empresas y organizaciones grandes, su administrador de sistemas deberá asesorarle para administrar esta información. plataforma segura) deberá... -
Page 128: Módulo 3G/4G (Opción)
Módulo 3G/4G (Opción) Si ha incluido un módulo opcional 3G/4G en su opción de compra, siga las instrucciones siguientes para instalar la tarjeta USIM (suministrada por su proveedor de servicios). Insertar la tarjeta USIM 1. Apague el ordenador y gírelo para quitar la batería (deslice los pestillos en la dirección indicada abajo y saque la batería). -
Page 129: Solución De Problemas
Solución de problemas Problema Posible causa - Solución Los módulos WLAN y Los módulos están apagados cuando el equipo está en Modo de avión. Compruebe el indicador Bluetooth no pueden para ver si el equipo está en Modo de avión (vea la Tabla 1 en la página 102). -
Page 130: Especificaciones
Especificaciones Núcleo logic Seguridad Chipset Intel® HM175 Ranura para cierre de seguridad (tipo Kensington®) BIOS Contraseña de BIOS AMI BIOS (SPI Flash ROM de 64Mb) Información actualizada de Intel PTT para sistemas sin hardware TPM Memoria especificaciones (Opción de fábrica) TPM 2.0 Dos zócalos de 260 pins SODIMM, para Las especificaciones listadas en esta Teclado... - Page 131 Interfaz Lector de tarjetas Especificaciones del ambiente Un puerto USB 2.0 Módulo lector de tarjetas multi en 1 Temperatura Un puerto USB 3.0 (USB 3.1 Gen 1) Tipo-A MMC (MultiMedia Card)/RS MMC En funcionamiento: 5°C - 35°C SD (Secure Digital)/Mini SD/SDHC/ Apagado: -20°C - 60°C Un puerto USB 3.0 (USB 3.1 Gen 1) Tipo-A SDXC...
-
Page 133: Informazioni Su Questa Guida Rapida
Informazioni su questa guida rapida Questa guida rapida rappresenta un’introduzione rapida all’avvio del sistema. Si tratta di un supplemento e non di una sostituzione del Manuale per l'utente completo in lingua inglese nel formato Adobe Acrobat, memorizzato sul disco Device Drivers &... -
Page 134: Istruzioni Per La Custodia E Il Funzionamento
Istruzioni per la custodia e il Se non si è certi delle specifiche elettriche locali, consultare l'assi- stenza tecnica o la società locale di fornitura elettrica. funzionamento • L'adattatore di alimentazione deve avere una spina dotata di messa a terra a due o tre poli. Il terzo polo costituisce un'importante funziona- Il computer è... - Page 135 Precauzioni relative alla batteria ai polimeri Pulizia Le informazioni seguenti sono molto importanti e si • Per pulire il computer utilizzare solo un panno morbido e pulito, evi- tando di applicare detergenti direttamente sul computer. riferiscono unicamente alle batterie ai polimeri e, ove •...
-
Page 136: Guida Di Avvio Rapido
Guida di avvio rapido 130 ° 1. Eliminare tutti i materiali di imballo. 2. Appoggiare il computer su una superficie stabile. 3. Inserire la batteria e verificare che sia bloccata in posizione. 4. Collegare bene le periferiche che si desidera usare con il computer (per esempio tastiera e mouse) alle porte corrispondenti. -
Page 137: Descrizione Del Sistema: Vista Anteriore Con Pannello Lcd Aperto
Descrizione del sistema: Vista anteriore con pannello LCD aperto Figura 2 Vista anteriore con pannel- lo LCD aperto Funzionamento del 1. Camera PC dispositivo senza fili a 2. *LED della camera PC bordo di un aereo *Quando si utilizza la Solitamente l’uso camera PC, l'indicatore... -
Page 138: Indicatori Led
Indicatori LED Gli indicatori LED sul computer segnalano importanti informazioni relative allo stato corrente del computer. Icona Colore Descrizione Arancione L'alimentatore è collegato Verde Il computer è acceso Verde lampeggiante Il computer è in modalità Sospensione Arancione La batteria è in carica Verde Batteria completamente carica Arancione lampeggiante... -
Page 139: Tastiera
Tastiera La tastiera, tastiera LED illuminata bianca o tastiera illuminata colore completo (Opzione di fabbrica), è dotata di un tastierino numerico (sul lato destro della tastiera) per facilitare l'immissione di dati numerici. Premere Bloc Num per commutare l’attivazione e la disattivazione della tastiera numerica. Dispone anche di tasti funzione che consentono di cambiare istantaneamente le funzionalità... -
Page 140: Tasti Funzione E Indicatori Visivi
Tasti funzione e indicatori visivi I tasti funzione (da F1 a F12) agiscono come Hot-Key quando premuti tenendo premuto il tasto Fn. In aggiunta alle combinazioni di tasti funzione base, quando è installato il driver Control Center alcuni indicatori visivi sono disponibili. Tasti Tasti funzione e indicatori visivi Tasti... - Page 141 Tastiera colorata LED di Applicazione di retroilluminazione della ta- stiera retroilluminazione Si può accedere all'applicazione Retroilluminazione tastiera (Solo per le tastiere colorate illuminate) premendo Fn più il tasto Premere Fn + tasto per attivare/disattivare il LED della tastiera. È possibile configurare il LED della tastiera utilizzando Fn + combinazione di tasti secondo quanto Figura 4 riportato nella seguente tabella.
- Page 142 Luminosità Anteprima Fare clic su qualsiasi dei numeri (0 - 3) sulla barra della La sezione inferiore sinistra dell'applicazione vi consente di luminosità per impostare il livello di luminosità della vedere in anteprima le modifiche di impostazione dei colori retroilluminazione della tastiera. sulla tastiera.
-
Page 143: Descrizione Del Sistema: Vista Anteriore, Posteriore E Inferiore
Descrizione del sistema: Vista anteriore, posteriore inferiore Figura 8 Lato anteriore Vista anteriore, posteriore e inferiore 1. Indicatori LED 2. Ventola Lato posteriore 3. Batteria 4. Altoparlanti incorporati Surriscaldamento Per prevenire il surriscaldamento del computer, accertarsi che non vi sia nulla che ostruisca la (le) ventola (ventole) durante l’uso del computer. -
Page 144: Descrizione Del Sistema: Vista Sinistra E Destra
Descrizione del sistema: Vista sinistra e destra Figura 9 Lato sinistro Vista sinistra e destra 1. Jack di ingresso DC 2. Jack RJ-45 per LAN 3. Porta Mini DisplayPort 1.2 Lato destro 4. Porta Mini DisplayPort 1.3 5. Porta uscita HDMI 6. -
Page 145: Control Center
Control Center Modalità risparmio energia Stato di alimentazione L'icona Stato di alimentazione viene È possibile impostare una Modalità Premere la combinazione di tasti Fn + visualizzata se attualmente il computer è risparmio energia facendo clic Esc oppure fare doppio clic sull'icona alimentatore con la batteria, oppure sull'icona corrispondente nella parte nell'area di notifica della barra... - Page 146 Conservazione dell'energia Switch visualizzazione Tasto Windows sinistro Cliccare Disattiva per disattivare il Fare clic pulsante Switch tasto Windows sul lato sinistro della visualizzazione per accedere al menu (o Il sistema supporta le funzionalità della tastiera. Questo può essere utile se si utilizzare la combinazione di tasti gestione energetica Energy Star che utilizzano i tasti di gioco (W, A, S &...
-
Page 147: Supporto Di Overclock Di Memoria
Supporto di overclock di memoria È possibile abilitare il supporto di overclocking per i sistemi con CPU e memoria compatibili (contattare il distributore / fornitore per i dettagli). Si noti che il sistema deve avere 2 moduli DIMM installato per supportare l’overclocking della memoria. - Page 148 Overclocking della memoria 1. Fare clic sulla scheda Memoria in basso a destra la scheda overclocking della memoria comparirà a schermo per consentire di apportare le Left modifiche necessarie. 2. Fare clic su Personalizzato per regolare le impostazioni dai menu a discesa. 3.
-
Page 149: Applicazione Flexikey
Applicazione Flexikey® Profili I menu sul lato sinistro dell'applicazione si riferiscono ai “Flexikey®” è un'applicazione per la configurazione rapida Profili. Potete Aggiungere o Eliminare Profili (potete dei tasti di scelta rapida che vi permette di assegnare un mantenere fino a 12 profili attivi), Esportare e Importare singolo tasto per lanciare combinazione multiple di tasti, profili dai menu. - Page 150 Impostazioni tastiera facendo clic nella casella Nome, e facendo clic nella casella Suggerimenti per digitare un appunto per ricordare la Le impostazioni della tastiera consentono di configurare funzione dell'azione. azioni per ogni singolo tasto (o una combinazione di tasti). Fare clic sul tasto e quindi selezionare il Tipo di azione (Tasto expresso, Lancia APP, Testo expresso, Disattiva) dal menu nella parte inferiore della pagina.
- Page 151 Impostazioni tastiera - Tasto expresso 9. Se si desidera cancellare tutte le impostazioni, fare clic su Ripristina per tornare all'impostazione tasto predefinita e fare clic Per configurare un singolo tasto per inviare più combinazioni su Eliminare. di tasti, o per creare tasti di scelta rapida, usare il tasto 10.
- Page 152 Impostazioni tastiera - Testo expresso 6. Se si desidera rimuovere qualsiasi tasto Testo expresso, selezionarlo e fare clic su Ripristina. Un singolo tasto può essere impostato per l'invio di una 7. Fare clic su Salva per salvare le impostazioni nel profilo scelto. stringa di testo all'interno di qualsiasi applicazione che utilizza Testo expresso.
-
Page 153: Menu Start, Menu Contestuale, Barra Delle Applicazioni, Pannello Di Controllo E Impostazioni Di Windows 10
Menu Start, Menu contestuale, Barra delle applicazioni, Pannello di controllo e Impostazioni di Windows 10 La maggioranza delle app, pannelli di controllo, utilità e programmi all’interno di Windows sono accessibili dal Menu Start cliccando l’icona nella barra delle applicazioni nell’angolo inferiore sinistro dello schermo (oppure premendo il Tasto logo Windows sulla tastiera). -
Page 154: Funzioni Video
Funzioni video Il sistema è dotato sia di una GPU integrata Intel (per il Per accedere al pannello di controllo Schermo: risparmio energetico) sia di una GPU discreta NVIDIA (per 1. Andare al Pannello di controllo. le prestazioni). È possibile modificare le Impostazioni di 2. - Page 155 Dispositivi di visualizzazione Configurare i display utilizzando il pannello di controllo Schermo: Si prega di notare che è possibile usare display esterni 1. Collegare il/i display esterno/i alla porta corretta e quindi connessi alle porte uscita HDMI e/o Mini DisplayPort. accendere.
-
Page 156: Funzionalità Audio
Funzionalità audio Sound Blaster Cinema 3 Installare l'applicazione Sound Blaster Cinema 3 per È possibile configurare le opzioni audio del computer dal consentire all'utente di configurare le impostazioni audio in pannello di controllo Audio di Windows, oppure base ai propri requisiti per ottenere le prestazioni migliori in dall'icona Gestione Audio Realtek HD nell'area di giochi, musica e filmati. -
Page 157: Opzioni Risparmio Energia
Opzioni risparmio energia Il pannello di controllo delle Opzioni risparmio energia (menu Hardware e suoni) di Windows consente la configurazione delle funzioni di risparmio energetico del computer. Selezionando Risparmio di energia è possibile attivare questa funzione e configurare le opzioni relative al pulsante di alimentazione, pulsante di sospensione (Fn + F12), coperchio del computer (chiuso), schermo e modalità... -
Page 158: Installazione Driver
Installazione driver Il disco Device Drivers & Utilities + User’s Manual contiene i driver e le utilità necessari per il corretto funzionamento del computer. Inserire il disco e fare clic su Install Drivers Linee guida generali per l'installazione dei driver (pulsante), oppure il pulsante Option Drivers per accedere al menu del driver opzionale. -
Page 159: Tpm (Opzione)
TPM (Opzione) 4. La finestra di gestione TPM vi consente di configurare il TPM dall'interno di Windows. Dato che in genere il TPM è amministrato Prima di configurare le funzioni TPM (Trusted Platform all'interno delle organizzazioni e delle imprese di grandi dimensioni, l'amministratore di sistema dovrà... -
Page 160: Modulo 3G/4G (Opzione)
Modulo 3G/4G (Opzione) Se nell'opzione di acquisto è stato incluso un modulo 3G/4G opzionale, seguire le istruzioni sotto per installare la carta USIM (presumibilmente fornita dal proprio operatore). Inserimento della carta USIM 1. Spegnere il computer, girarlo e rimuovere la batteria (rilasciare i fermi nella direzione indicata sotto e sganciare la batteria facendola scorrere). -
Page 161: Risoluzione Dei Problemi
Risoluzione dei problemi Problema Possibile causa - Soluzione Non è possibile rilevare i moduli I moduli sono disattivati quando il computer si trova nella modalità aereo. Controllare il LED LAN Wireless e Bluetooth. indicatore per vedere se il computer è in modalità aereo (vedere la Tabella 1 a pagina 134). -
Page 162: Specifiche Tecniche
Specifiche tecniche Logica del core Sicurezza Chipset Intel® HM175 Slot blocco di sicurezza (tipo Kensington®) Password del BIOS BIOS Intel PTT per sistemi senza hardware TPM Ultimi aggiornamenti delle AMI BIOS (SPI Flash ROM da 64Mb) specifiche tecniche (Opzione di fabbrica) TPM 2.0 Memoria Le specifiche tecniche elencate in que- Tastiera... - Page 163 Interfaccia Lettore di schede Requisiti ambientali Una porta USB 2.0 Modulo lettore di schede multi-in-1 Temperatura ° ° Una porta USB 3.0 (USB 3.1 Gen 1) Tipo-A MMC (MultiMedia Card)/RS MMC In esercizio: 5 C - 35 ° ° SD (Secure Digital)/Mini SD/SDHC/ Non in esercizio: -20 C - 60 Una porta USB 3.0 (USB 3.1 Gen 1) Tipo-A...
Need help?
Do you have a question about the N850HP6 and is the answer not in the manual?
Questions and answers